Set up Loops SMTP in Novu
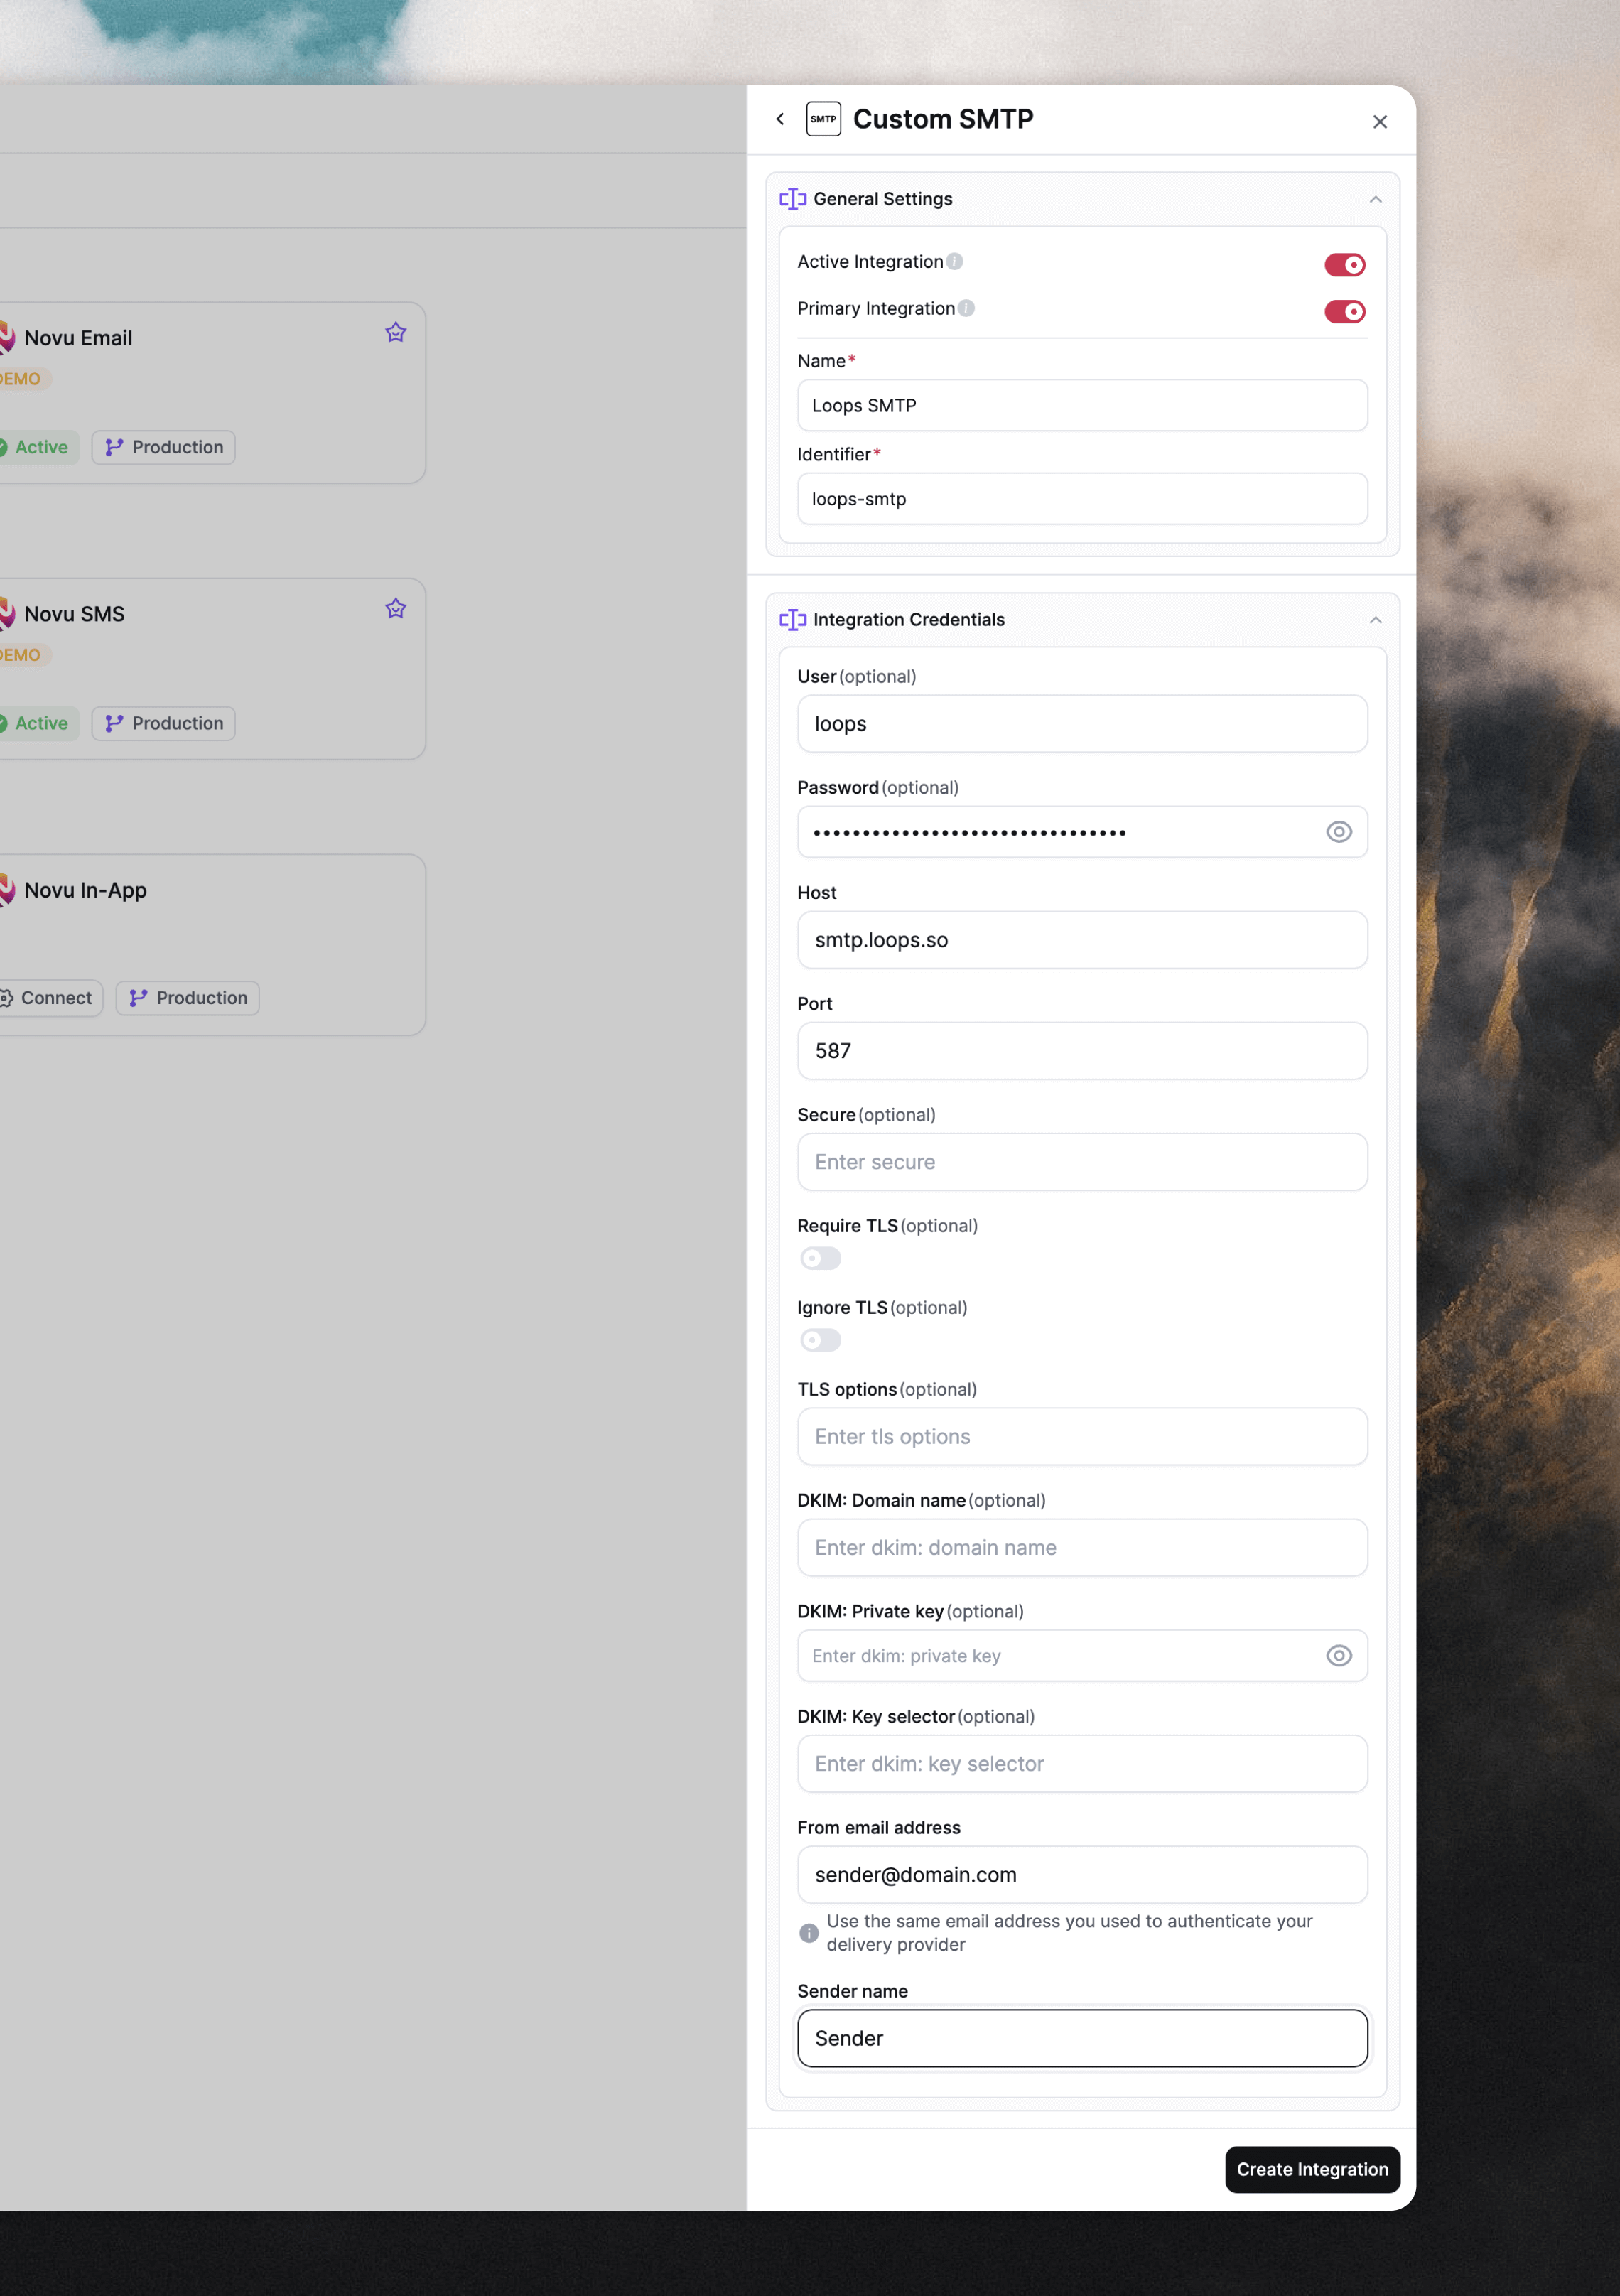
Go to the Integration Store settings in Novu and create a new email provider. Click Connect Provider and then Custom SMTP. Give your provider a name like “Loops SMTP” in the Name field. Then add the following details into each field:
You also have to add values to the From email address and Sender name fields because Novu requires them. You can add any value here because Loops will overwrite these values when sending emails.
Click Create Integration to finish setup.
Create Transactional emails in Loops
Next, create new transactional emails for the emails you are sending from Novu. In Loops, go to the Transactional page and click New. Alternatively, you can select one of our many ready-made templates from the Templates page.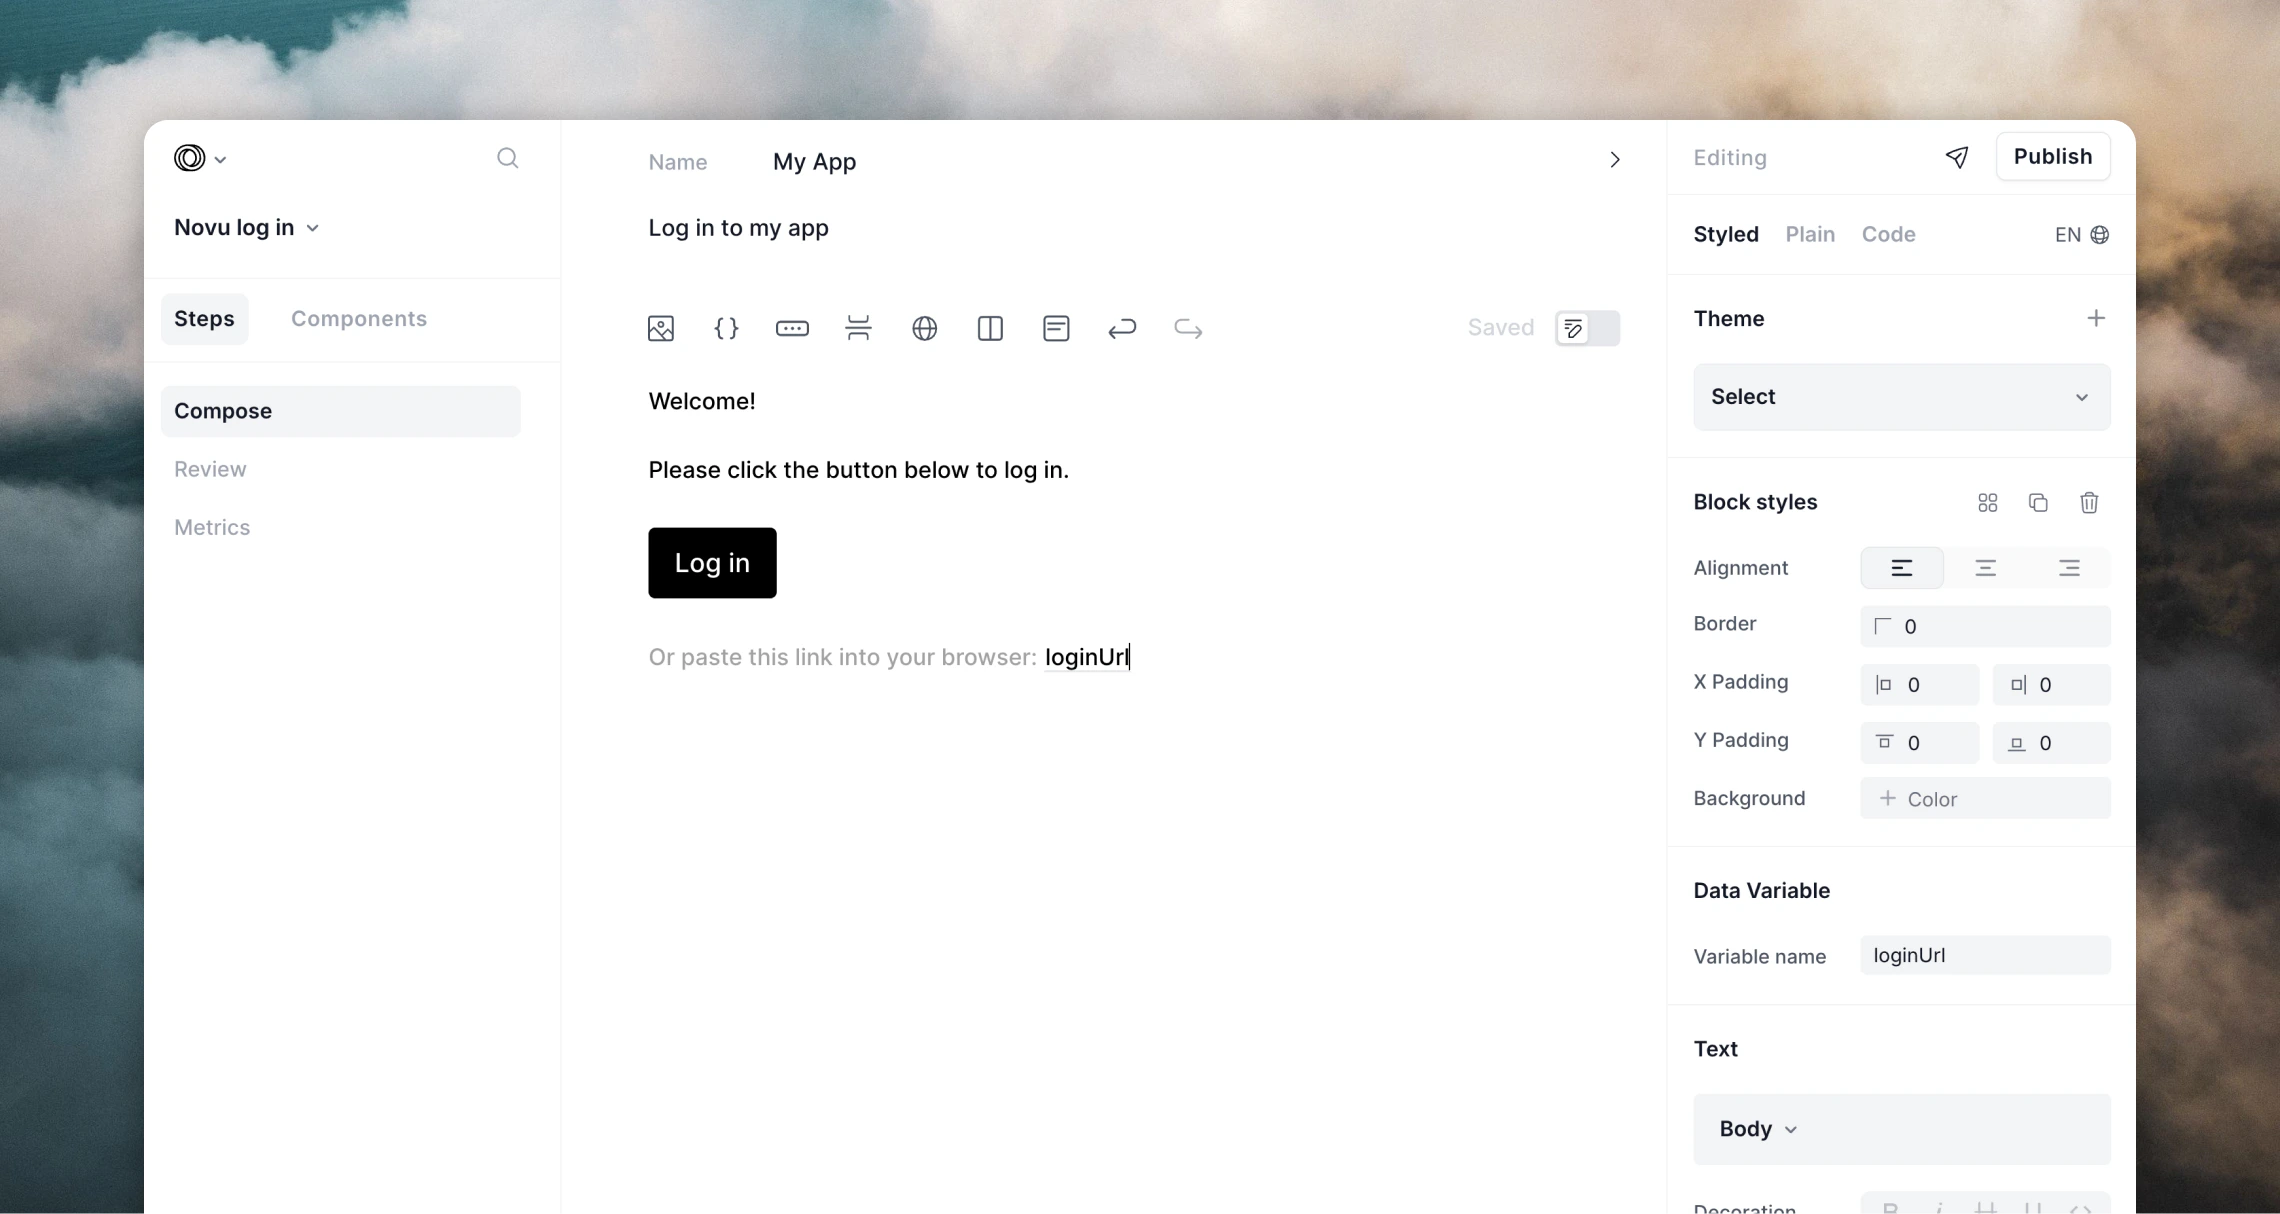
Transactional email guide
Read our detailed guide for sending transactional emails.
Configure email templates in Novu
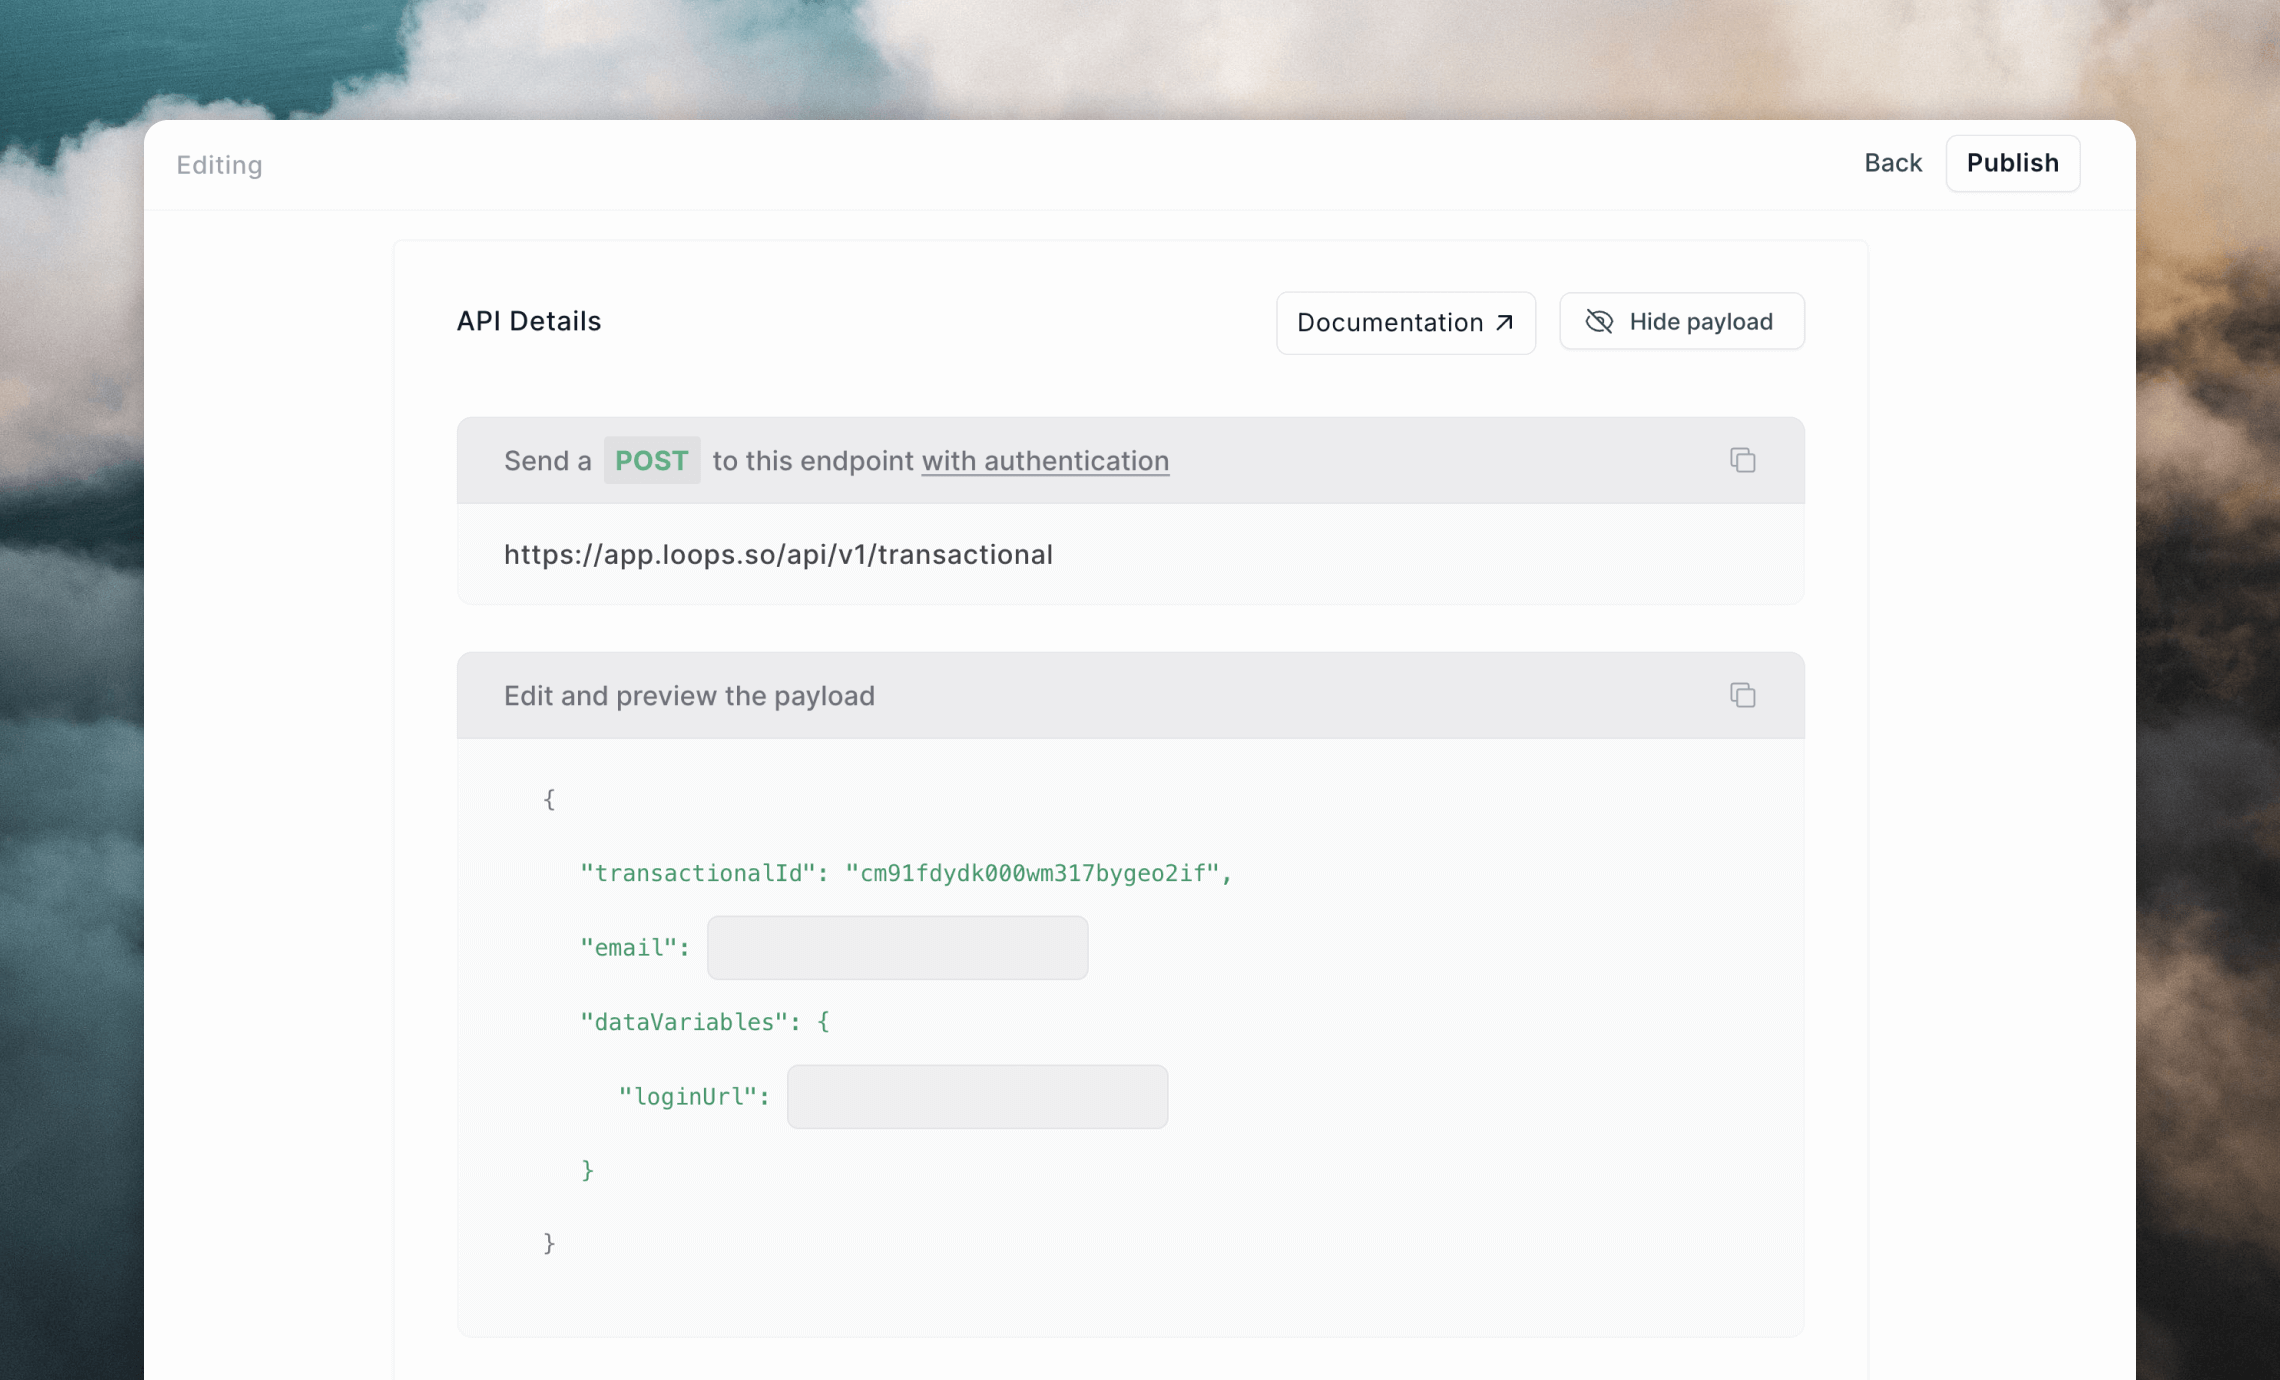
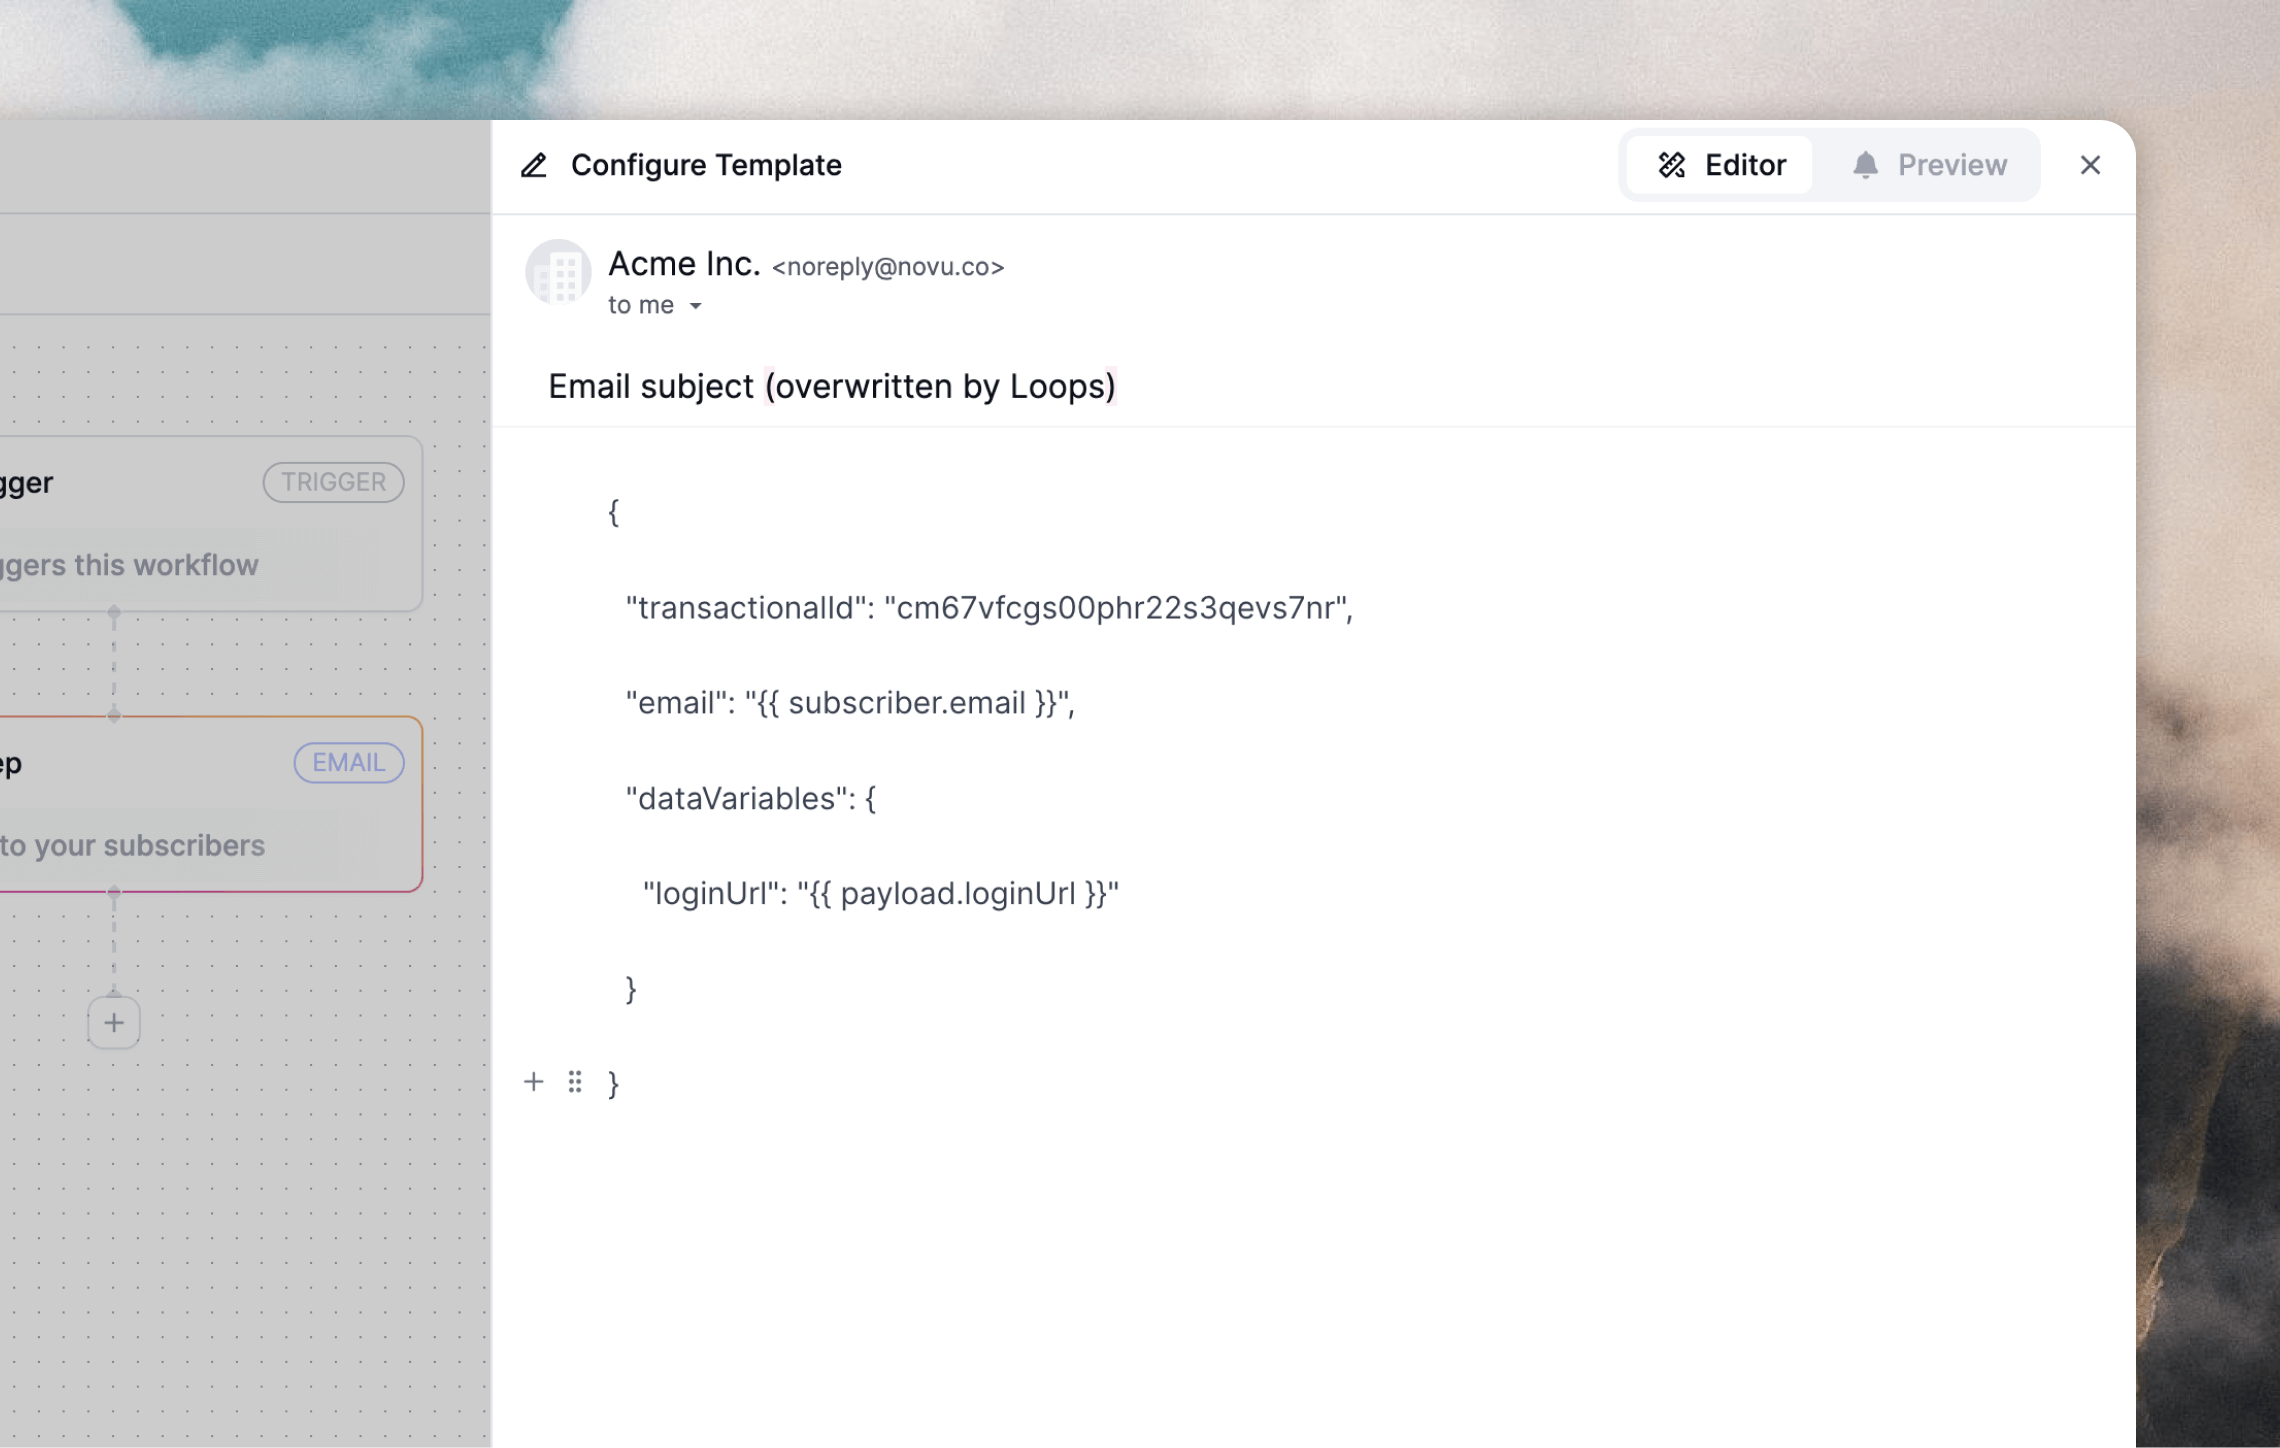
The final setup step is to add email templates in Novu. Loops SMTP integrations work a bit differently than most. Instead of sending a text or HTML email body, you set them up to send API-like data. In Novu, go to Workflows and create a new workflow. Give it a descriptive name and click Create workflow. You will enter the workflow UI. Add an Email node. In the email body paste the transactional payload from Loops from the previous step.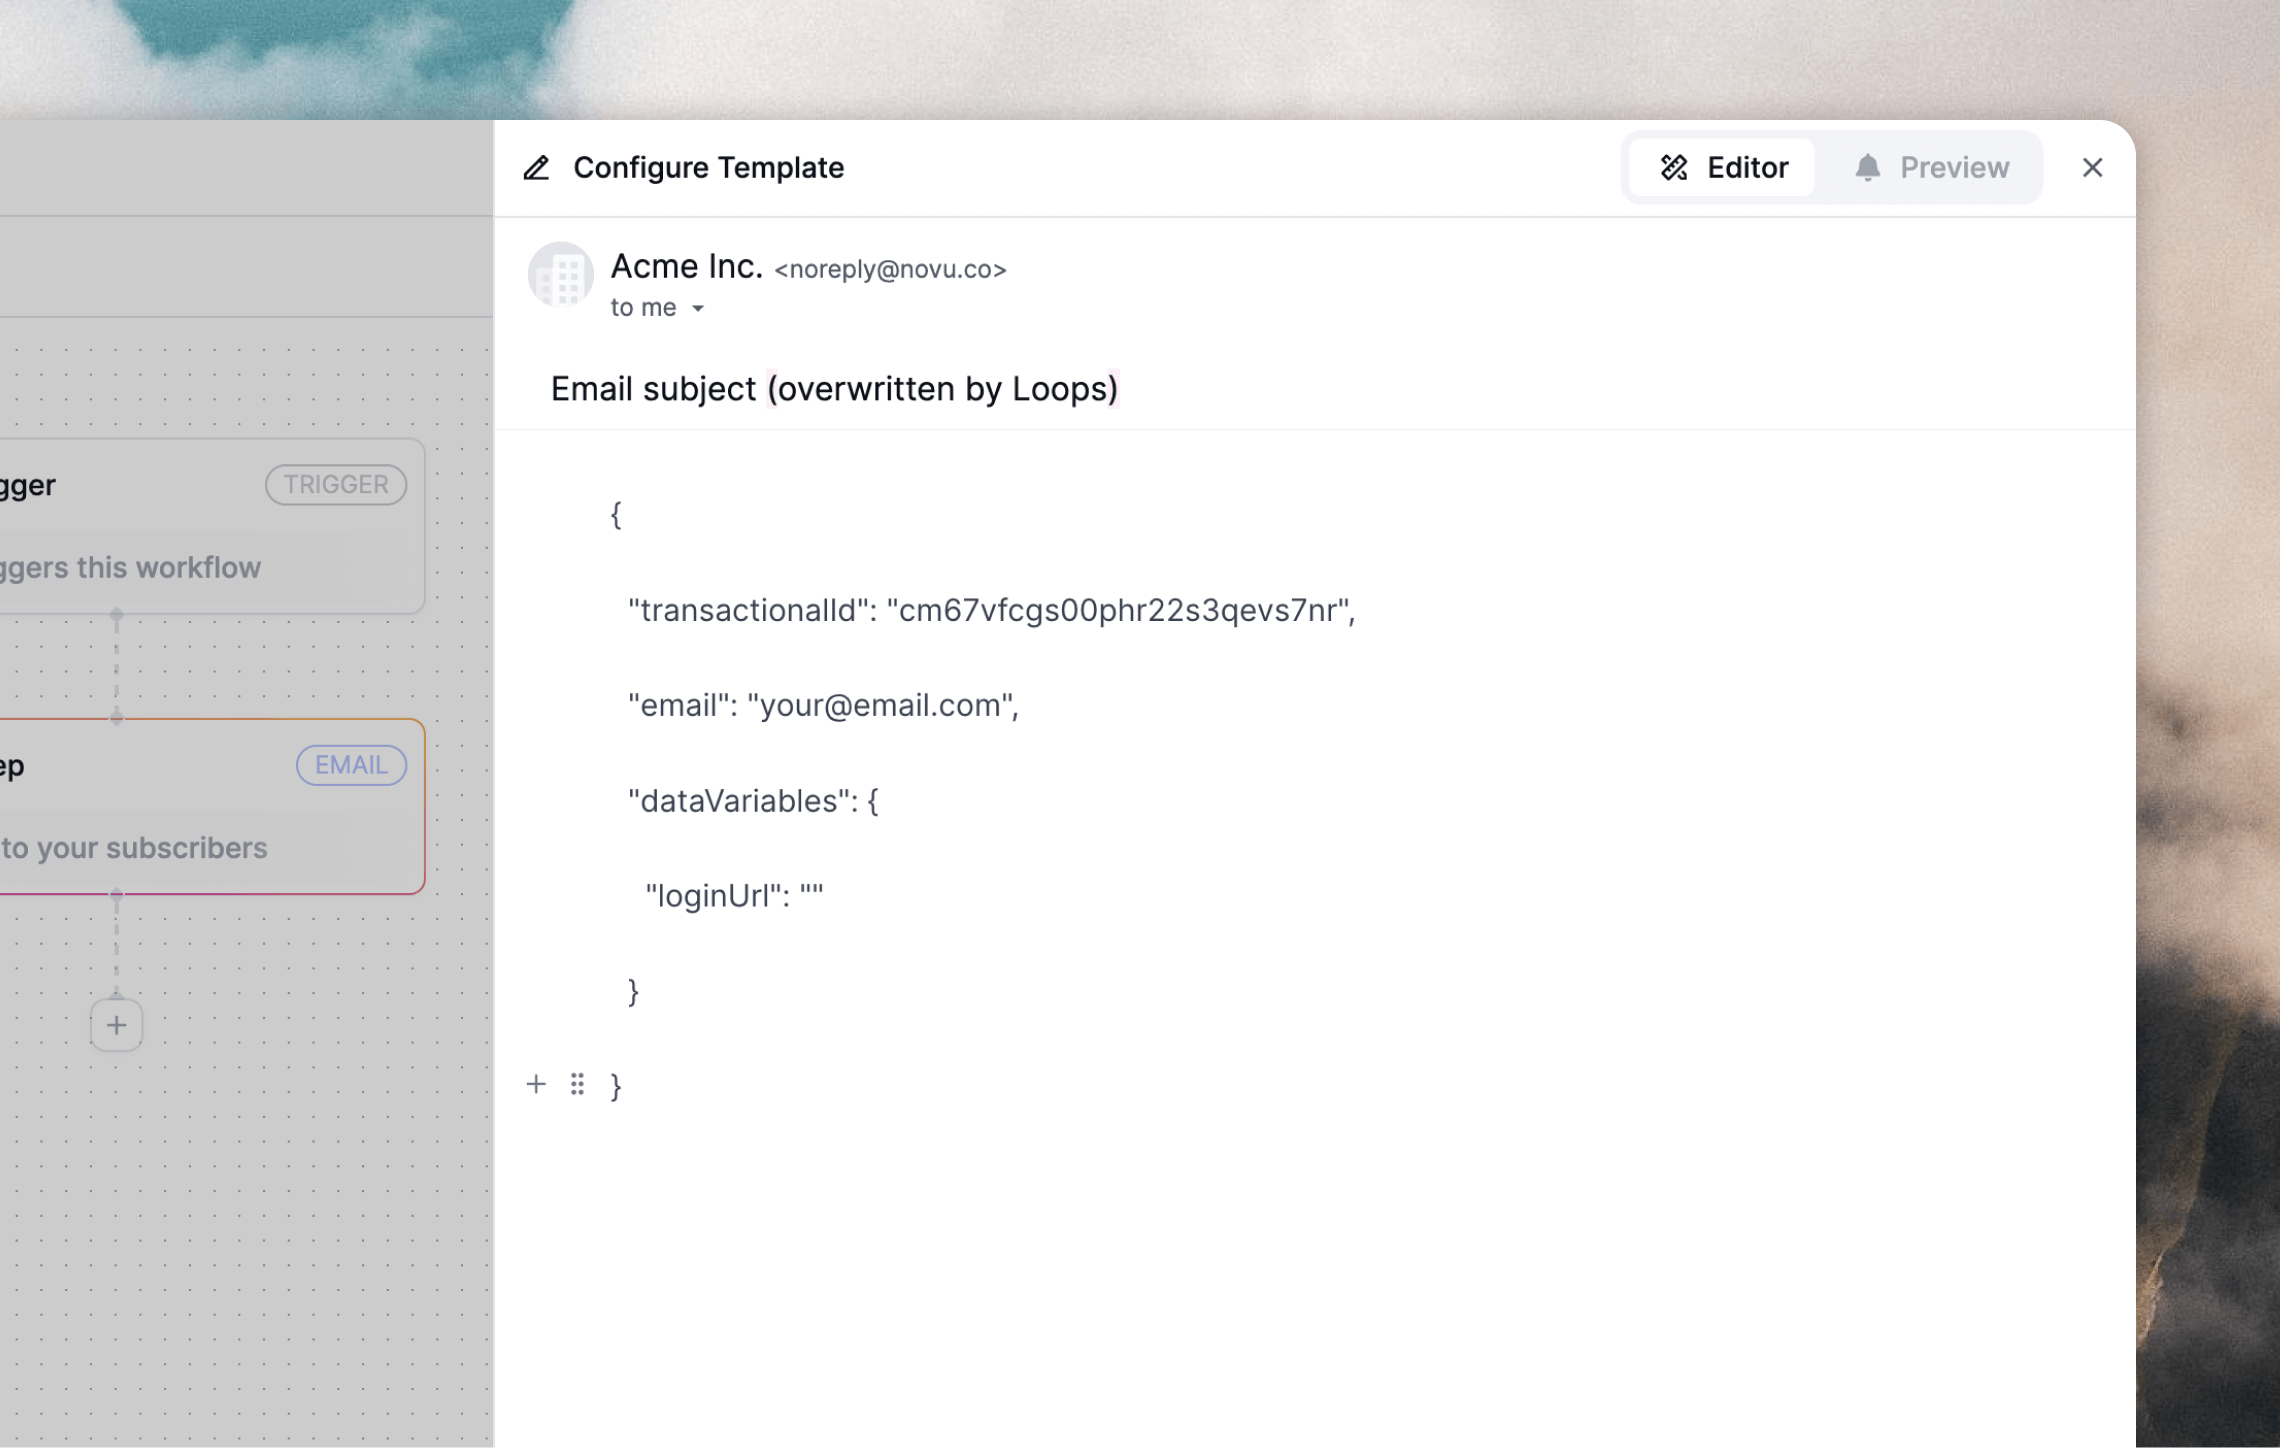
{{ subscriber.email }} and {{ payload.loginUrl }} variables from Novu were added.
You can add any custom data to the payload object when triggering emails from Novu. We need to pass those same values to your Loops transactional email via the dataVariables data.
Email template in Novu
addToAudience flag to your template as below. This will create a contact in Loops using the {{ subscriber.email }} value.
Email template in Novu
firstName here) into your Loops transactional email.
Email template in Novu
Trigger emails with Novu
When it comes to triggering Novu notifications to subscribers, you can use the Novu SDKs or API. In each call, you need to specify your workflow by its ID, add recipient data and also pass in any data variables for your Loops transactional email into the payload. Using the same example from above, here’s the trigger using Novu’s Node SDK.You can add a
to.email value to send notifications to a specific email
address.Testing the integration
Novu offers a testing UI where you can try out your set up before going live. Go to the Workflows page and click on your workflow, then select the Trigger tab. Here you will be able to set different subscriber and payload data and send test email notifications. The SDK examples below also update, so you can easily create code for your application. You can also see logs of all emails sent from the Activity Feed page in Novu.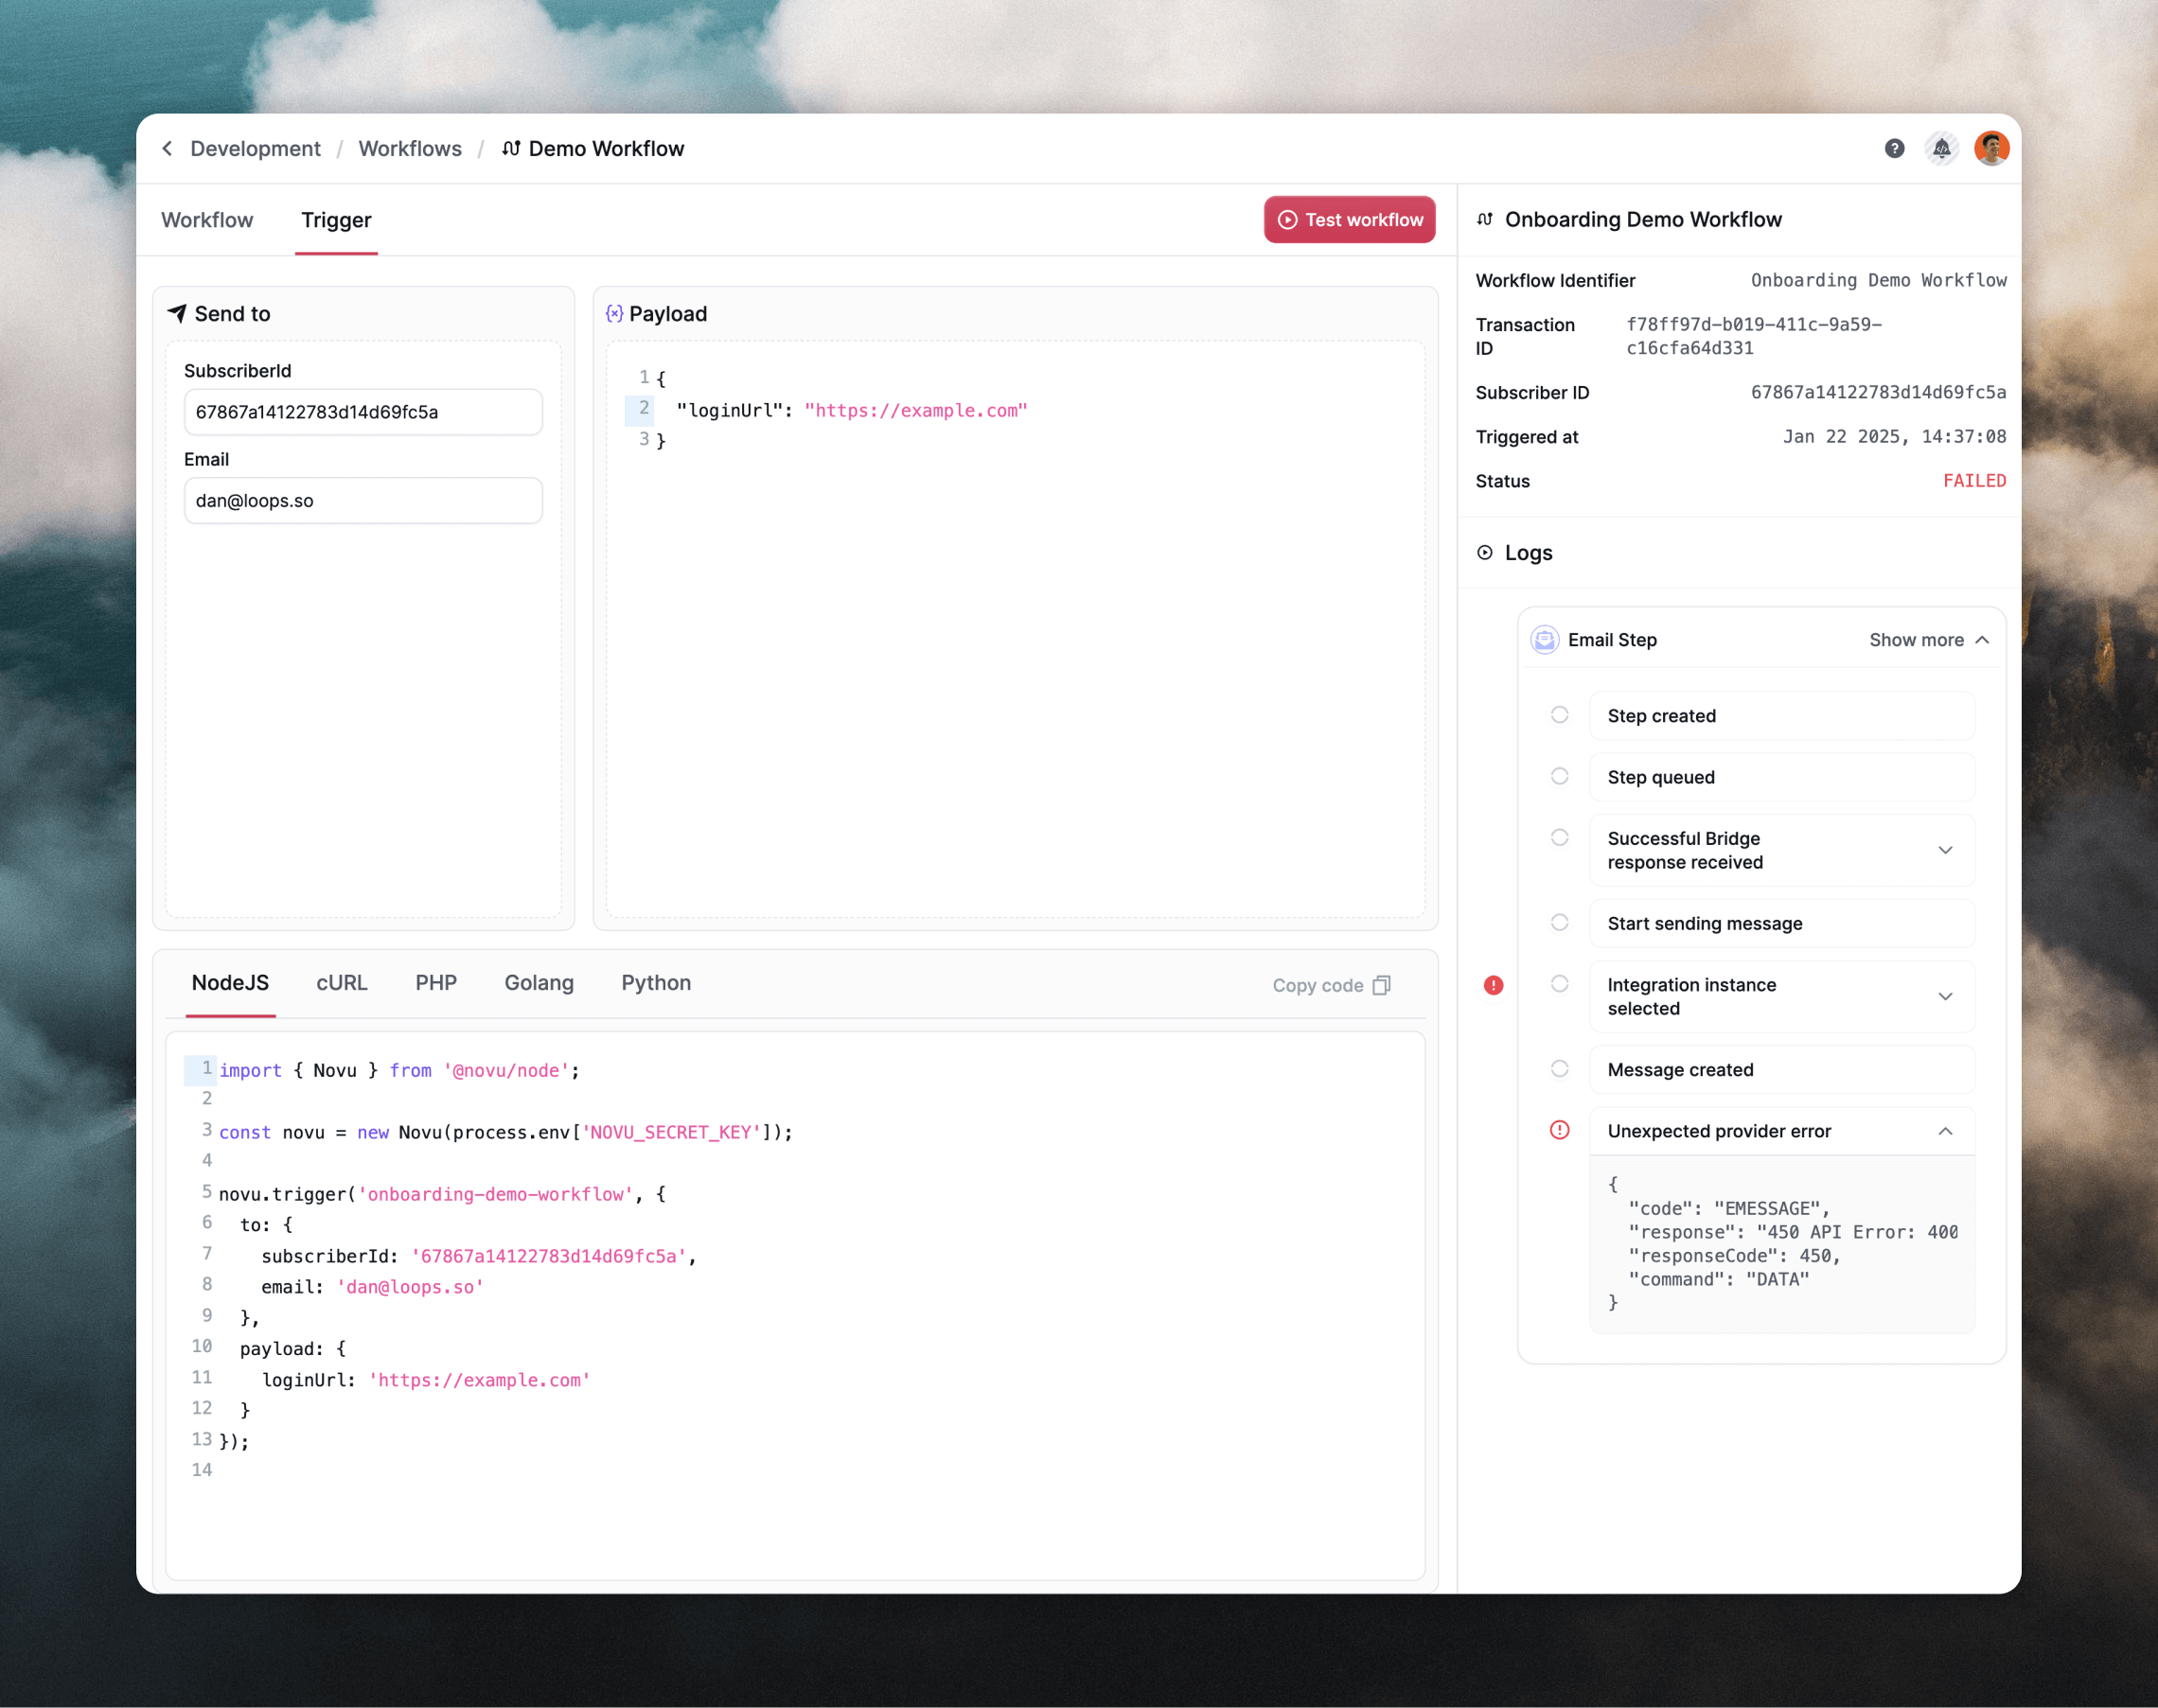
Important notes
- The subject in Novu templates is always overwritten by the subject added to the corresponding template in Loops.
- The From email address and Sender name configured in your Novu SMTP settings are always overwritten by the sender details added to your templates in Loops.