Styled vs Plain emails
Loops offers two different email styling options, Styled and Plain.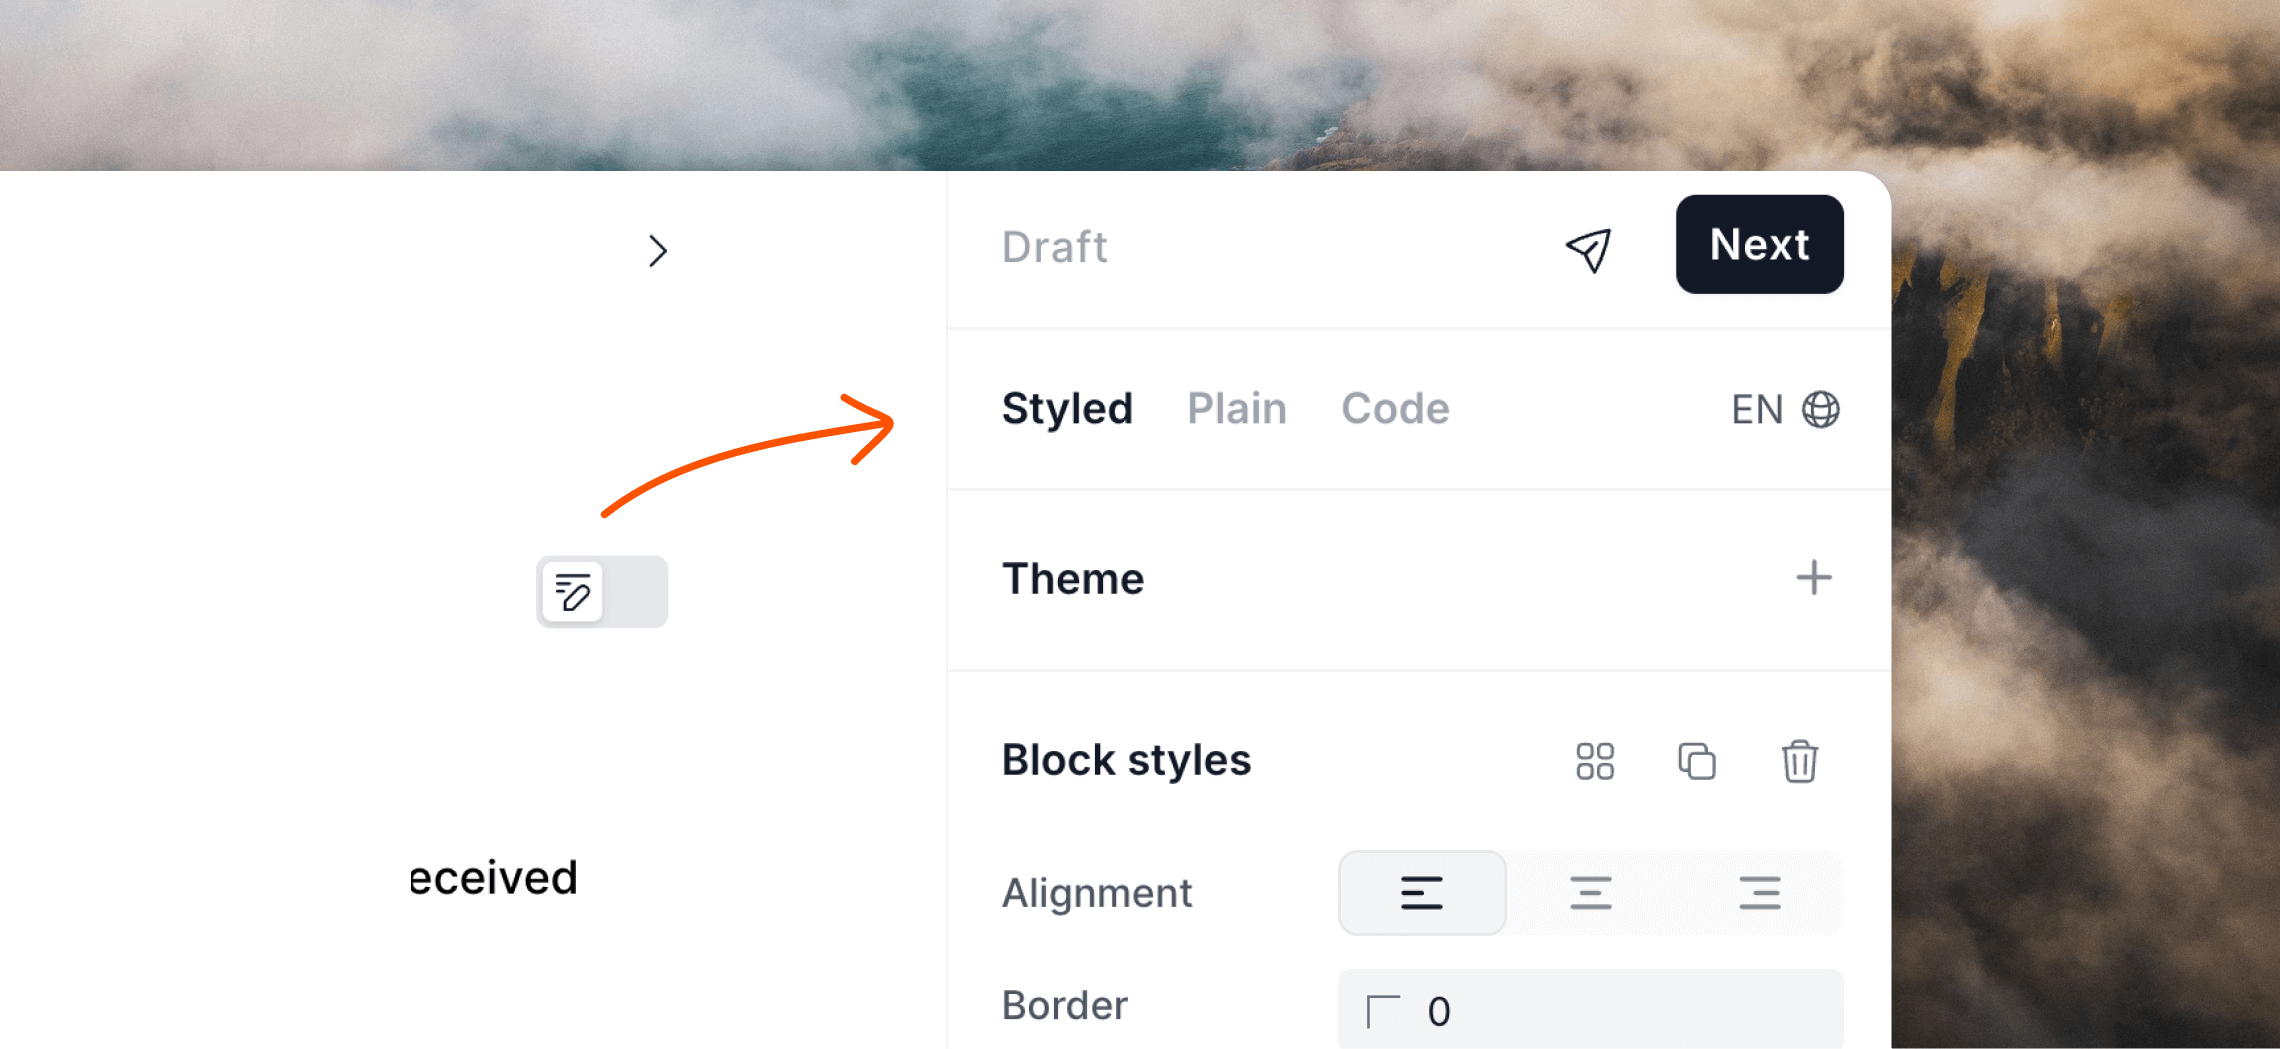
Style panel
Both Plain and Styled emails will show an editor side panel with formatting options for elements in your email. This includes all text, headings, links, buttons and dividers in your email, as well as design options for the main email body (padding, background and border).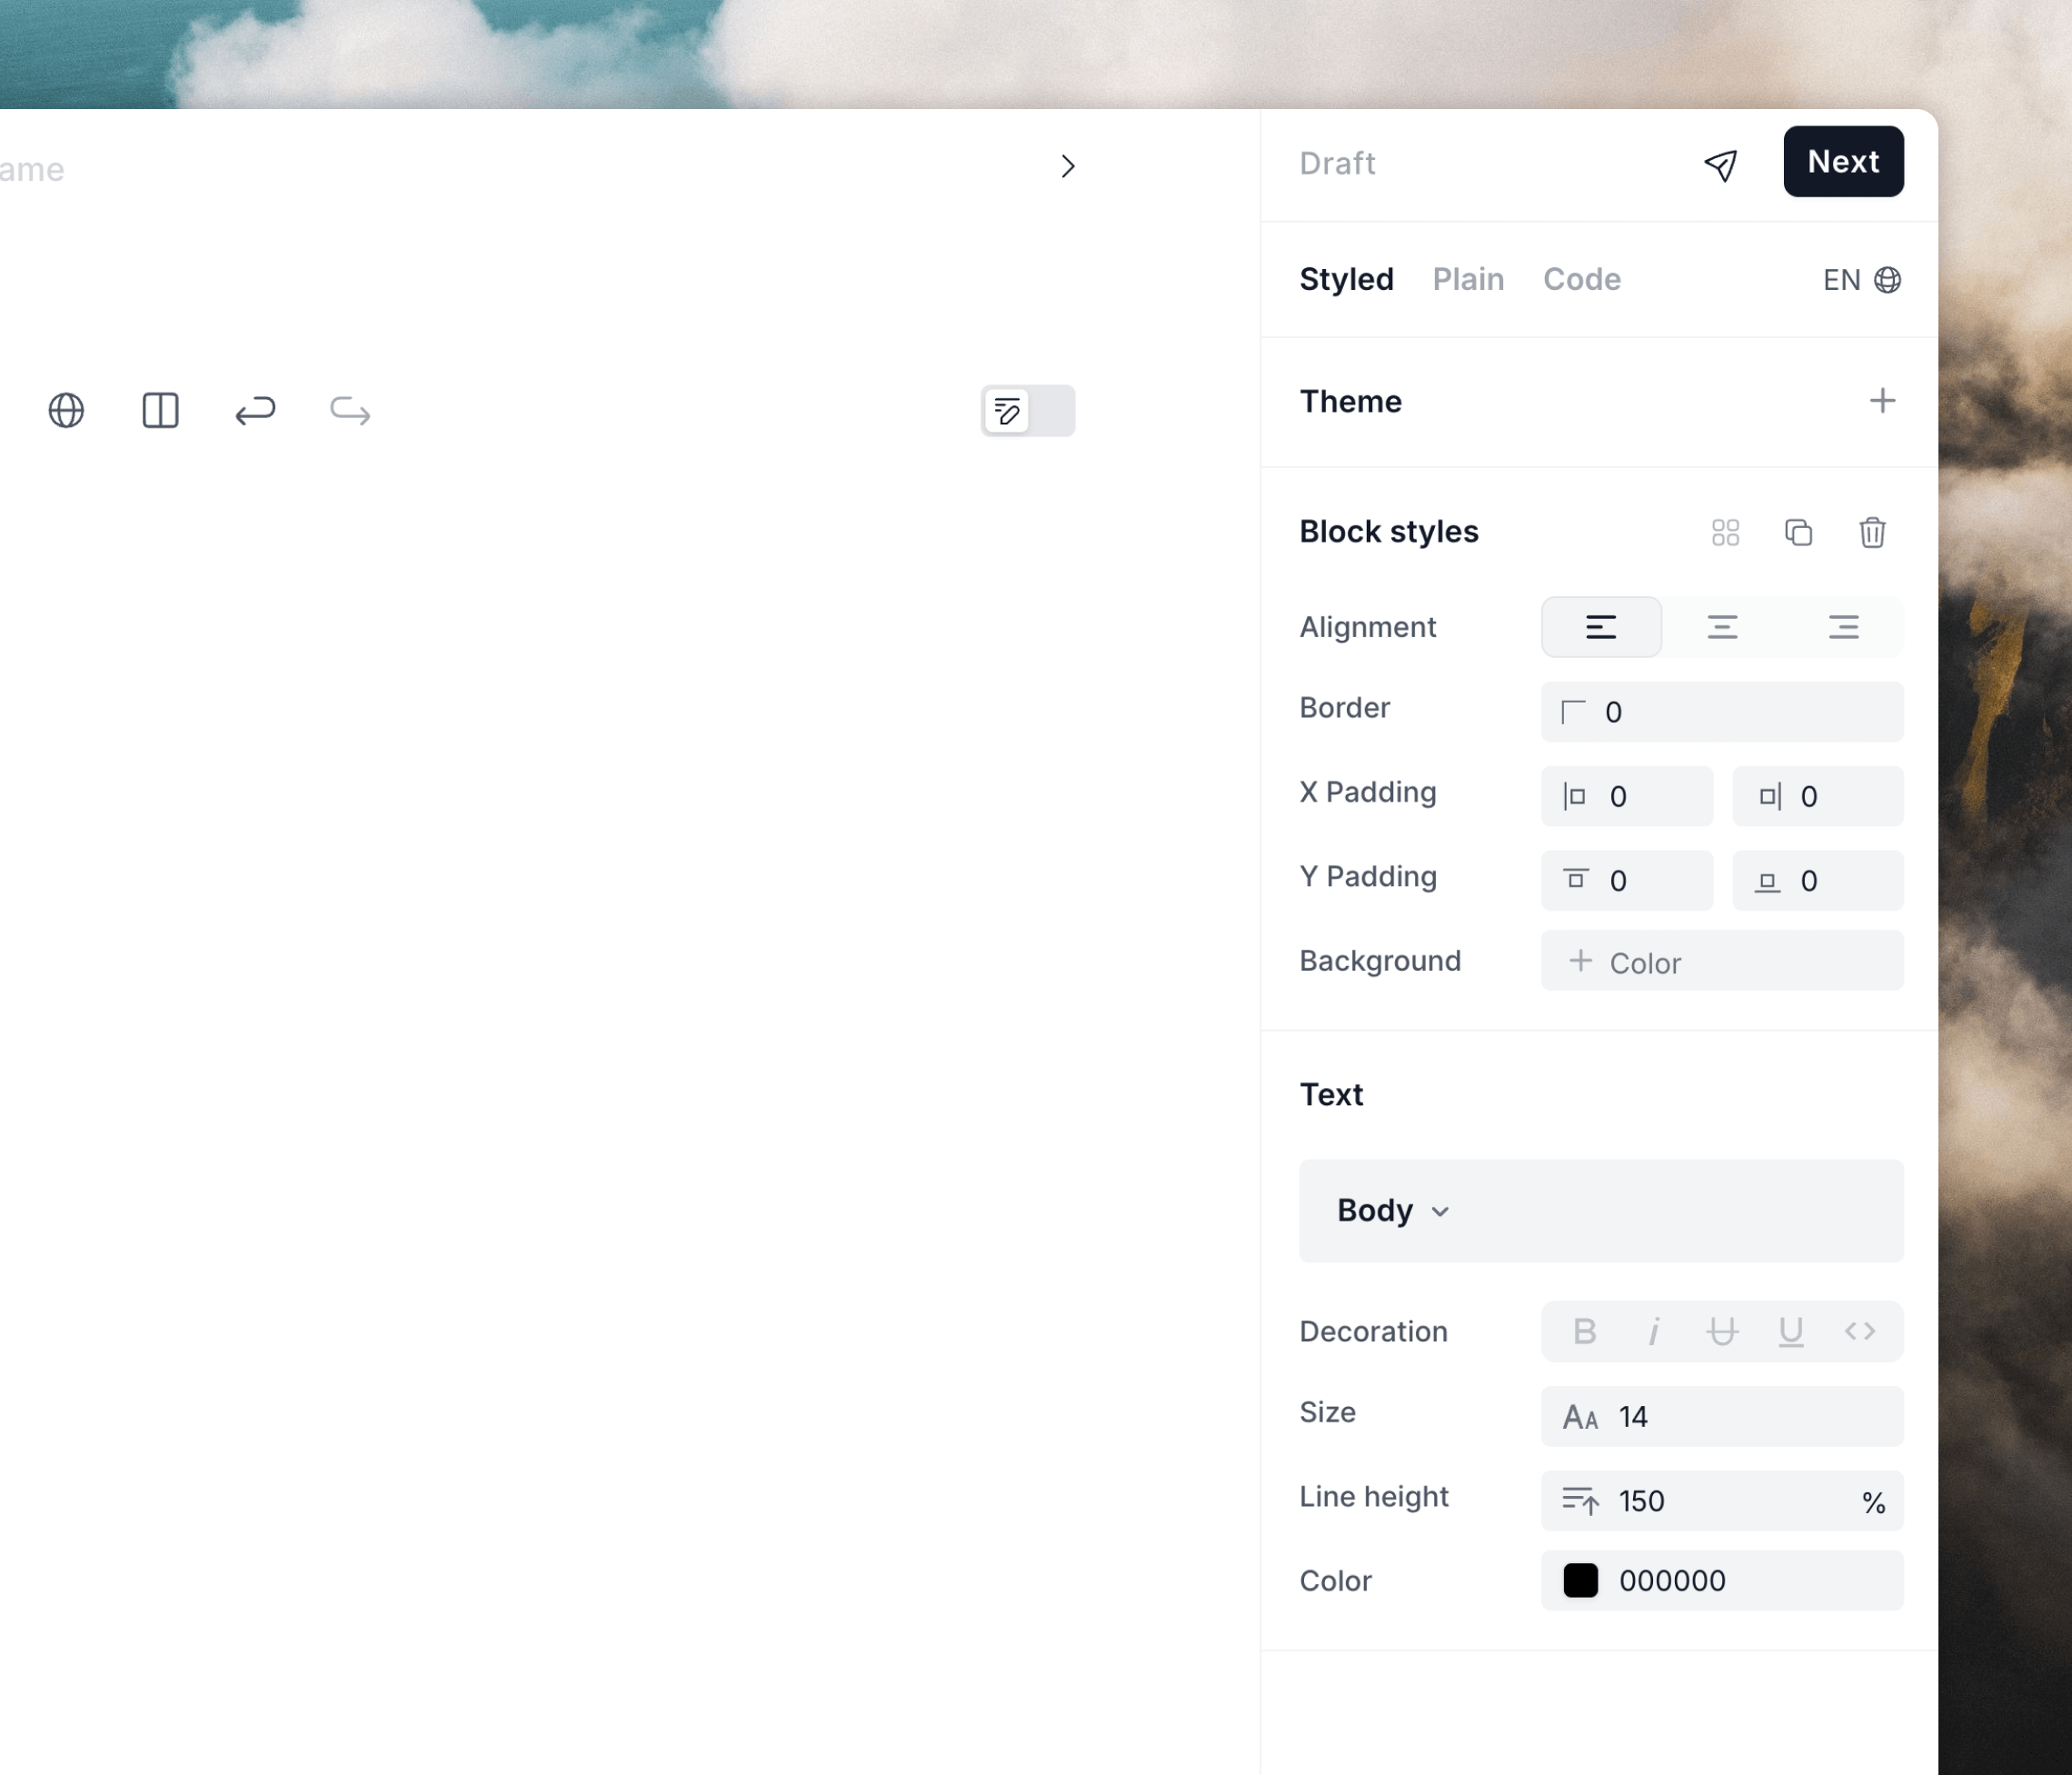
Language selector
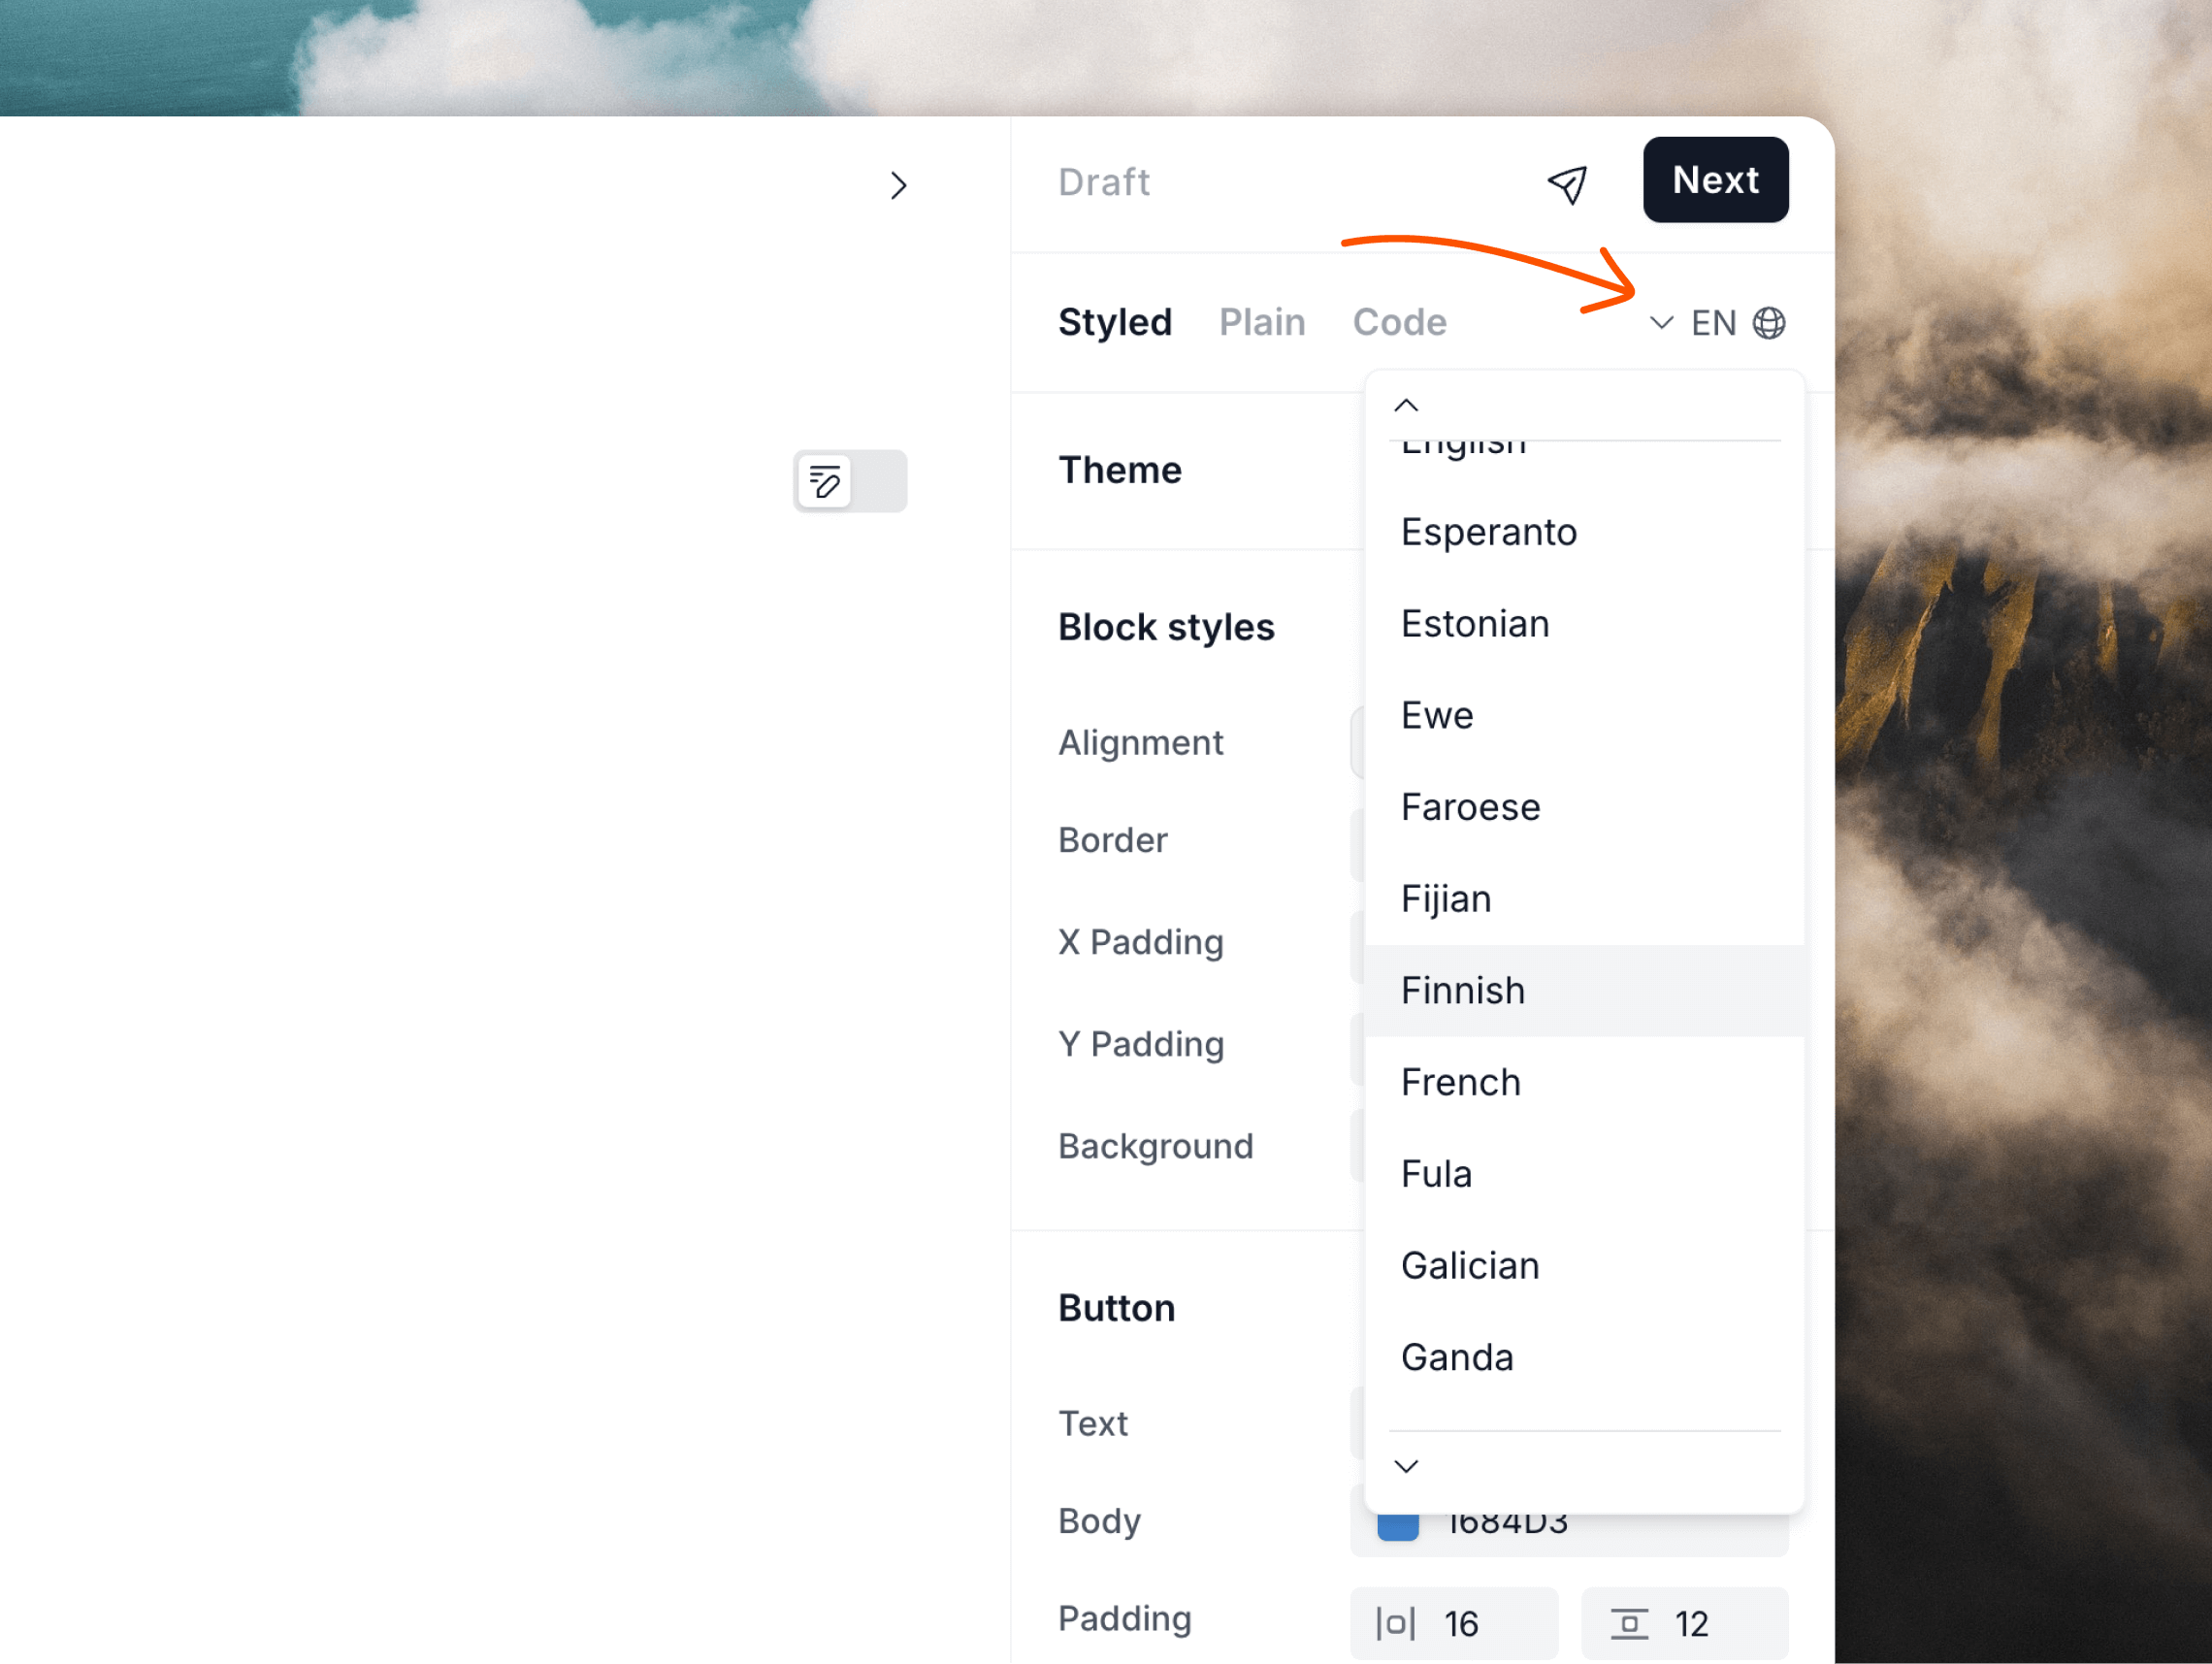
We’ve included a helpful language selector in the style panel. Using this will tell email clients which language your emails are written in. (It will not translate your emails.)You can translate emails inside
Loops.
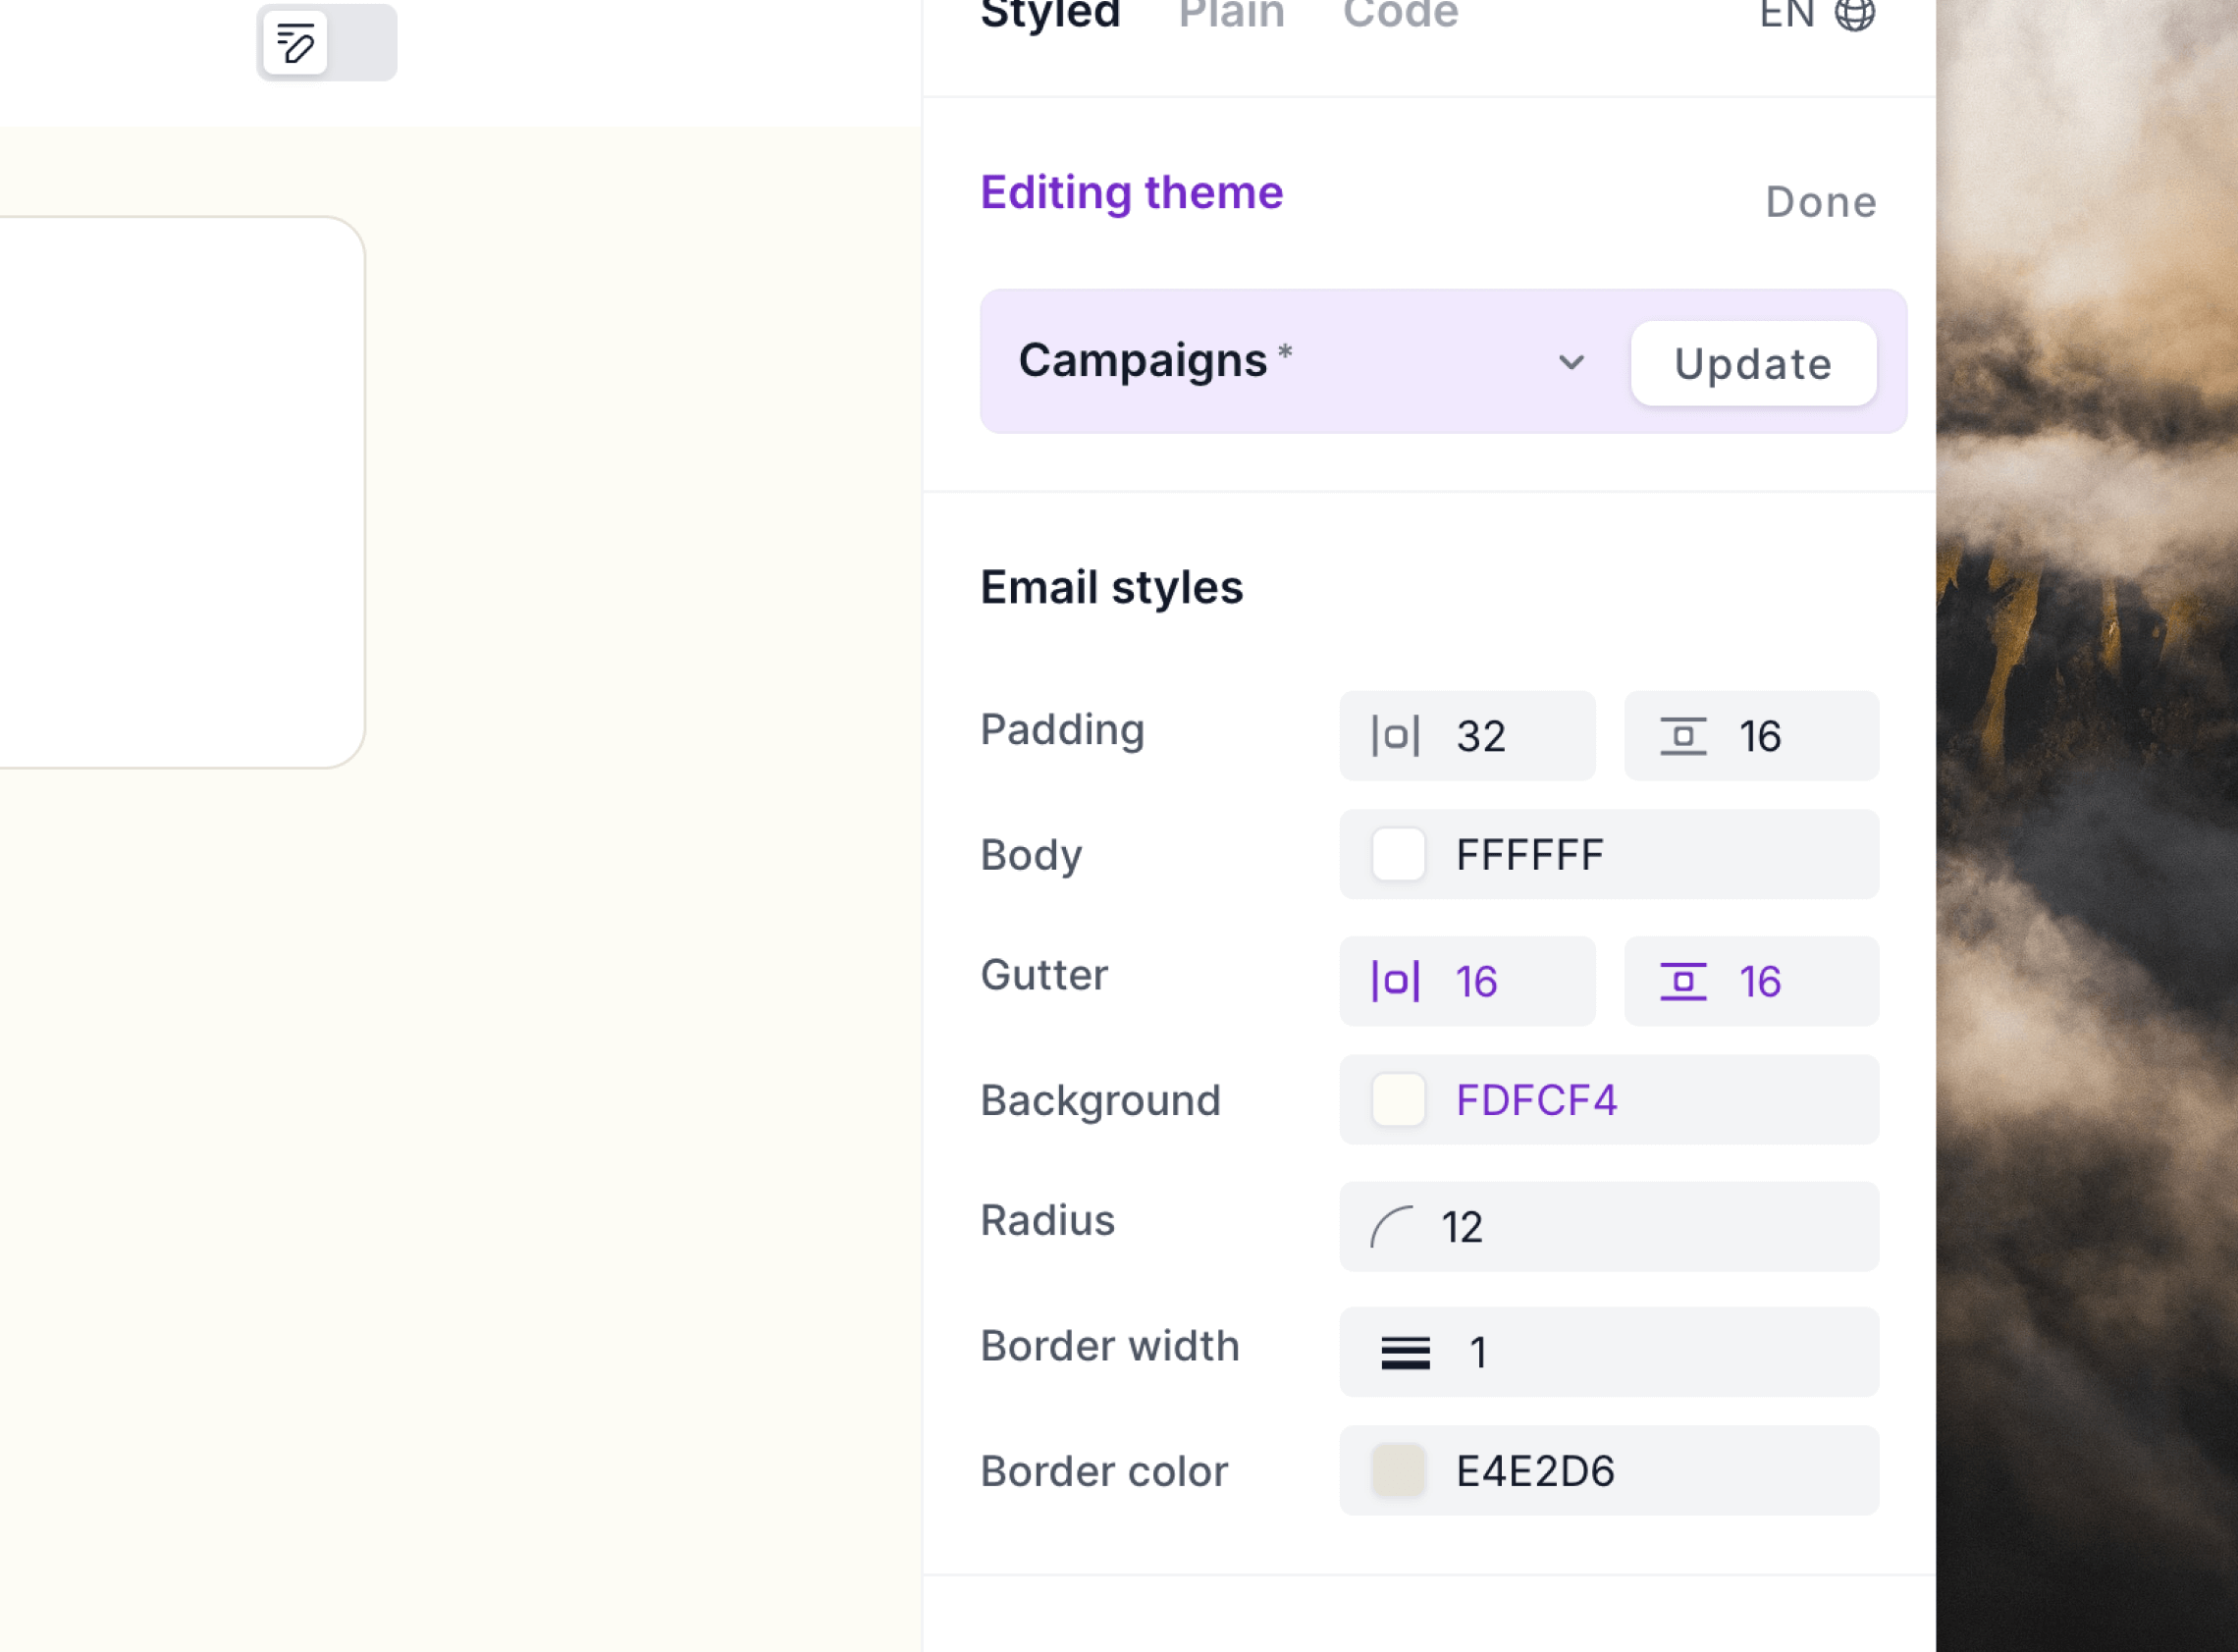
Themes
Themes let you create repeatable styles that can be easily applied to new emails. Once applied, a theme can be tweaked on each email and changes will also be synced back to the main style set. This makes the same change happen on any other email that the theme is applied to.Themes are not available on Plain mode emails.
Create a theme
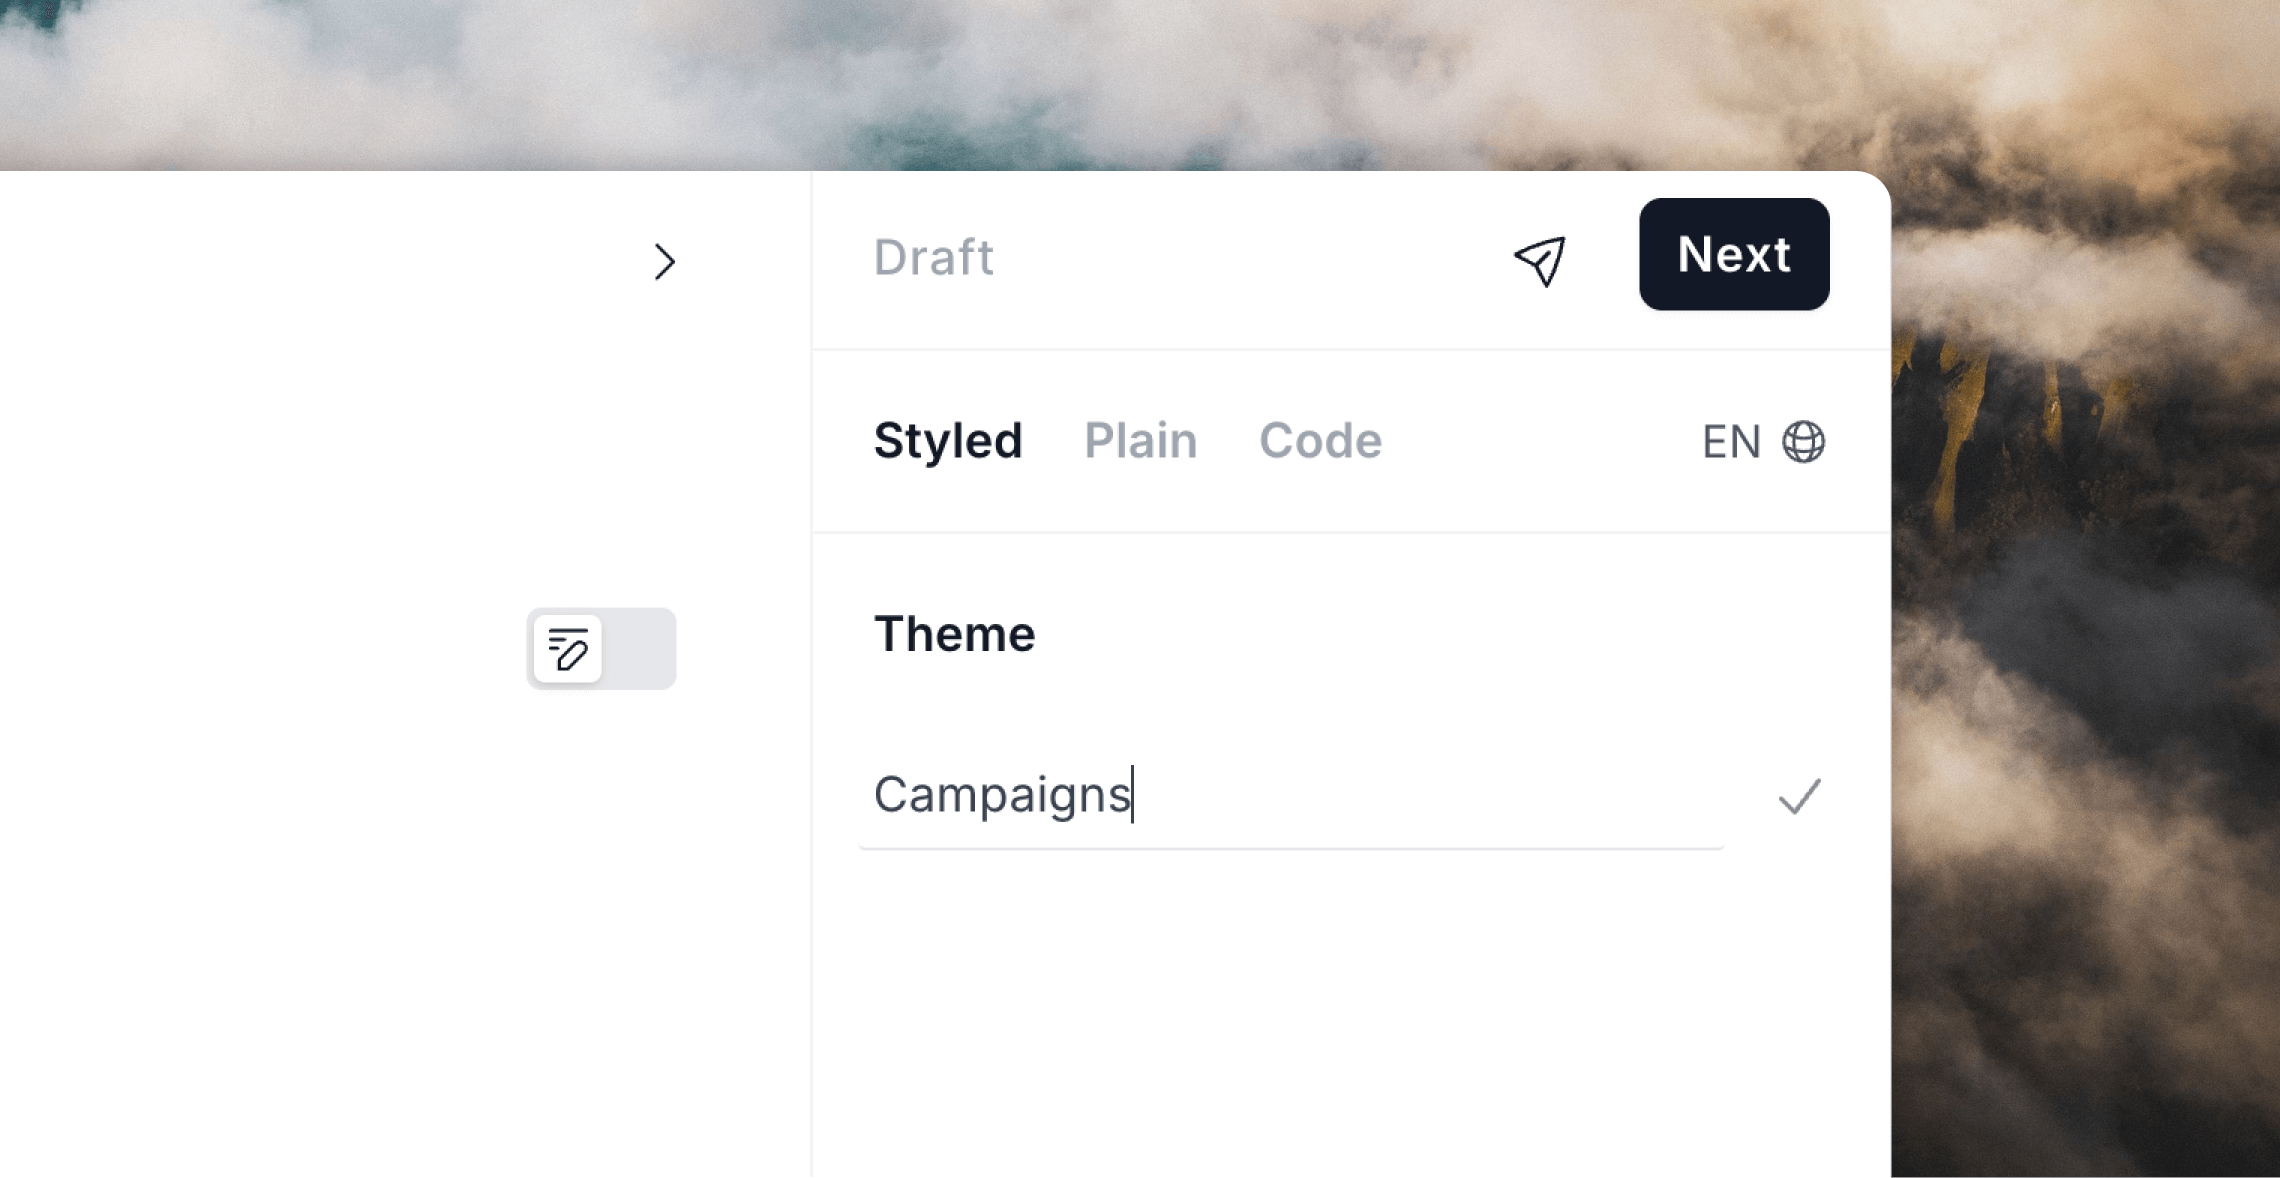
To create a theme, click the+ plus icon in the Theme editor panel.
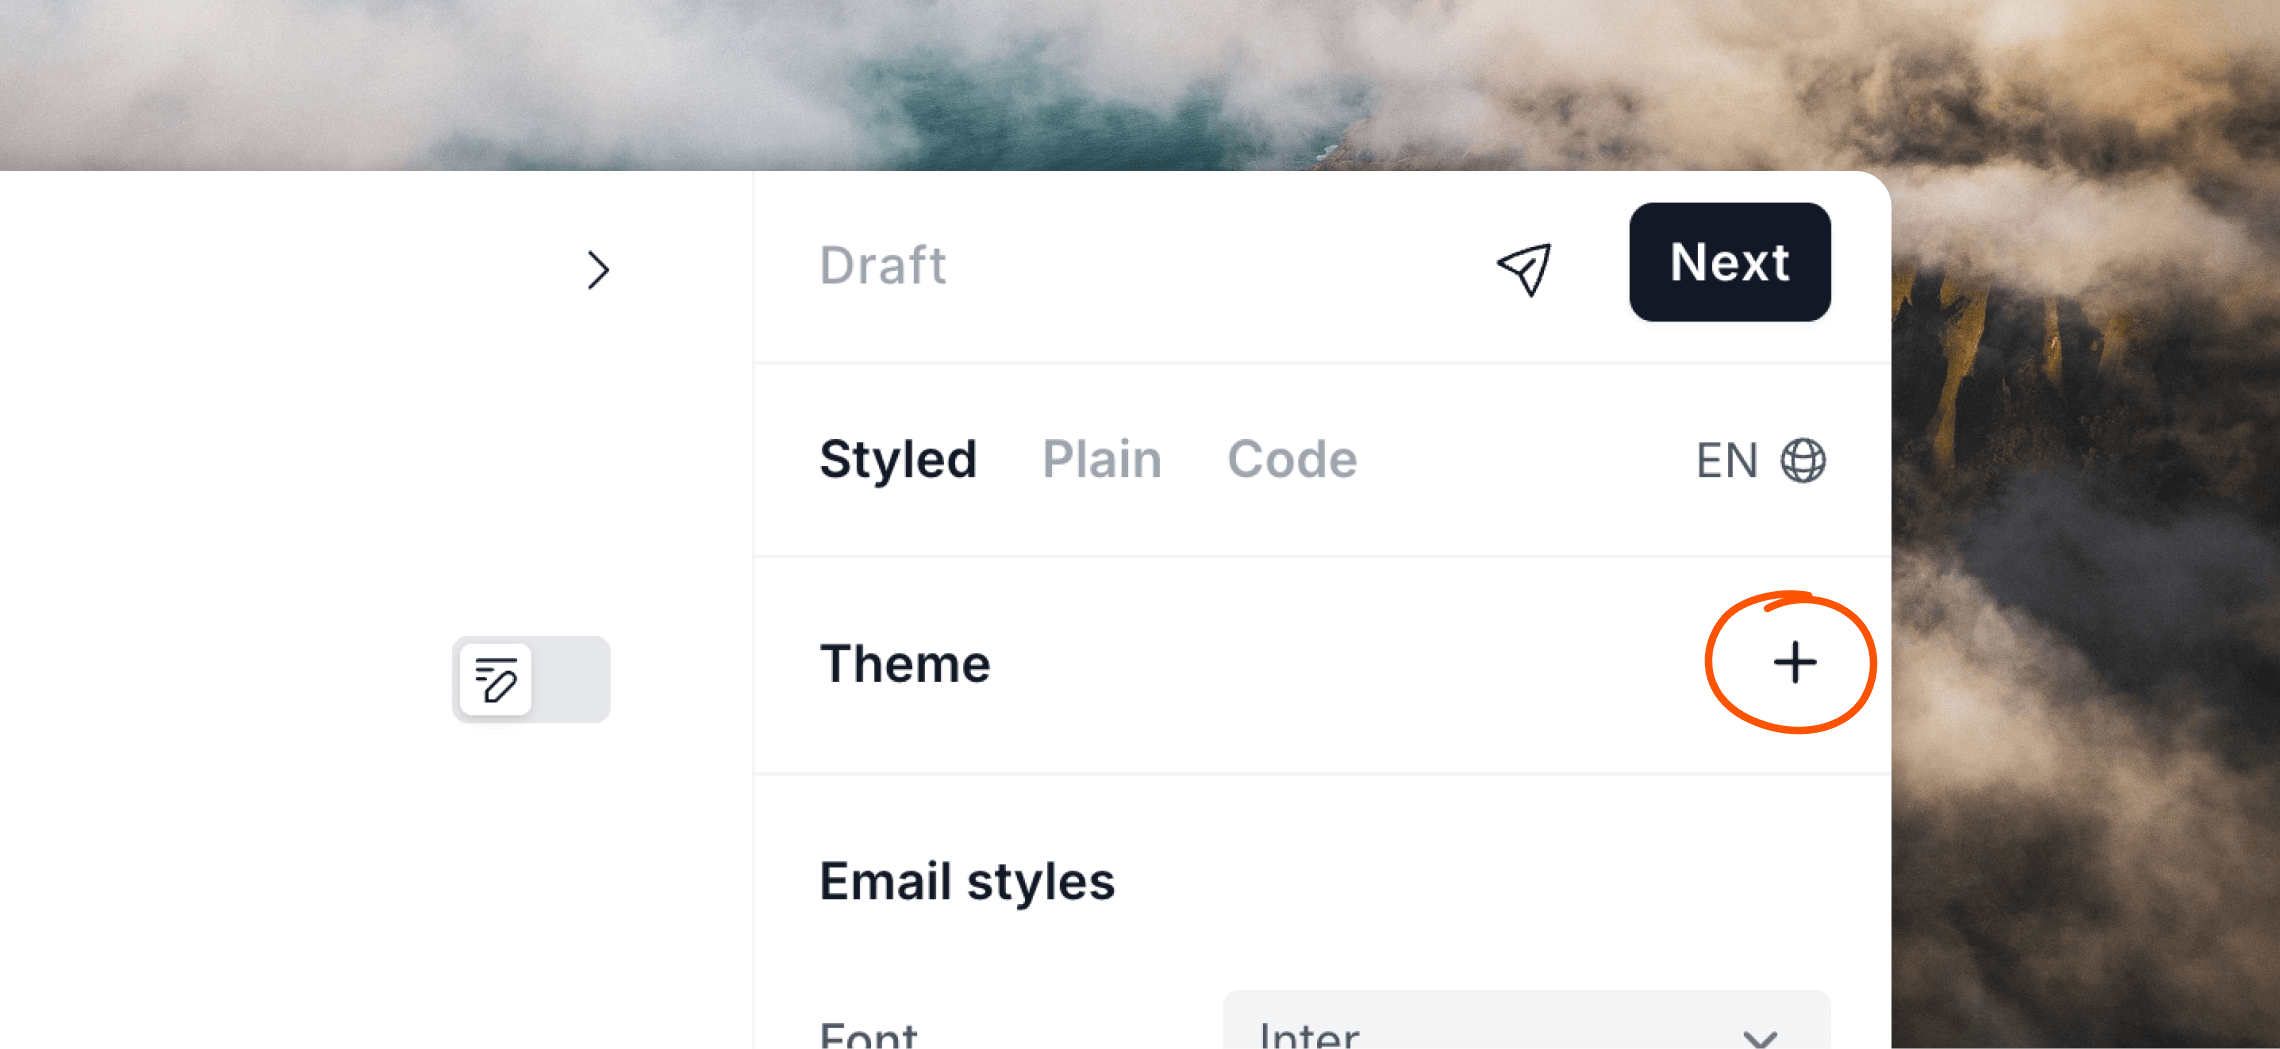
✓ check icon or press Enter. This will create a theme based on the current styling options selected in the style panel and apply it to the current email.
Apply a theme to an email
To add an existing theme to an email, click the Select dropdown in the Theme editor panel and select your desired theme.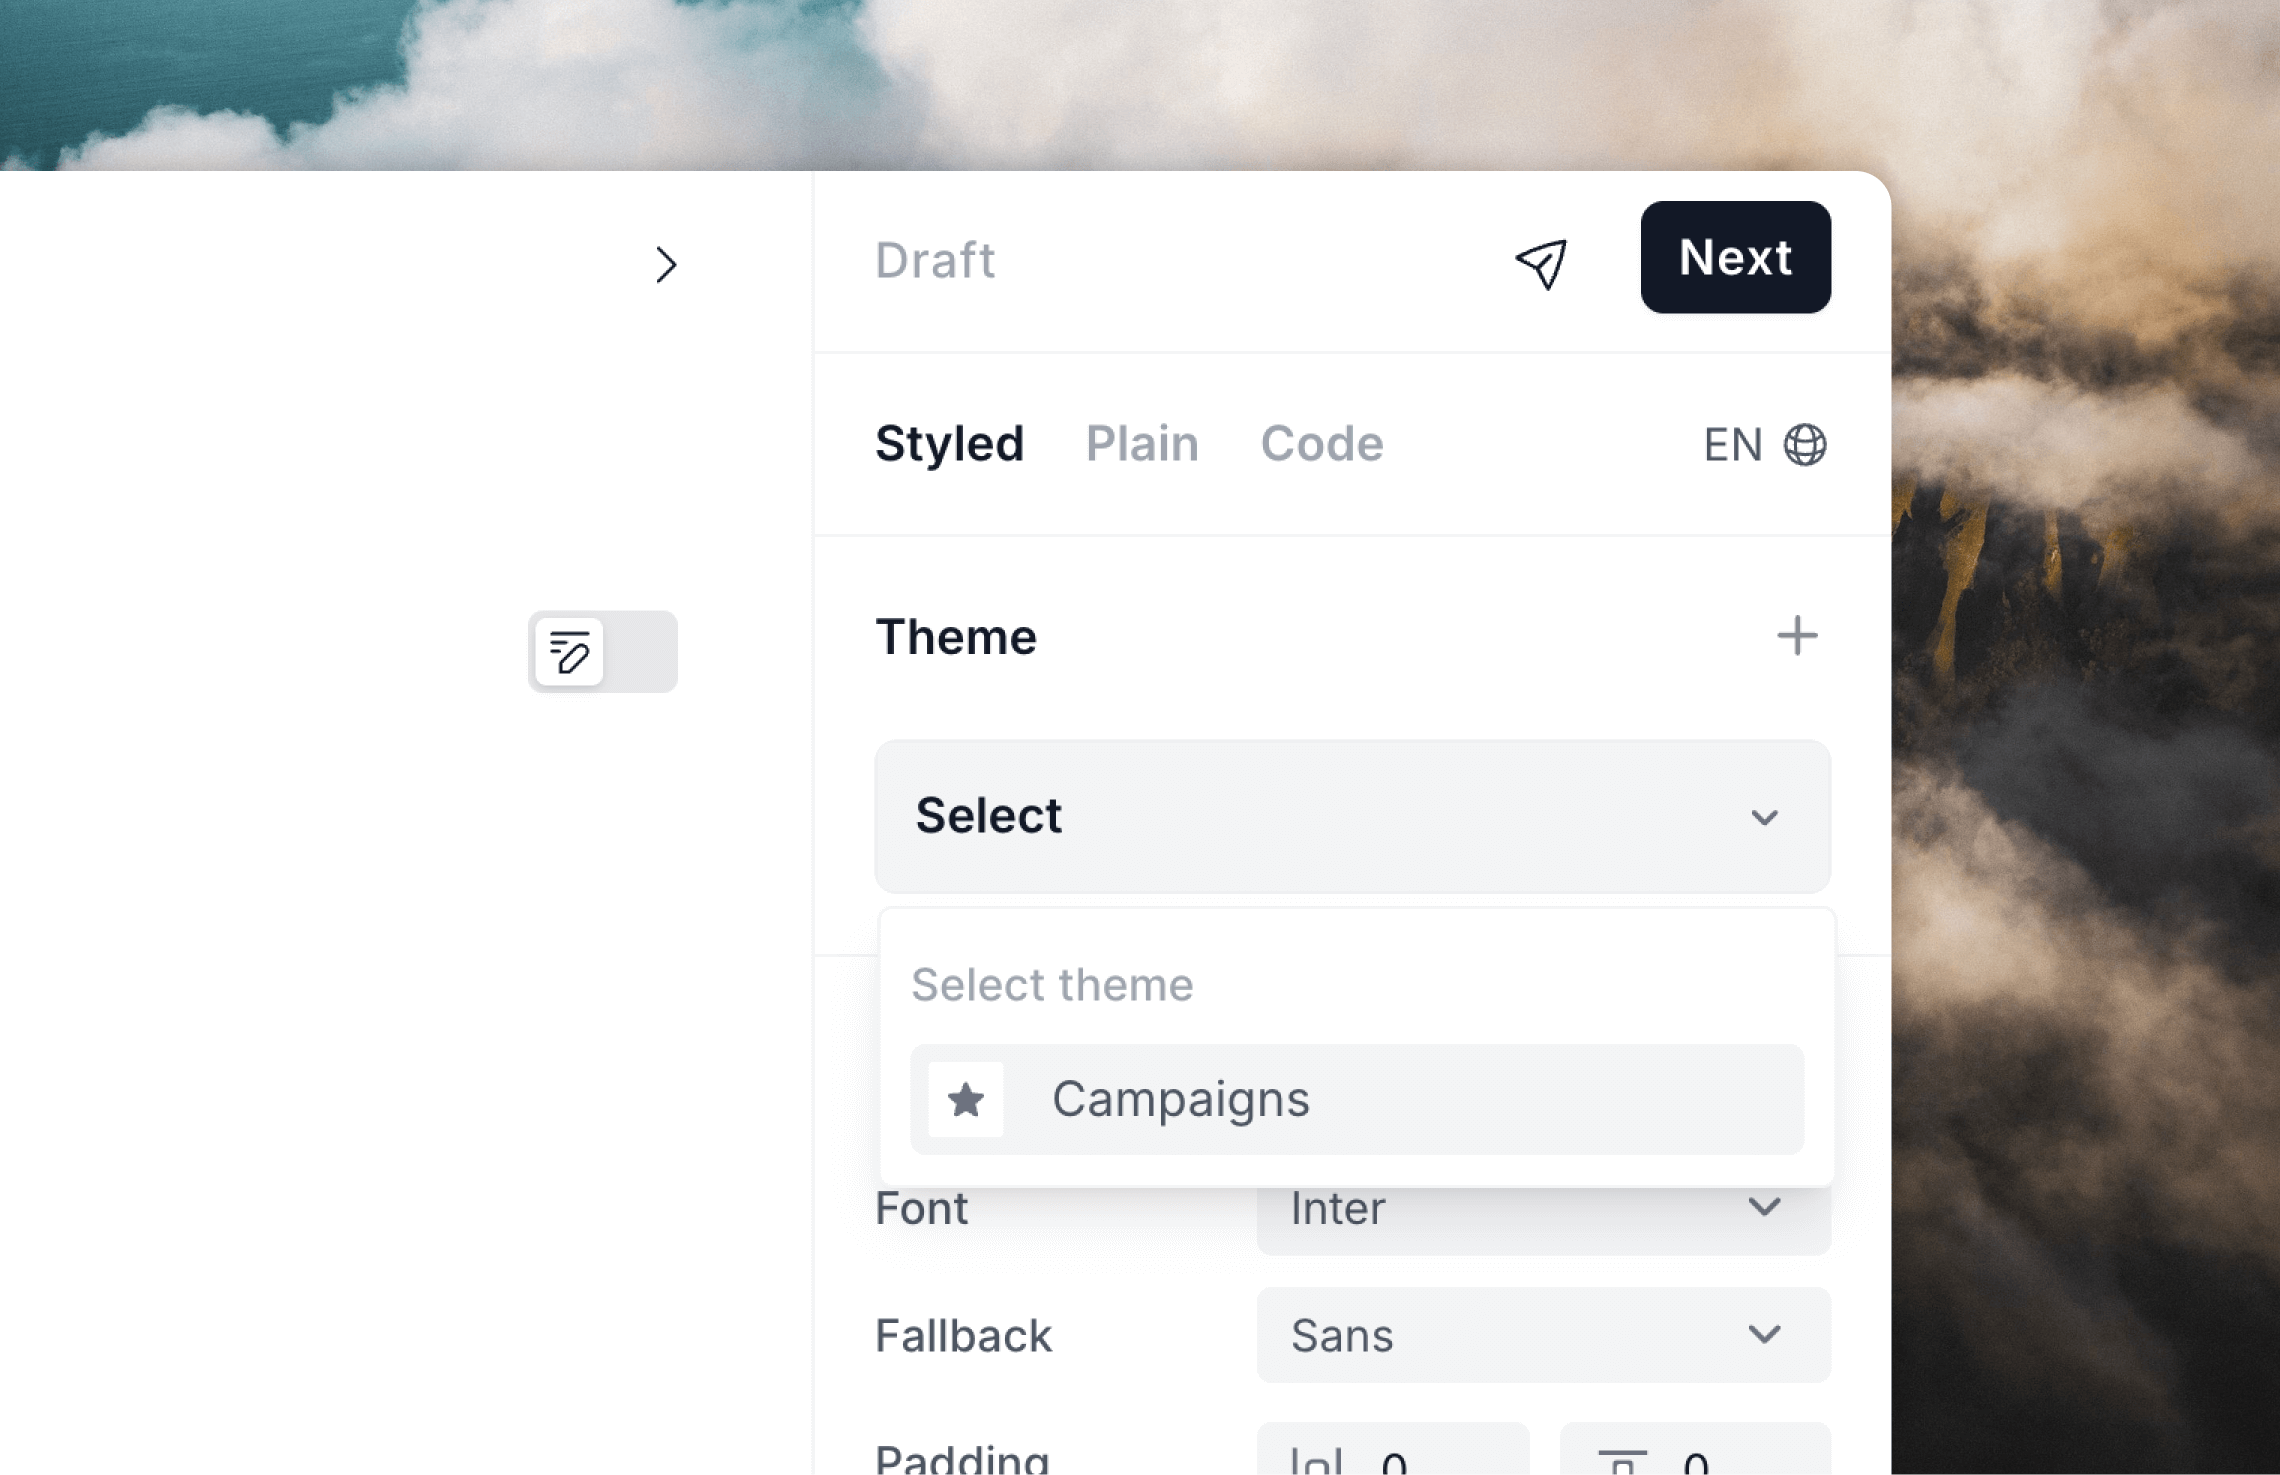
Edit a theme
To edit a theme, first open an email with it applied, or apply it to an email. Then click Edit to open the theme editor panel.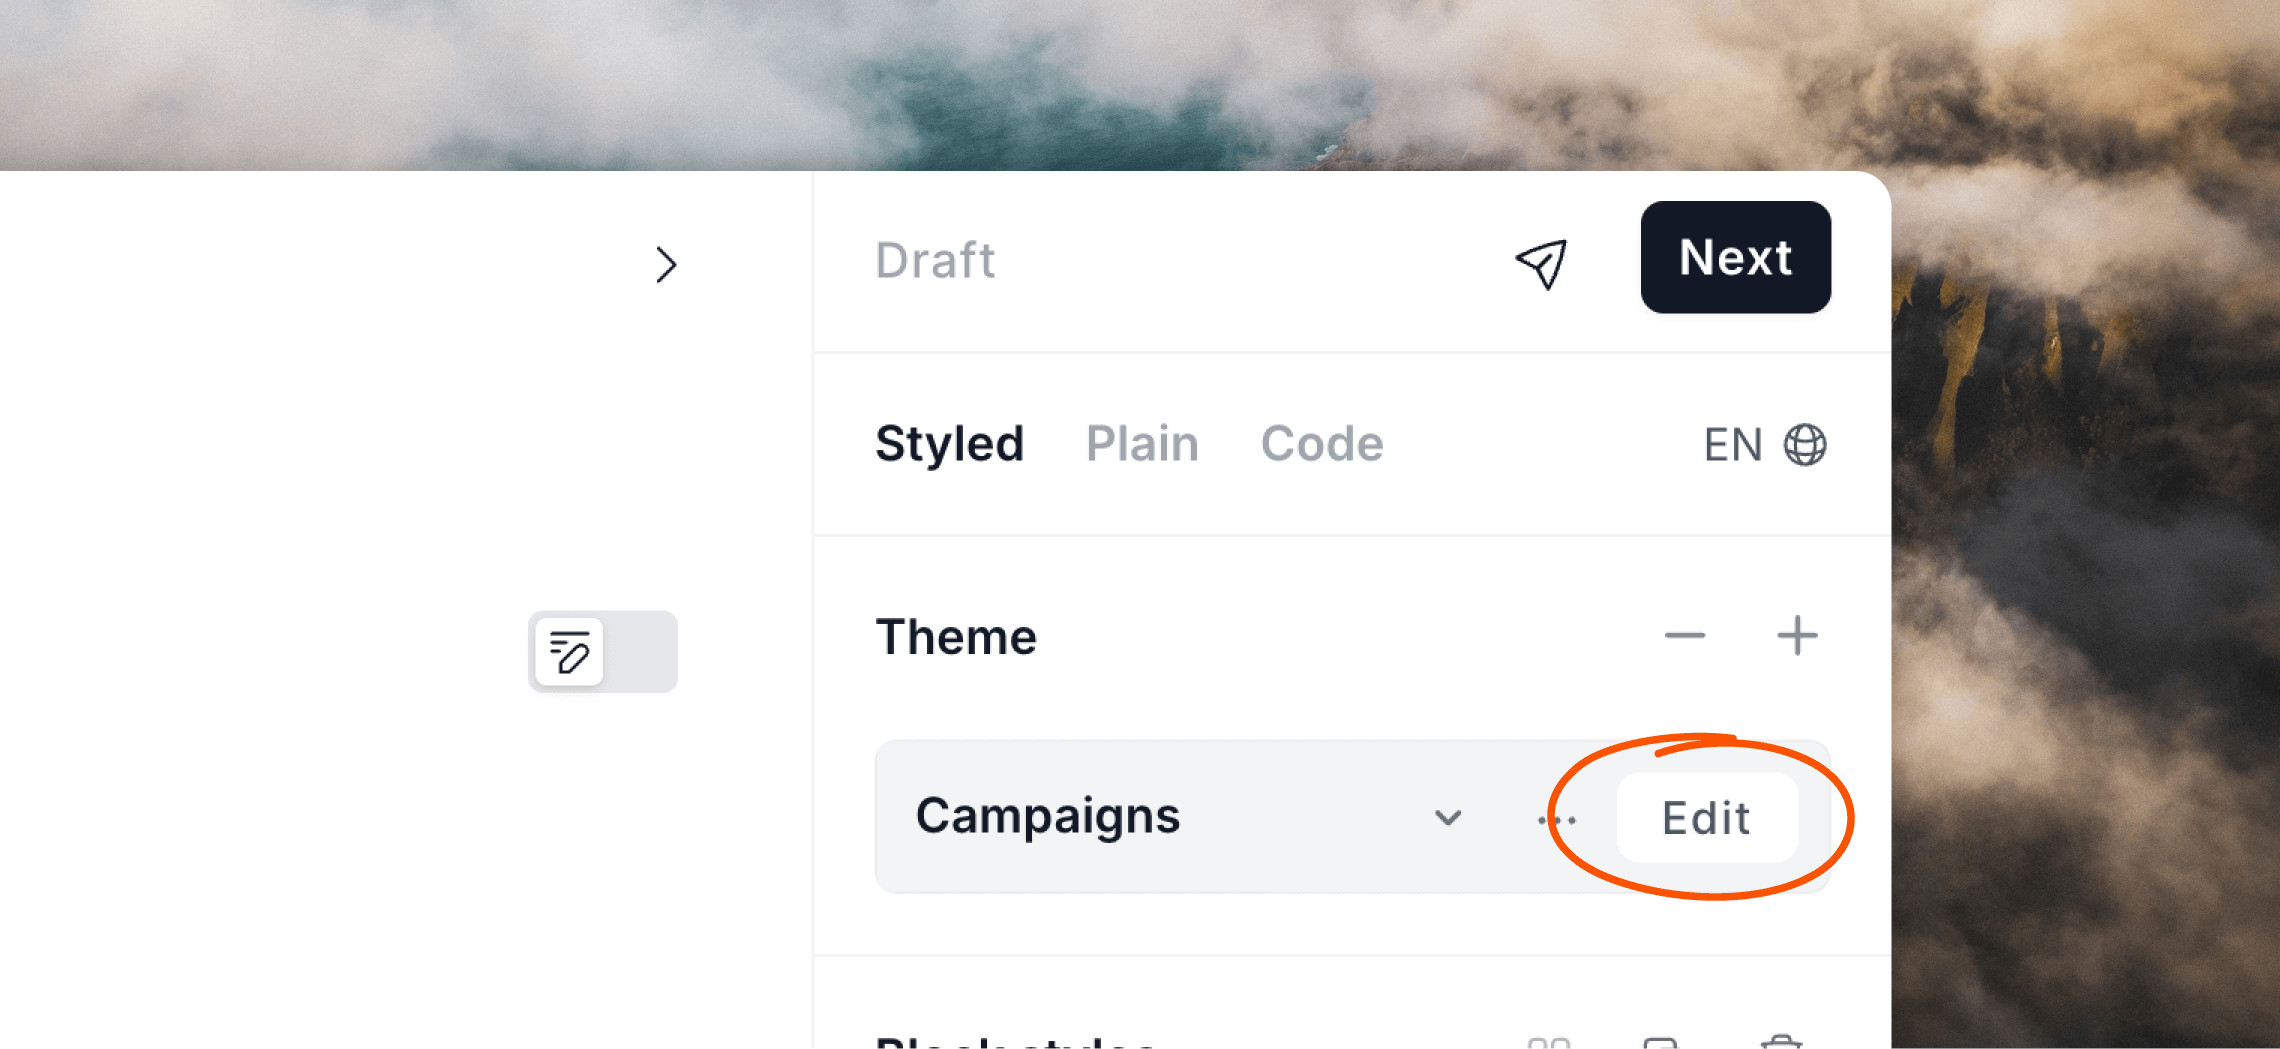
Make one-off changes to a theme
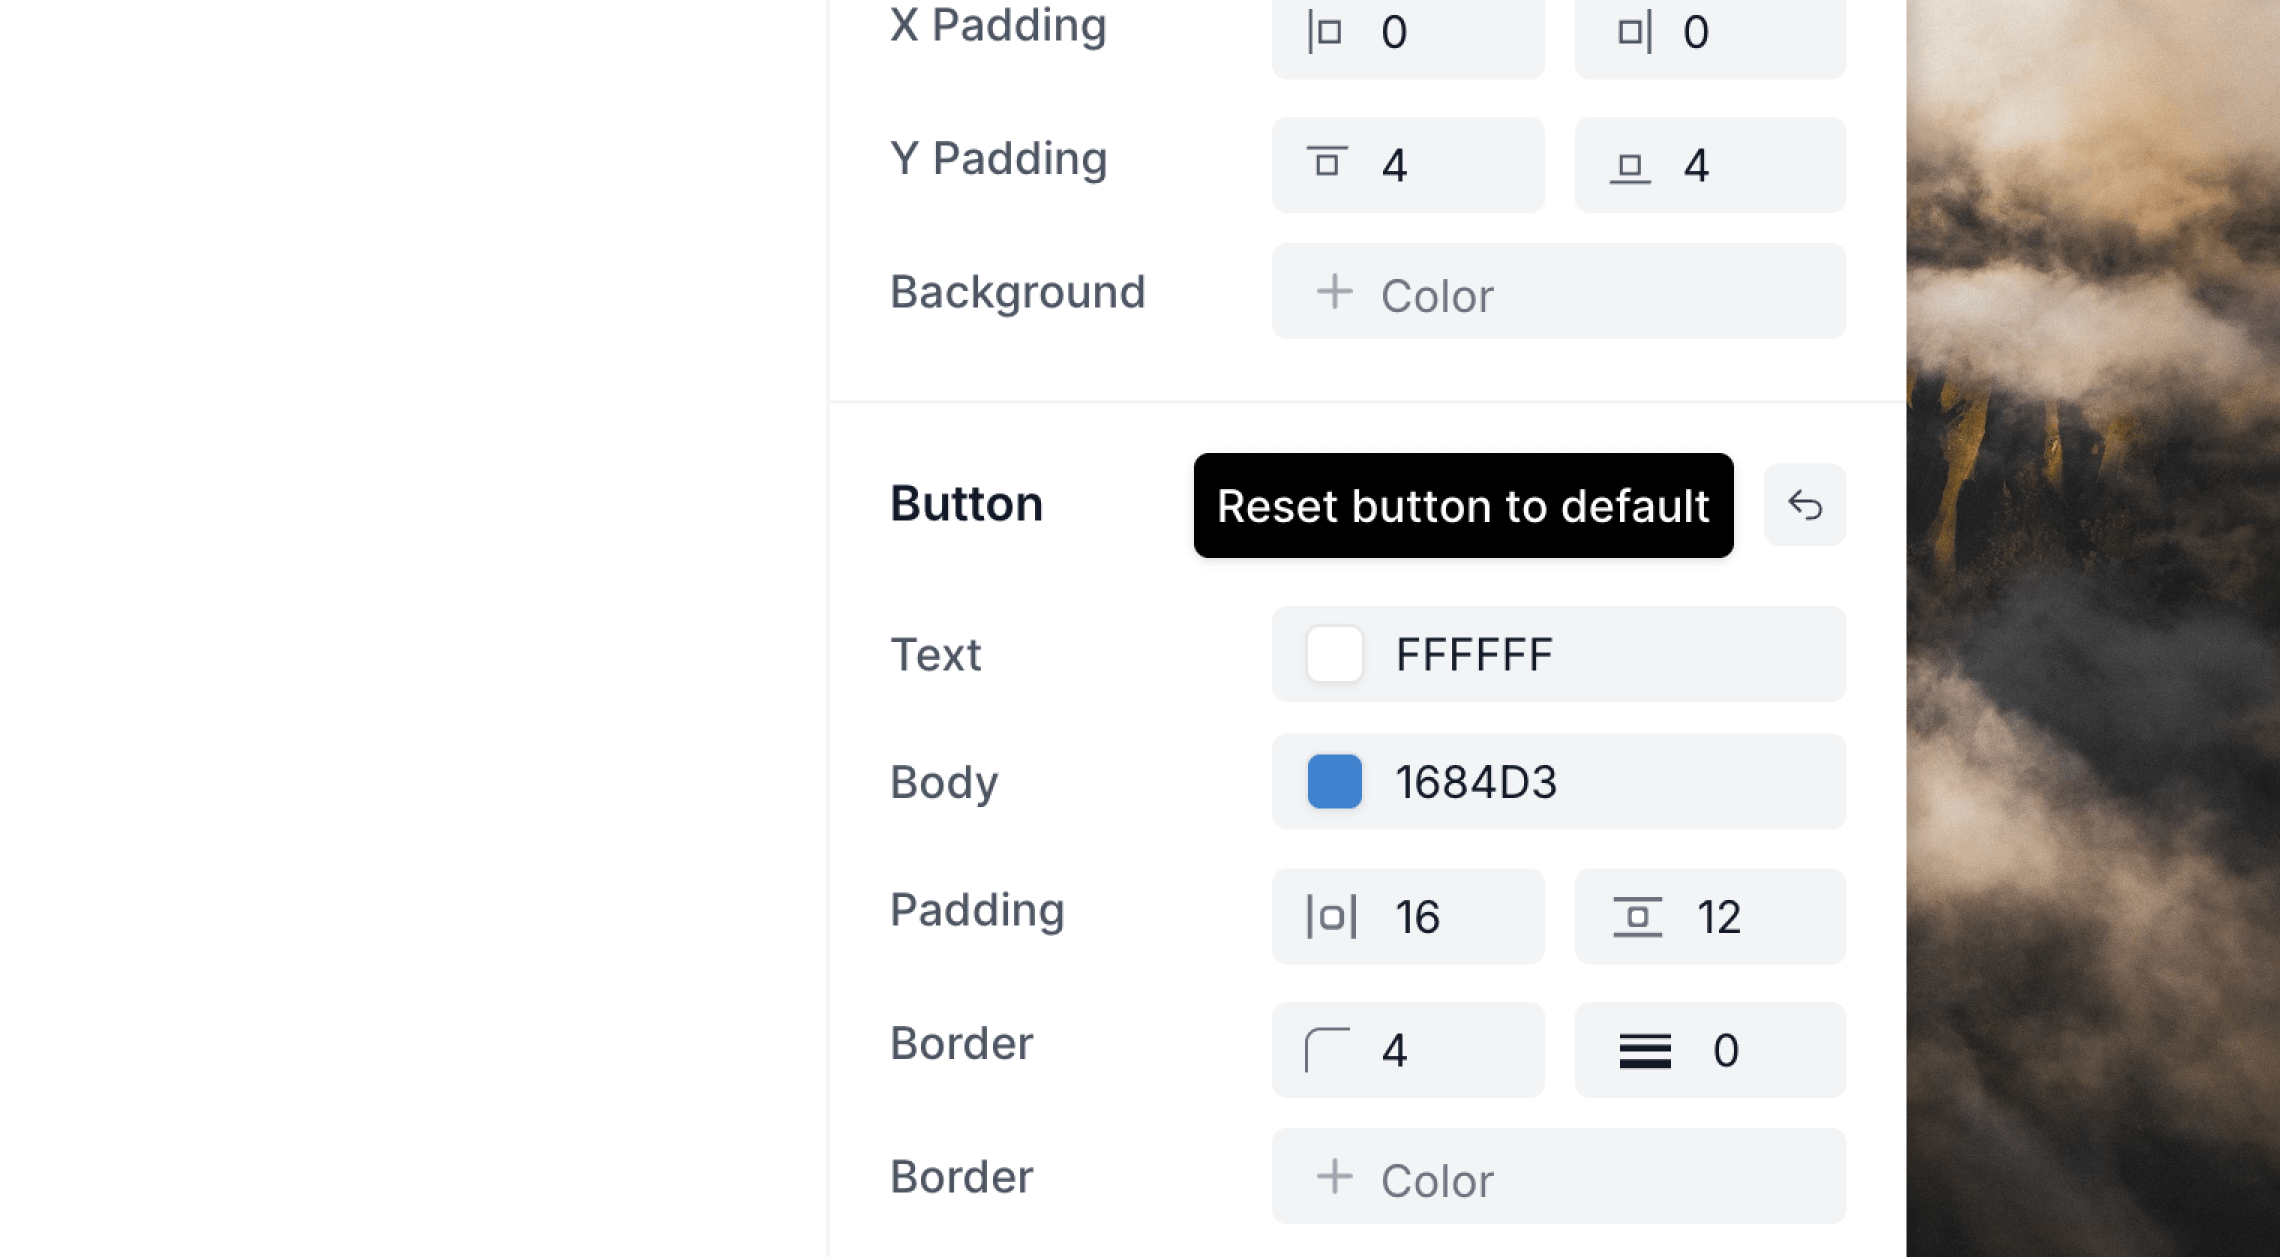
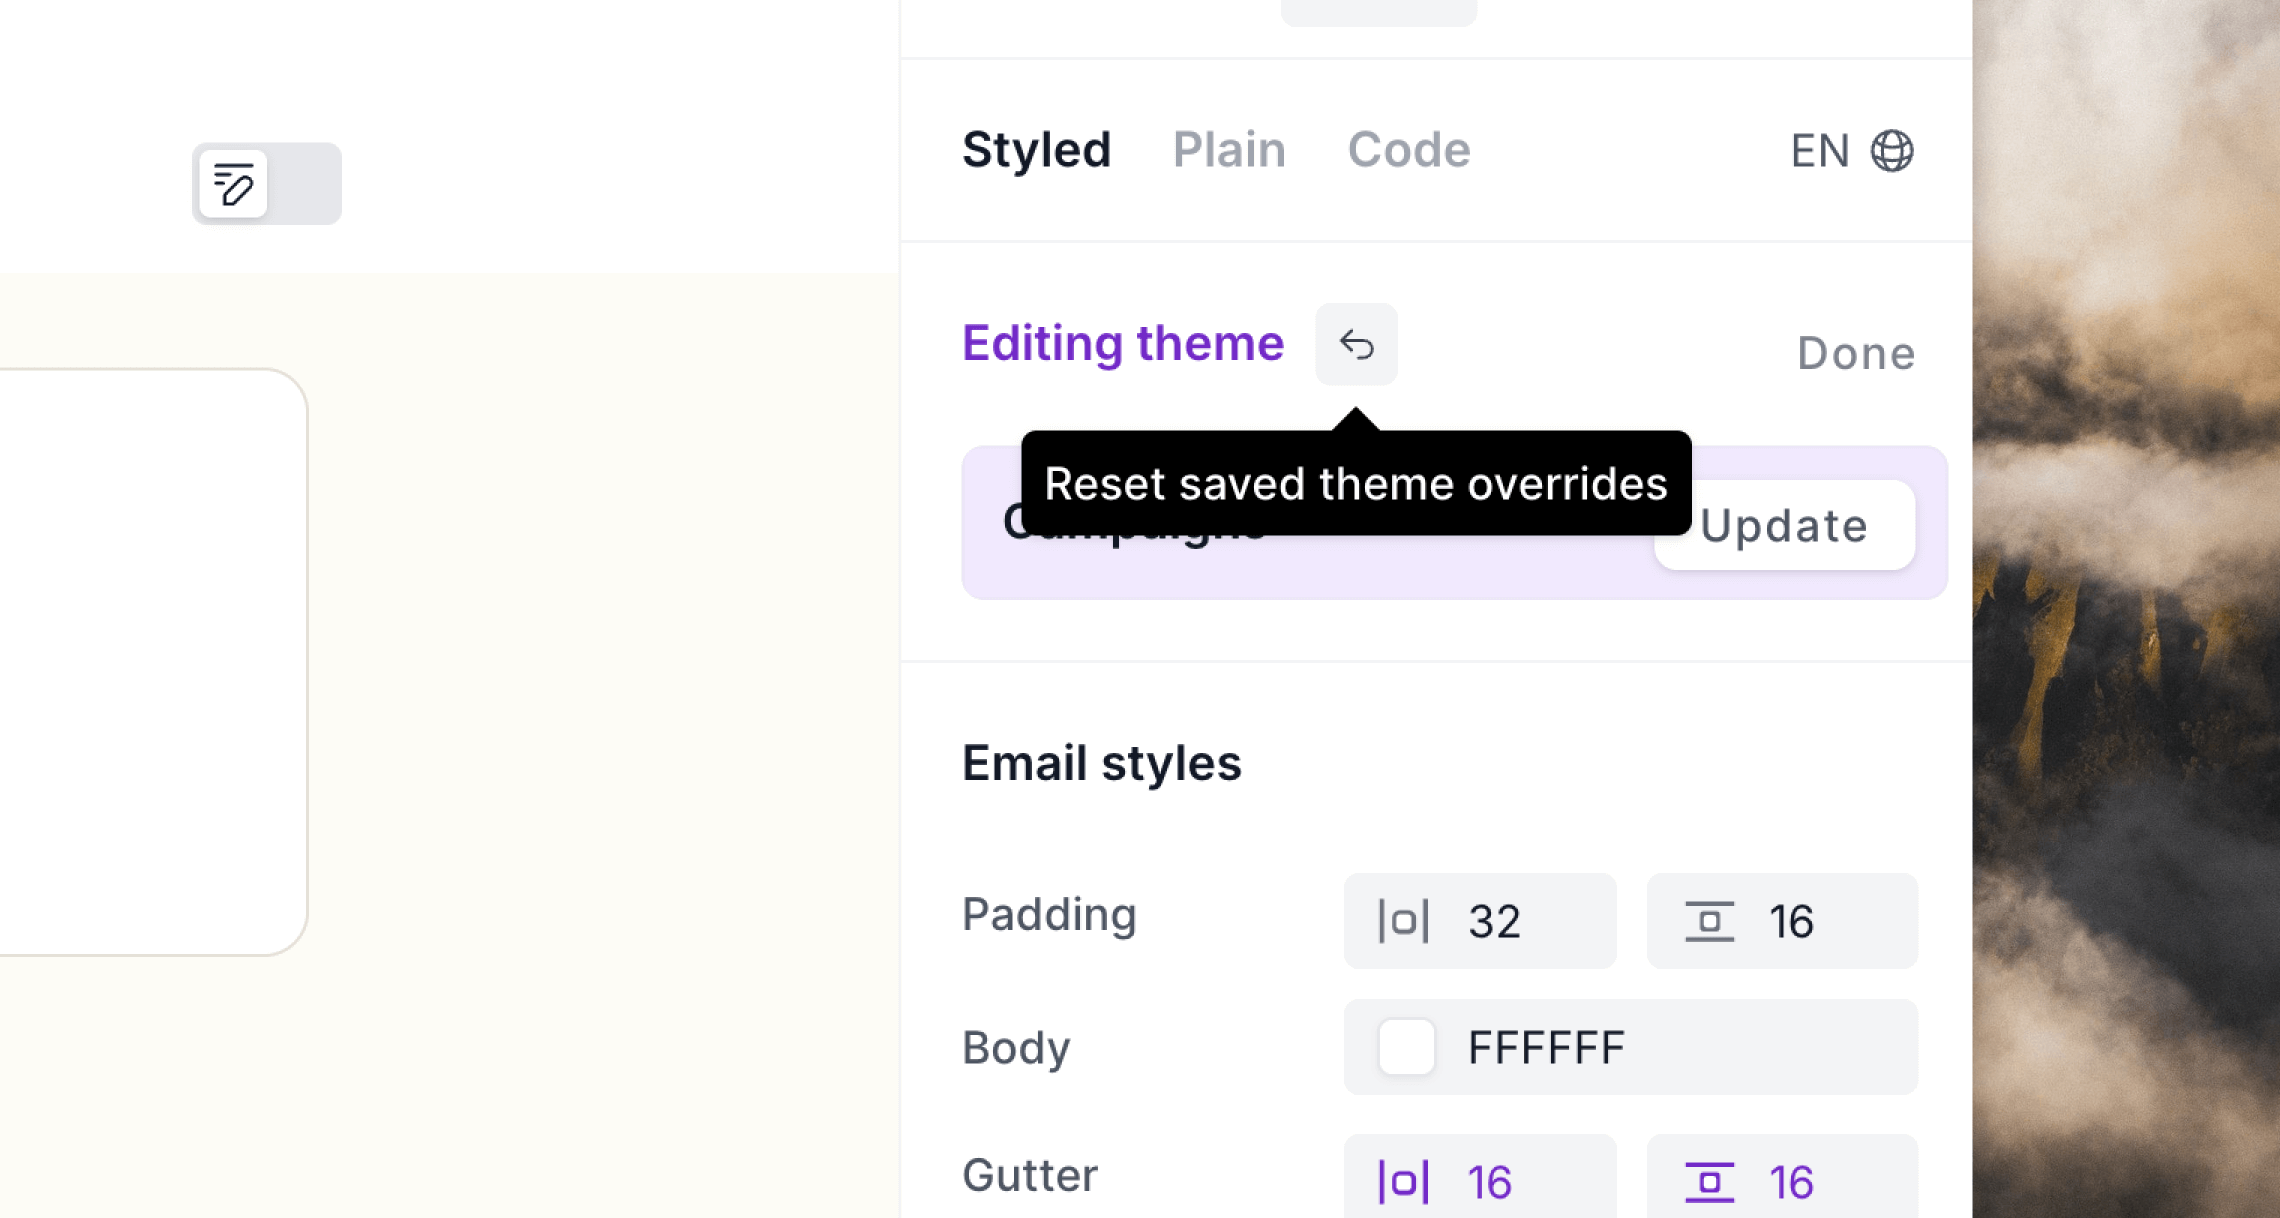
You are free to make one-off custom design changes to an individual email. If you avoid clicking the Update button shown above, changes will not be synced to all other emails using the theme. Any subsequent updates made to the underlying theme will be synced to your email but your individual style changes made directly on the email will override any synced changes.Reset to a theme’s defaults
After making design changes to an email with a theme applied, you can get back to the theme’s defaults by using the⤺ reset icons.
You can reset styles for each of the Email styles, Text, Button and Divider sections individually.
Or if you want to reset all current edits, hover over the Editing theme panel at the top and click the reset button there.
This will re-apply the theme’s original design to your email and remove all current overrides.
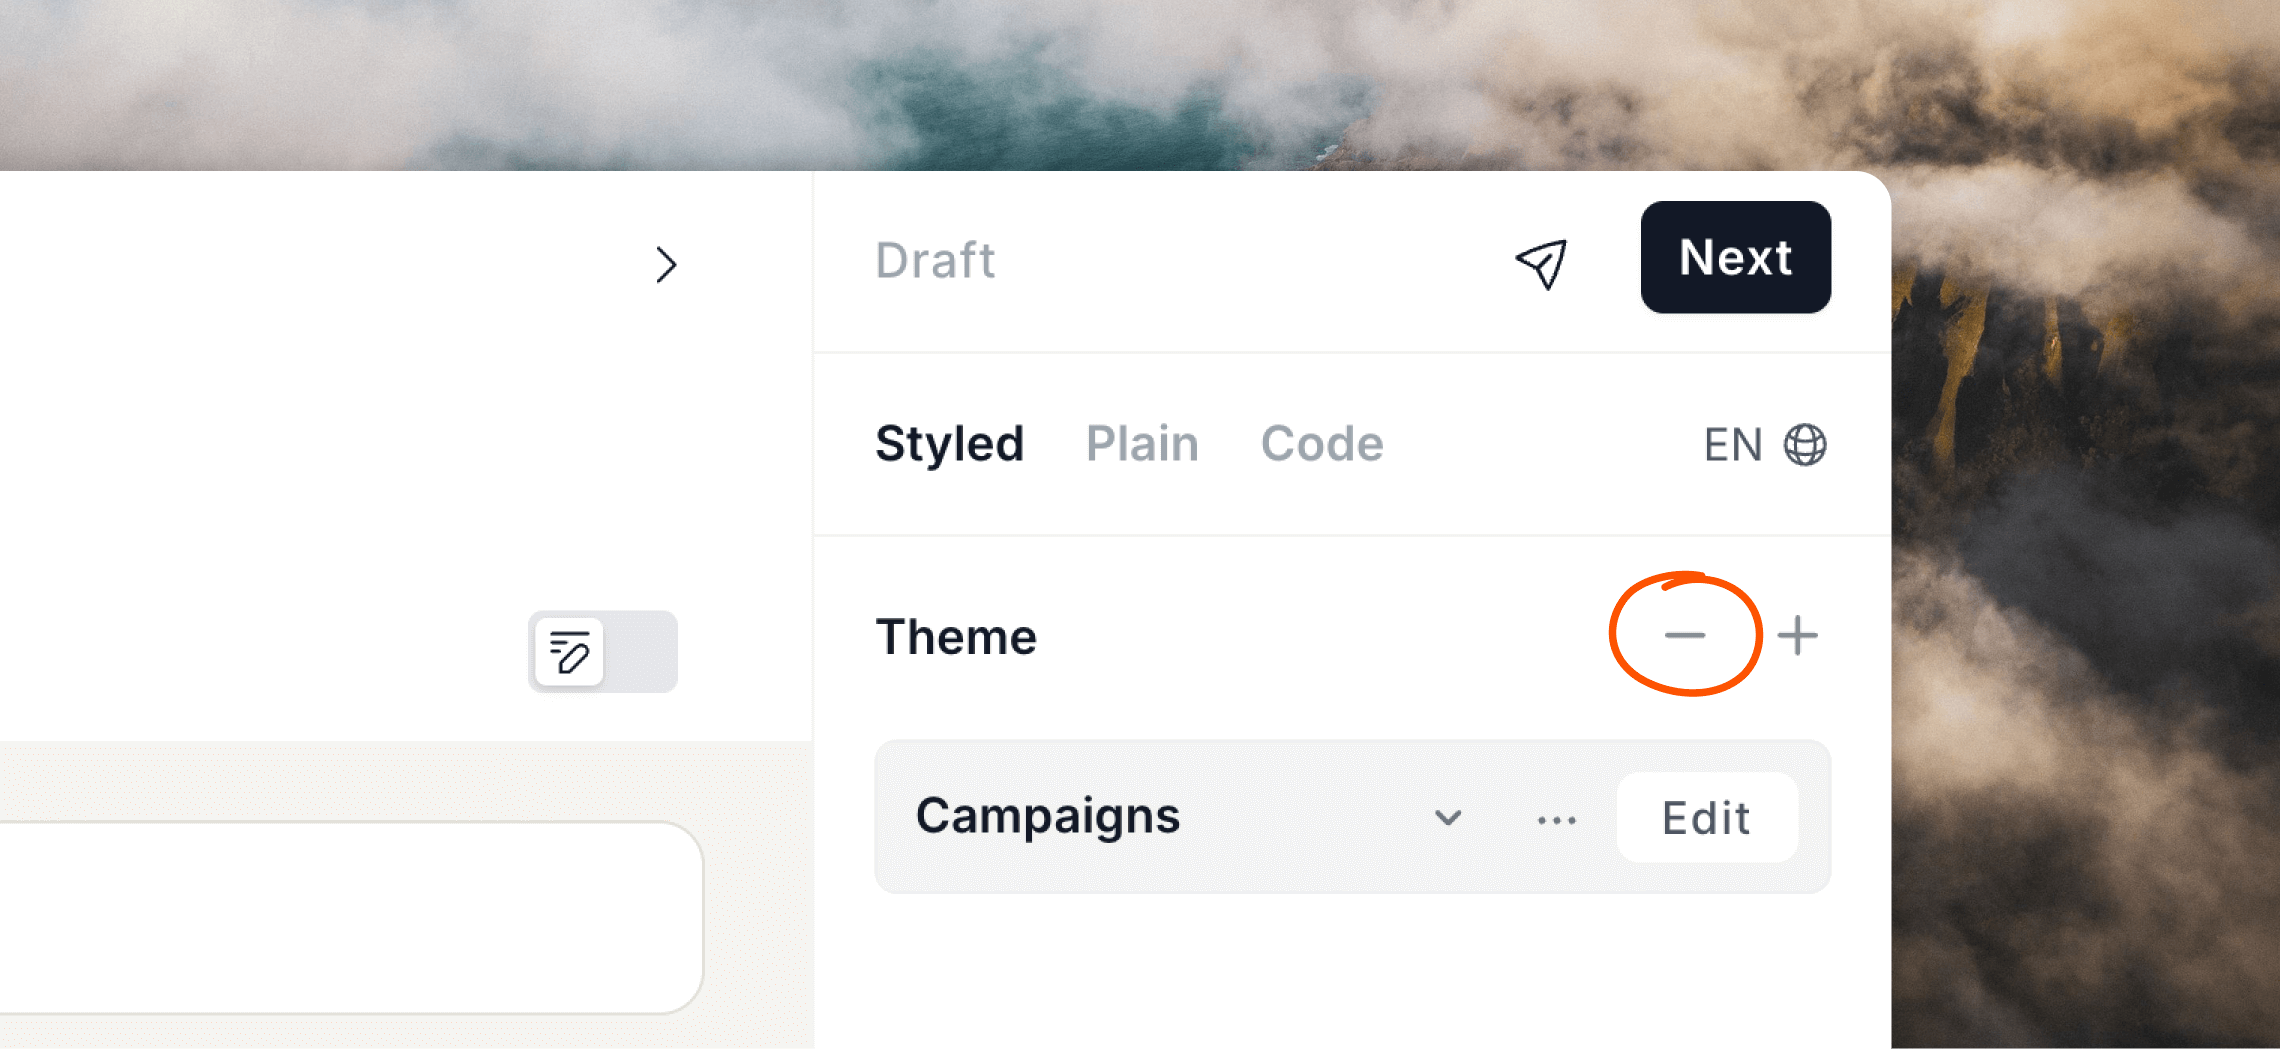
Remove a theme from an email
To remove a theme from an email click on the– minus icon in the Theme editor panel.
This will revert back to any styles directly applied to the email before the theme was applied.
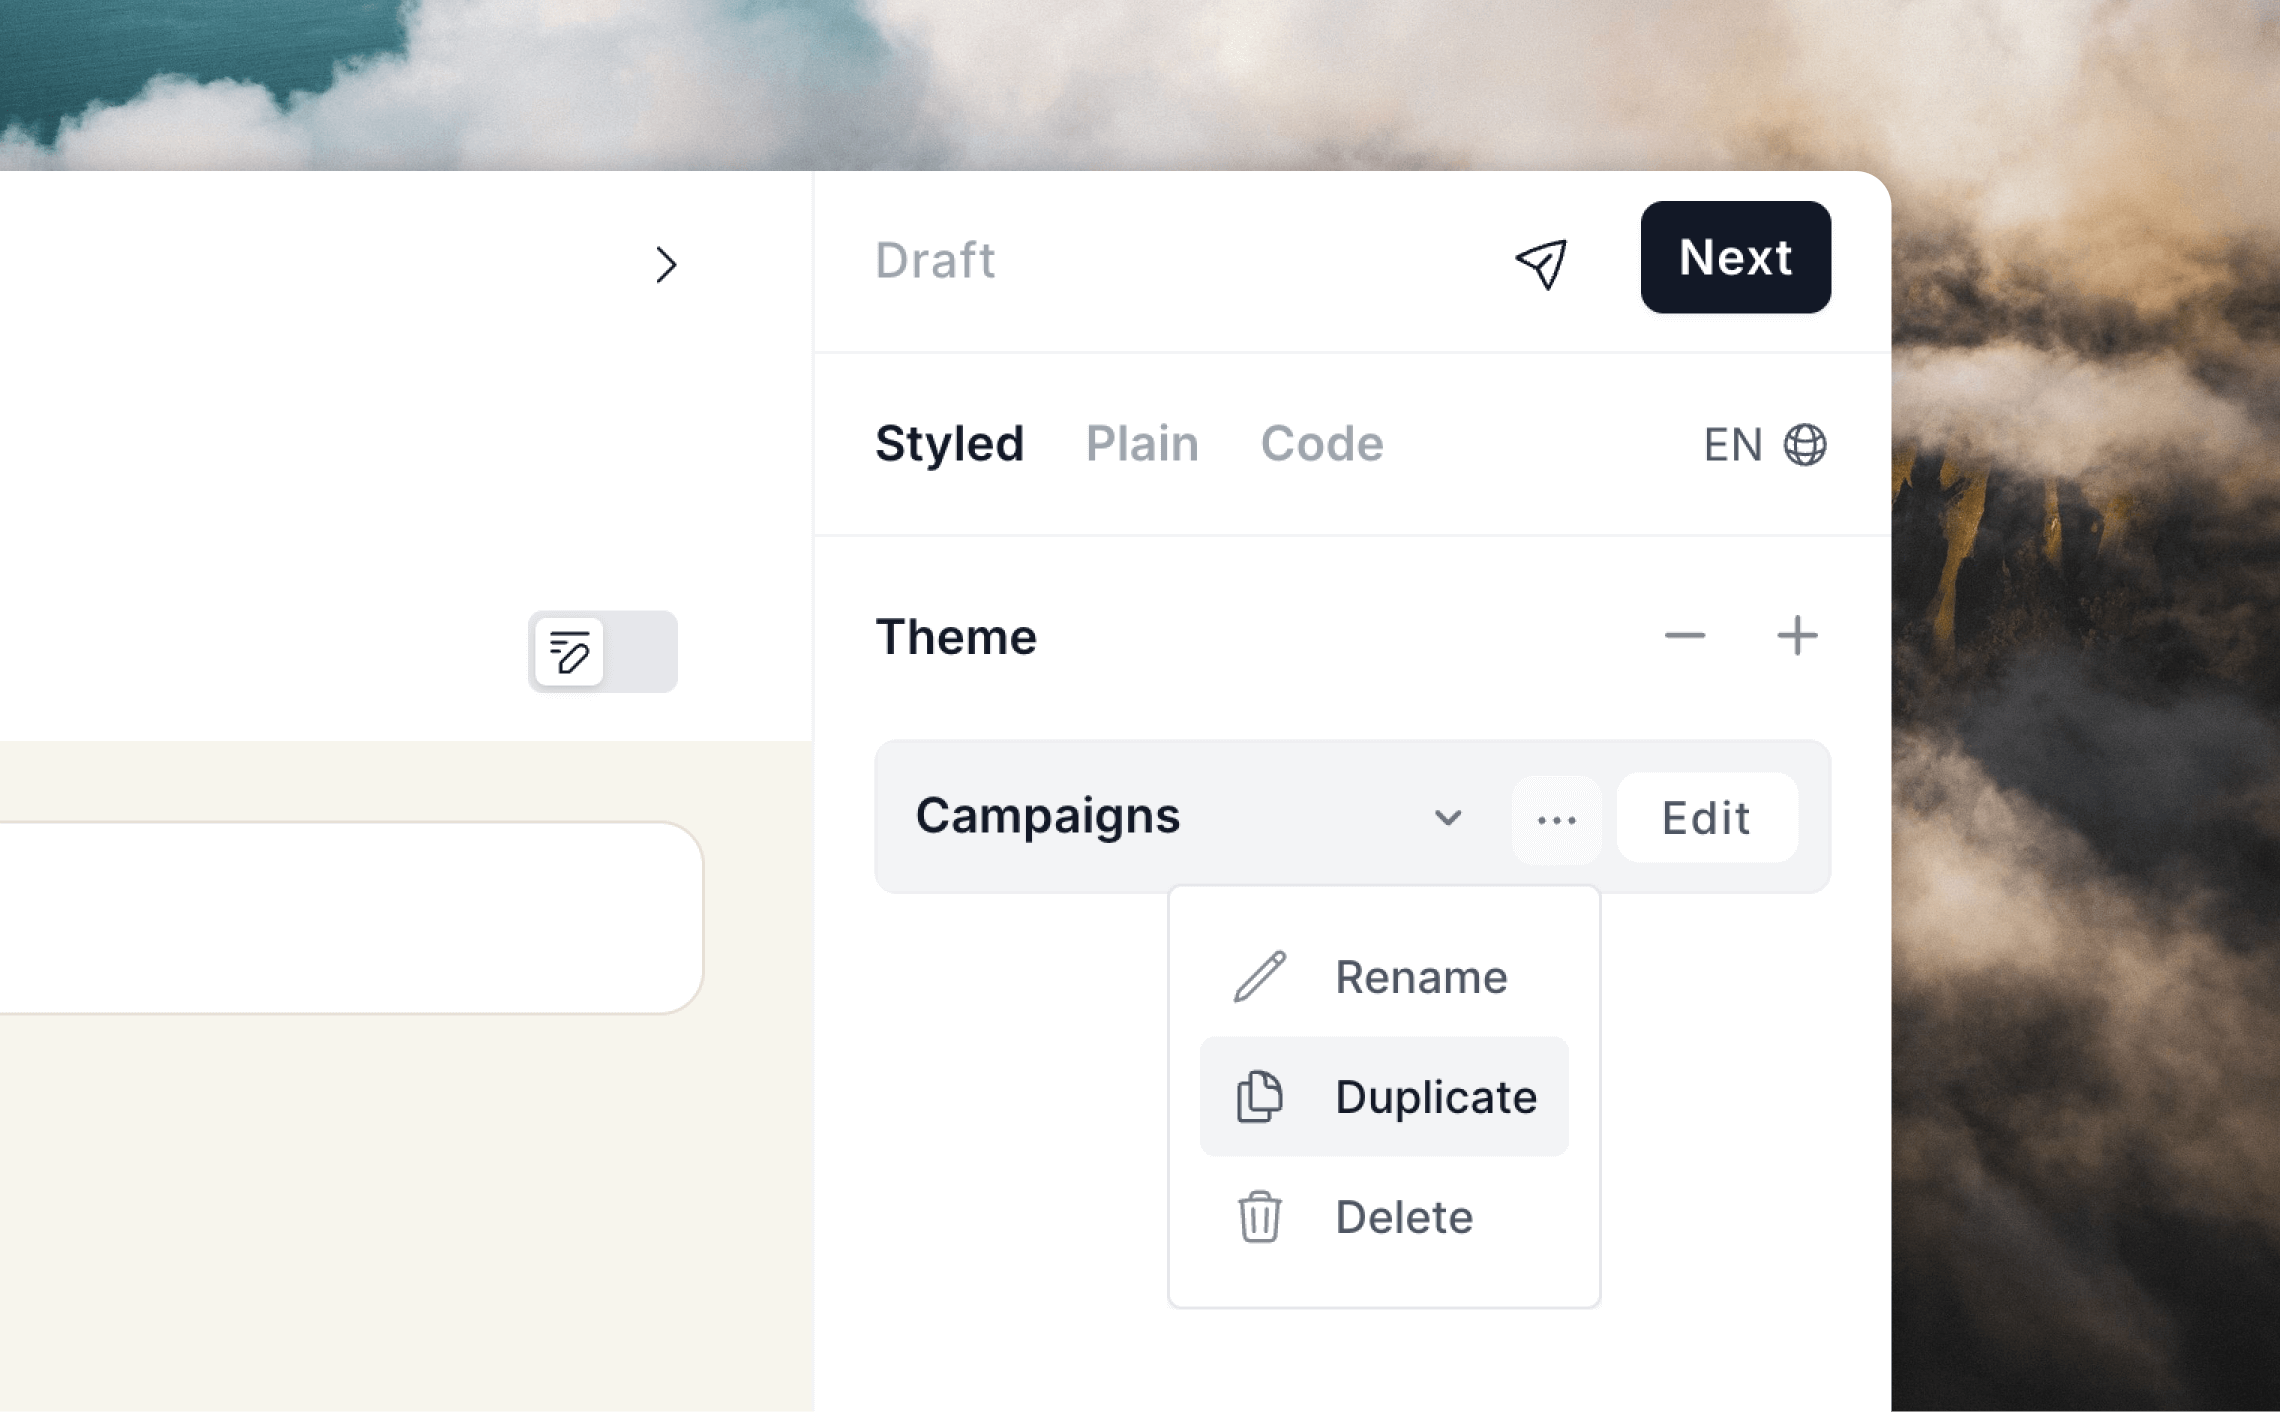
Duplicate a theme
To create a new theme based on the current one, you can duplicate by clicking the••• menu icon and selecting Duplicate.
✓ check icon or press Enter to save.
This will create a new theme using the current styles and apply it to your email.
Delete a theme
To delete a theme from your account, make sure the theme is applied to the email you have open and then click the••• menu icon and select Delete.
To make sure there are no unintended design changes to emails in your account, the settings from the deleted theme will get applied individually to each email it was active on.
However, please note that any overrides made to the theme in the affected emails will still be retained even after the style is deleted.