How it works
Sending transactional email with Loops has two steps.Create transactional emails
First, create transactional emails in Loops using our email
editor. In your email you can add data variables,
which let you insert custom data into each email you send.
Send with the API
To send transactional emails you need to use the Loops API. All it takes is
a simple call to our Send transactional email
endpoint. Your request needs to
include the ID of the transactional email you created, the recipient’s email
address and any data variables needed for the email.
Transactional vs marketing emails
Transactional emails are one-to-one messages triggered by user actions (like password resets, receipts, or login links). Marketing emails (campaigns and loops) are promotional or lifecycle emails sent to your Audience. Key differences:- Transactional emails do not include an unsubscribe link.
- Transactional emails do not track opens or link clicks.
- Unsubscribed contacts can still receive transactional emails.
Contacts
Transactional emails can be sent to any email address, whether or not the recipient exists in your Audience.- Your Audience only contains marketing contacts. If a new contact is sent a transactional email, they are not added to your Audience.
- Sending a transactional email to a new contact will not trigger the “Contact added” loop trigger.
- The “Subscribed” contact property does not affect transactional emails. Unsubscribed contacts will still receive all transactional emails they are sent.
"addToAudience": true in your API request (see below).
Compose your email
There are two ways to create emails in Loops: using our editor or import an MJML template.Use our editor
You can create emails in the editor, letting you easily add formatting, images and buttons.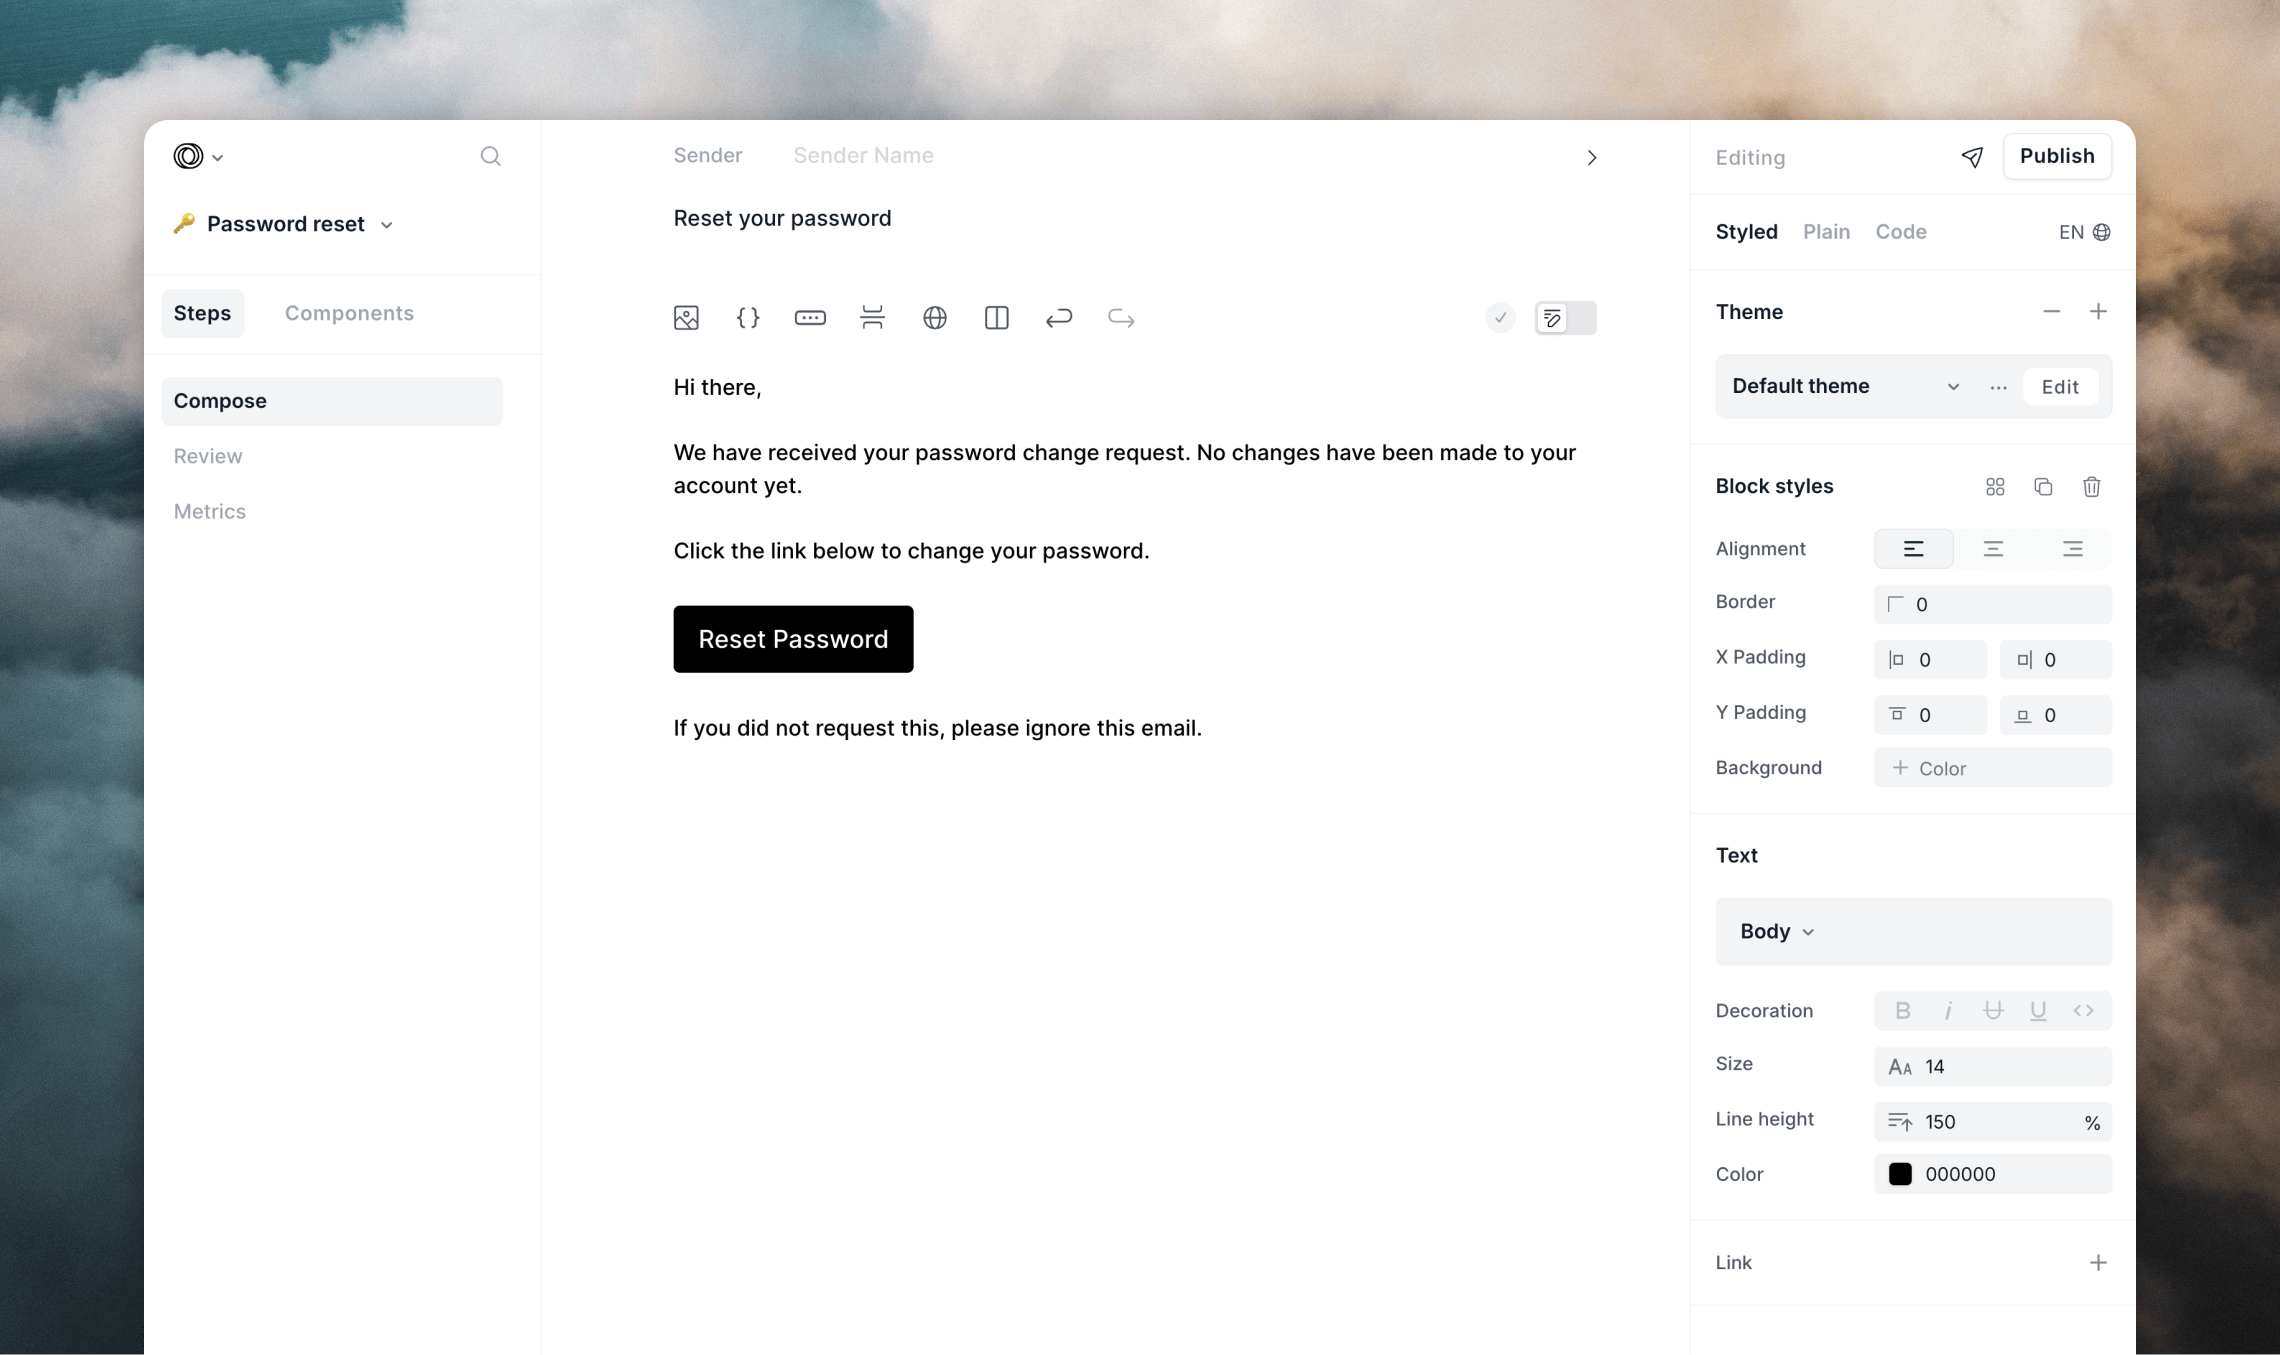
name in the example above). Read on for more information about data variables.
Bring your own MJML
You can also upload your own MJML code to use in the email. This is useful if you have a pre-existing template you want to use. Like emails created in our editor, you can add data variables to MJML templates. To add a data variable calledpasswordResetLink, you can use it in your MJML like this:
Add data variables
Data variables let you insert dynamic values into every transactional email, to personalize them to each recipient. When it comes to sending the email, you specify the value of each data variable in the API call. Let’s say you have a password reset email that is sent once a user clicks a “Reset Password” button in your application. For this we need to add two data variables to the email:name and resetUrl.
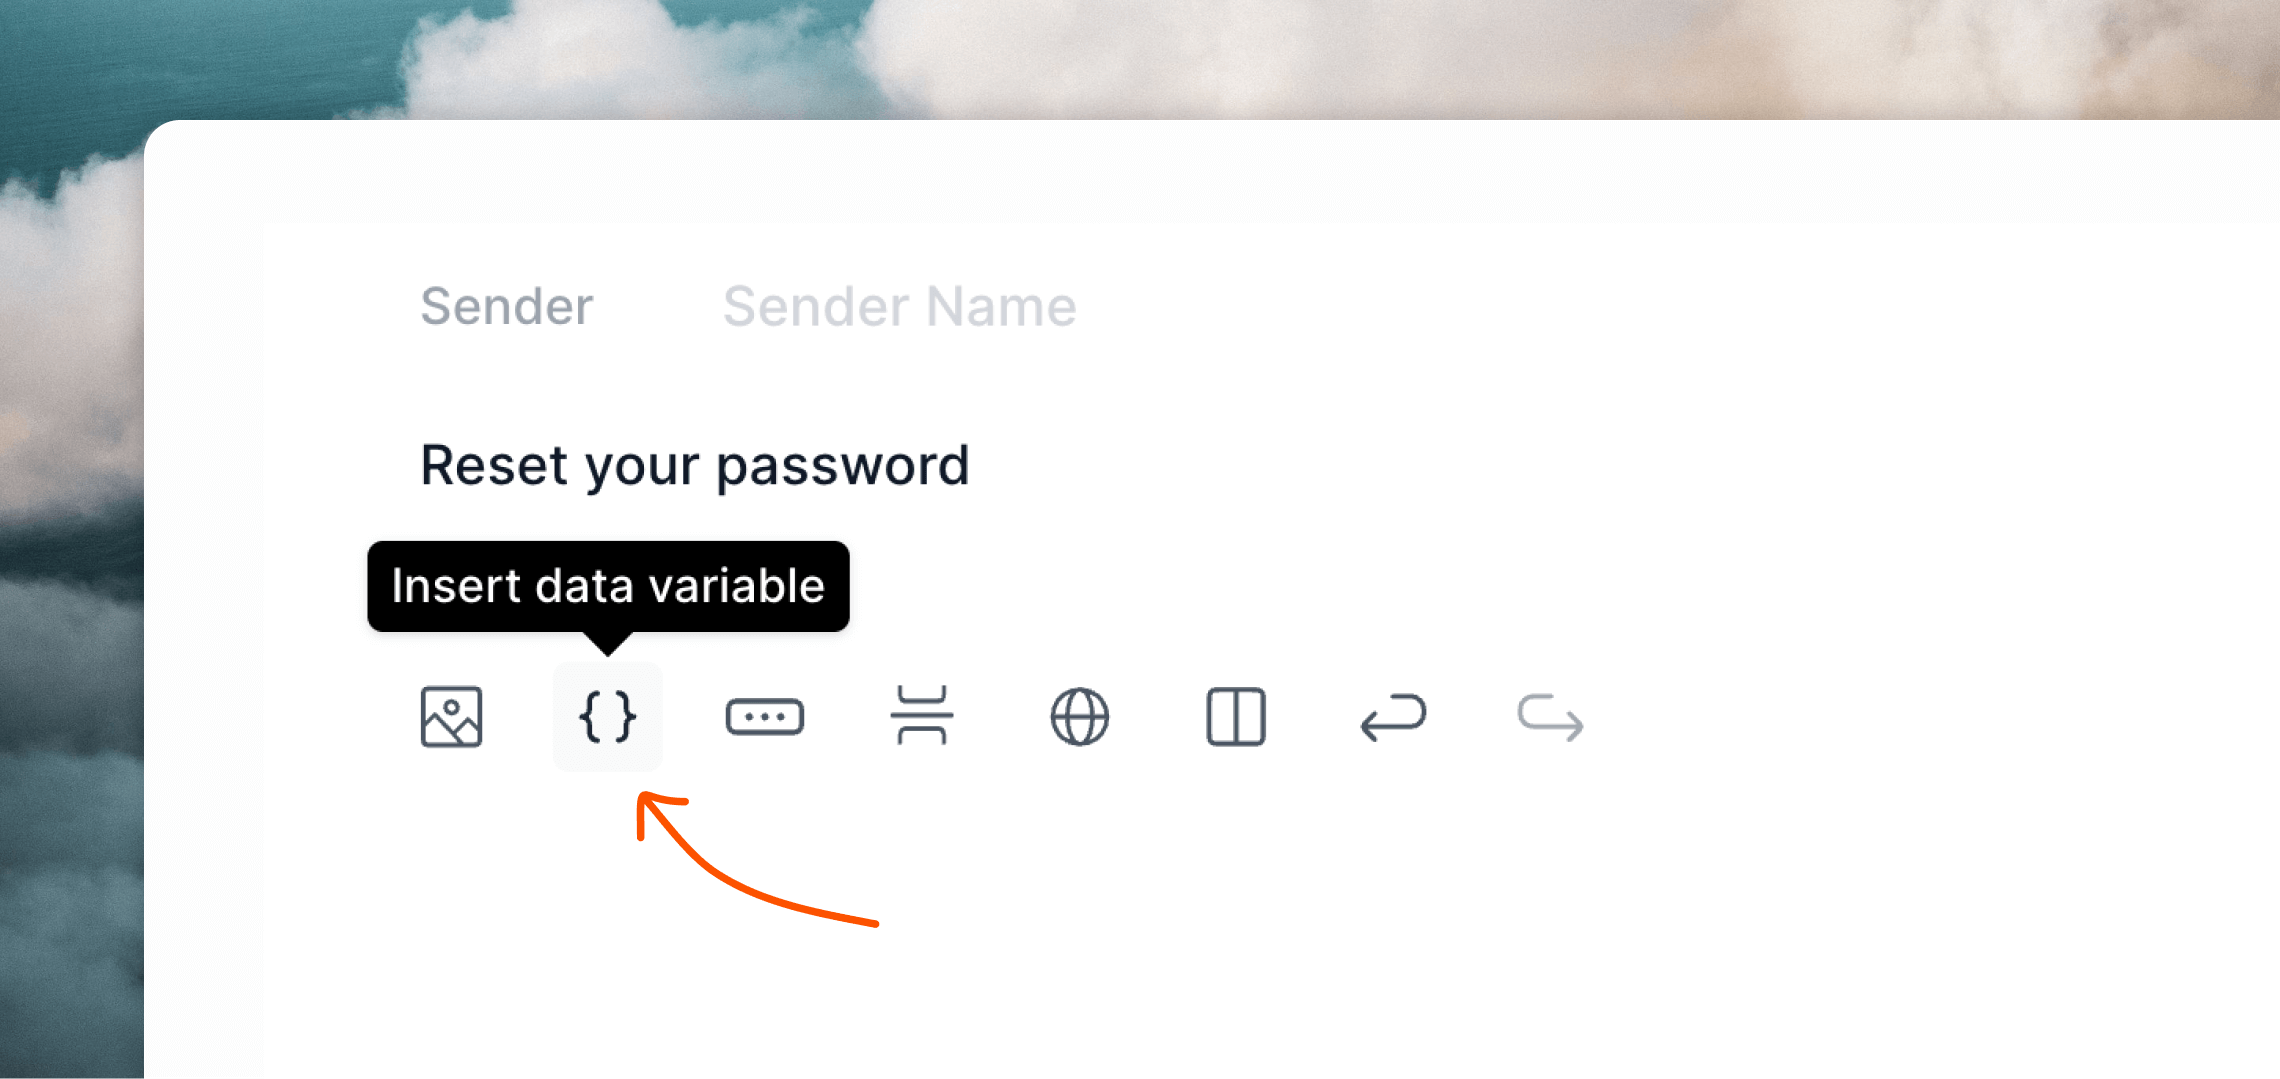
You can insert data variables into the text of the email in three ways:
- click the
{}dynamic content button above the editor (see below) - type variables directly into the editor, like
{planName} - use the
/slash menu (select “Data variable” from the menu).
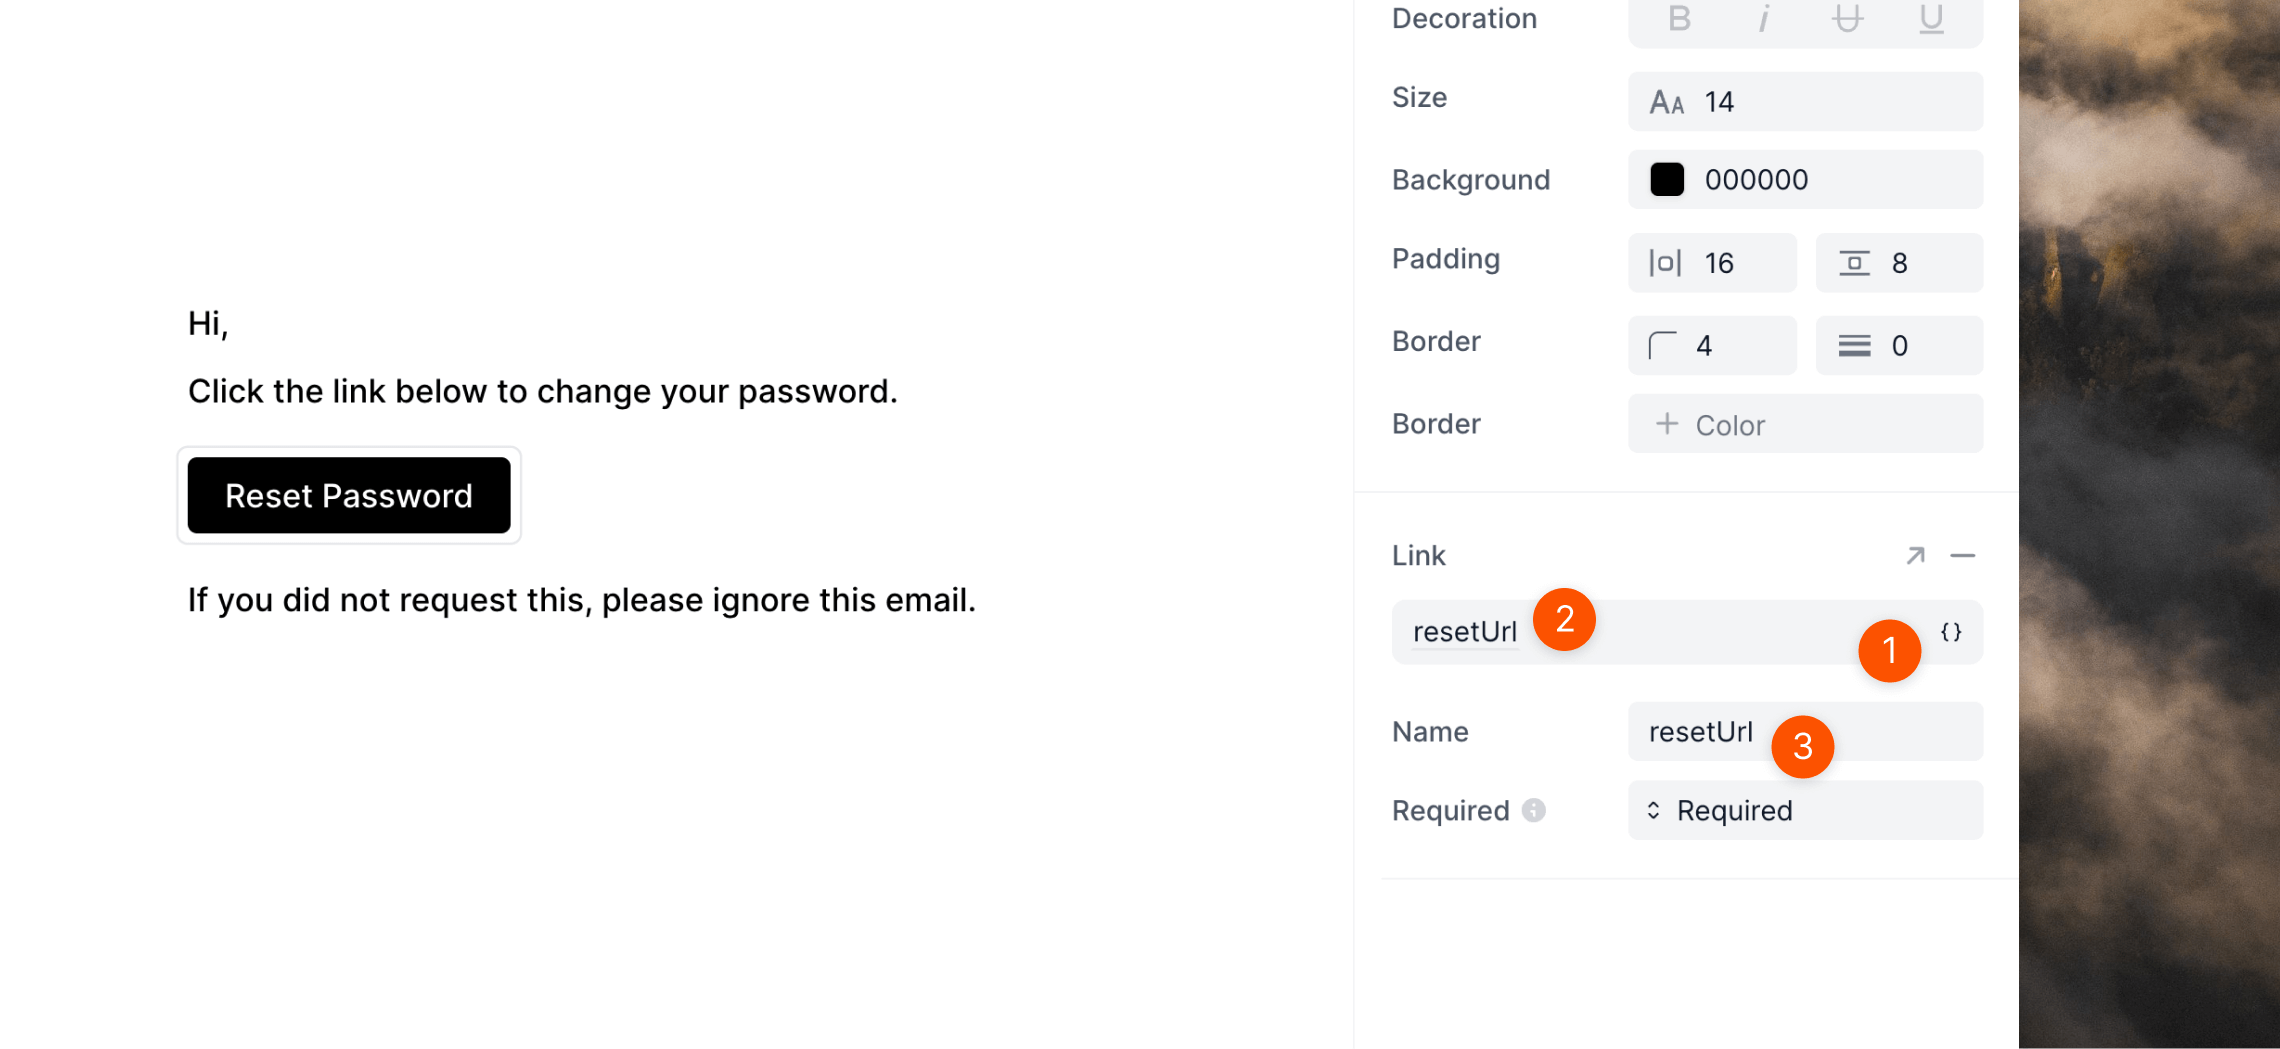
resetUrl as the button’s link, click on the data variable icon (1), click the data variable (2) and then enter your data variable name into the Variable name field (3).
Data variables in email headers
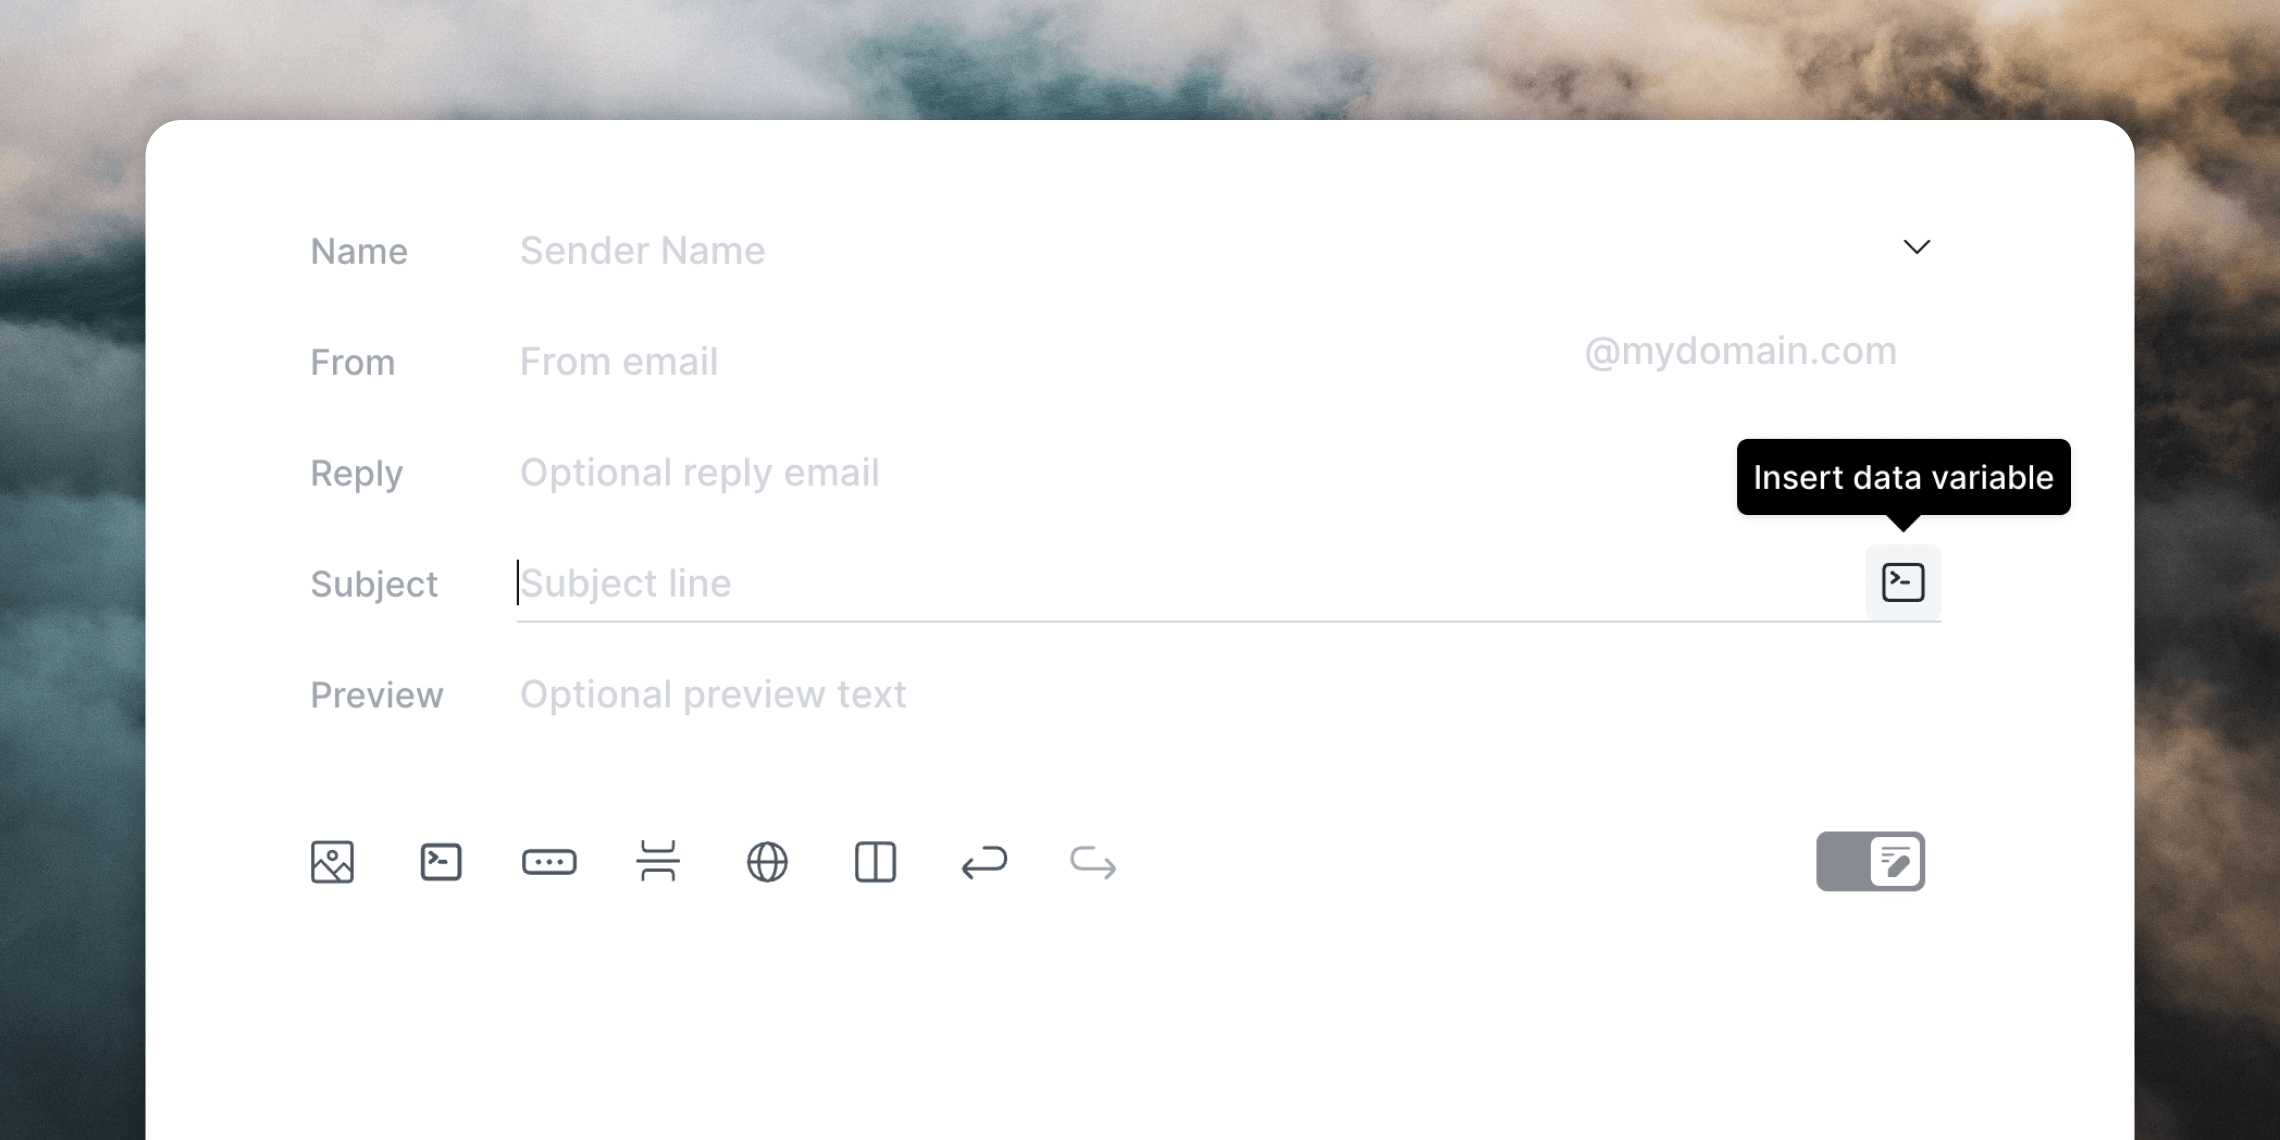
Data variables are also available in the email sending settings fields, like From, Reply, CC, BCC and Subject. Click the> button to view all fields and then click the data variable icon. Use sensible names for your data variables, like bccAddress or replyToAddress so they are clear in your API call.
To send data to these fields, simply include the data variables in your API call as normal (see below).
Optional data variables
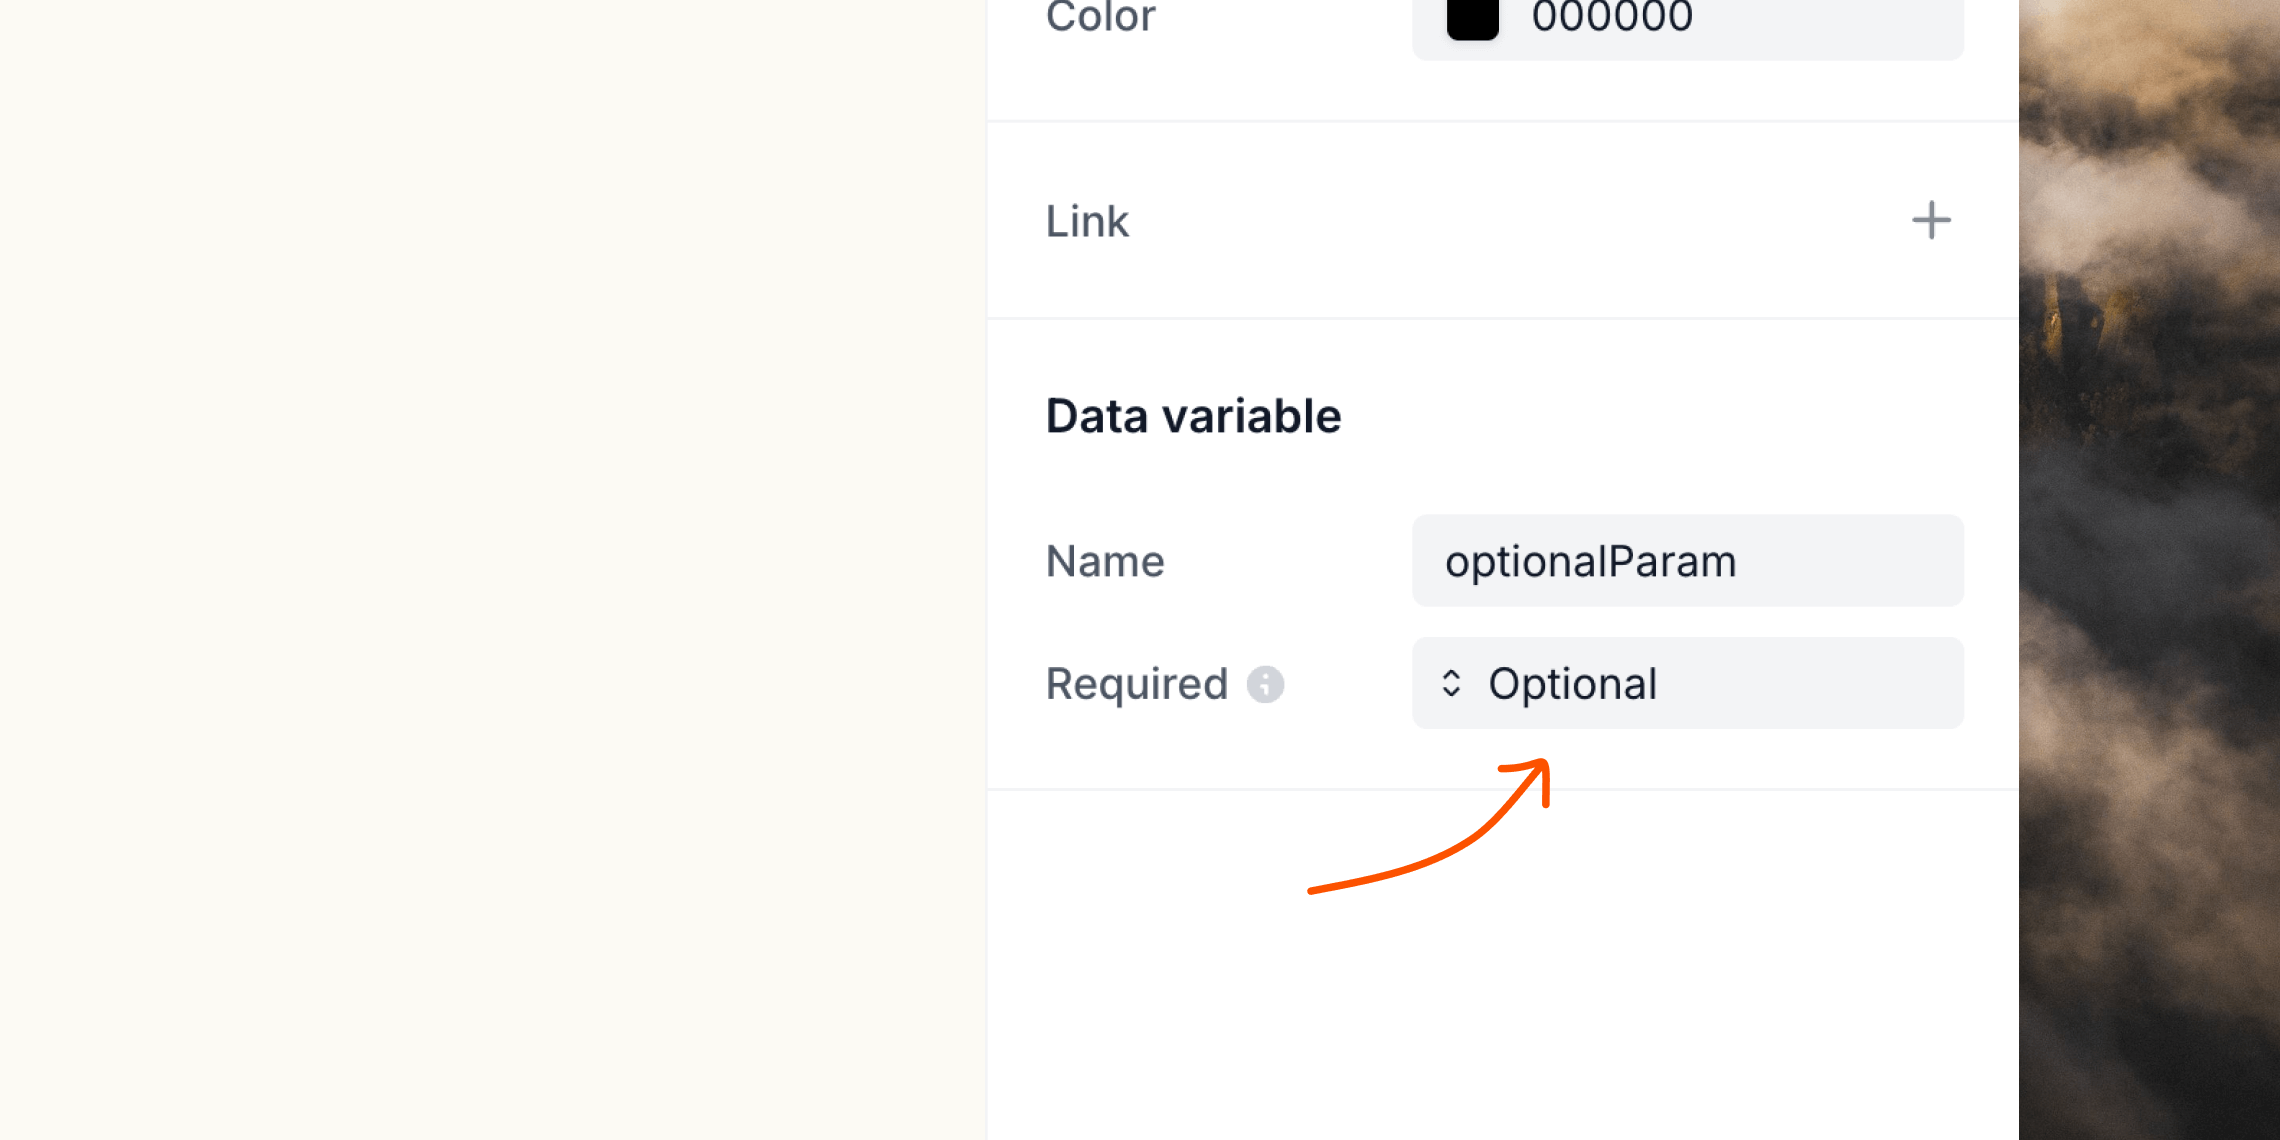
Data variables can be optional, by selecting “Optional” from the selector just below the data variable name. If a data variable is optional, you can omit the key from the API request entirely, or include the key and send an empty string"" (sending null will not work).
Array data variables
Arrays are a way to add repeatable items to an email (only available in transactional emails for now). [image of filled array block] Once you add an array block to your email, you can edit its data variable name in the editor panel in the Array section (the default isitems).
Any data variables you add inside the array block will be repeated for each item in the array.
Then, when sending the email, you can include an array of objects containing those variables.
[image of editor panel with data variables in the array section]
Personalizing emails
Read more about adding dynamic content into your emails.
Send transactional email
Read how to send transactional email with the API.
Important information about data variables
- Make sure that when you send a transactional email using the API that you include all non-optional data variables in your request. If you do not include the correct set of data variables in your API call, the send will fail.
- Data variable names are case-sensitive (meaning
LastLoggedInandlastLoggedInare different variables). - Data variable names can only contain:
- letters
- numbers
- underscores
- dashes
- Data variable values sent over the API can be
stringornumber.
Review your email
On the next page, after clicking Next, you’ll see the API Details section. This contains the data variables used in the email as well as a sample payload for reference. The “Transactional ID” lets you distinguish between different transactional emails when calling the API and is required.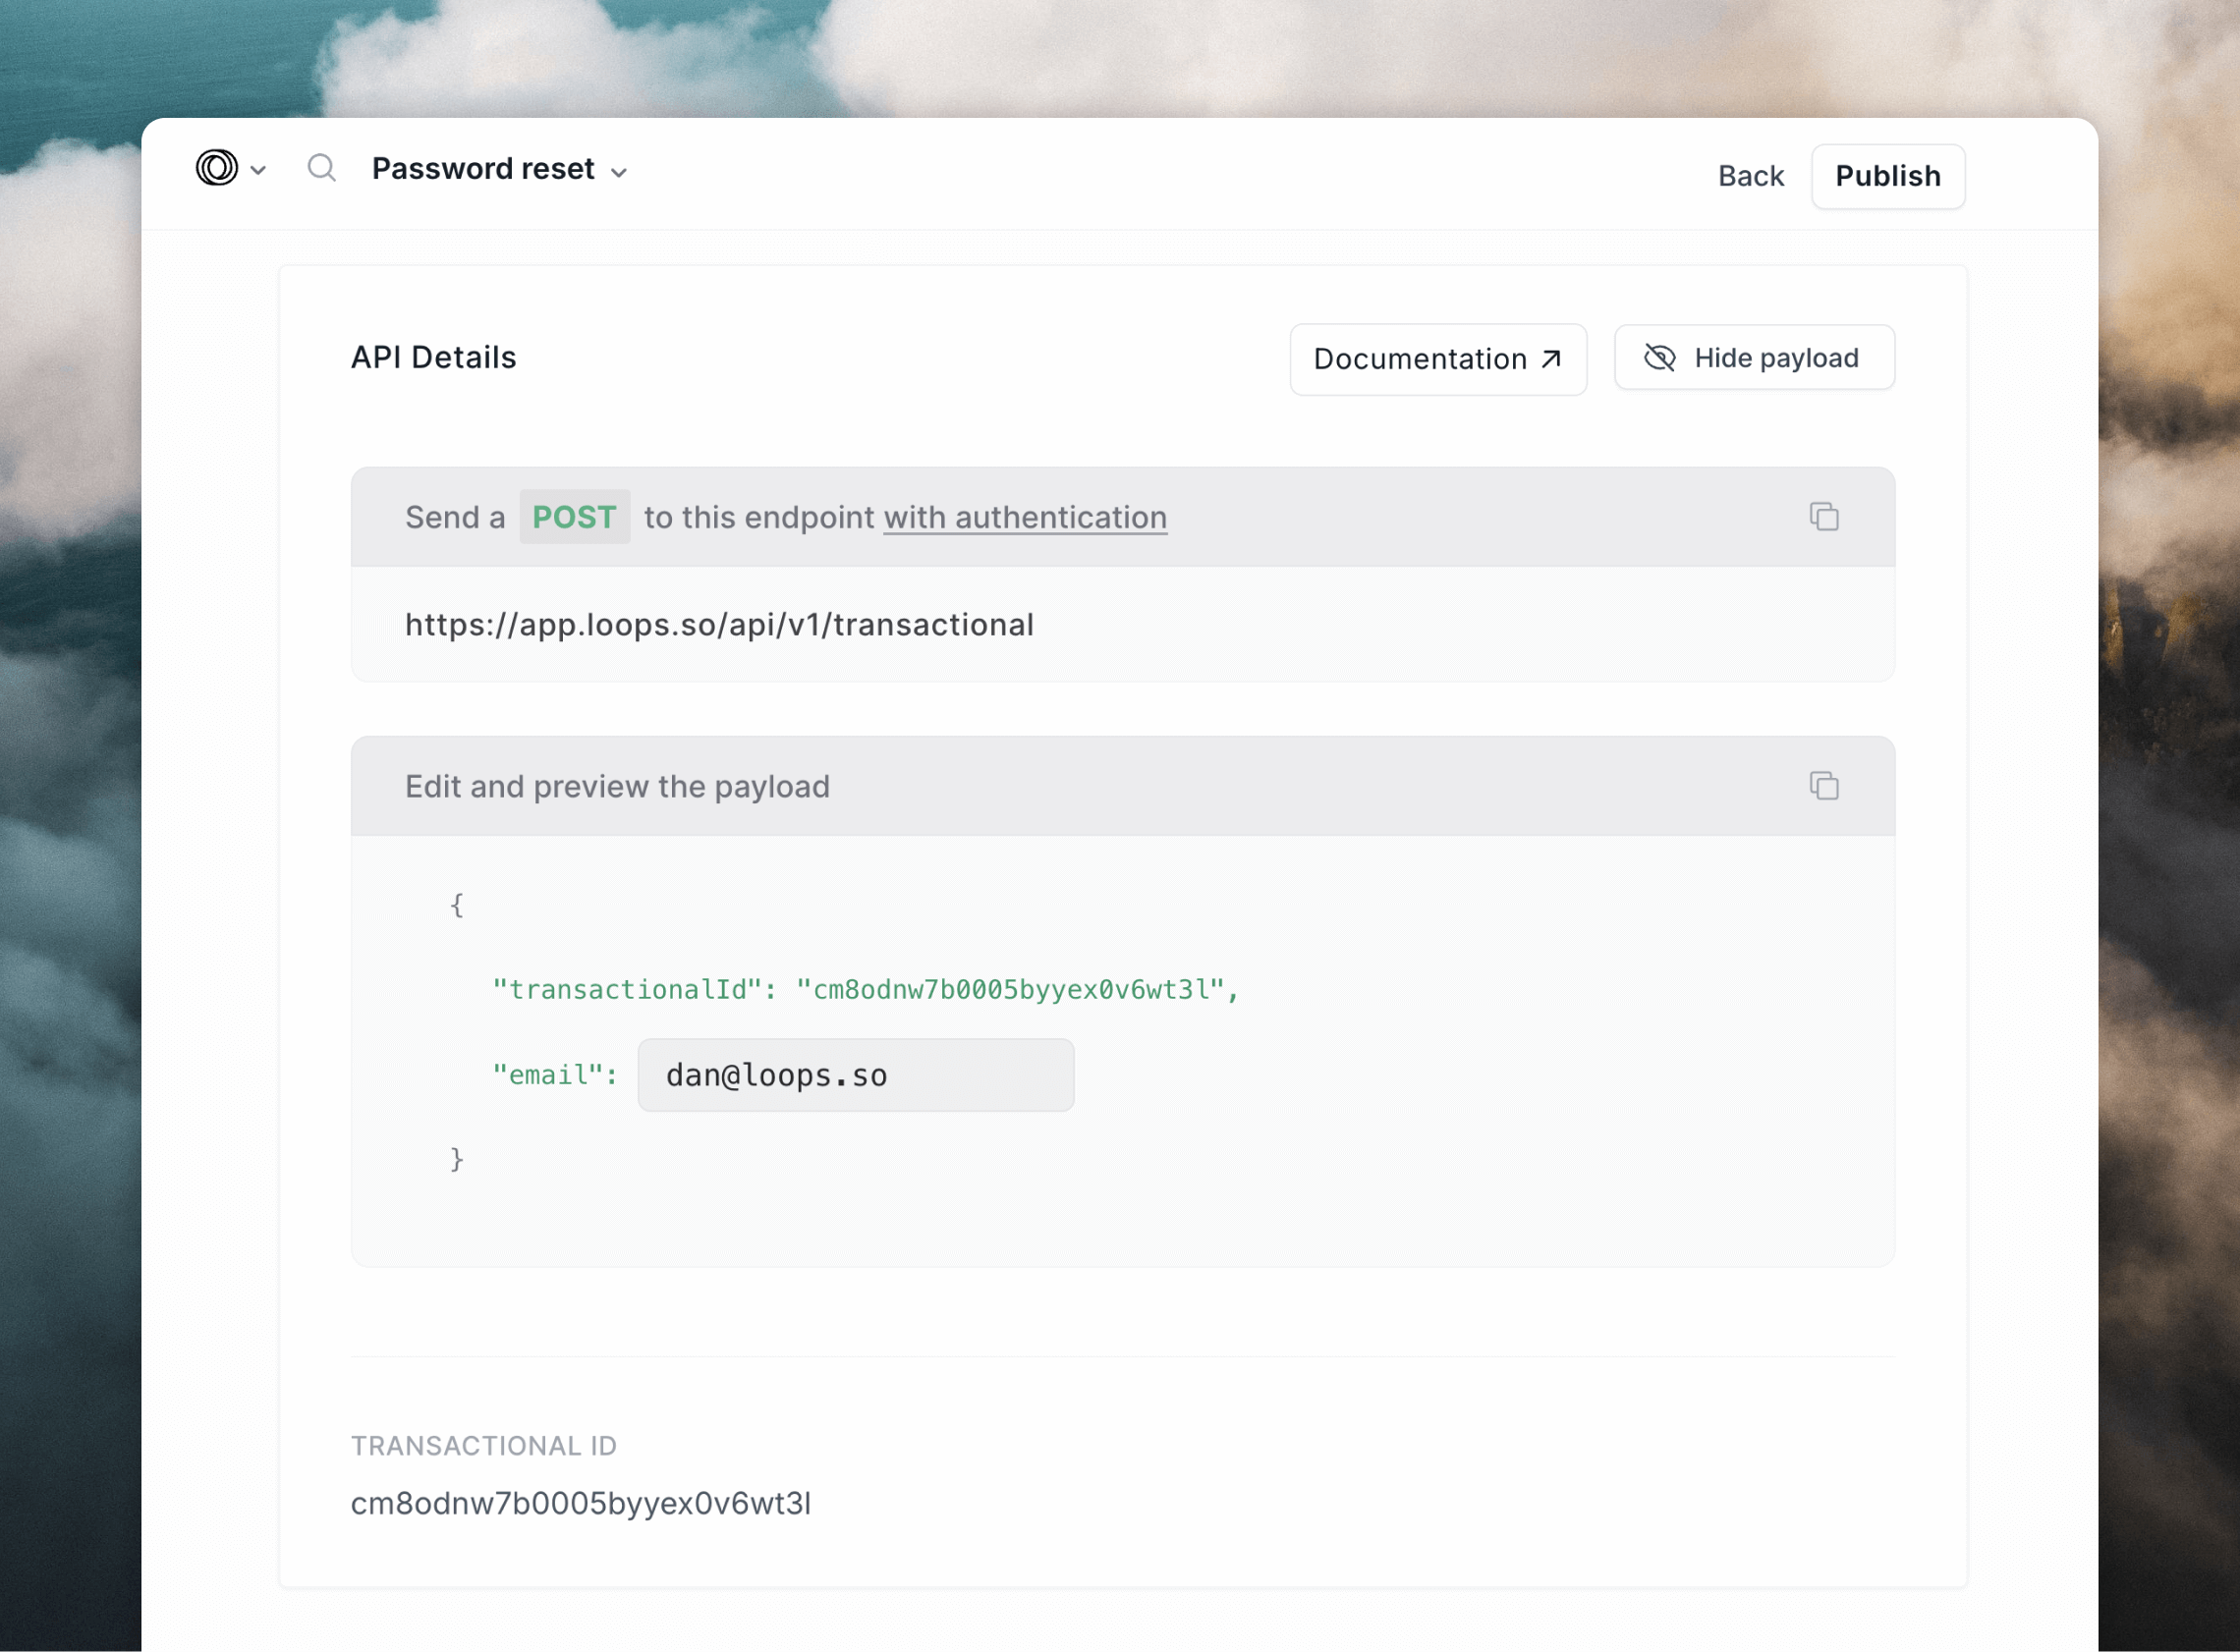
Publish the email
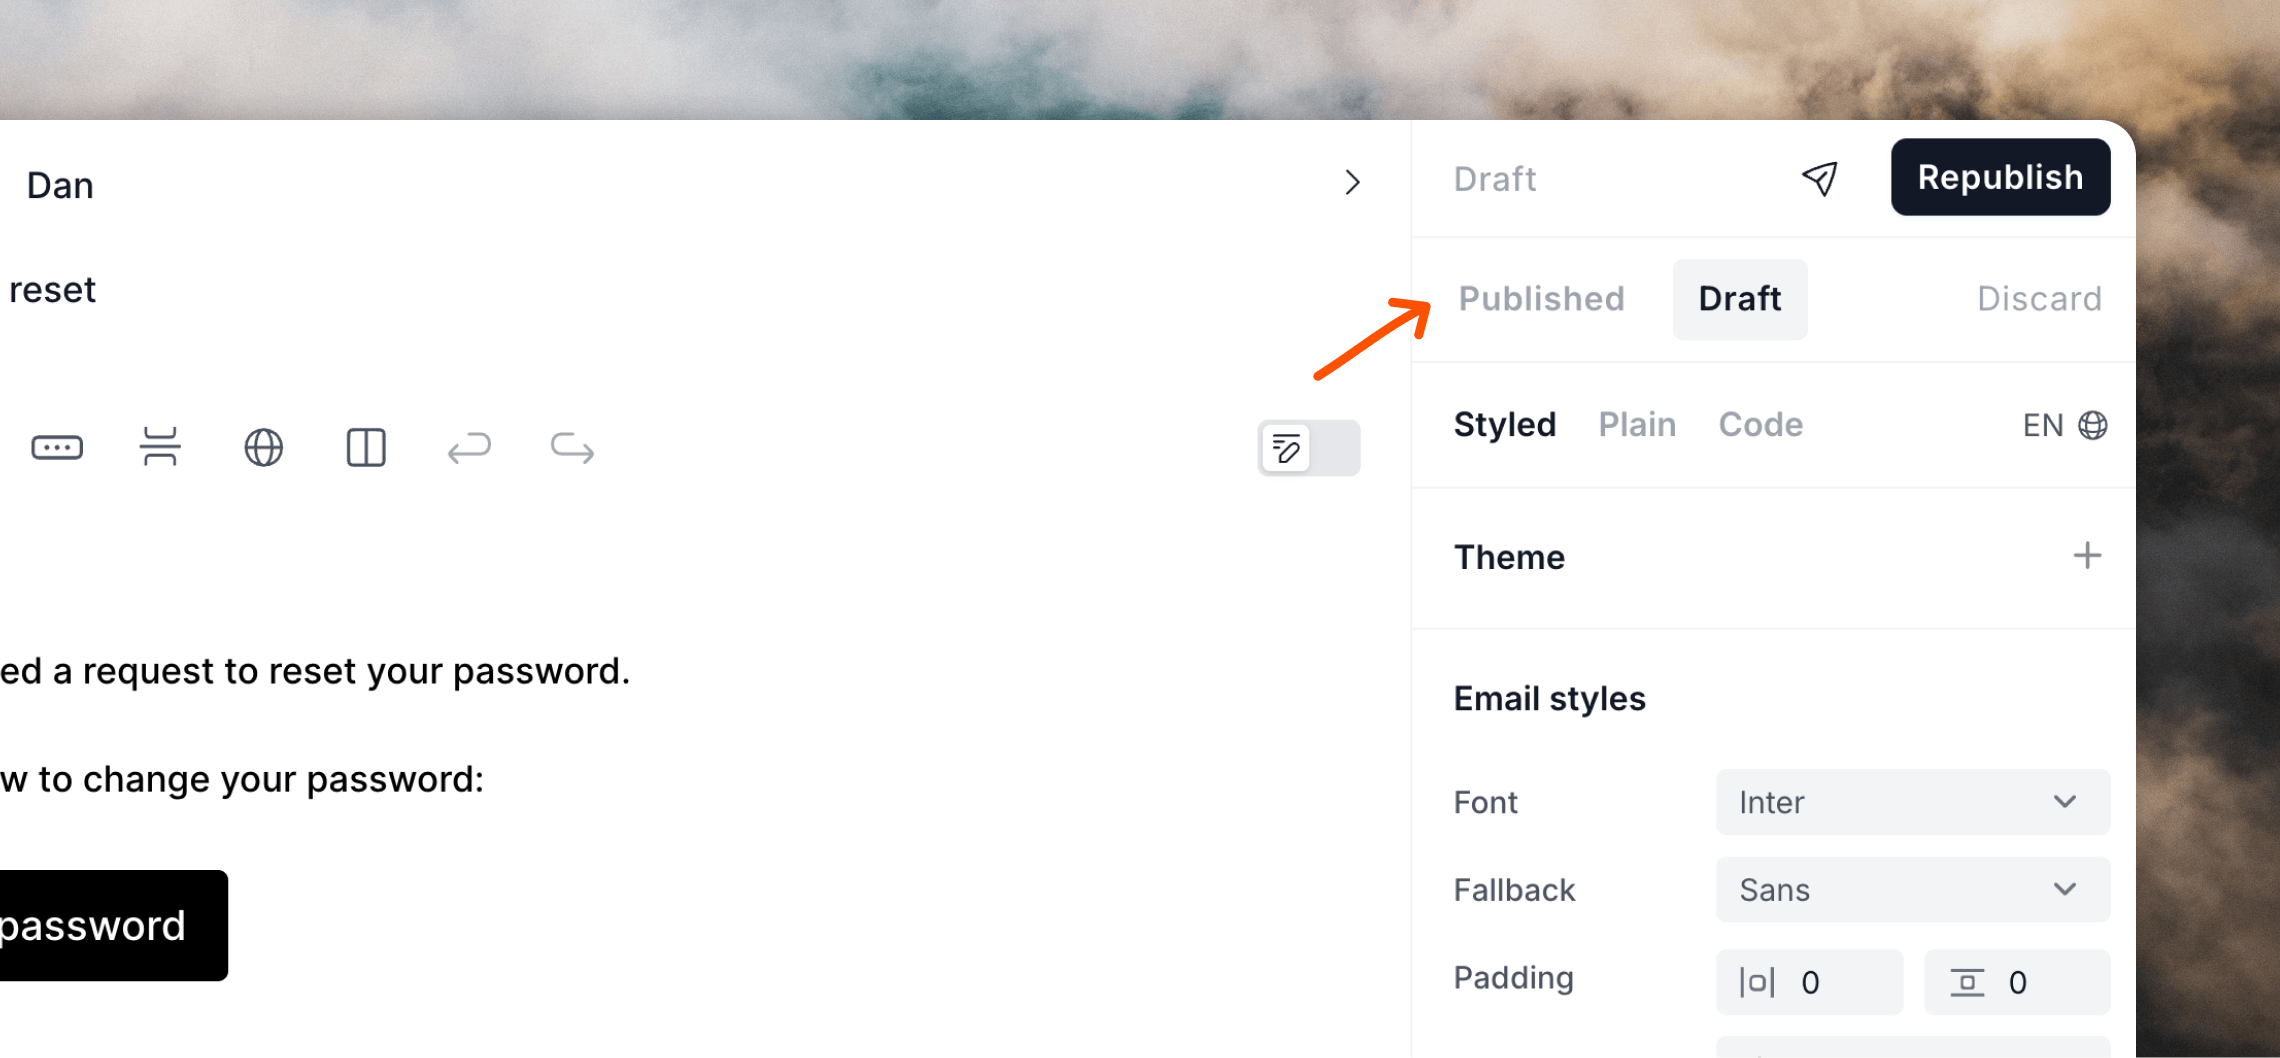
To enable sending the email, it needs to be published by clicking Publish.Send your email
In the example above, two Data Variables were used in the email and there is a transactional ID needed as part of our API call. Any data variables created in the email are required when making the API request. Here’s an example of the request for sending this email: Send a POST to this endpoint (make sure to authenticate)"addToAudience": true to your payload.
If you have added an array block to your email, make sure to include the parent data variable that is tied to your array, then include an array of objects.
Loops API - Send transactional email
Read how to send transactional email with our API.
JavaScript/TypeScript SDK
Integrate our SDK into your JS or TS application.
Editing the email
To edit the email, click Edit Draft on the Compose page.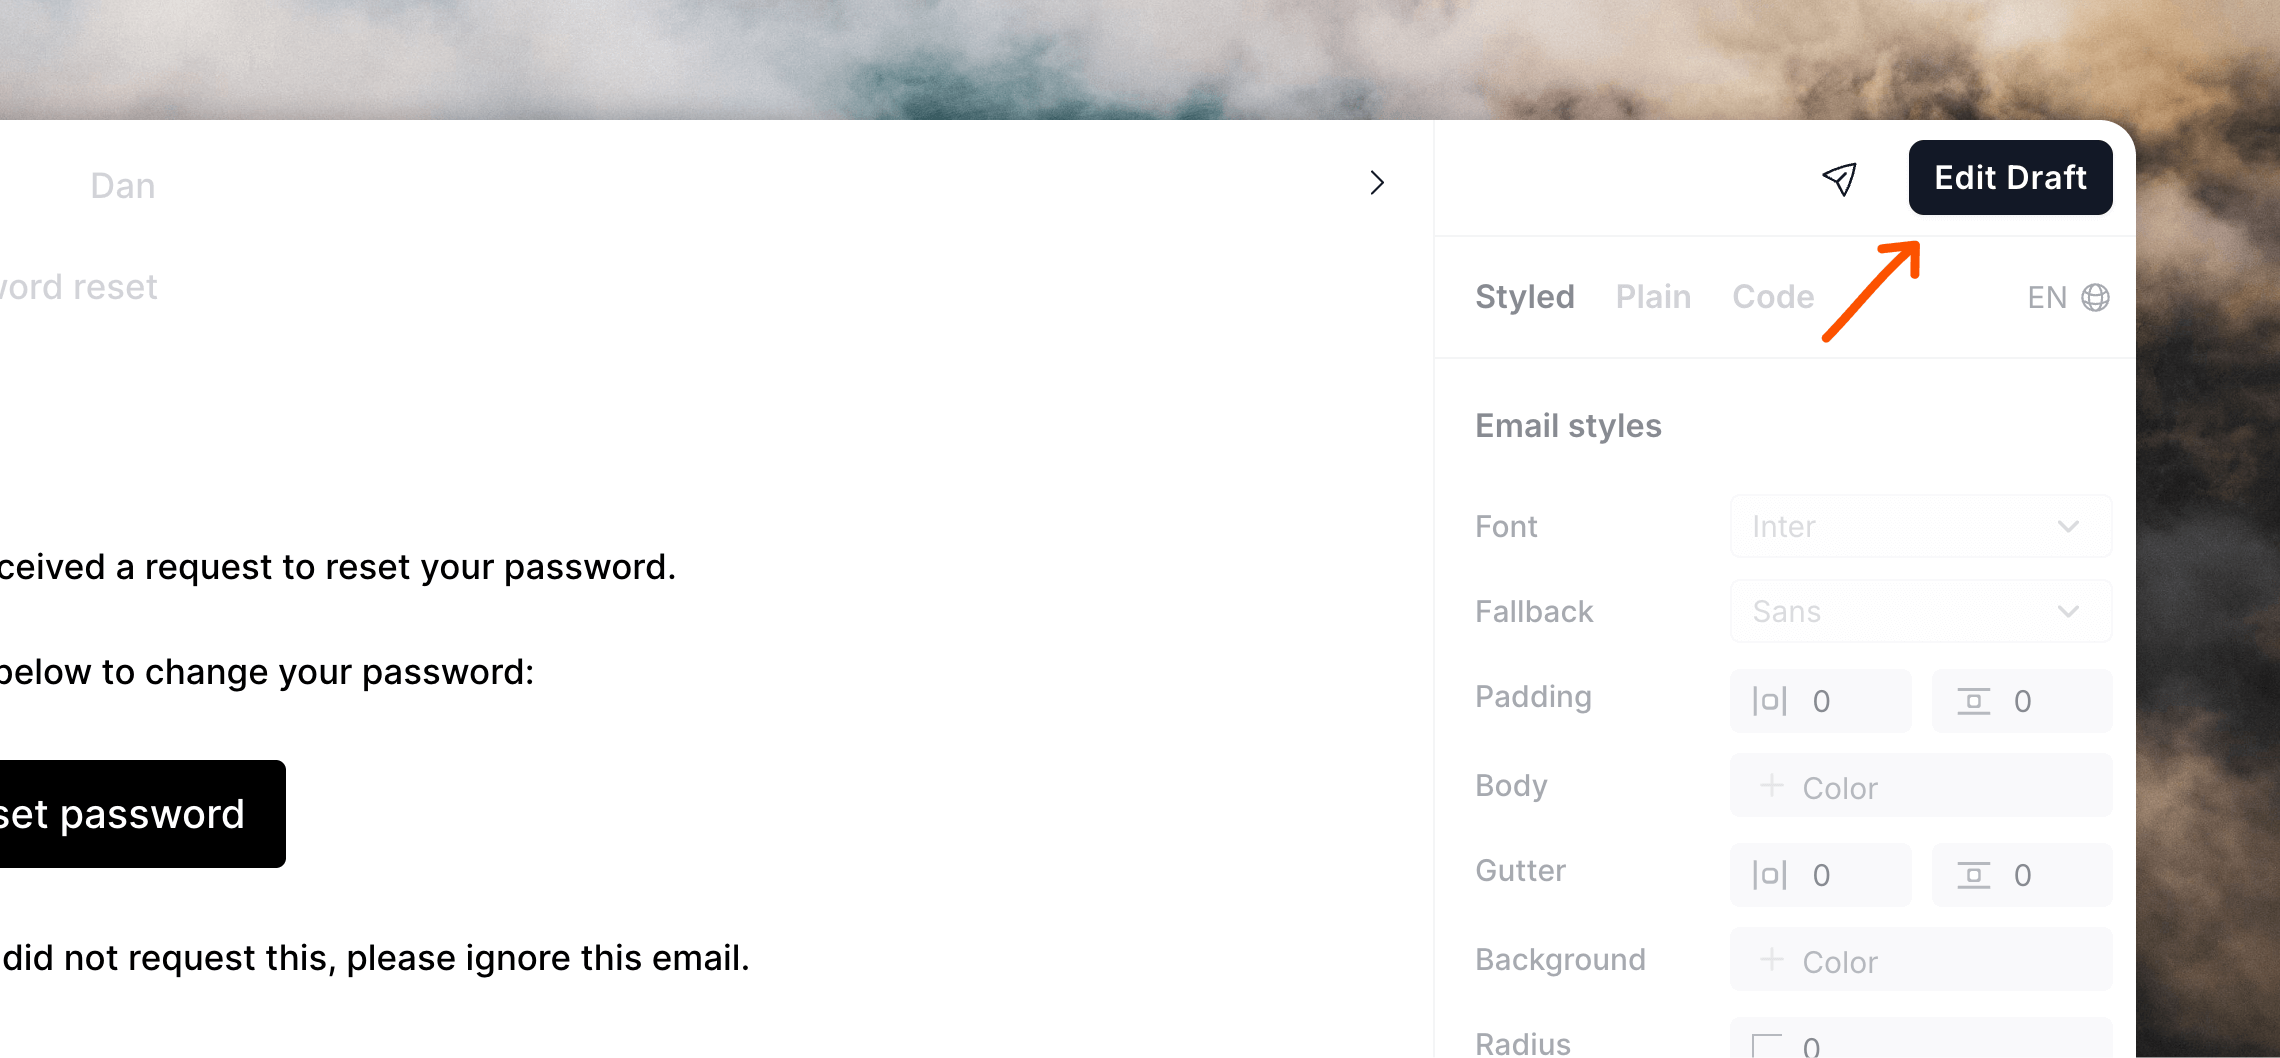
Metrics
After emails are sent, details are shown in the email’s Metrics page. These include send time and if messages experienced any issues with delivery (bounces or spam complaints).Testing transactional emails
You can test your transactional email integration by sending to email addresses with@example.com and @test.com domains (for example [email protected] and [email protected]).
Everything will work as normal (e.g. you will receive success responses from the API), but no emails will be sent to @example.com or @test.com email addresses, making this a good way to test transactional emails without affecting your sending domain’s reputation.
Errors
Links look like x-webdoc://....
This is a known issue with Apple Mail. Make sure that your links start with https:// or http:// and they should work fine.
API (400-level error)
The first place to start is to check the body of the response. It will contain a JSON object with amessage property that will give you more information about the error. Here are common reasons that the API might return with a 400-level error:
- Using the API without a verified domain.
- Trying to use the API for a transactional email without a published email message.
- Missing a required parameter:
transactionalId,email, ordataVariables. - Missing a data variable that is required by the email message.

