Our Clerk integration lets you:
- Create and update contacts
- Send events to trigger workflows
Supported events
We accept the following Clerk events:user.createduser.deleteduser.updatedwaitlistEntry.createdwaitlistEntry.updated
If you would like to see more events supported, please let us know by sending
a message to our support team. Please keep in mind only
events that contain an email address are able to be processed.
Synced data
Foruser.created or user.updated events, we sync the following Clerk data to your Loops contacts:
- User ID
- Email address
- First name (optional)
- Last name (optional)
user.deleted event can be used to delete or unsubscribe your Clerk users from your Loops audience.
For waitlistEntry.* events, we sync:
- Email address
Create a webhook endpoint in Loops
Follow the instructions here to create a new webhook endpoint, which will allow you to send webhook events directly to Loops.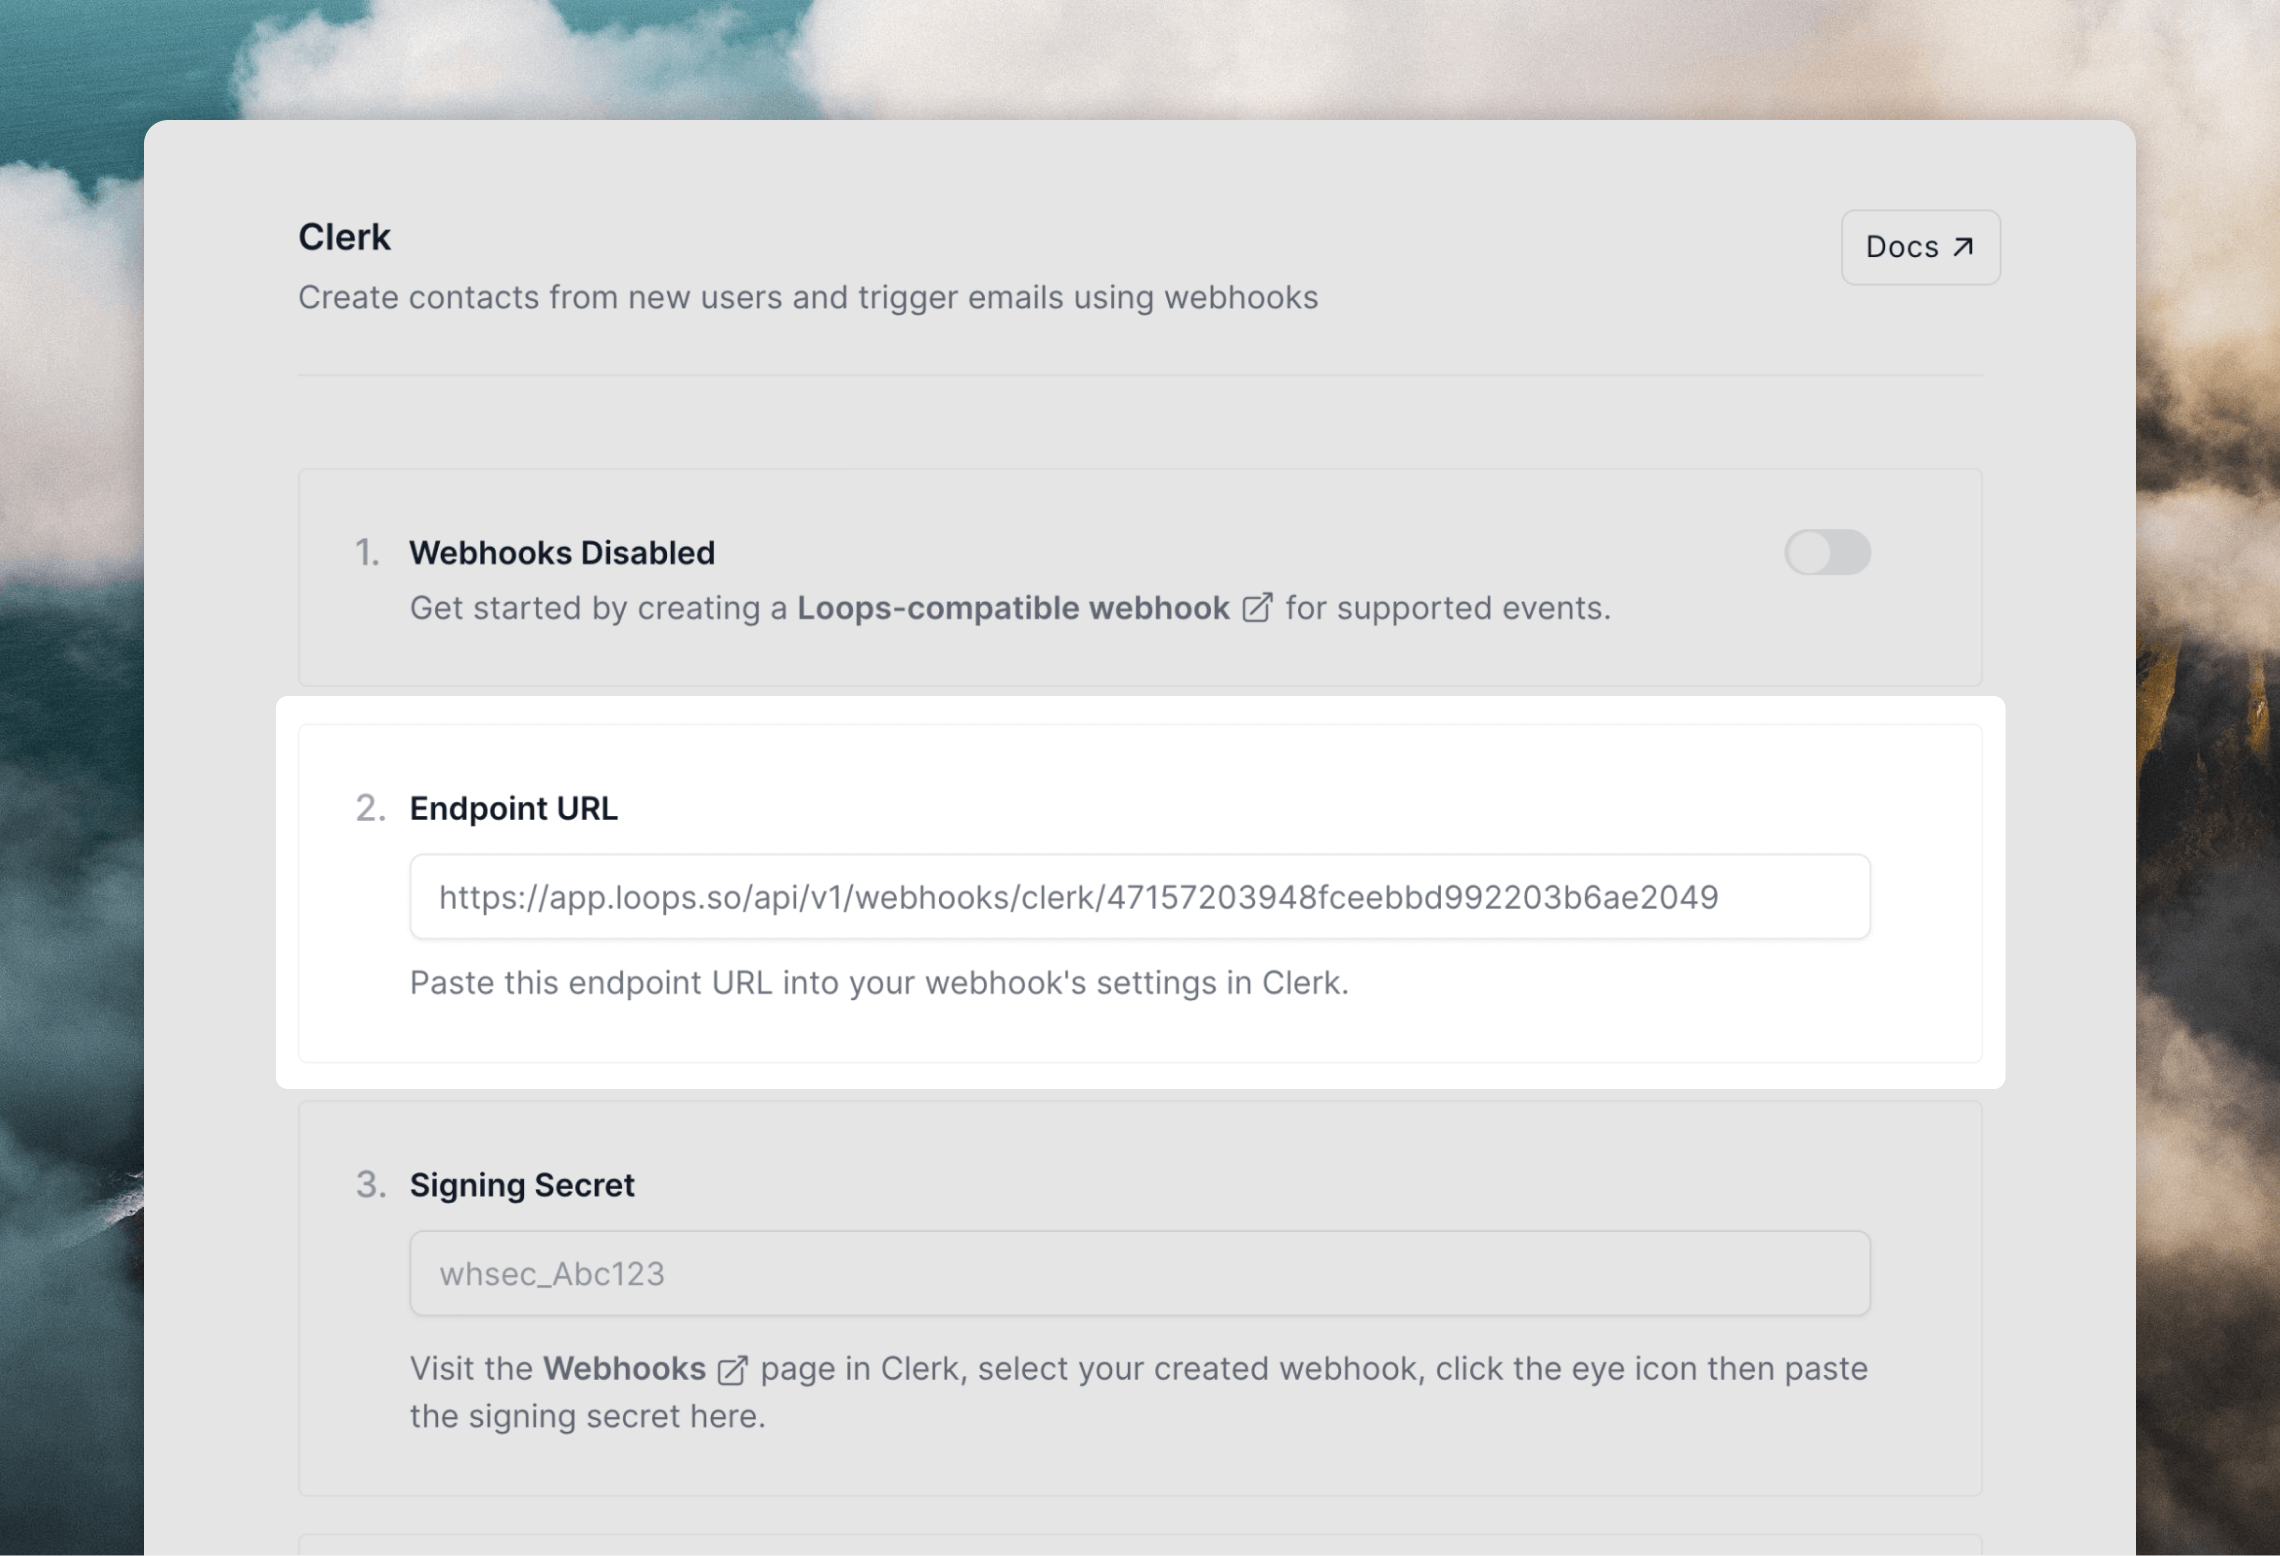
Create a webhook in Clerk
Next, you need to set up webhooks in Clerk. Inside a project in Clerk, go to Configure -> Webhooks and click + Add Endpoint. Paste in the endpoint URL from Loops, then select the event(s) you want to send (see our supported events above).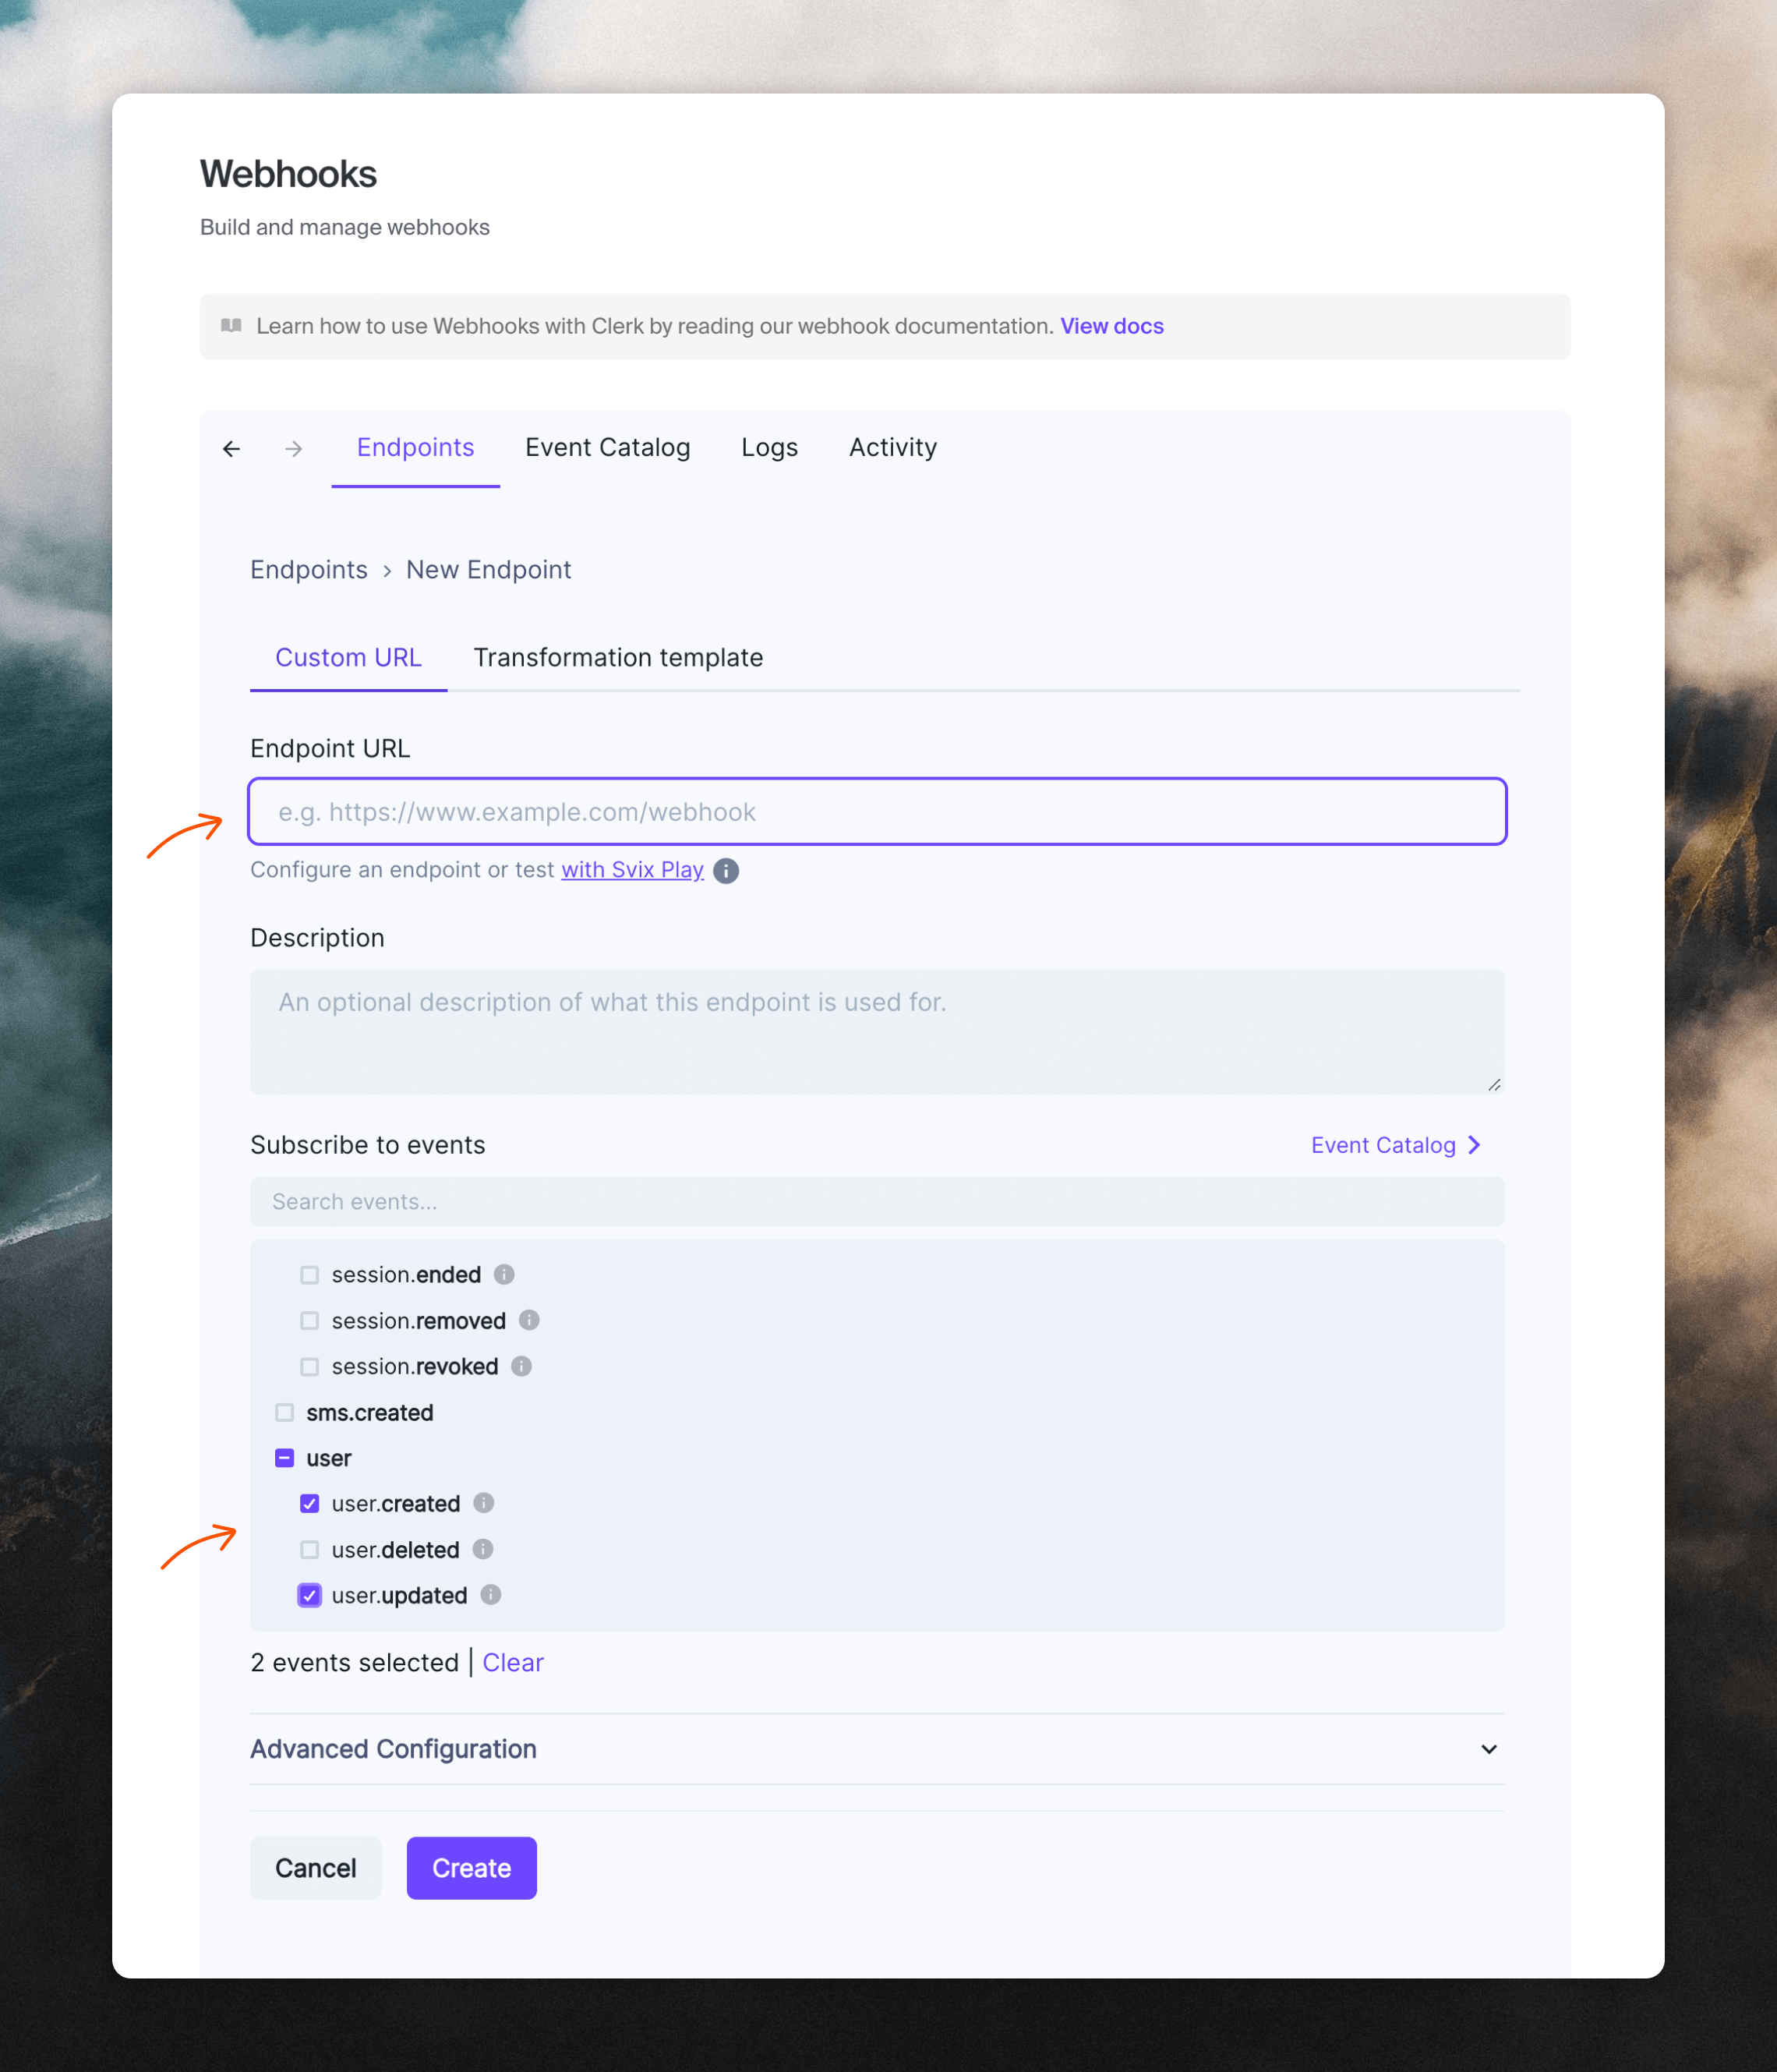
Testing Clerk webhooks
Clerk offers a nice way to test webhooks. Click through to the webhook you created and then the Testing tab. Selectuser.created or user.updated from the Send event dropdown, tweak the example data that’s shown, then click Send Example.
This will send real data to your Loops account.
You can also test your webhook by creating and editing users in the Users page in Clerk, or by signing up in your application.
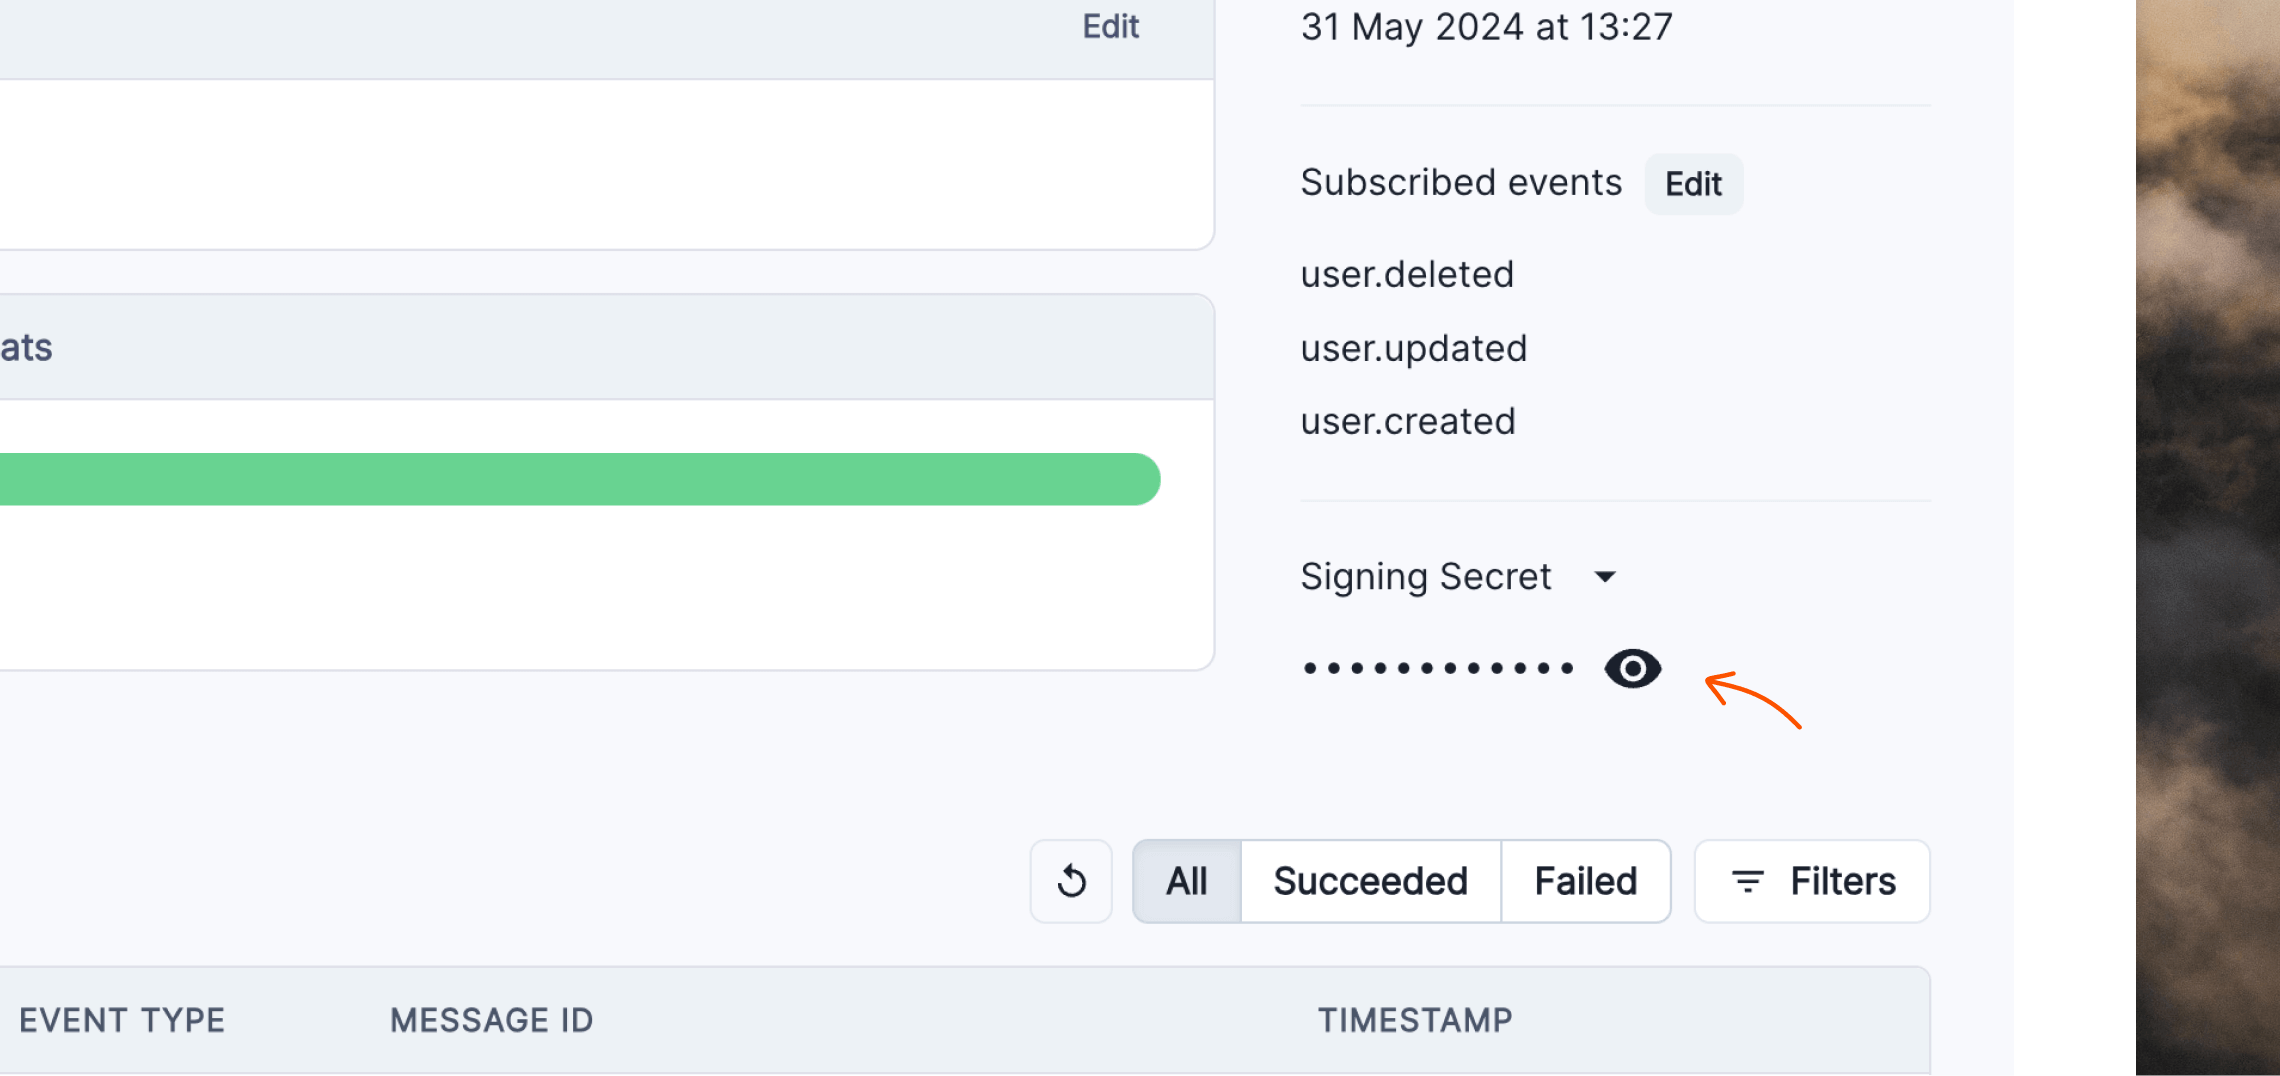
You can see all sent webhooks by going to Webhooks, clicking on the webhook and scrolling down to the Message Attempts section.
On Loops’ end, you will see new contacts appear in your Audience page, and triggered events in the Events page.
Examples
Here are some examples of how you can send data from Clerk to Loops to sync contacts and trigger useful emails to your customers.Syncing users to Loops
Create or update contacts in your Loops audience when a user is created or updated in Clerk.- Create a new Clerk webhook endpoint in Loops (instructions).
- In Clerk, create a new webhook (instructions above) for the
user.createdanduser.updatedevents and paste in your endpoint’s URL. - In Loops, make sure
user.createdanduser.updatedare toggled on on the Clerk settings page.
Syncing waitlist signups to Loops
Create or update contacts in your Loops audience when someone joins your waitlist in Clerk.- Create a new Clerk webhook endpoint in Loops (instructions).
- In Clerk, create a new webhook (instructions above) for the
waitlistEntry.createdevent and paste in your endpoint’s URL. - In Loops, make sure
waitlistEntry.createdis toggled on on the Clerk settings page. - To keep track of waitlist users you can use the Assign a user group option. Enter something like “Waitlist” into the field.
Send an email to all new Clerk users
Send an email from Loops when a new user is created in Clerk.- Set up your Clerk webhook endpoint in Loops (instructions).
- In Clerk, create a new webhook (instructions above) for the
user.createdevent and paste in your endpoint’s URL. - In Loops, make sure
user.createdis toggled on on the Clerk settings page. - Create a new workflow in Loops using our Onboarding drip template.
- For the workflow trigger, select Event received and then select Clerk from the first dropdown and user.created from the second dropdown.
Enter all new Clerk users into an onboarding email sequence
Send an email from Loops when a new customer is created in Clerk.- Complete Steps 1–5 from “Send an email to all new Clerk users” above.
- Add more emails and timers into the workflow to complete your email sequence.
Send an email to a deleted Clerk user
Send an email from Loops when a user is deleted in Clerk.- Set up your Clerk webhook endpoint in Loops (instructions).
- In Clerk, create a new webhook (instructions above) for the
user.deletedevent and paste in your endpoint’s URL. - In Loops, make sure
user.deletedis toggled on on the Clerk settings page. - Create a new workflow in Loops.
- For the workflow trigger, select Event received and then select Clerk from the first dropdown and user.deleted from the second dropdown.
- Add an email to the workflow.
- You can optionally delete or unsubscribe the user from your audience from the Clerk settings in Loops. Note that both options will stop that contact from receiving future emails from Loops.