Send Loops contacts to Clay
You can send Loops contact data to Clay using Loops webhooks.Create a webhook in Clay
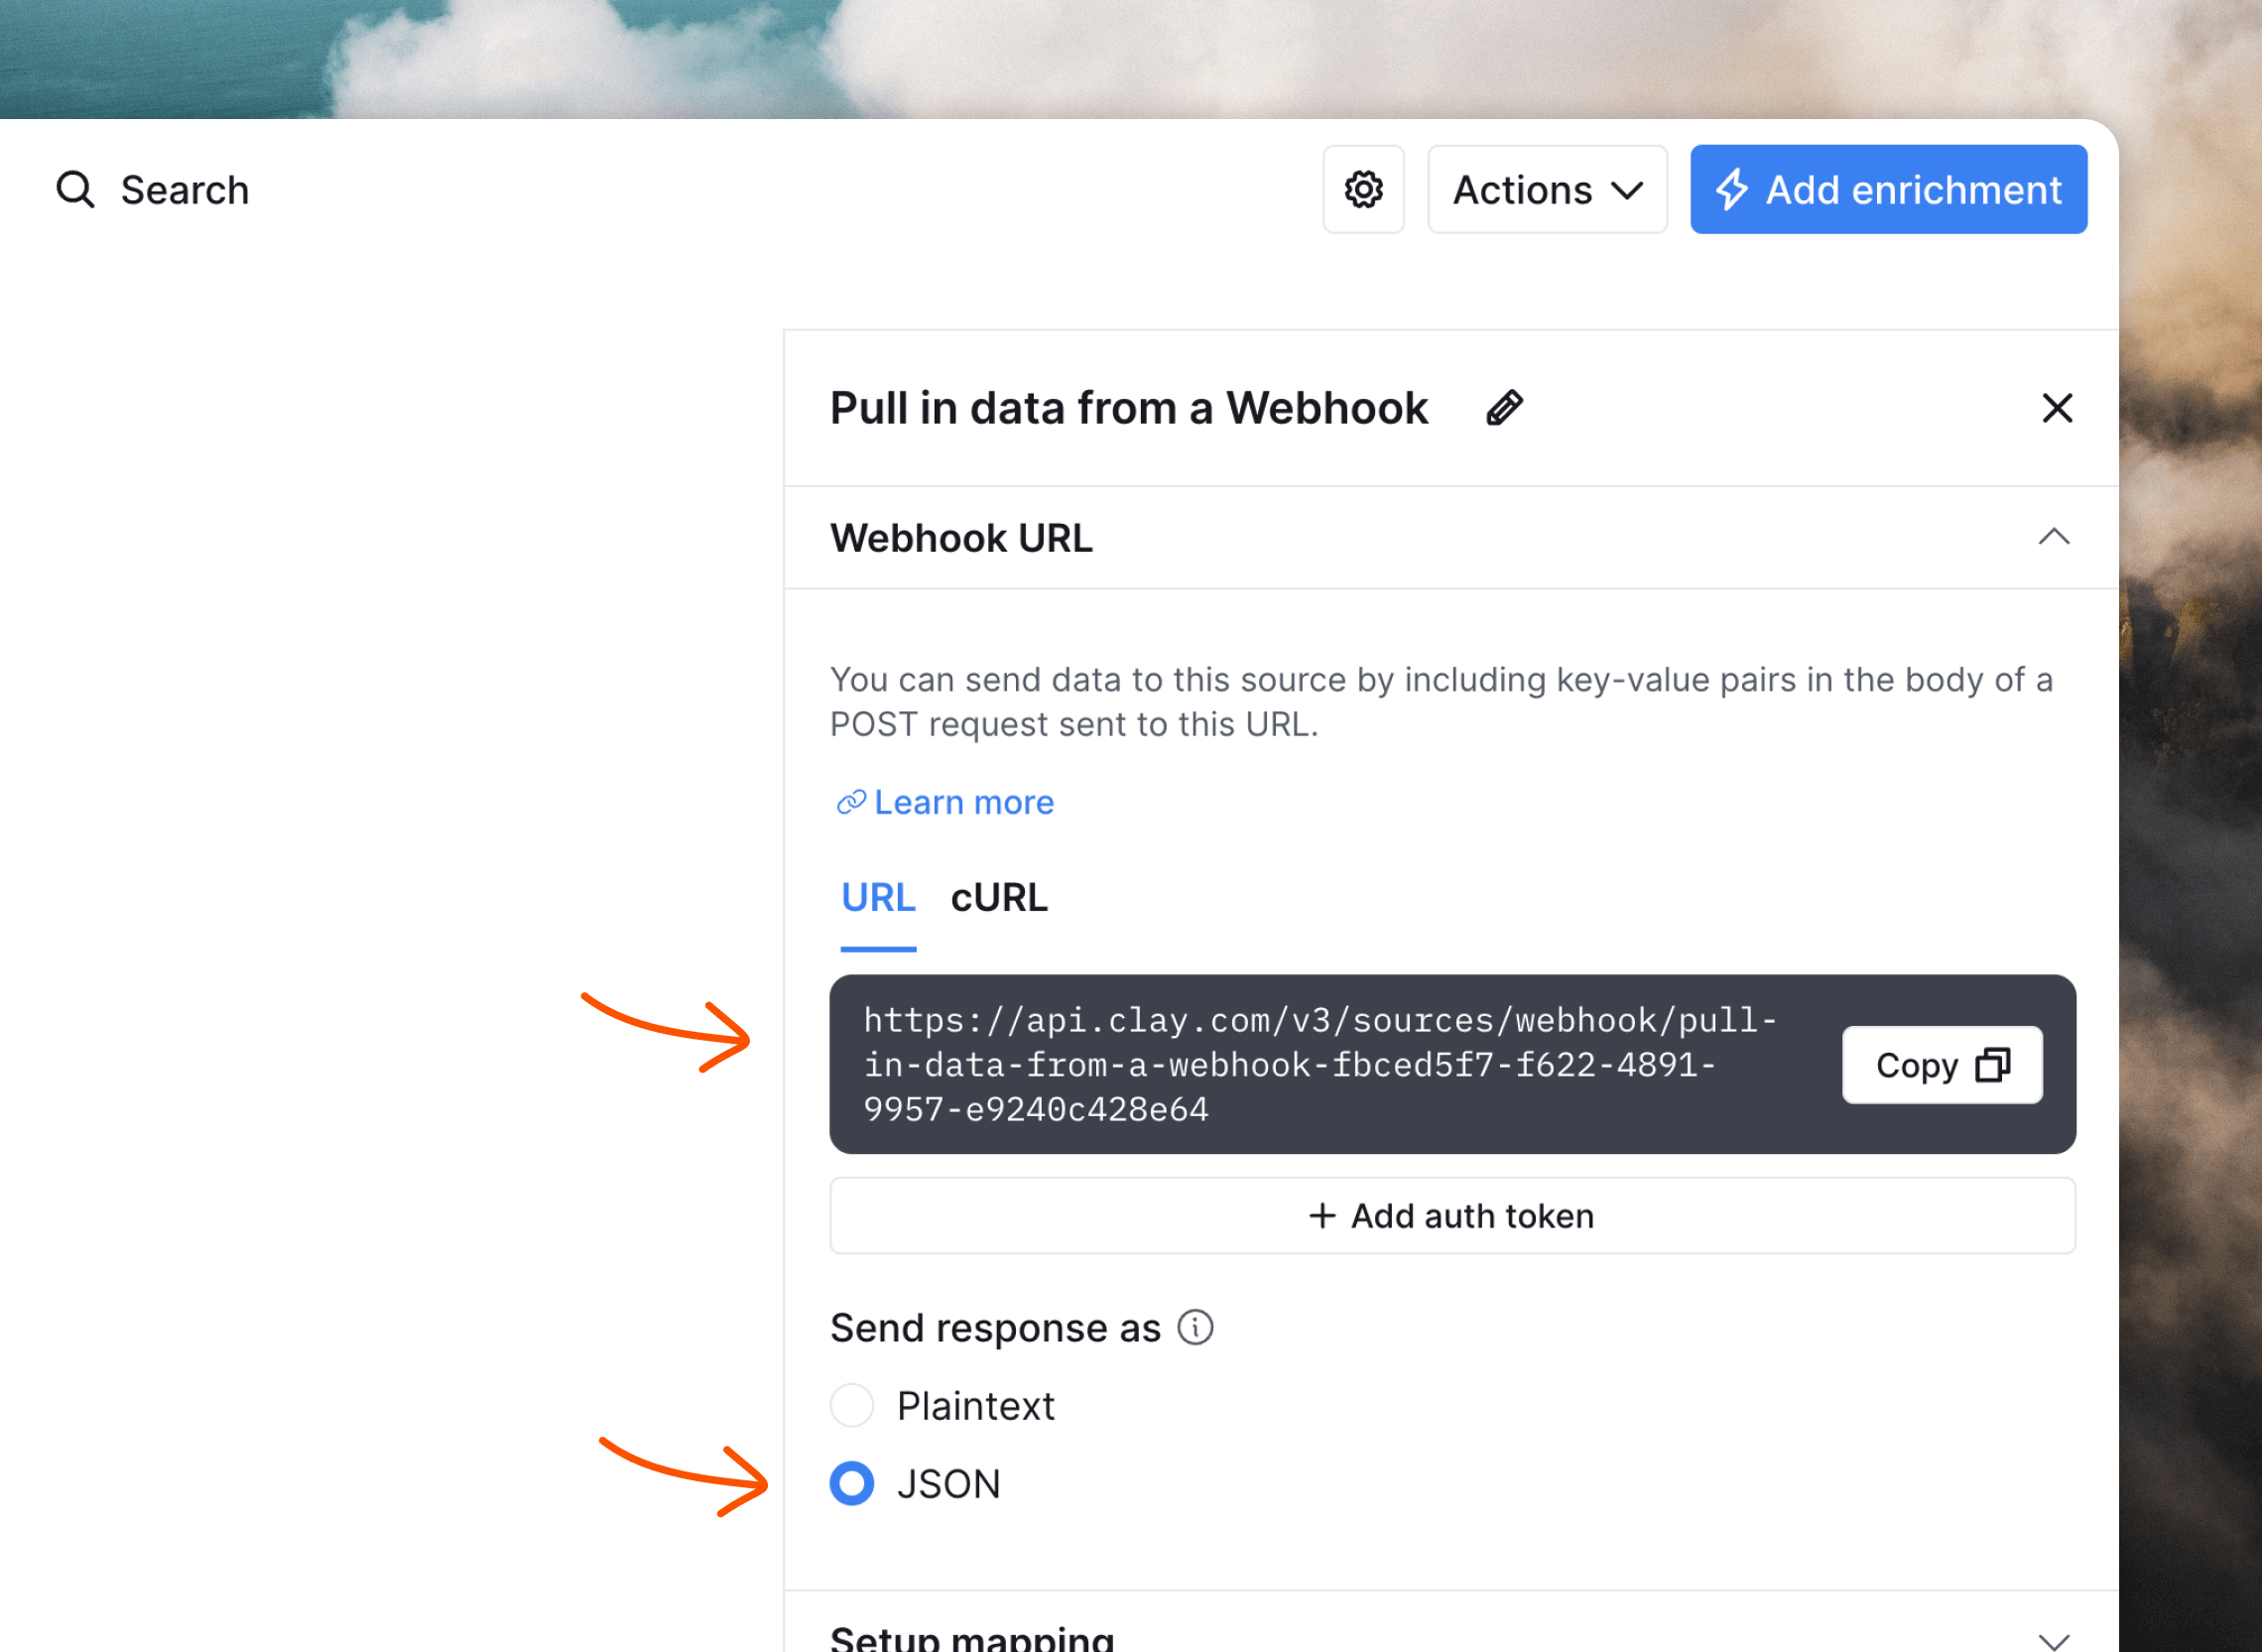
In Clay, add a Webhook source by clicking More sources… in the sidebar and selecting Webhook.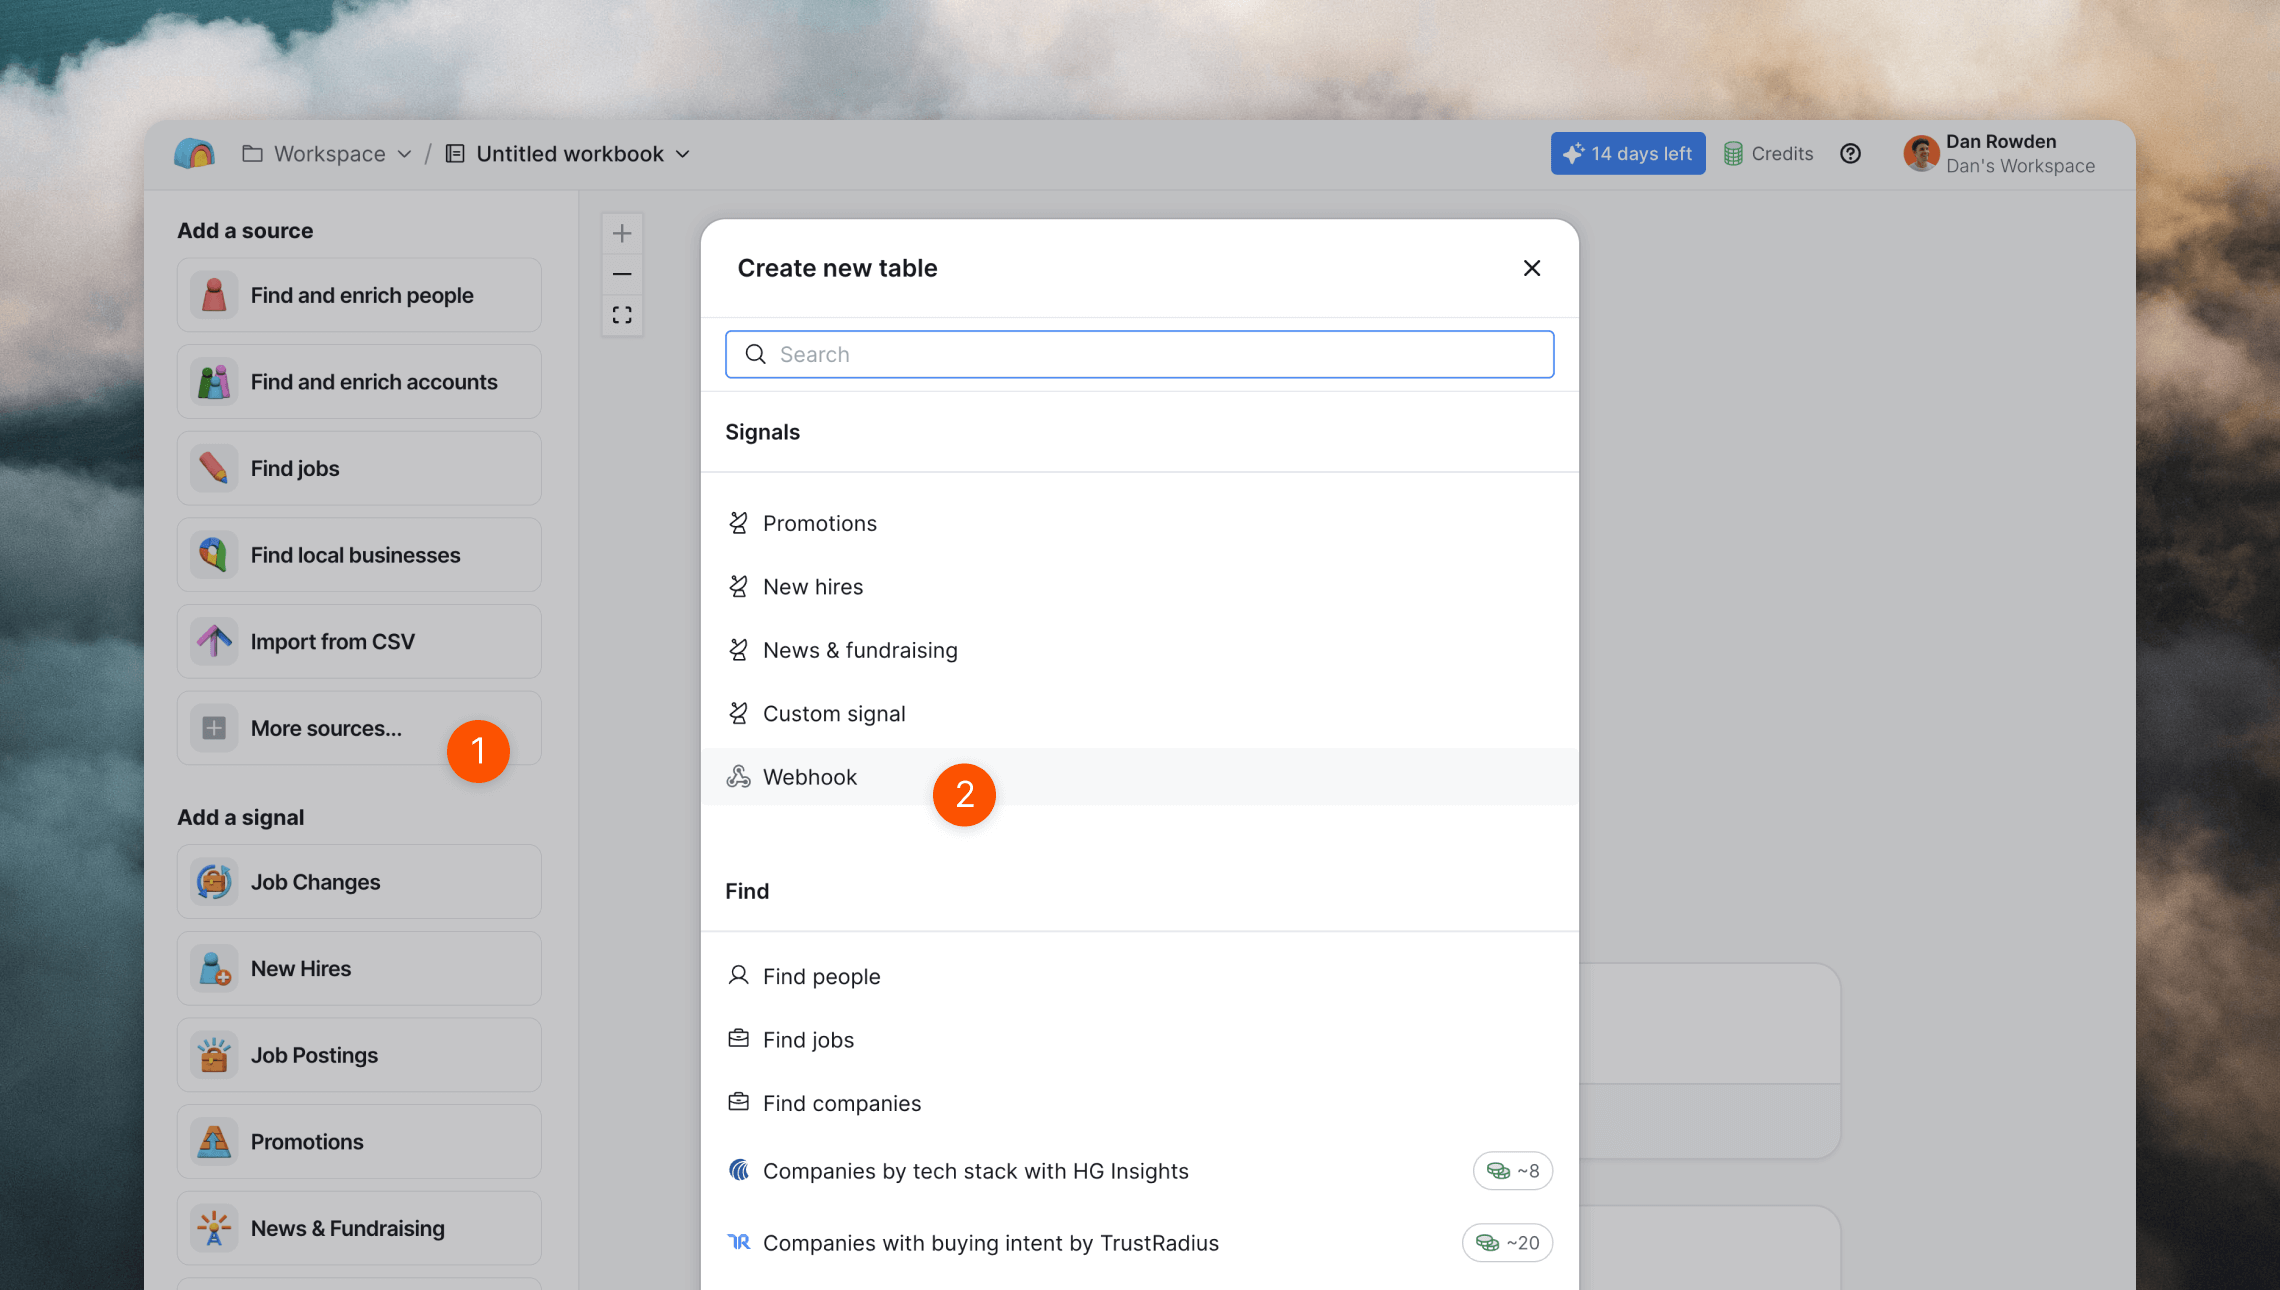
Set up the webhook in Loops
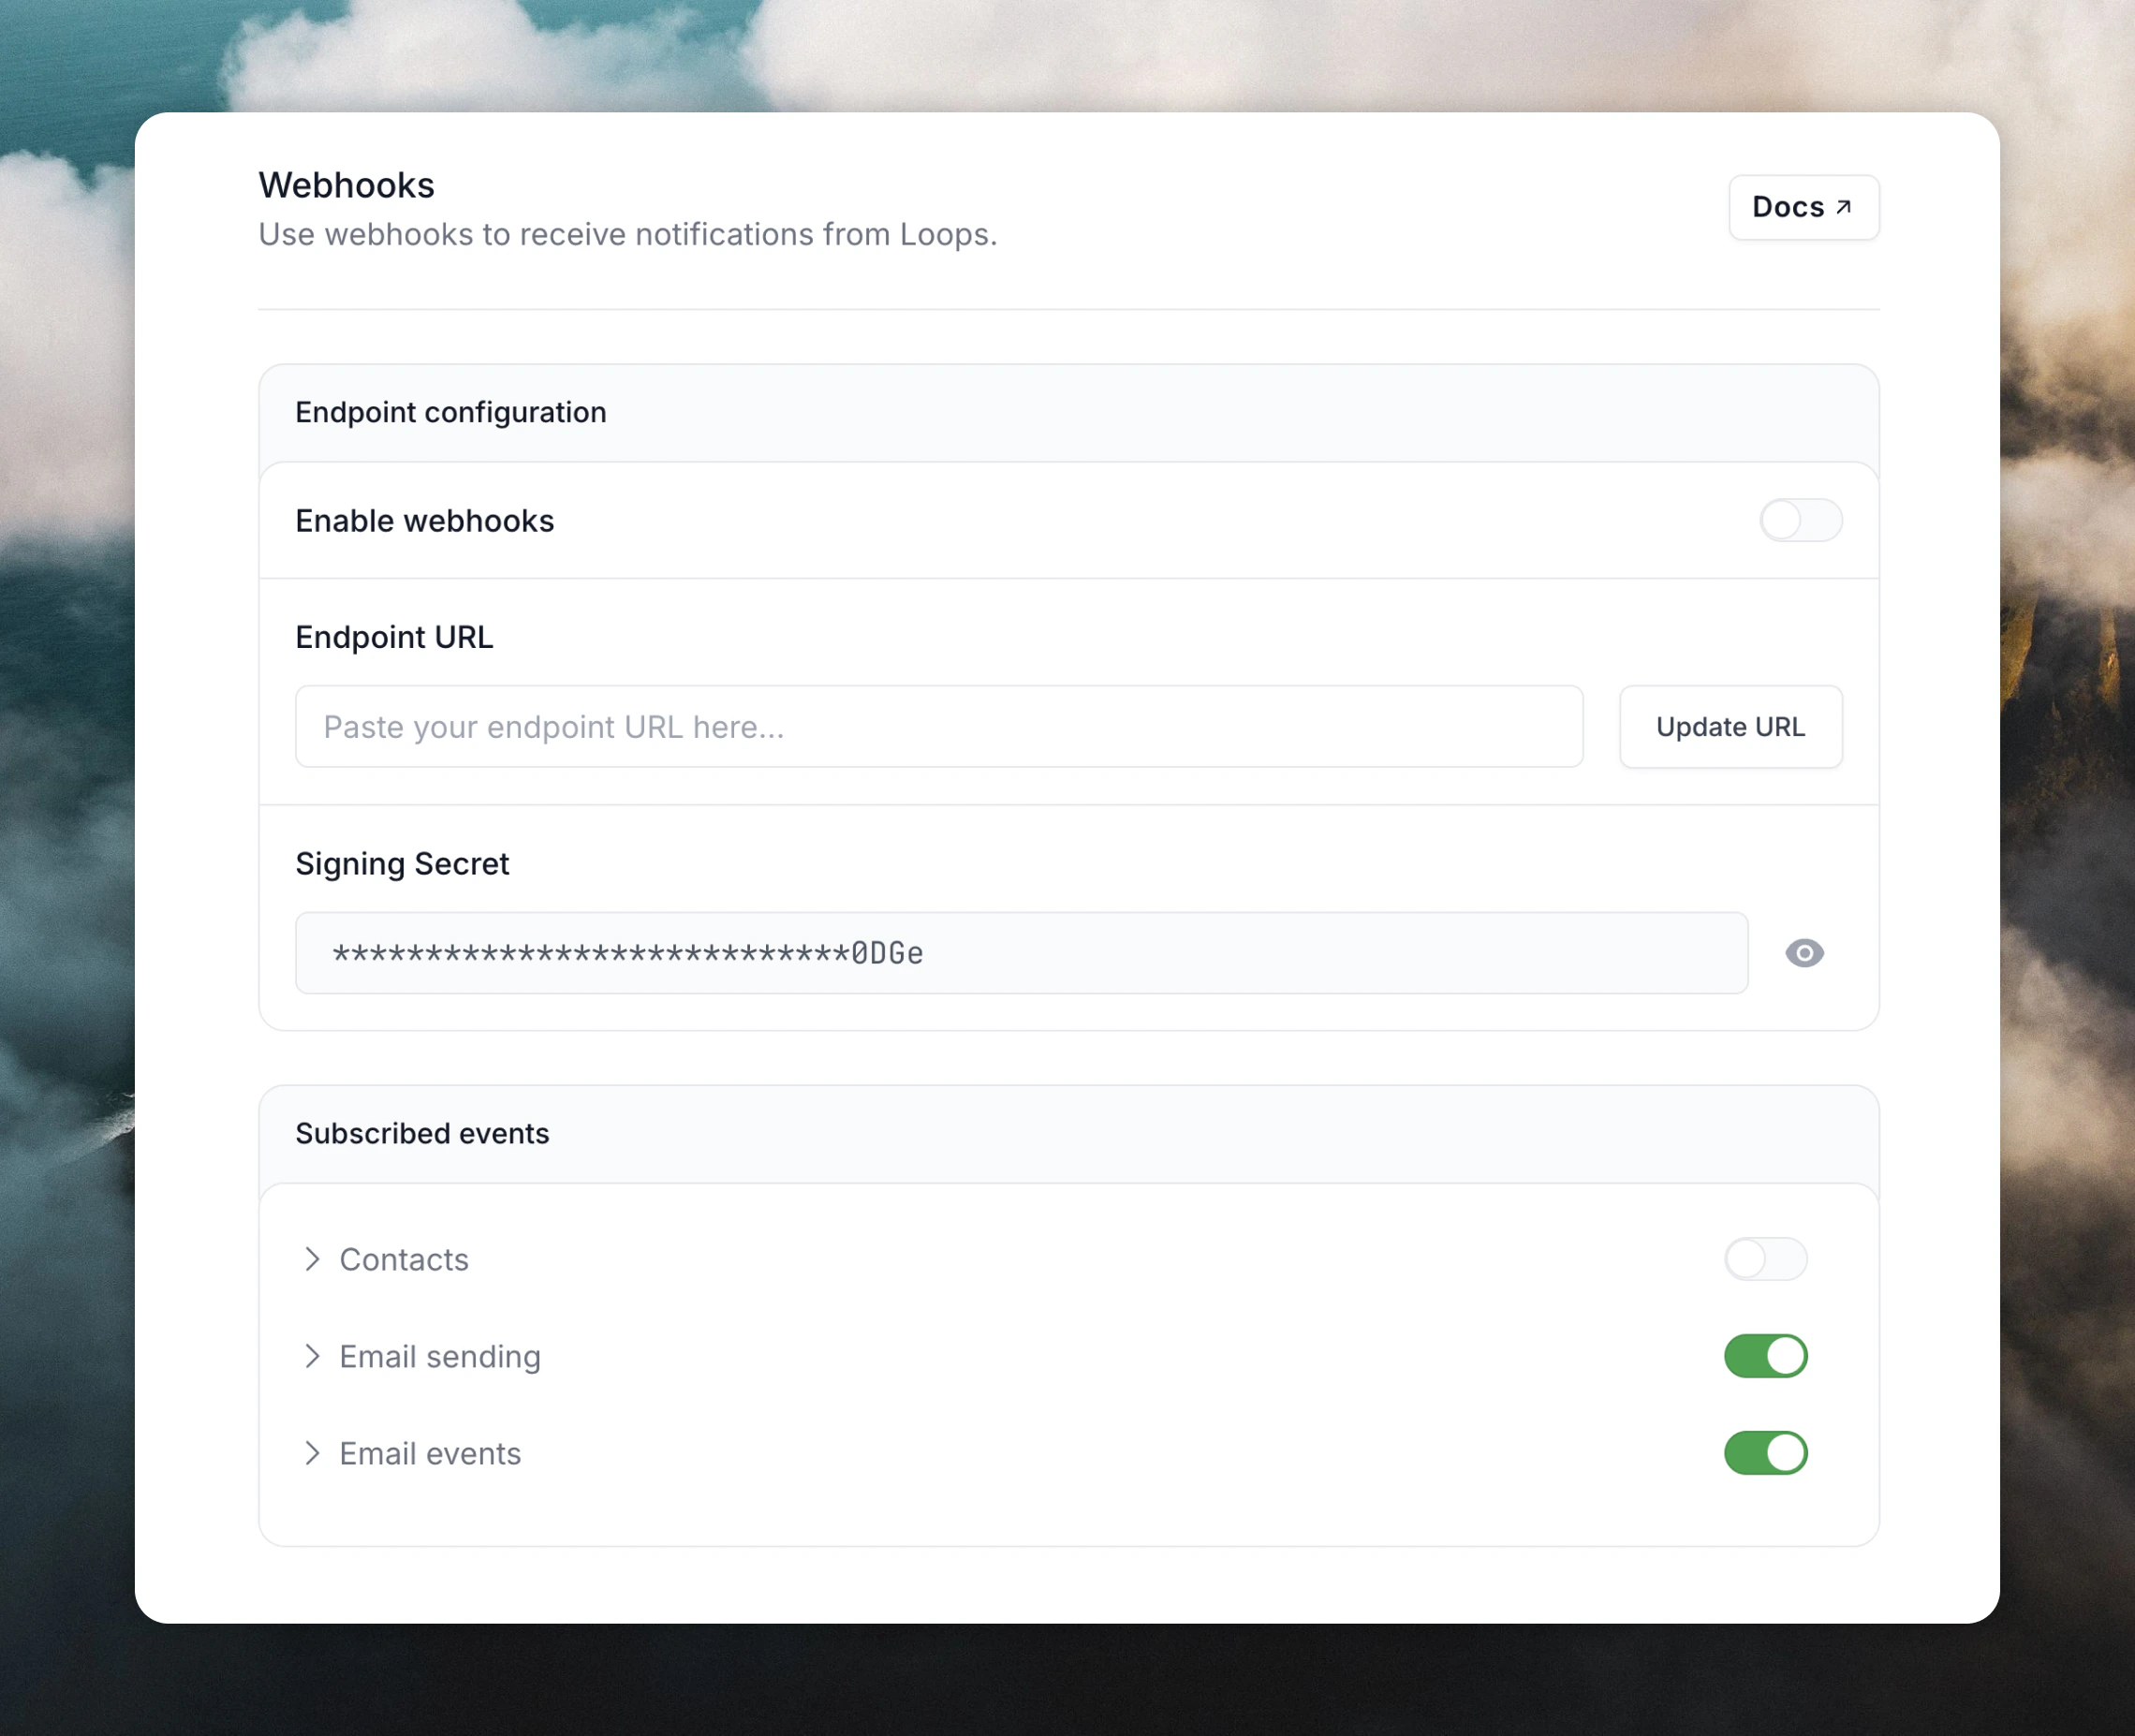
Copy the URL and paste it into the Endpoint URL field on the Webhooks settings page in Loops. Activatecontact.created events. This is the only event that makes sense to sync to Clay because it’s the only event type that contains a full contact record.
Create a data mapping in Clay
Now, in order to create data mappings in Clay, you need to send some data from Loops. To do this we need to create a contact, which will trigger a webhook to be sent to Clay. In your Loops Audience page you can create a new contact from the+ button in the top right, or use the API or an integration.
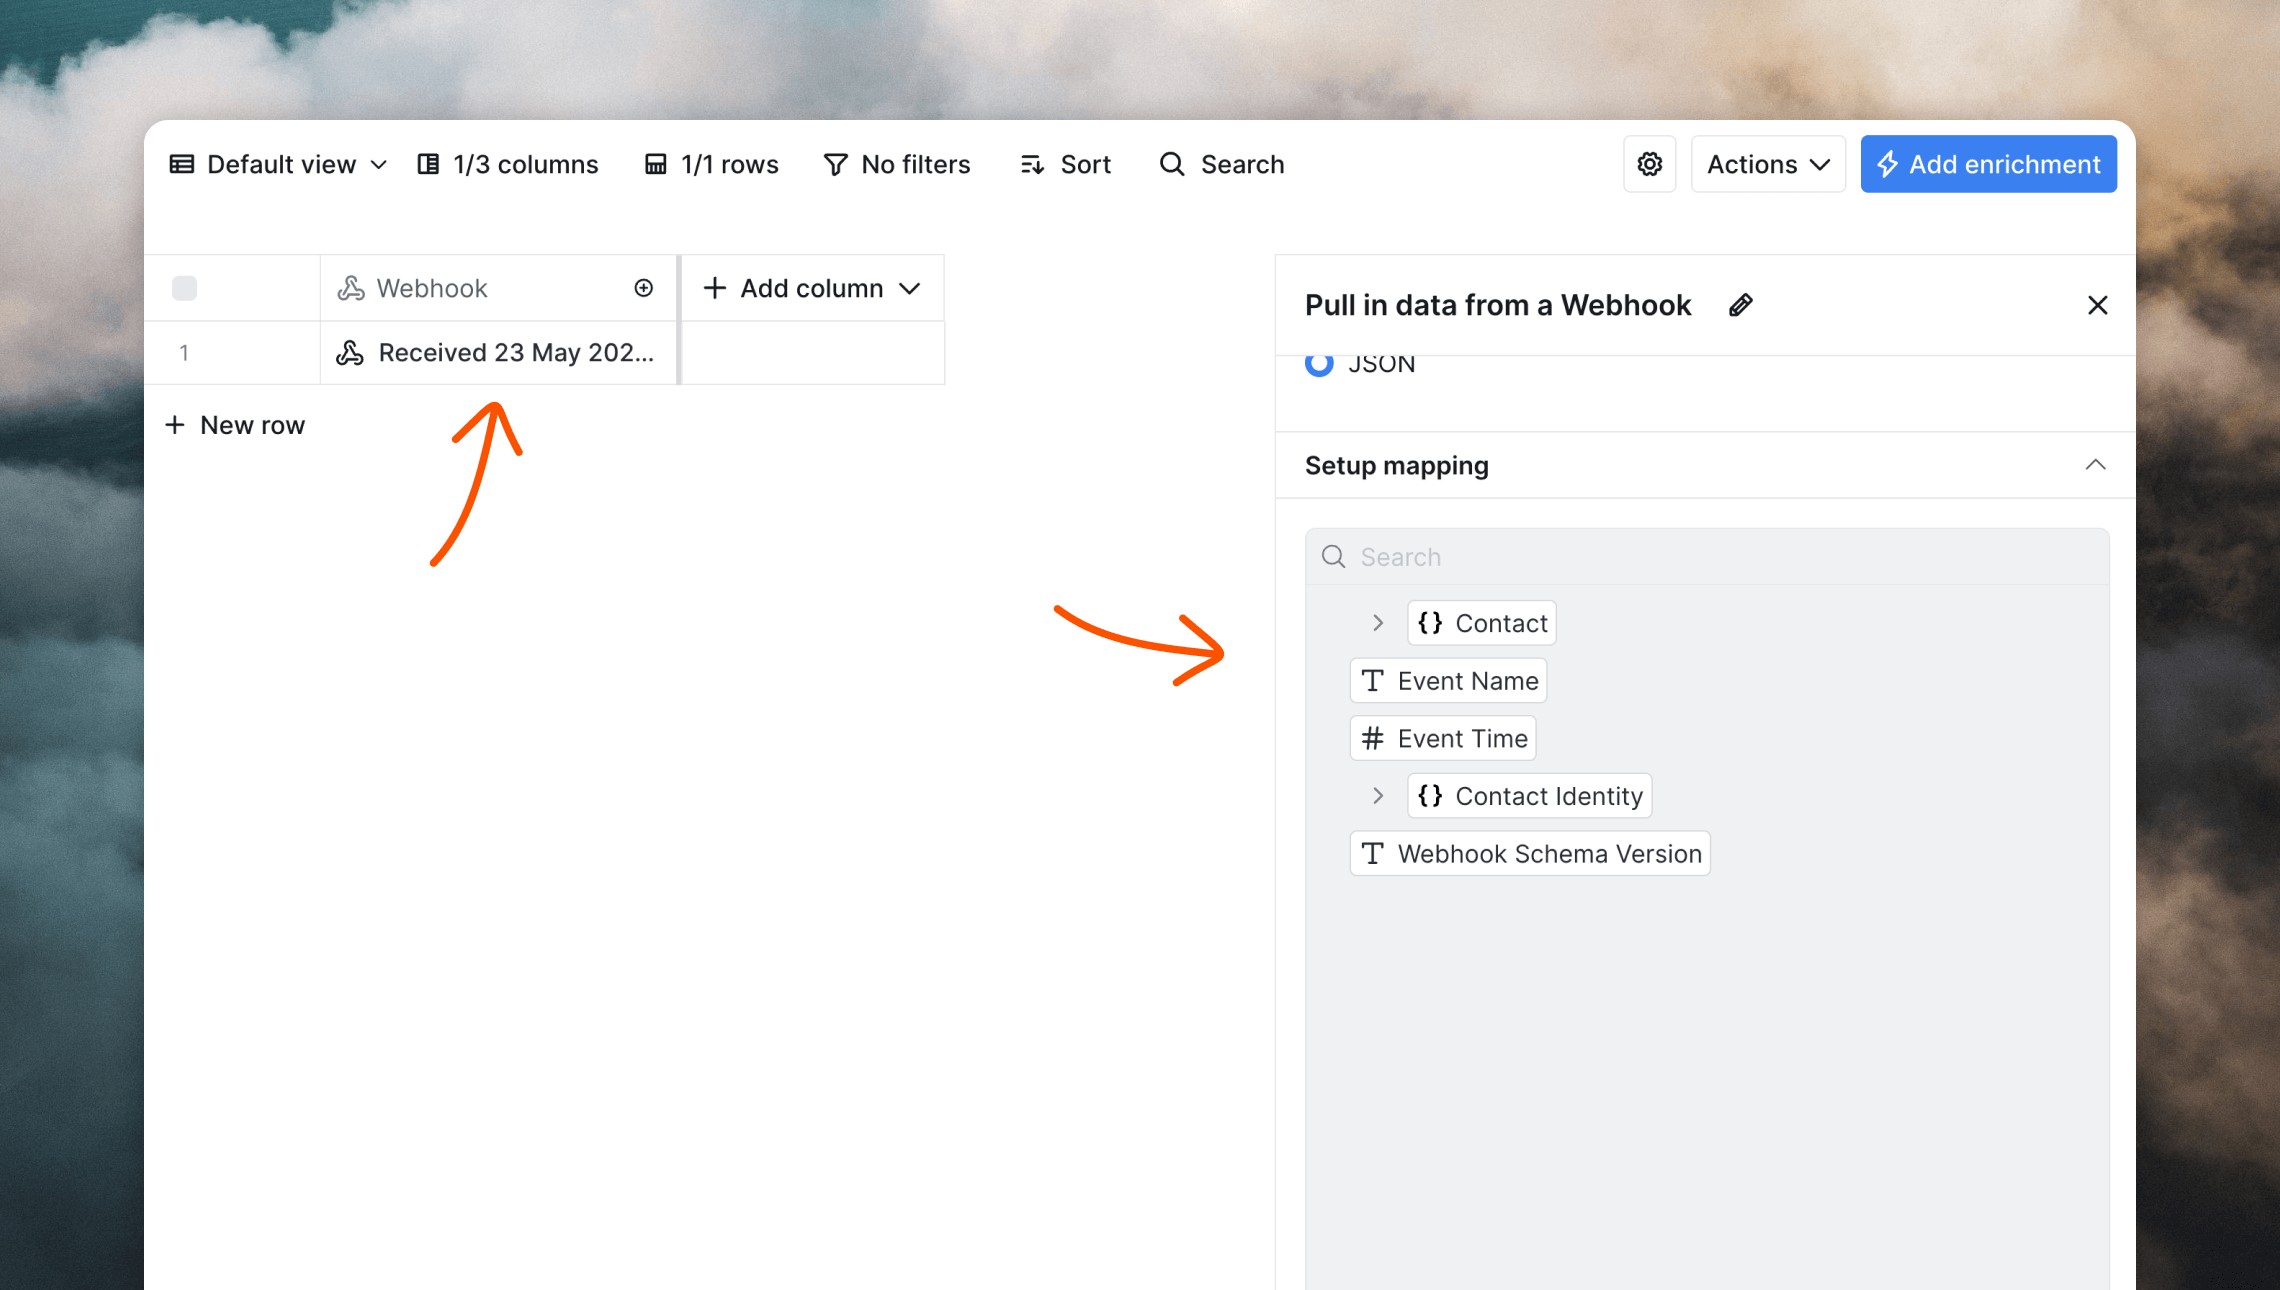
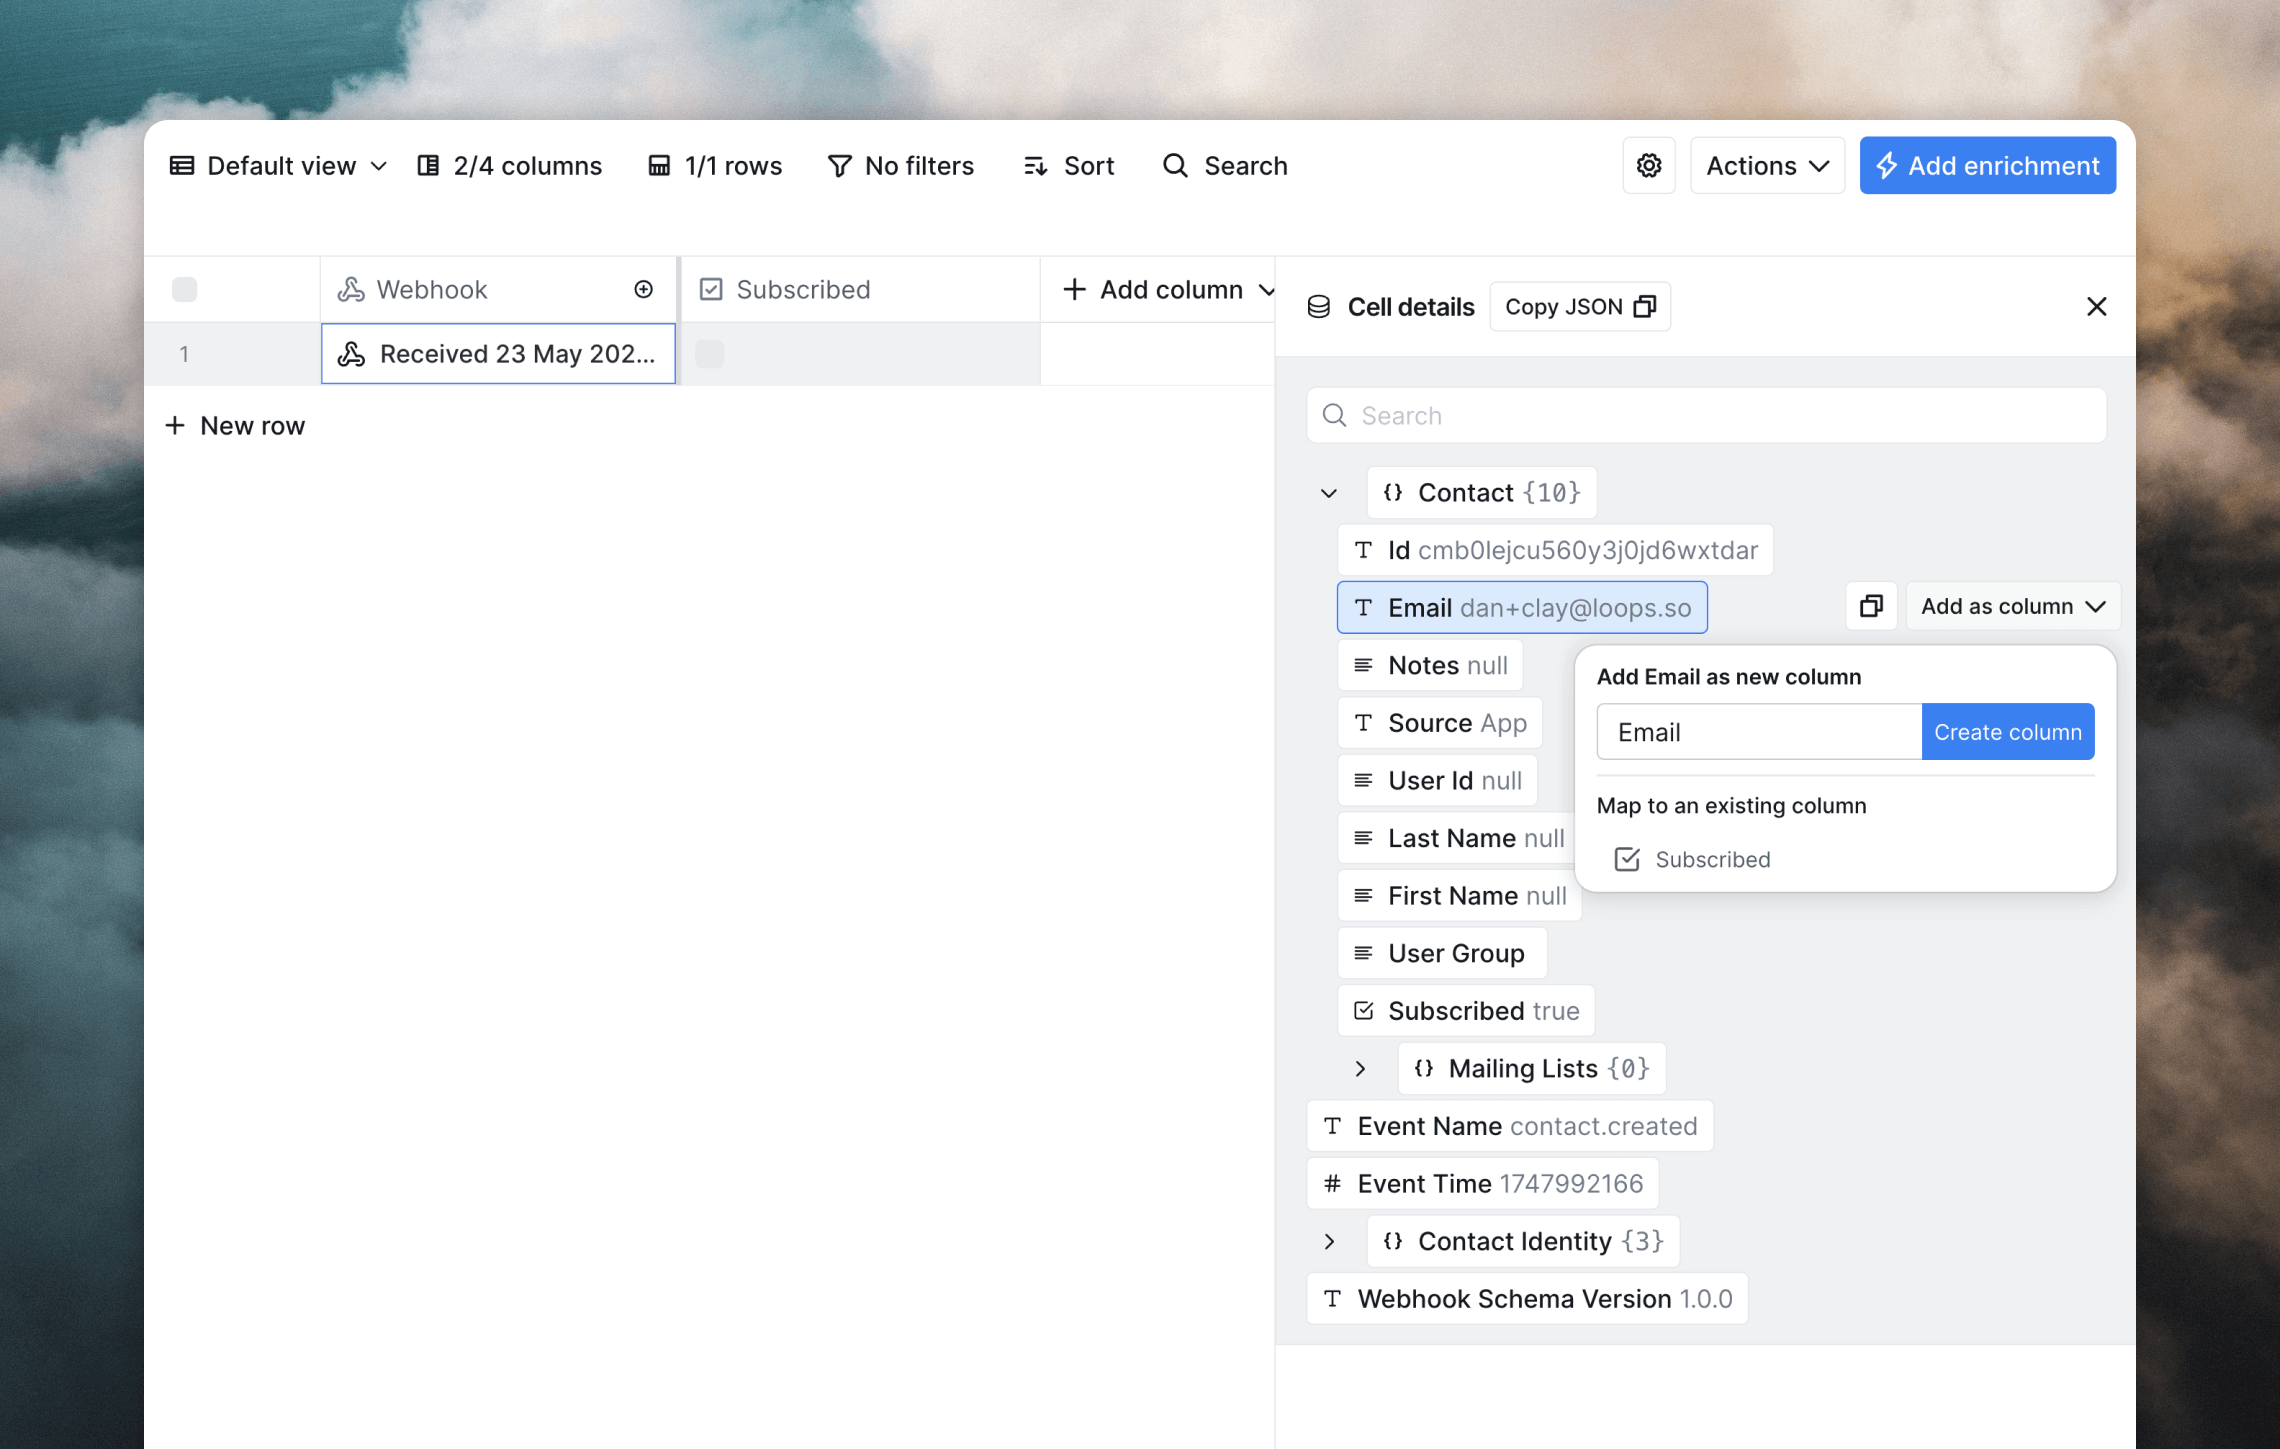
Once the contact is created, go back to Clay. You should see a webhook record in your table, and there should now be data shown in the Setup mapping section on the right.
Send Clay contacts to Loops
You can sync data to your Loops audience from Clay using a custom enrichment in your tables. This sends contact data to Loops whenever a row is created or updated (or on a manual schedule).Create a connection to the Loops API
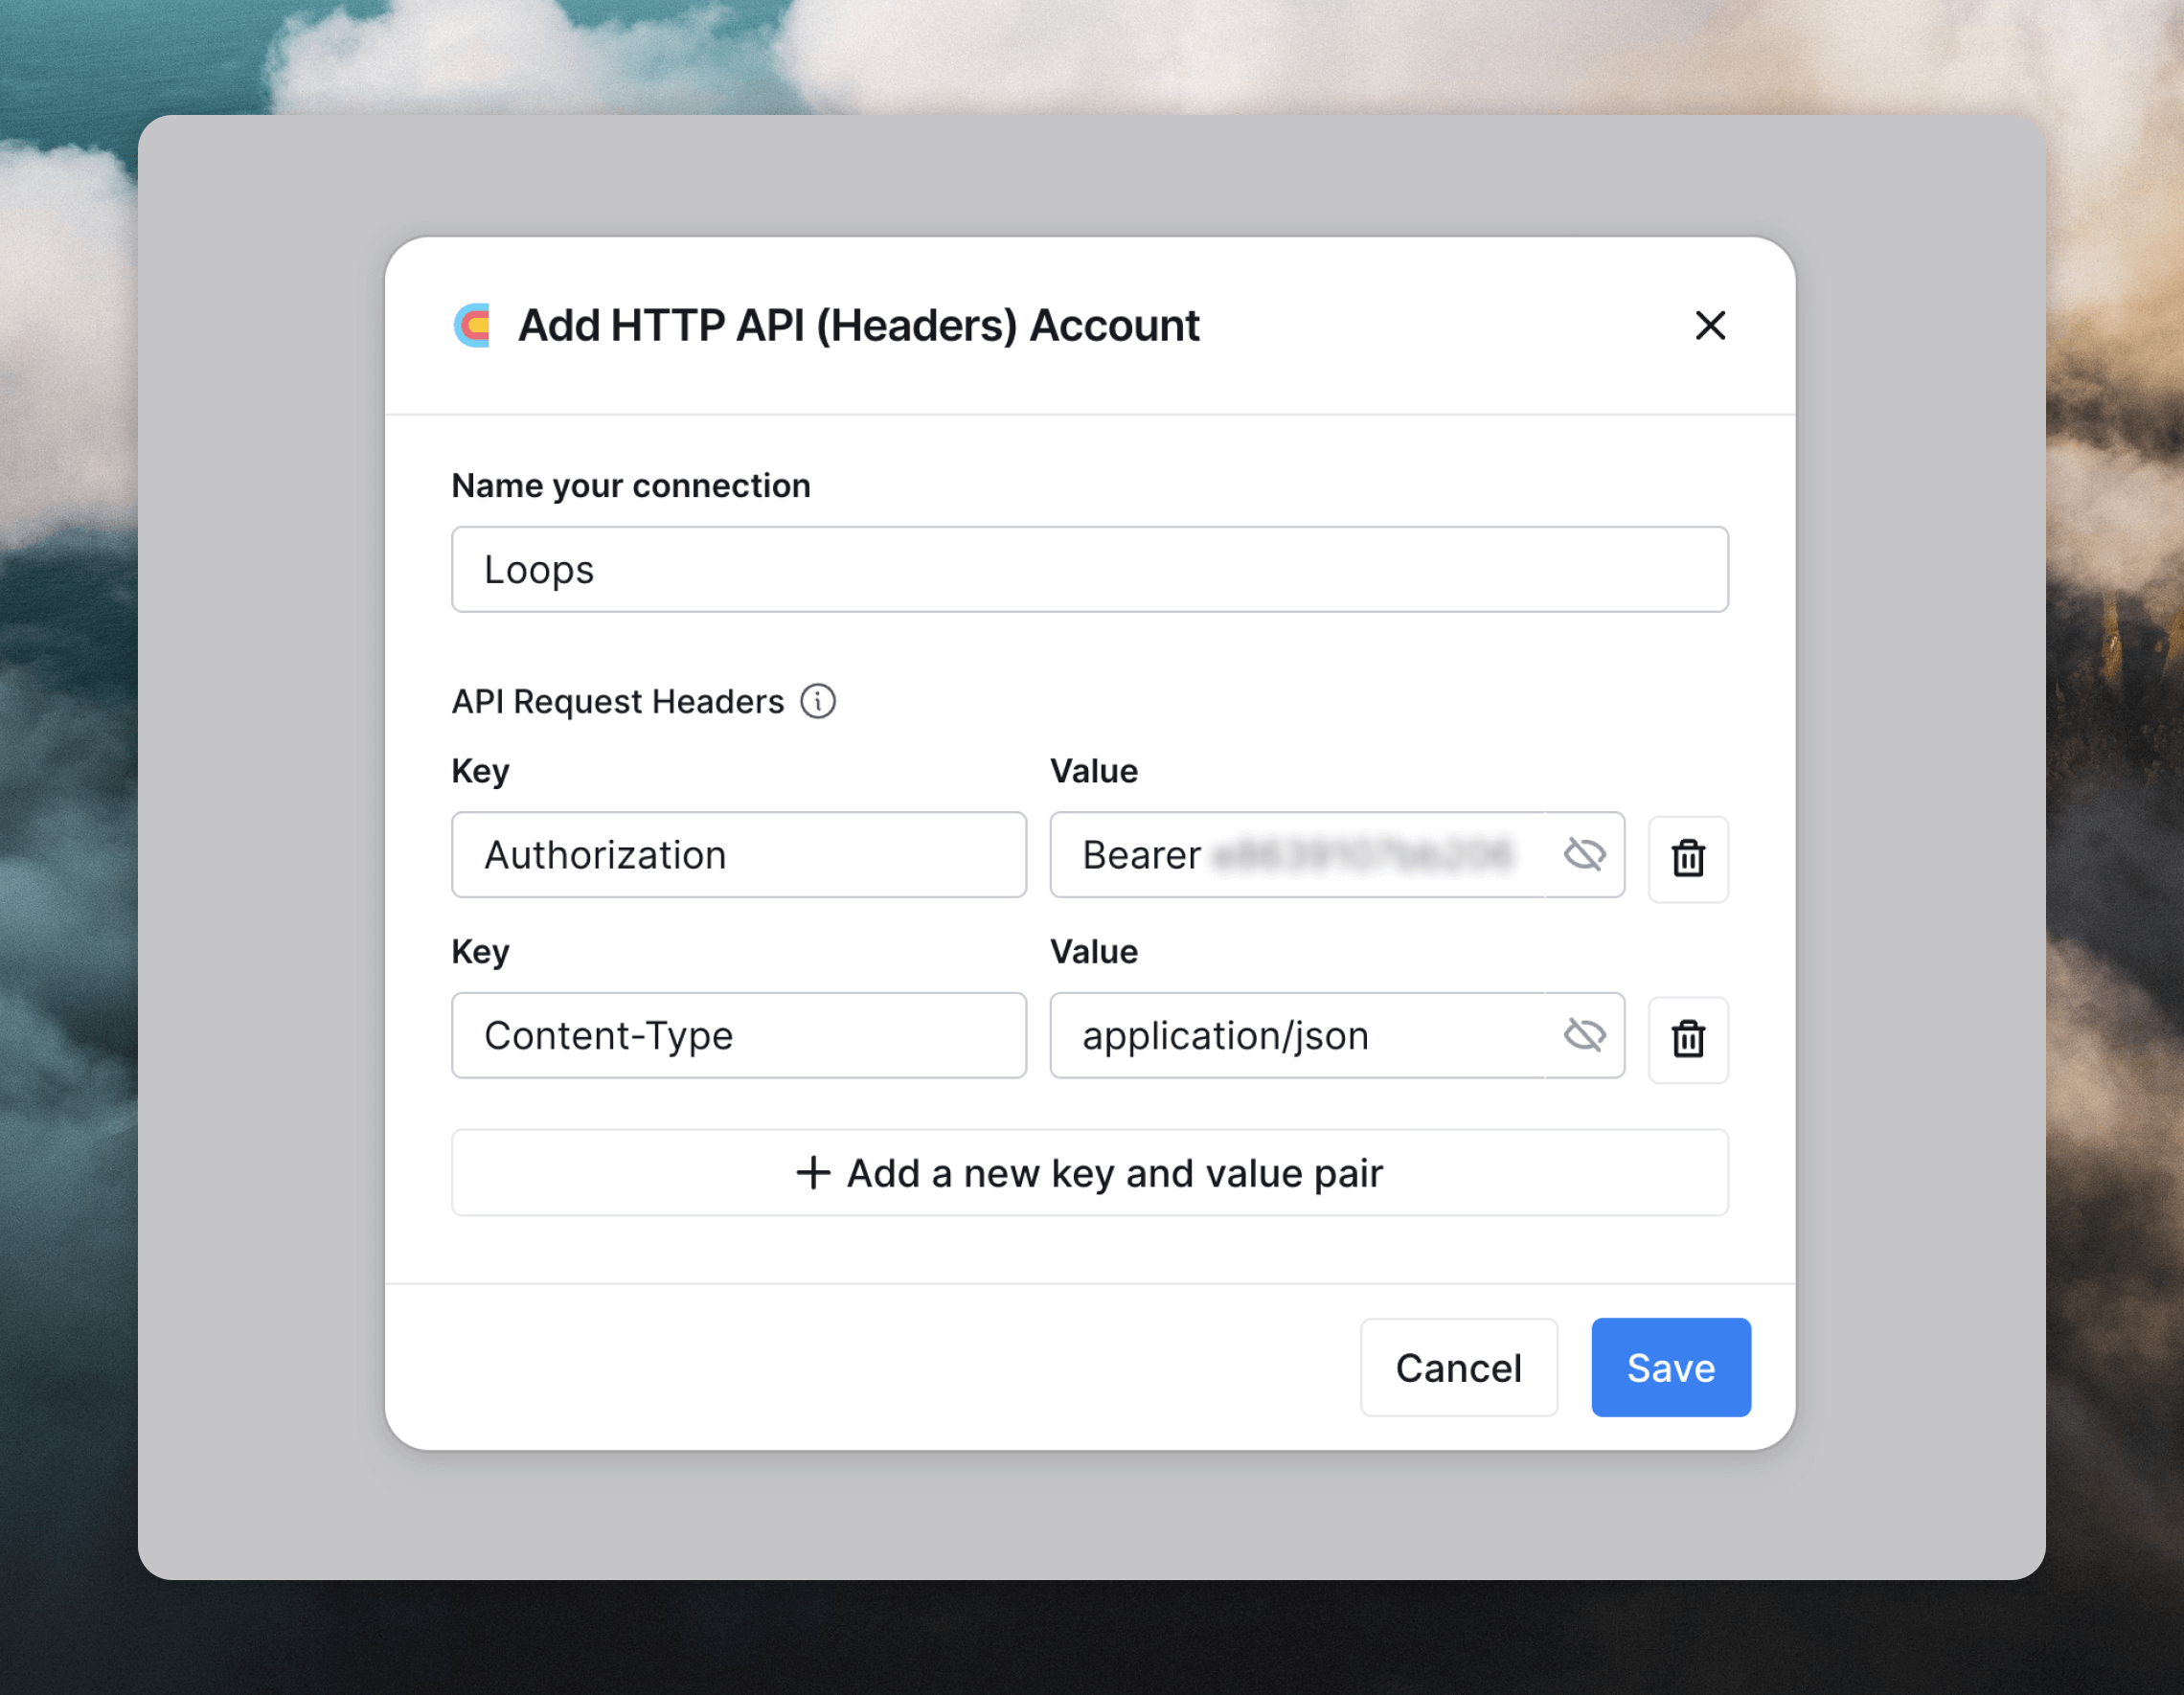
Add an API connection to your table in Clay by selecting Add enrichment and searching for HTTP API as the data source. In the Account section of the sidebar, click + Add account or select an existing connection.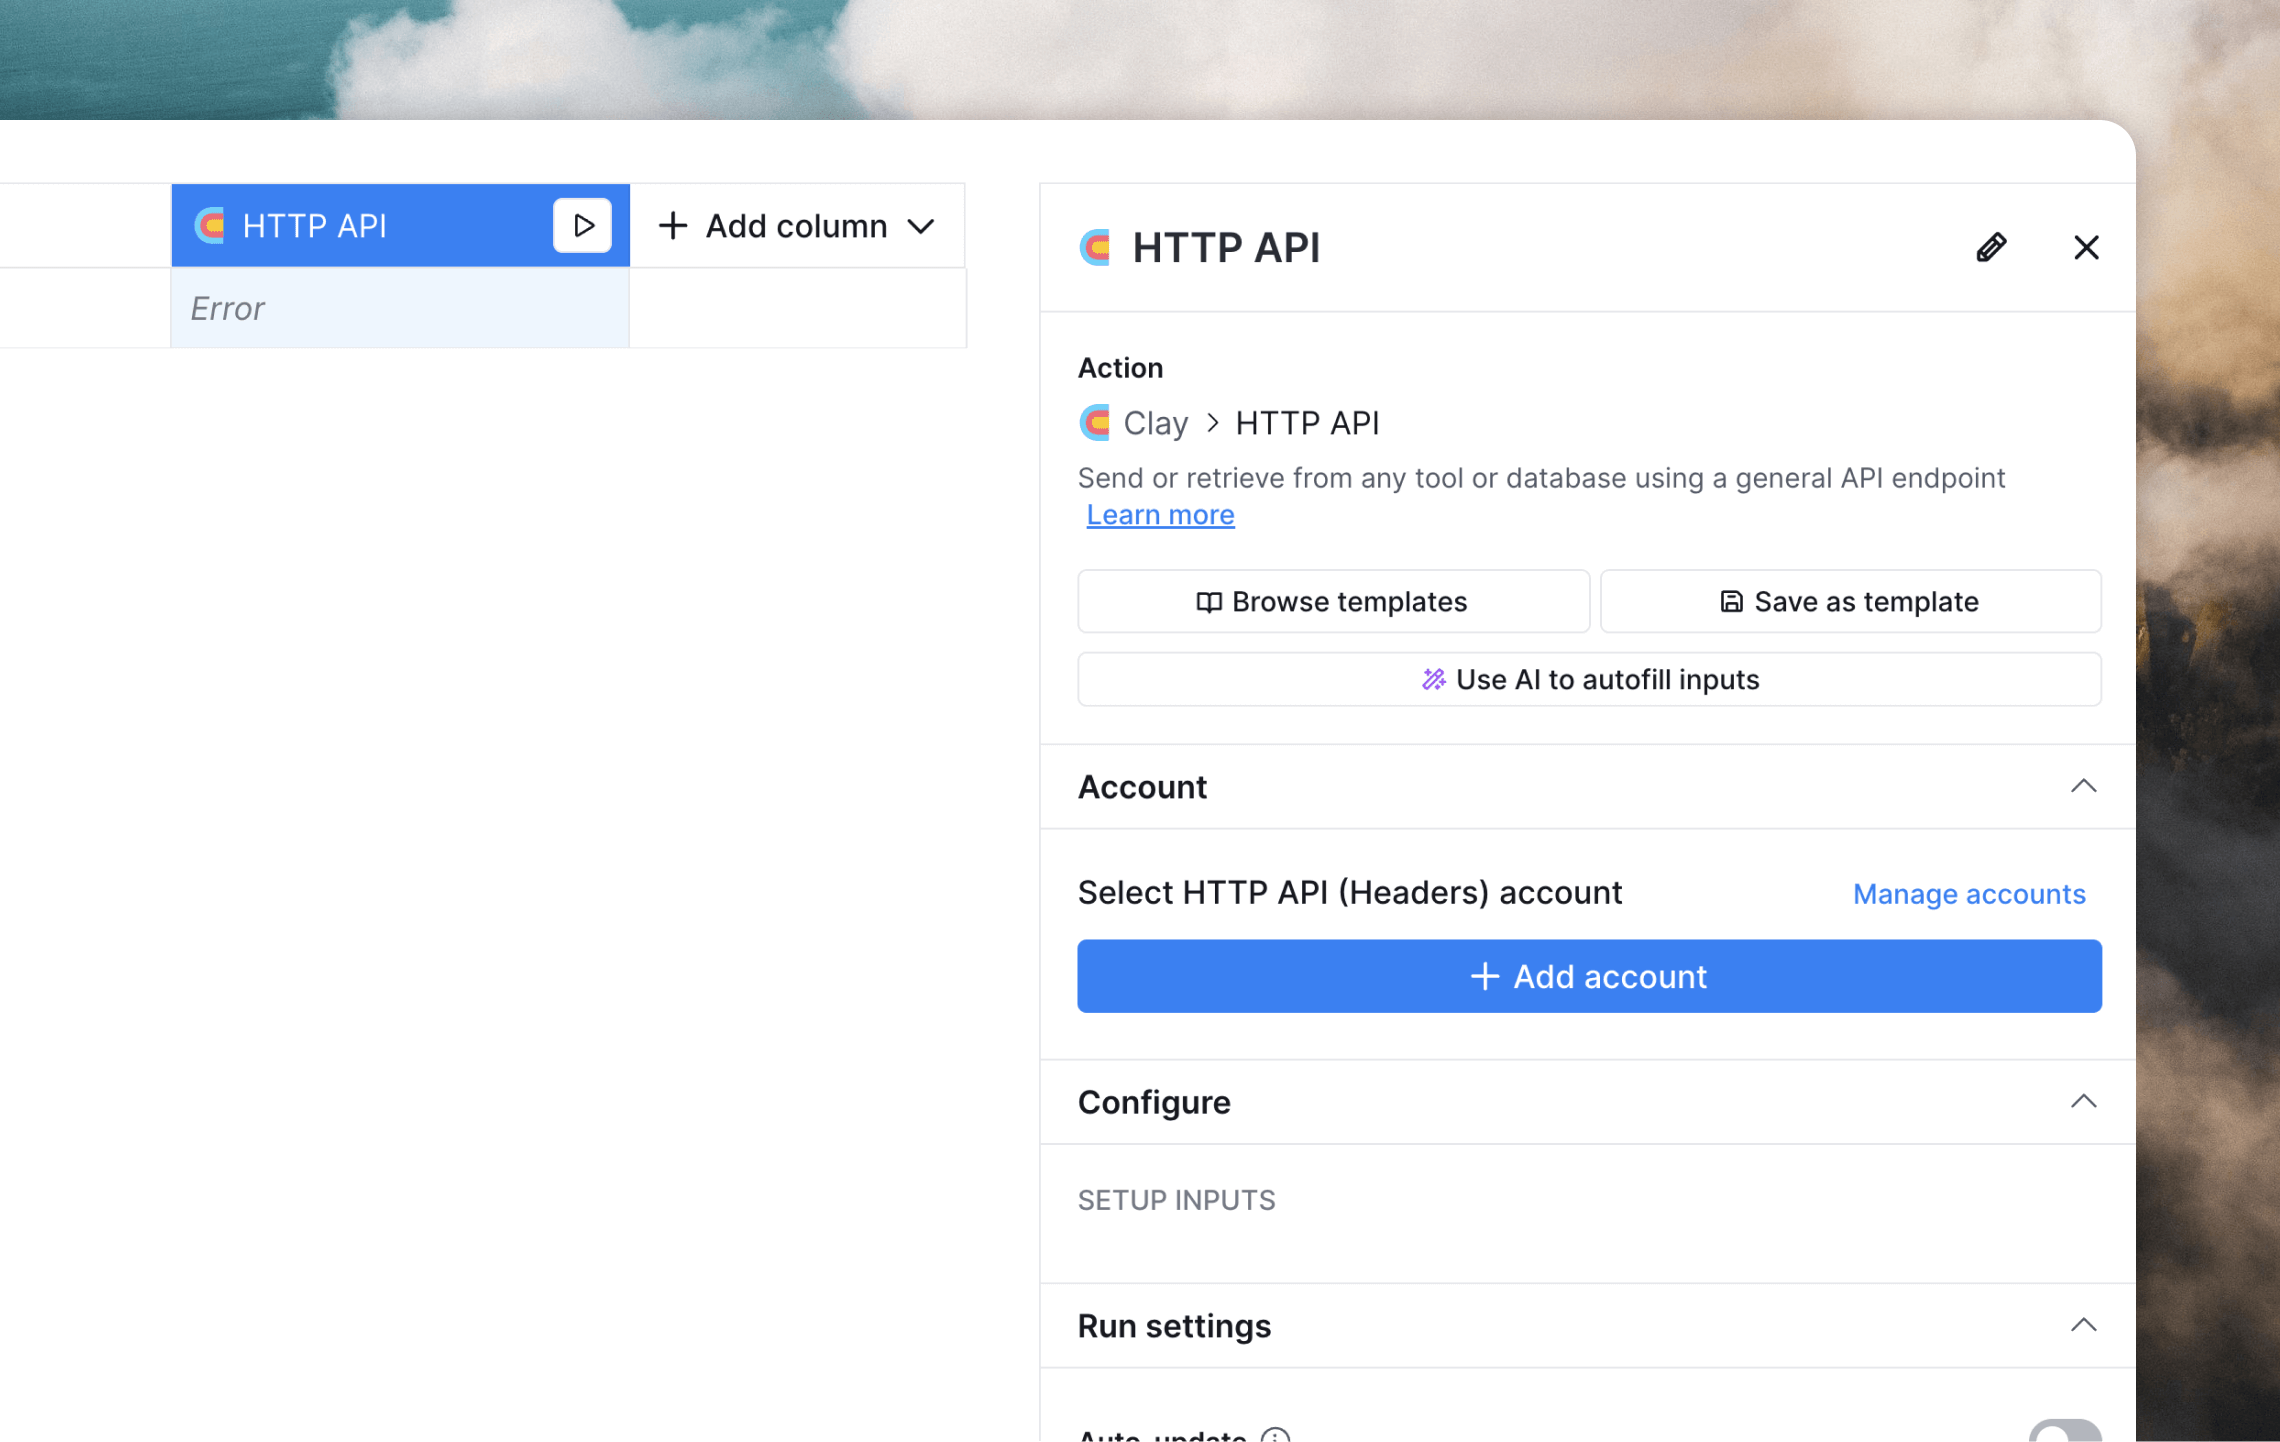
<api_key> with the key.
Click Save to create the connection.
Create an API request
We’re going to set up an “update contact” API request, which will create or update contacts in Loops. In the Configure section, select “PUT” from Method dropdown and enter the following URL into the Endpoint field:/ to add columns, and make sure to wrap values in quotes to create valid JSON data for the API.

Update contacts
Read the API documentation for updating contacts
Test the setup
To test the connection and request you created, click Save and then Save and run (x) rows in this view. If the sync succeeds, you’ll see the cell populate with “200”, which means a successful API request was made.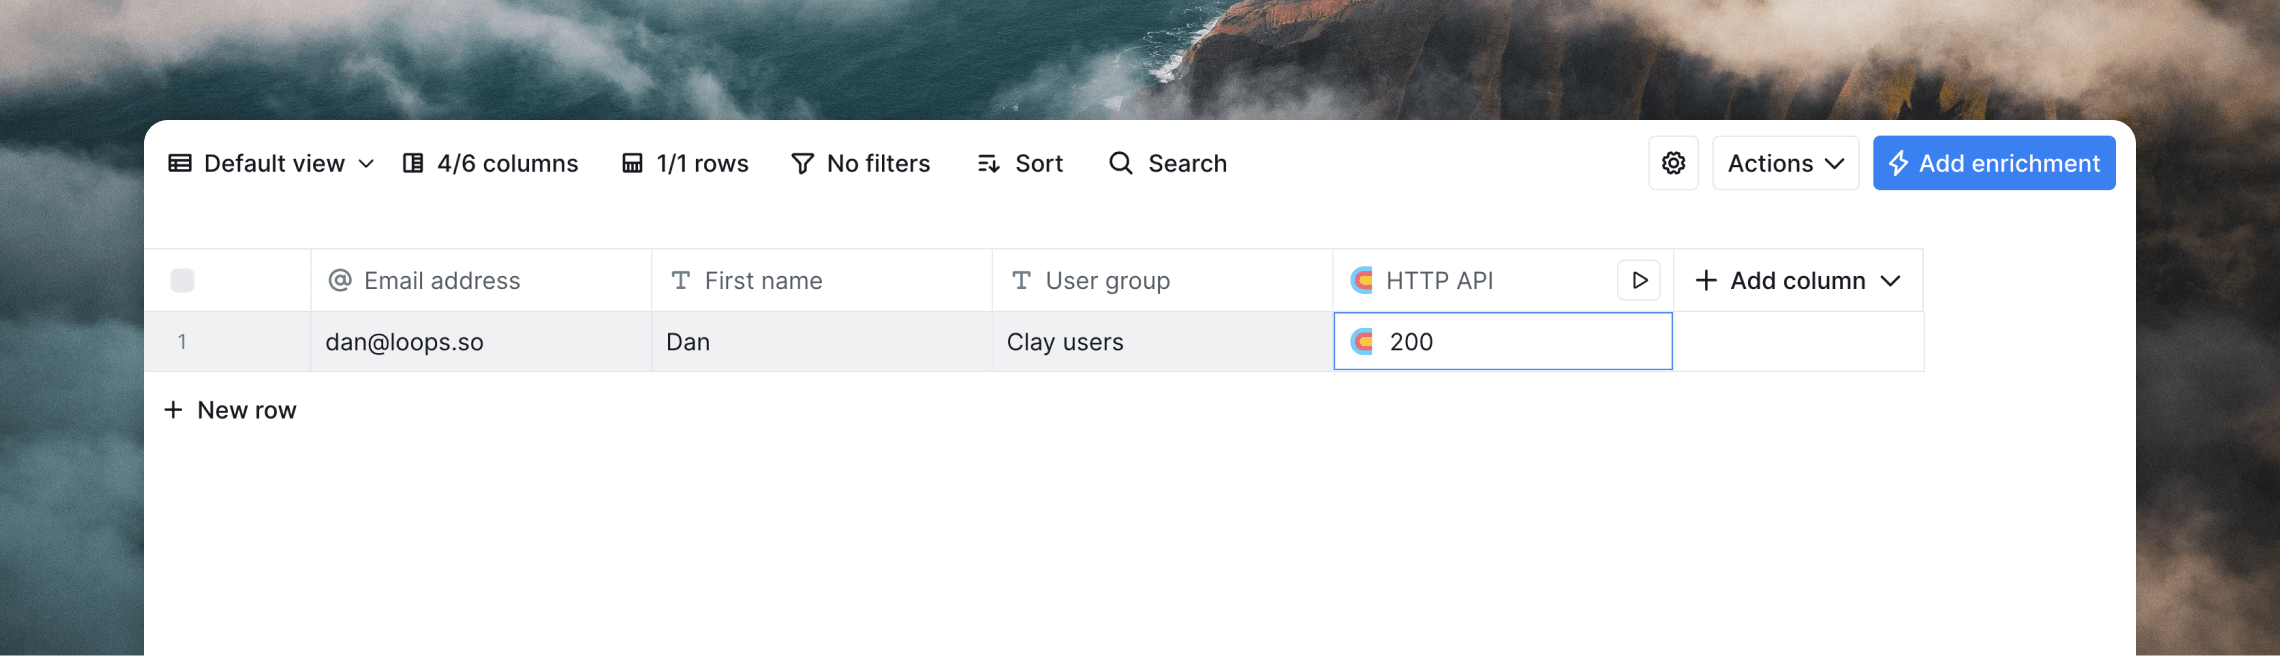
Send events from Clay
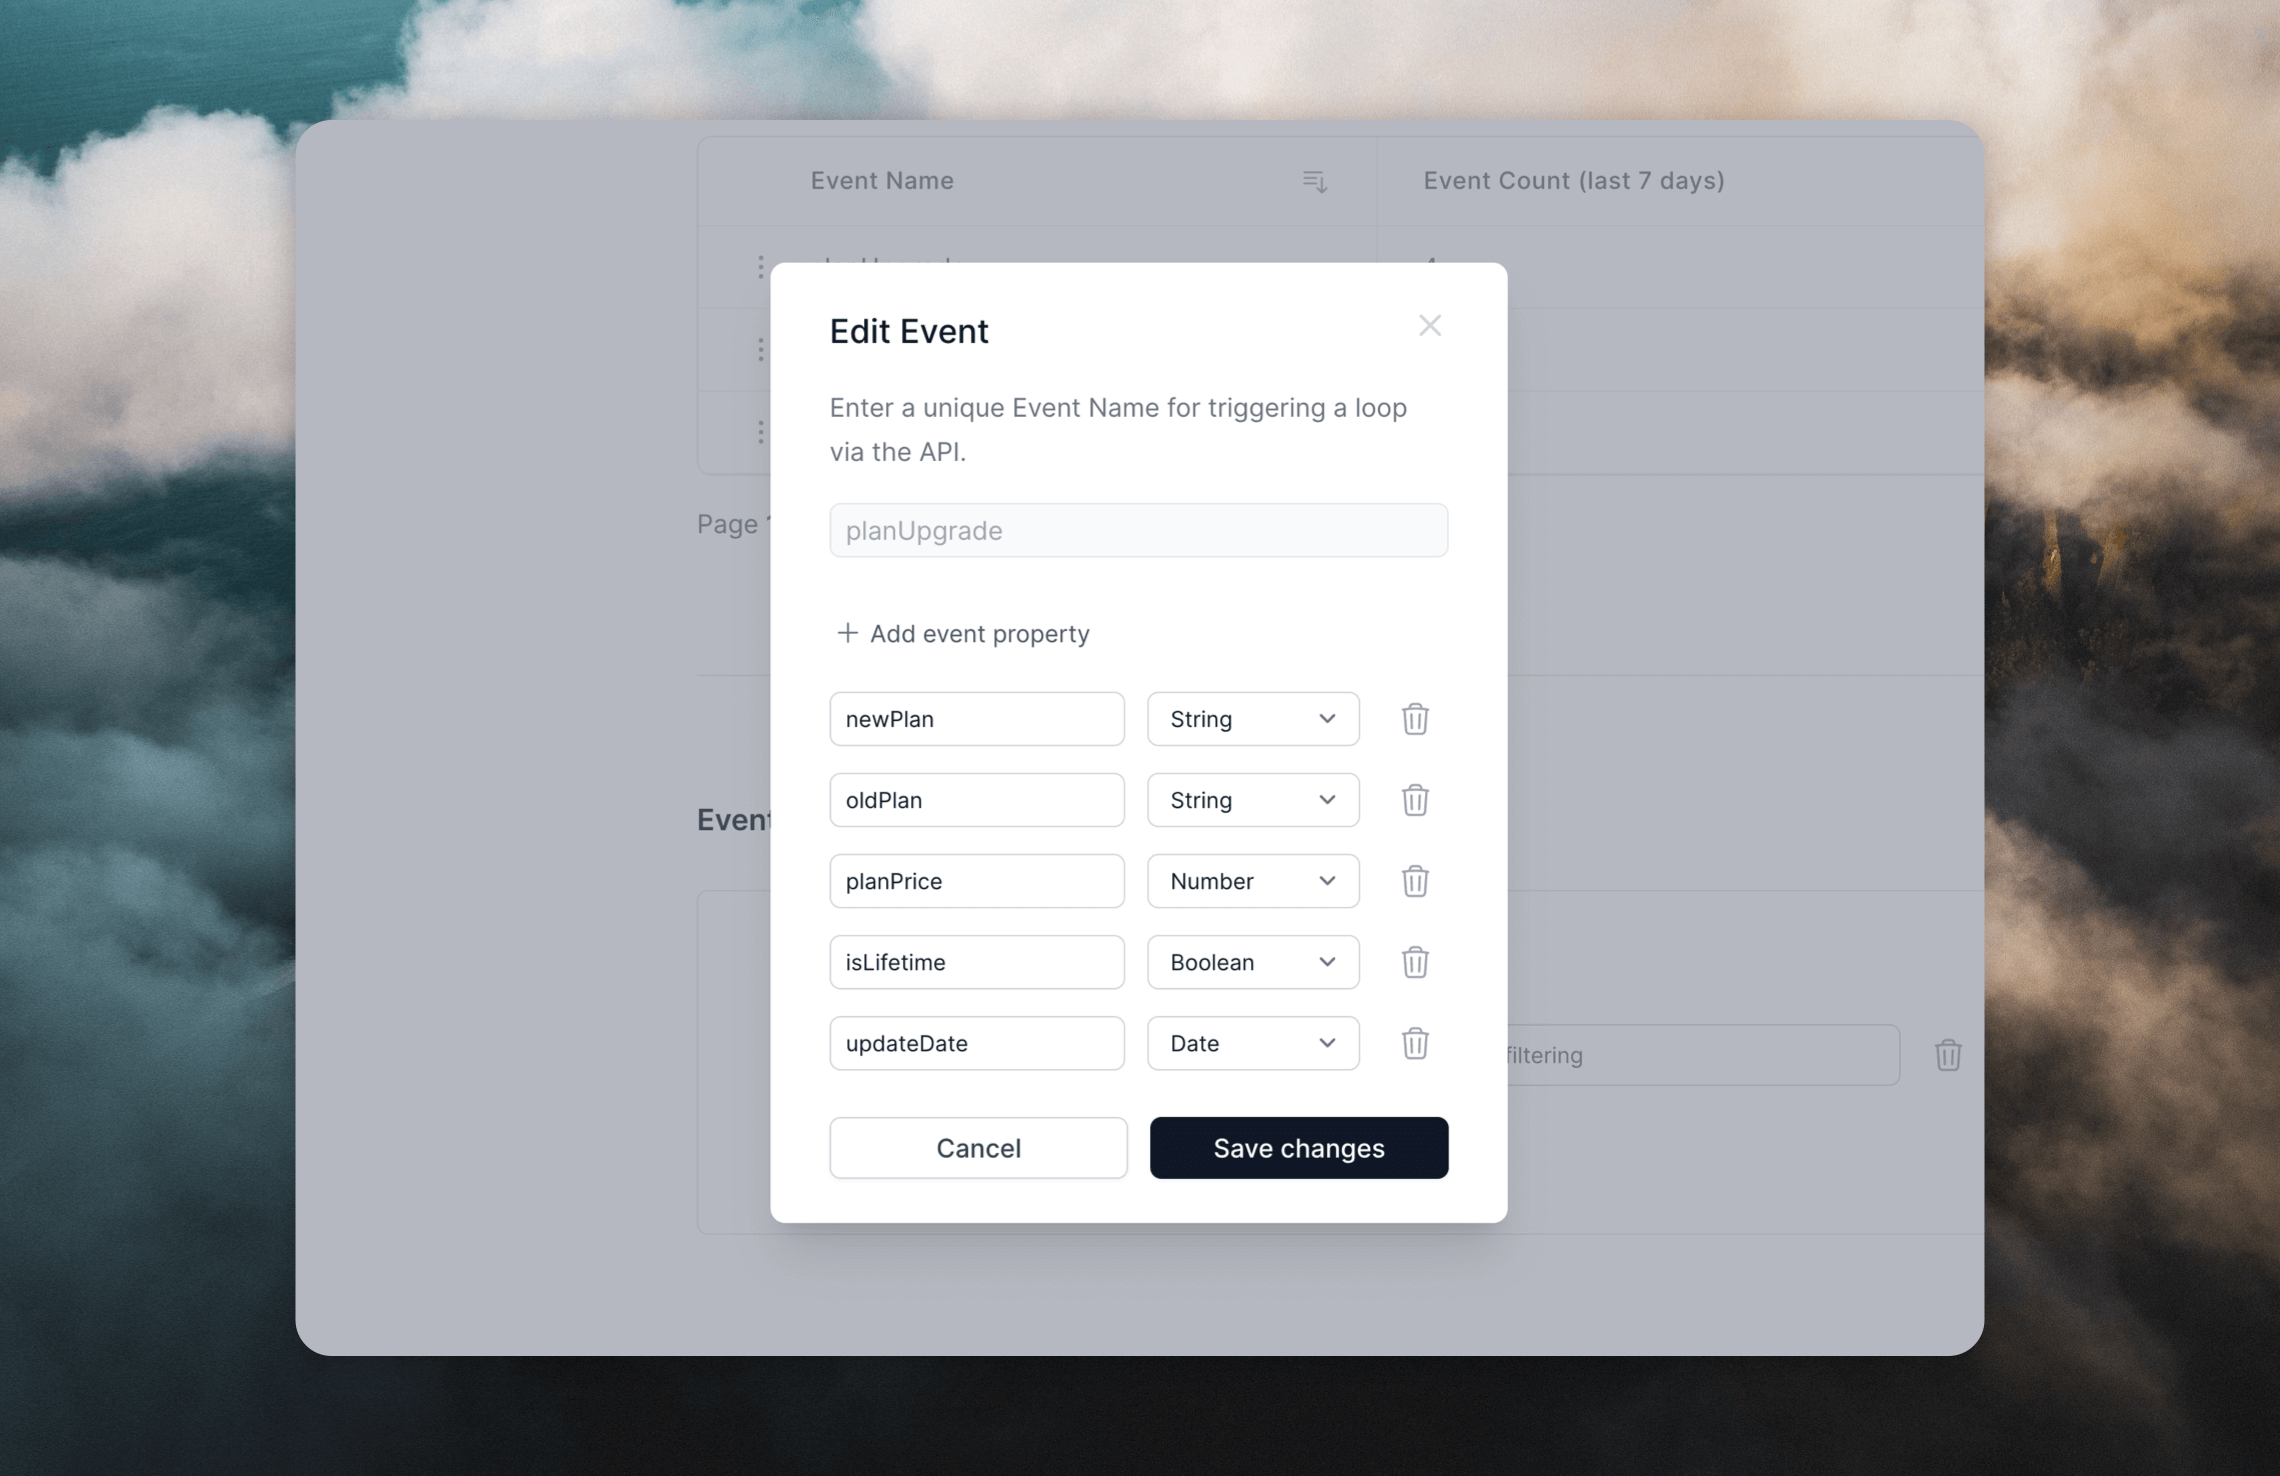
You can trigger workflows from inside Clay by sending events with the Loops API.Create an event and a workflow
An event allows you to start a workflow when something happens in an external platform (like Clay). Workflows can contain emails, timers, and filters.Events
Learn more about events
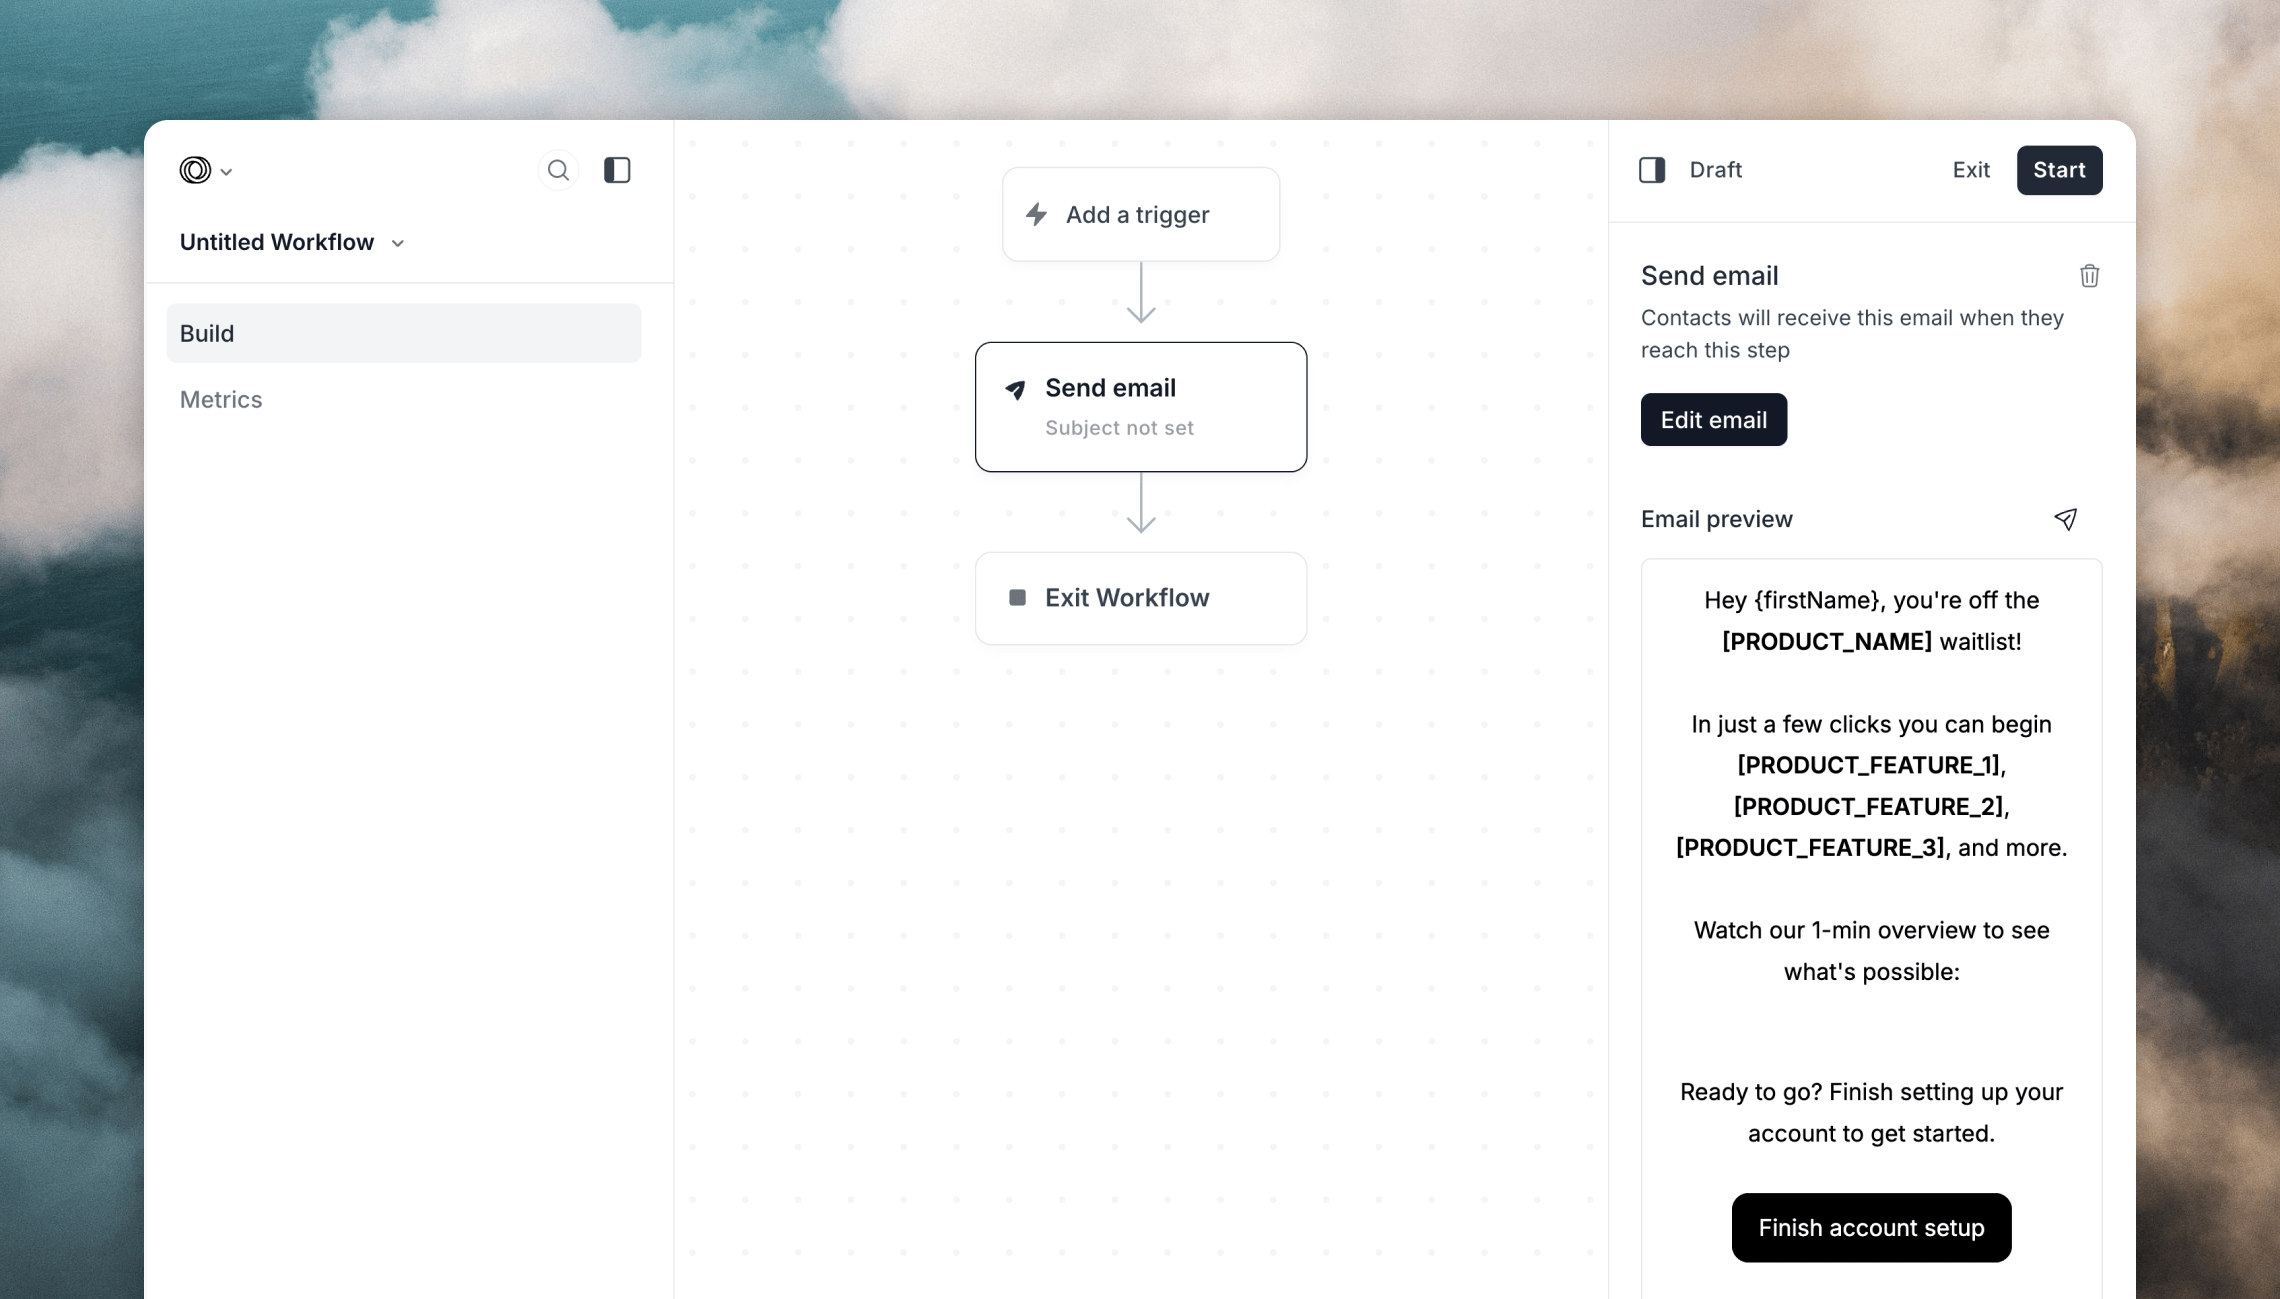
Workflows
Learn more about workflows
Create an API request
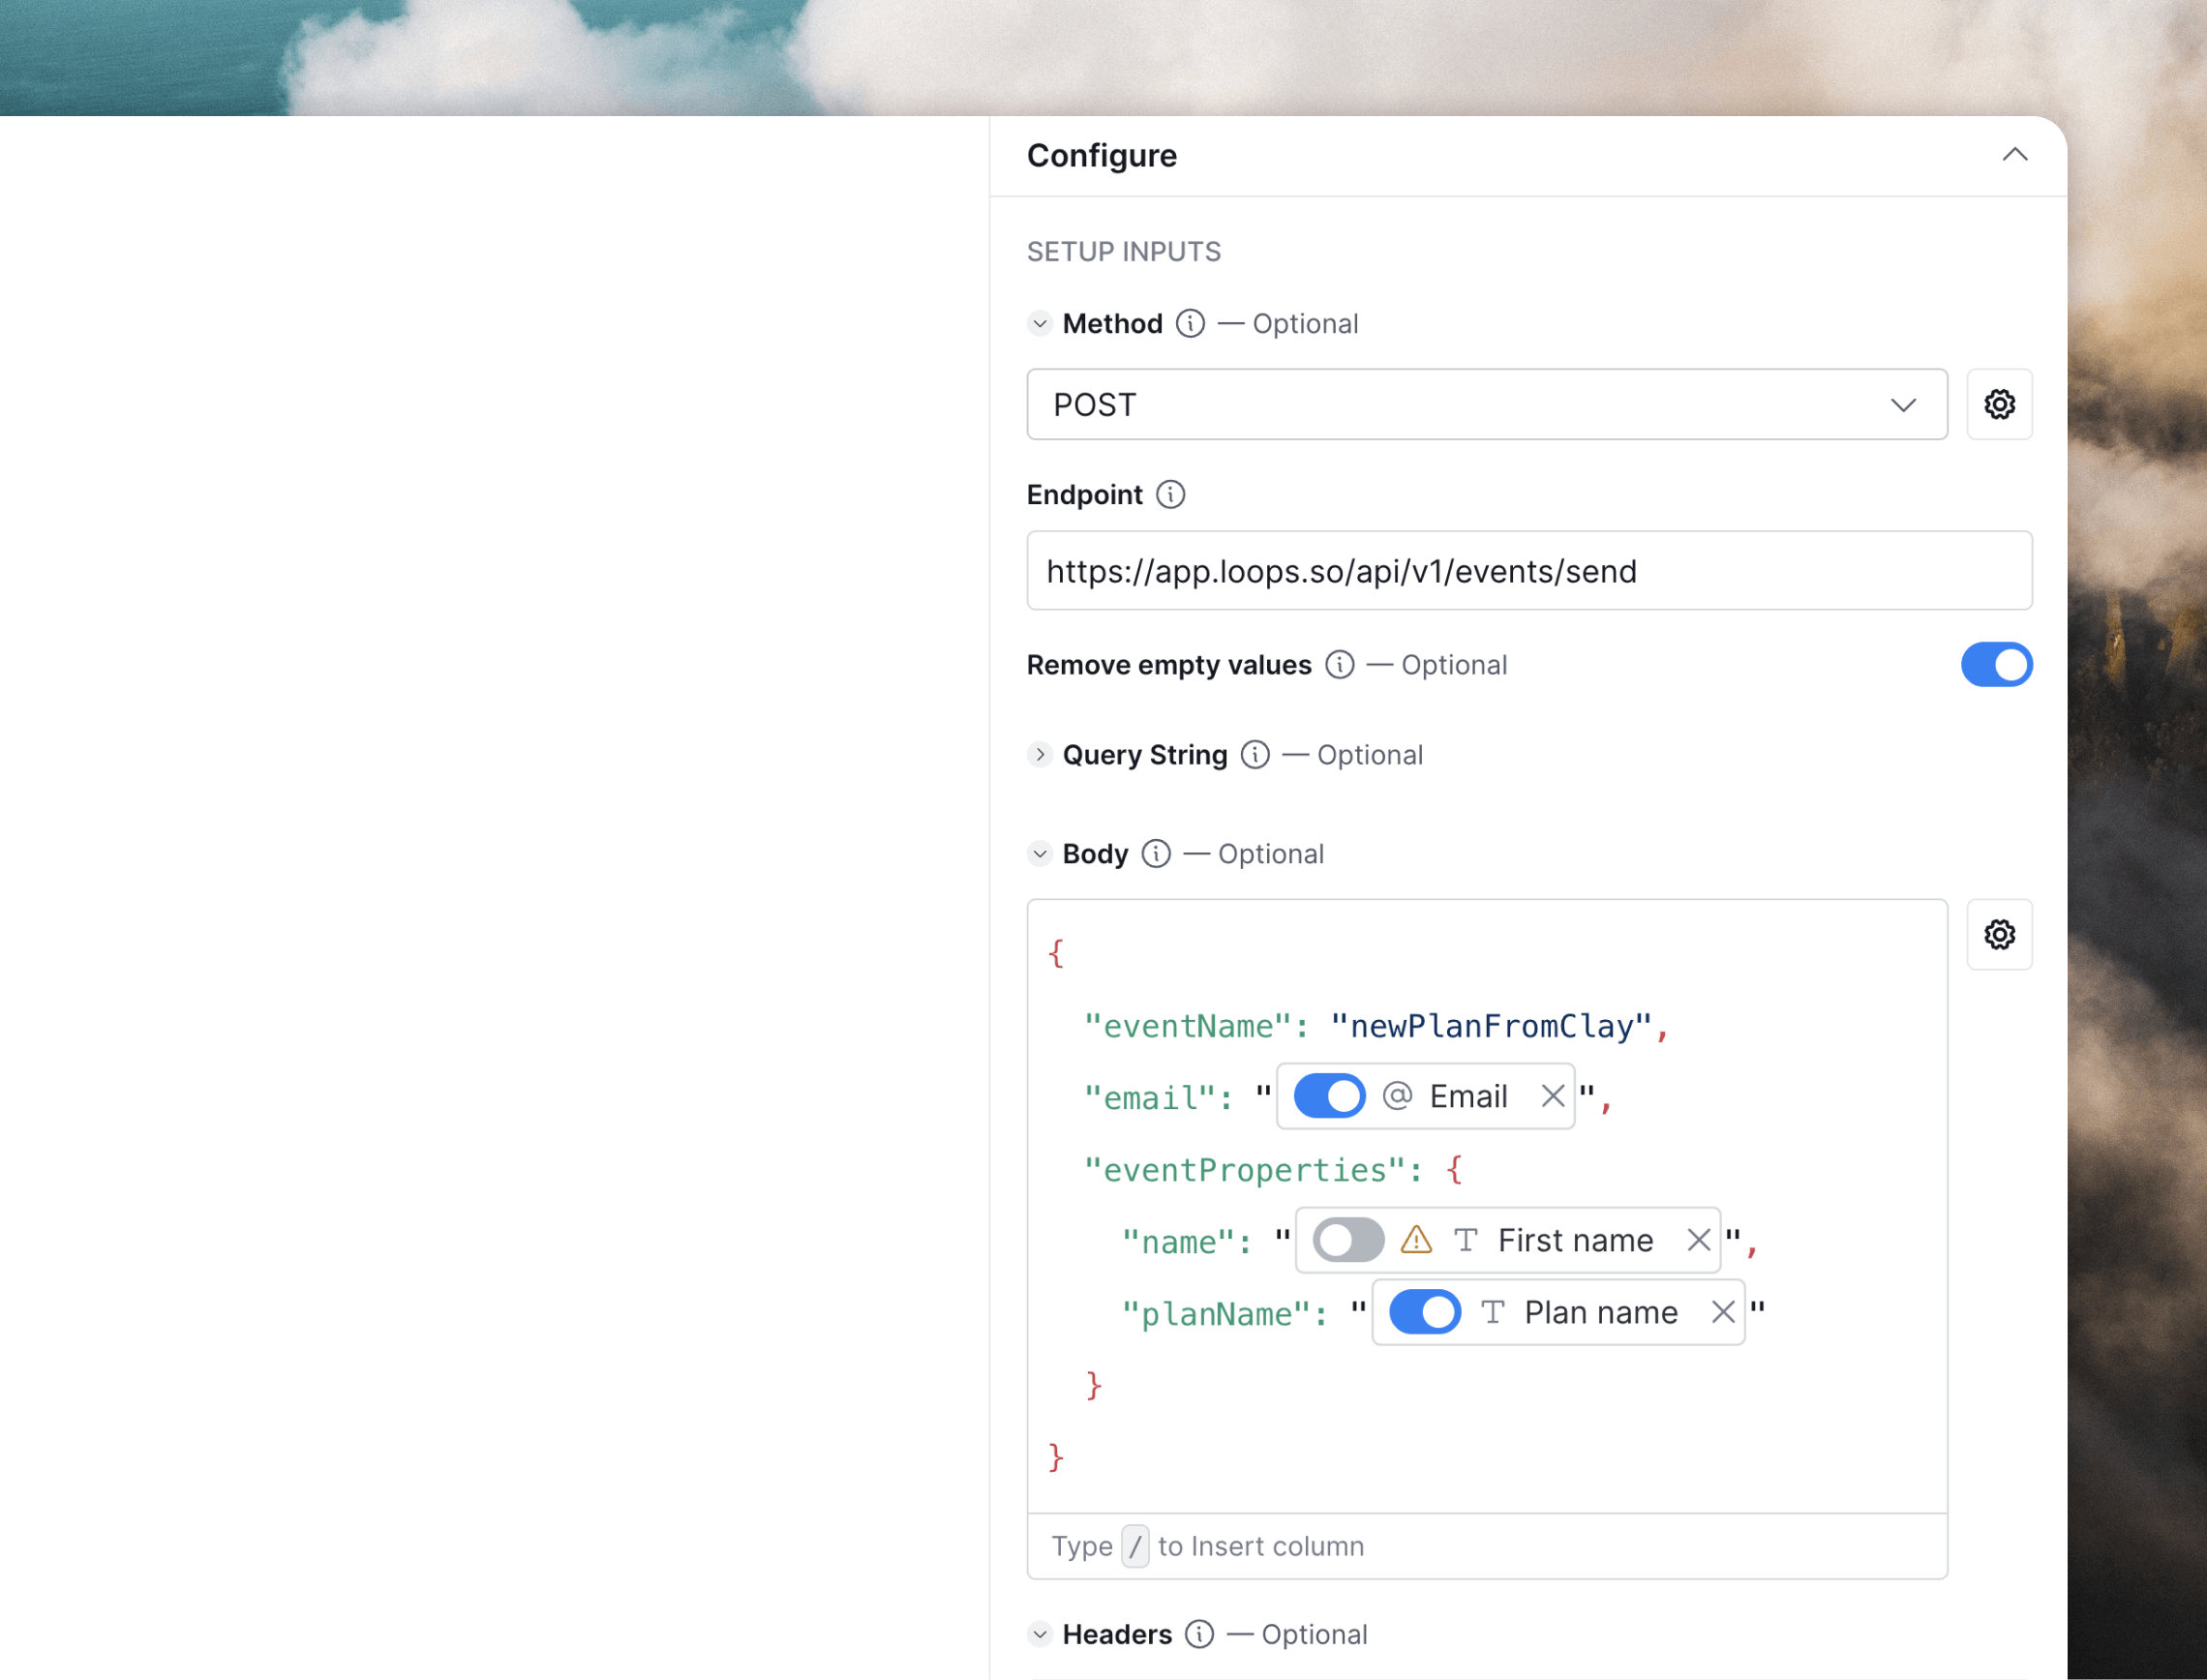
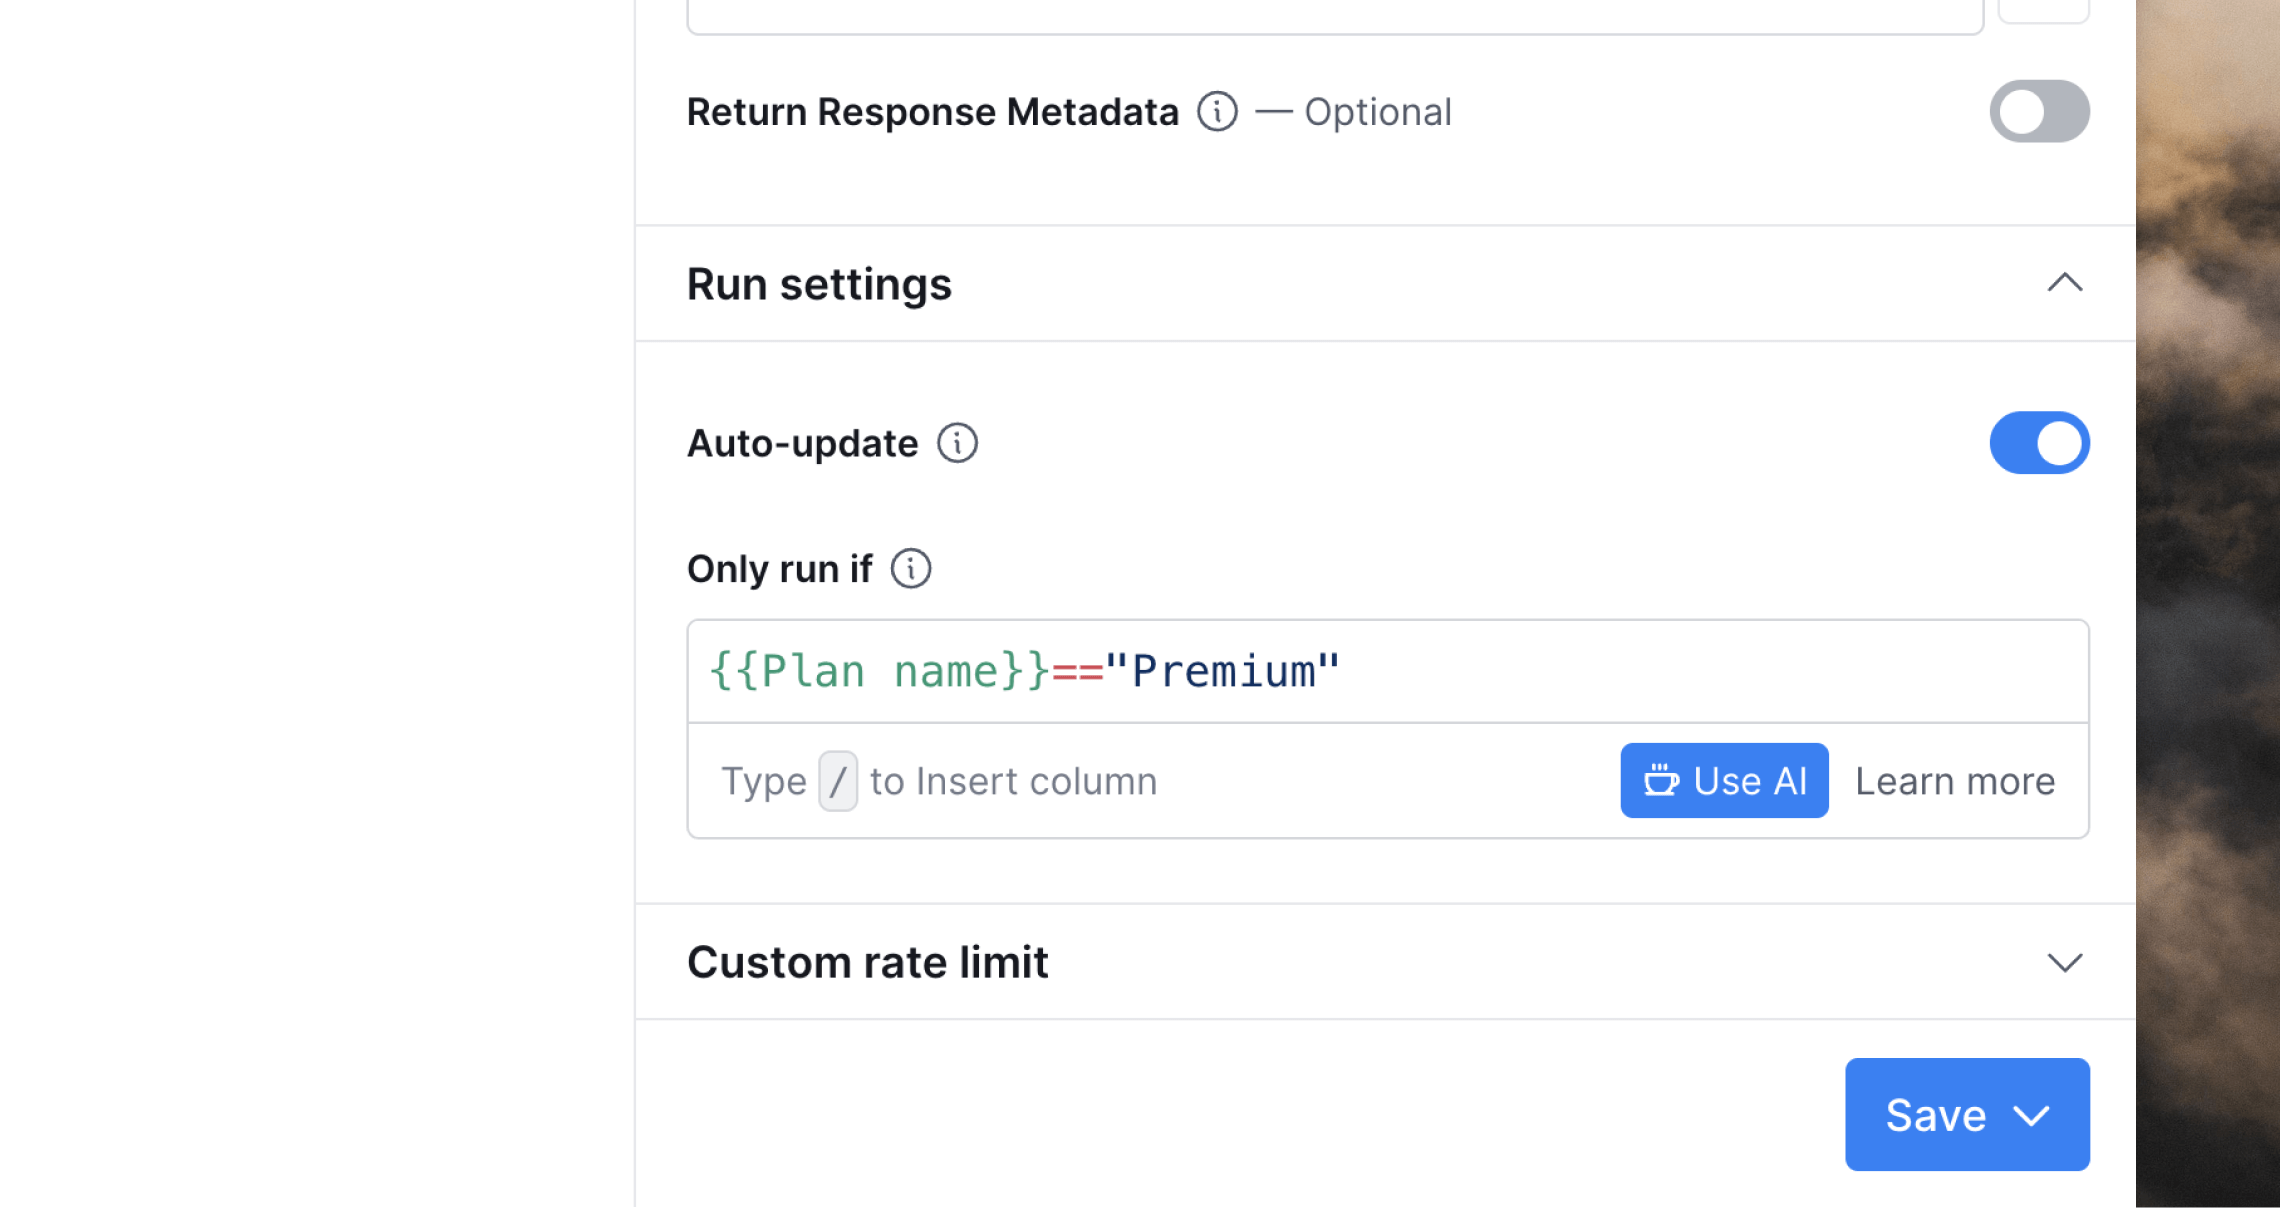
To send an event with the API from Clay, we need to make a request containing our event data. If you’ve added event properties to your emails, we need to include those in the request. Add a new enrichment to your table in Clay by selecting Add enrichment and searching for HTTP API as the data source. Then create or select an existing connection to the Loops API. Follow the steps outlined above. In the Configure section of your HTTP API enrichment, select “POST” from Method dropdown and enter the following URL into the Endpoint field:/ to add columns, and make sure to wrap values in quotes to create valid JSON data for the API.
Send event
Read the API documentation for sending events