Incoming webhooks allow you to:
- Create and update contacts
- Send events to trigger workflows
How it works
External platforms send webhook events to Loops and Loops processes them to create and update contacts and trigger workflows. For some platforms, you will need to manually create a webhook in the external platform, and for some it can be done via a simpler OAuth flow. Note: we only process specific webhook events listed for each provider (and which contain an email address). We return helpful messages in responses if there is an issue processing a webhook event. Check the webhook logs in your external platforms for more details. For each type of webhook event, you can sync customer data like names and assign user groups, as well as trigger workflows via events.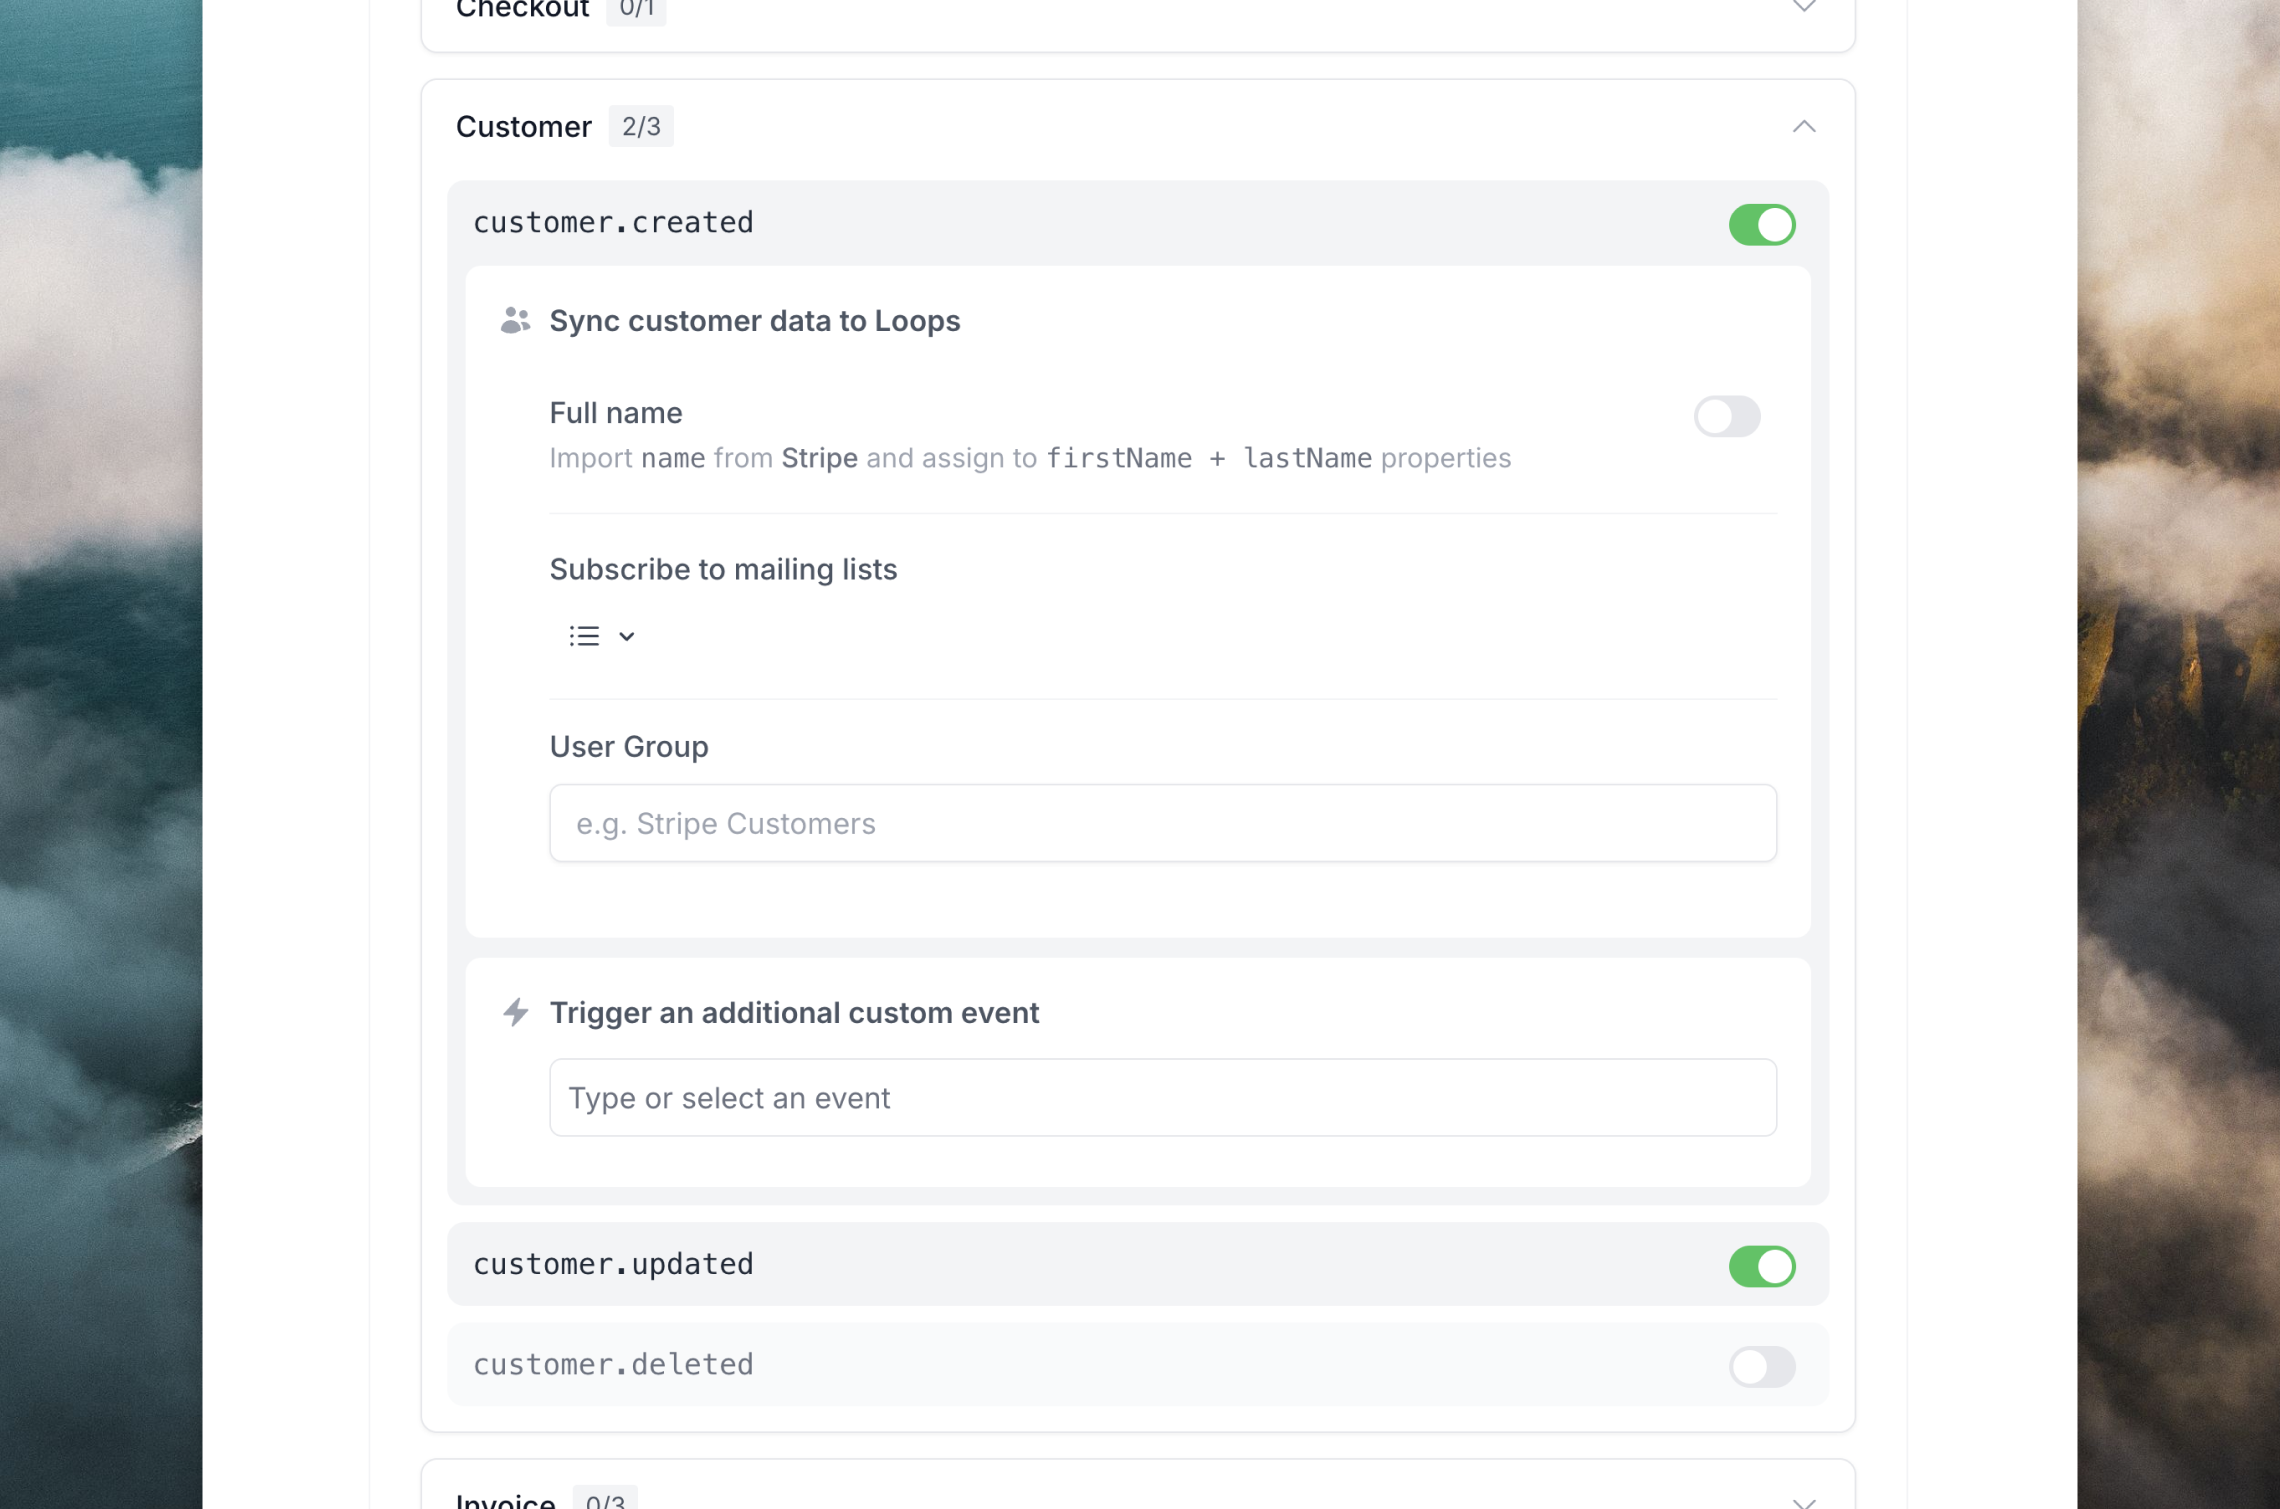
Syncing contacts
The primary use case for incoming webhooks is to create and update contacts in your Loops audience. When data arrives in Loops, we grab the email address to create and update contacts in your Loops audience. To this end, we only support incoming events that contain an email address. You can choose to update first and last name data from the webhook event as well. Additionally, you can assign a user group value to each new contact, which helps create segments from webhook-created contacts. Any new contact created via a webhook will have a source like “Stripe webhook” so you know where it originated from. For events that reference record deletion, like Stripe’scustomer.deleted event, you can choose to unsubscribe or delete contacts in Loops.
Subscribing to mailing lists
You can subscribe contacts to mailing lists when they are created or updated via a webhook.Sending emails
Incoming webhooks can trigger emails if you connect events to workflow triggers. This can be useful if you want to automatically send emails when something has happened in the external platform, for example a successful payment in Stripe or a new sign up in Clerk. Just create a workflow using the Event received trigger and select the event you want to trigger on.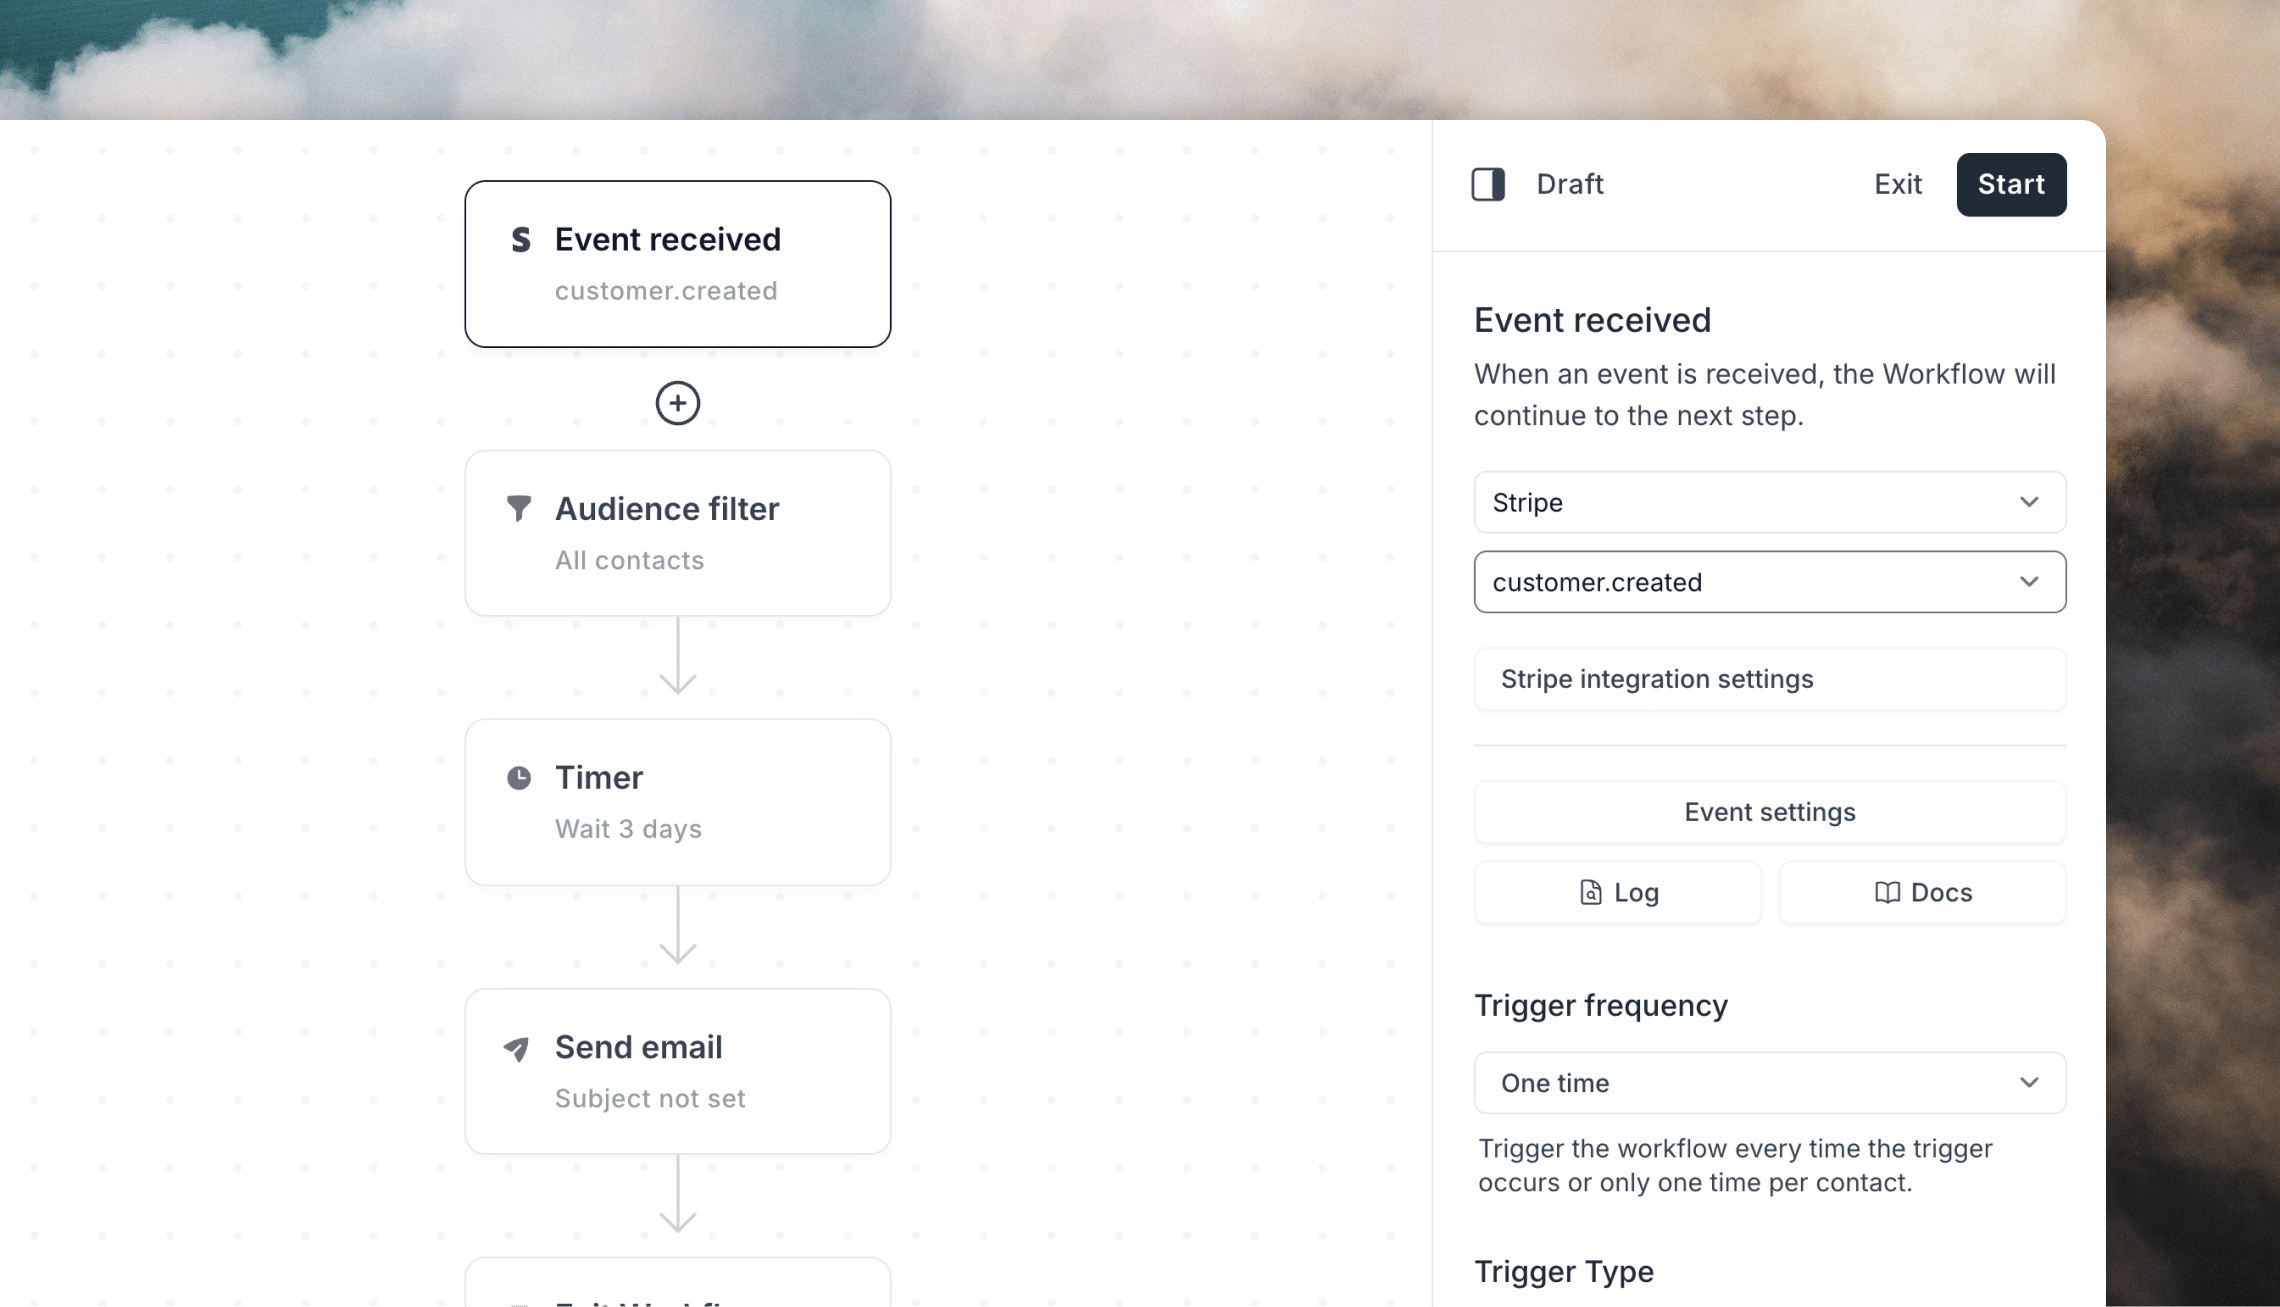
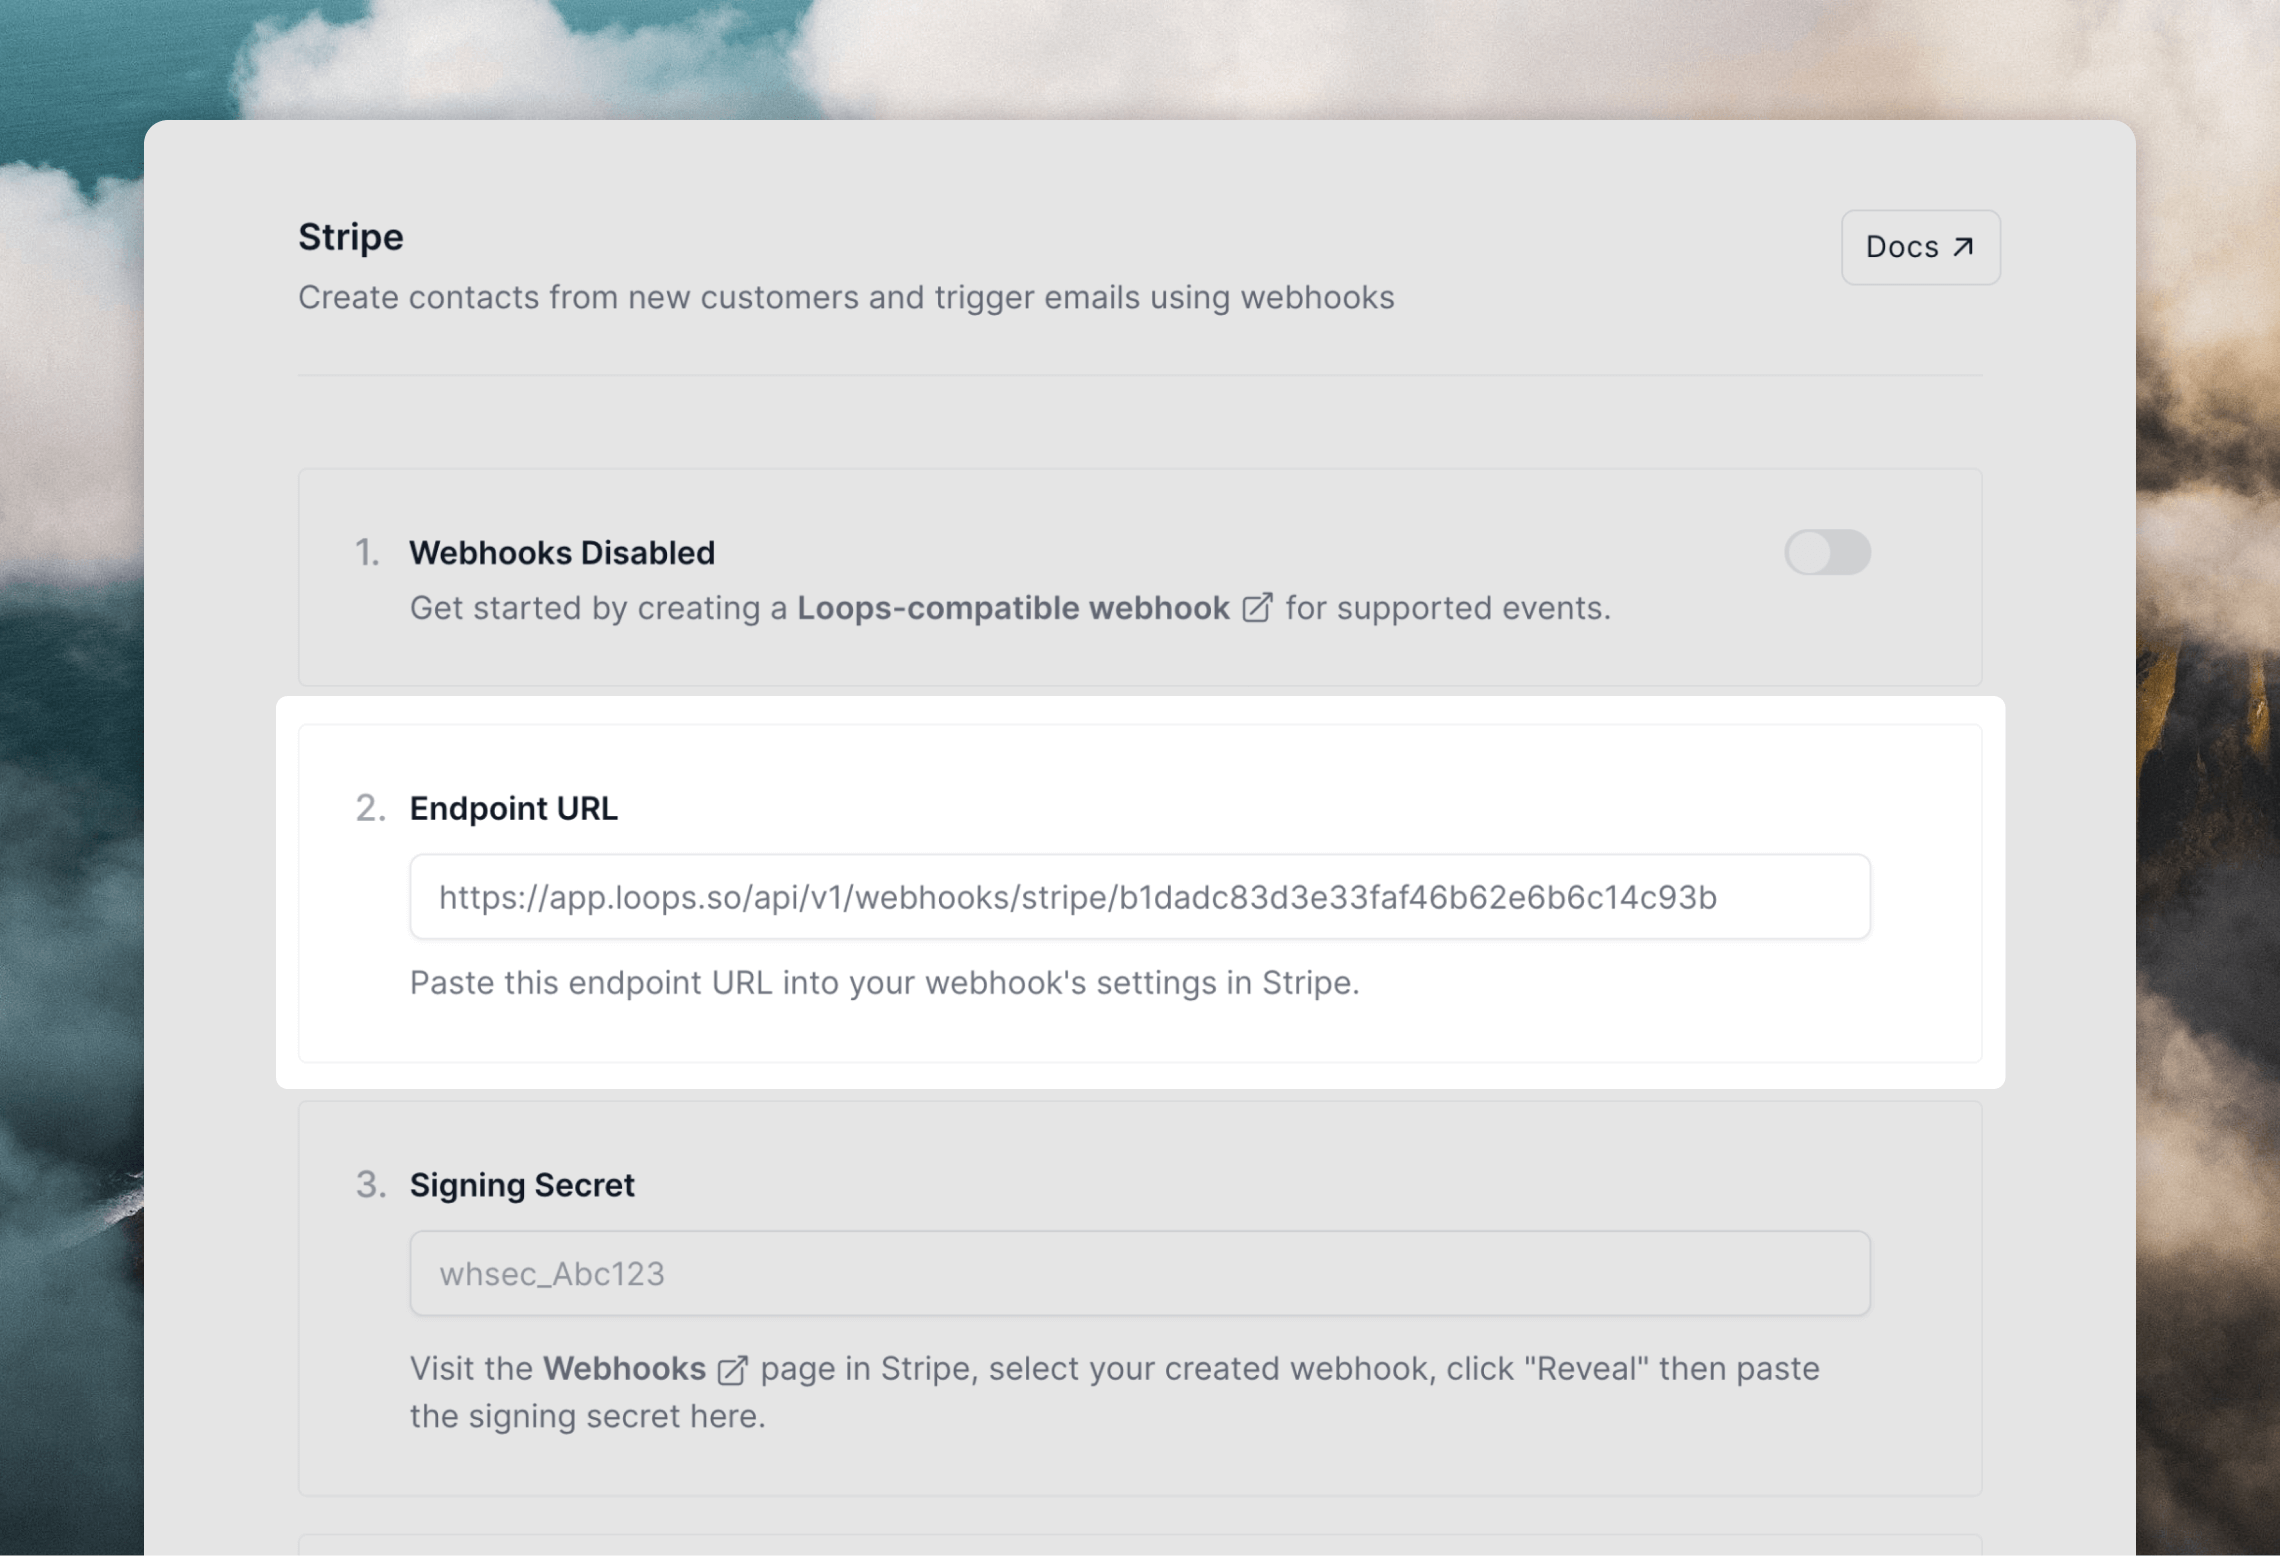
Set up incoming webhooks
To start sending webhook events to Loops, go to your chosen integration’s settings page in Loops.Stripe
For Stripe, install the Loops app, which lets you skip the creation of webhooks as it’s handled for you. Everything is set up for you automatically. Click the Connect to Stripe button to install the Loops app.Polar
For Polar, sign in to Polar by clicking the Sign in to Polar button. This will create a new webhook endpoint in Polar so there is no manual set up required. Select the Polar organisation you want to connect to. You will be redirected back to Loops when you are done.Clerk and Supabase
A webhook endpoint will be created for you. Copy the endpoint URL and paste it into your external platform.