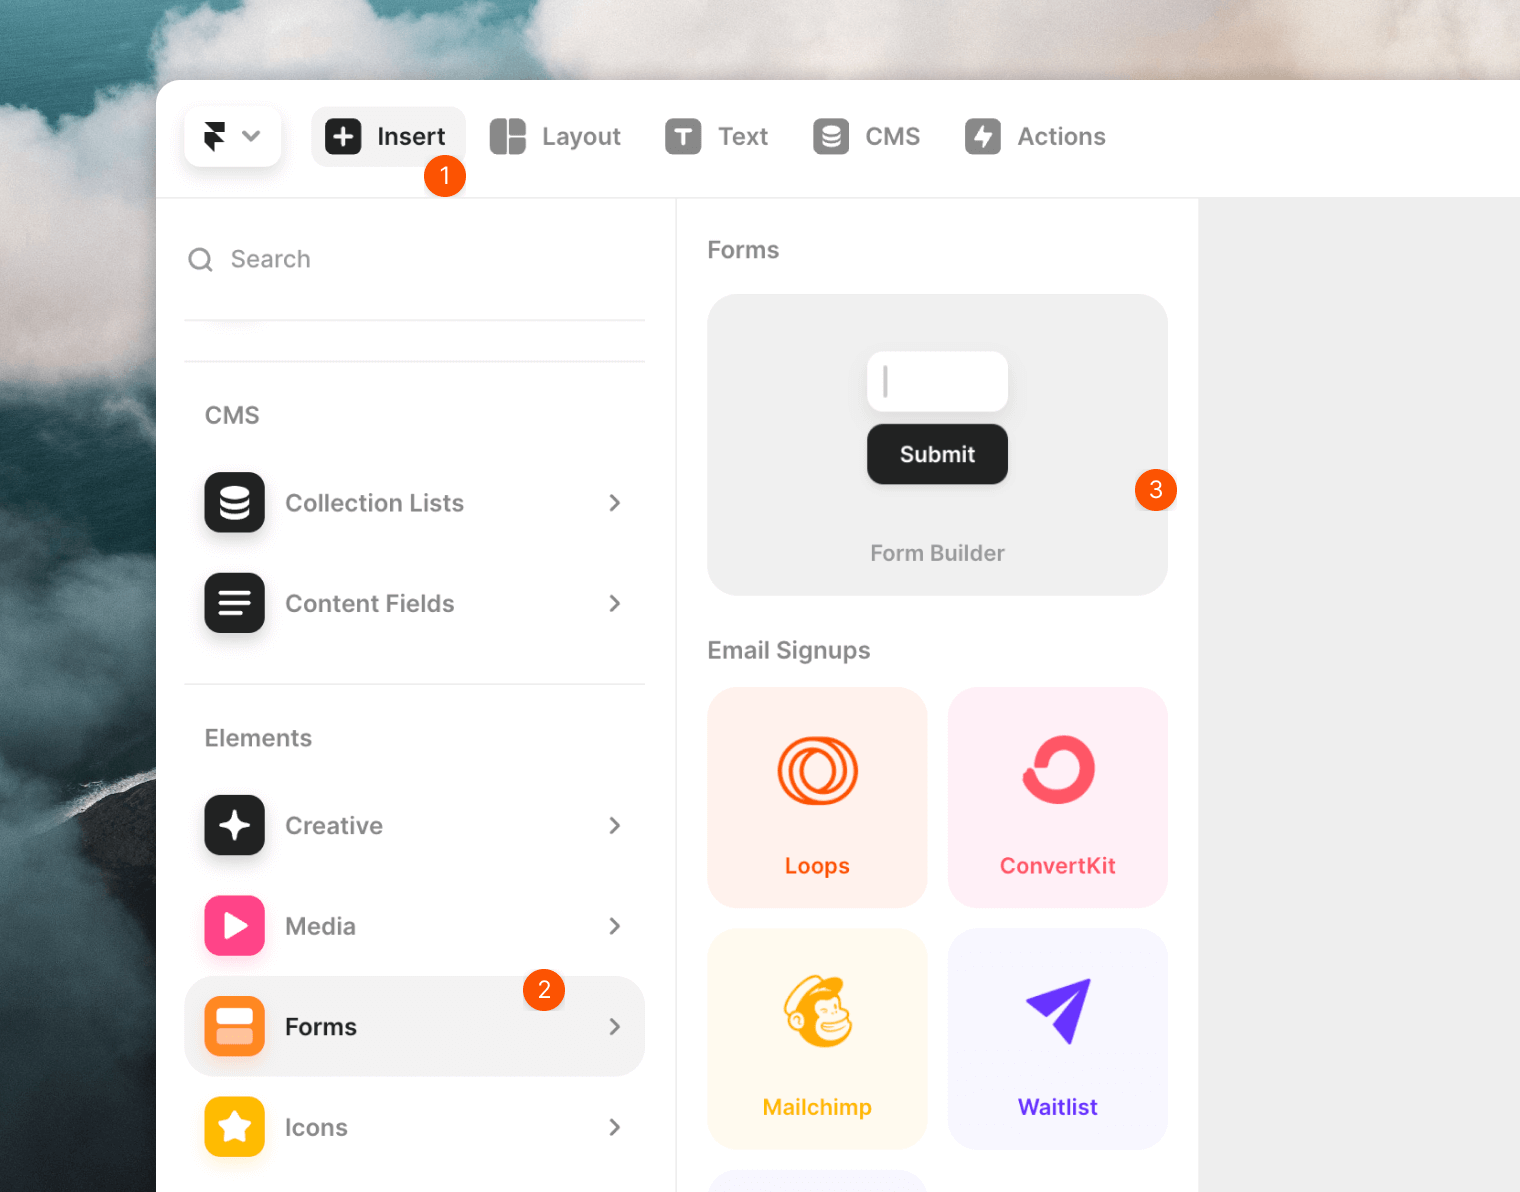
Collect new subscribers from your Framer site. There are a few ways to set this up.
- Framer Form component
This uses the native Form component in Framer and gives good flexibility for extra form fields.
- Framer Loops component
This simplest method. A simple drop-in form with an email address input.
- Custom component with code
The most flexible but complex option, using custom code.
Our form submission endpoint has rate limiting, so you will see an error in
testing if you submit more than once per minute or submit the same email
twice.
 Edit the fields in the form to match the data you want to collect from new subscribers.
An email field is required. Make sure to toggle the Required option to Yes for your email field.
You need to edit the Name value of each field to match the contact properties’ “API name” in Loops.
For example, the Name value must be “email” for the email address field.
Edit the fields in the form to match the data you want to collect from new subscribers.
An email field is required. Make sure to toggle the Required option to Yes for your email field.
You need to edit the Name value of each field to match the contact properties’ “API name” in Loops.
For example, the Name value must be “email” for the email address field.
 You can add hidden fields to populate data like
 mailingLists, userGroup and source in Loops yet ensure they don’t show up in the form.
You may have to click the + button to show the Value and Hidden options.
To add subscribers to specific mailing lists, add a
field with Name mailingLists. The Value can be a single mailing list
ID or a comma-separated list of IDs. Mailing lists need to be marked Public in your Lists
settings in order for them to work
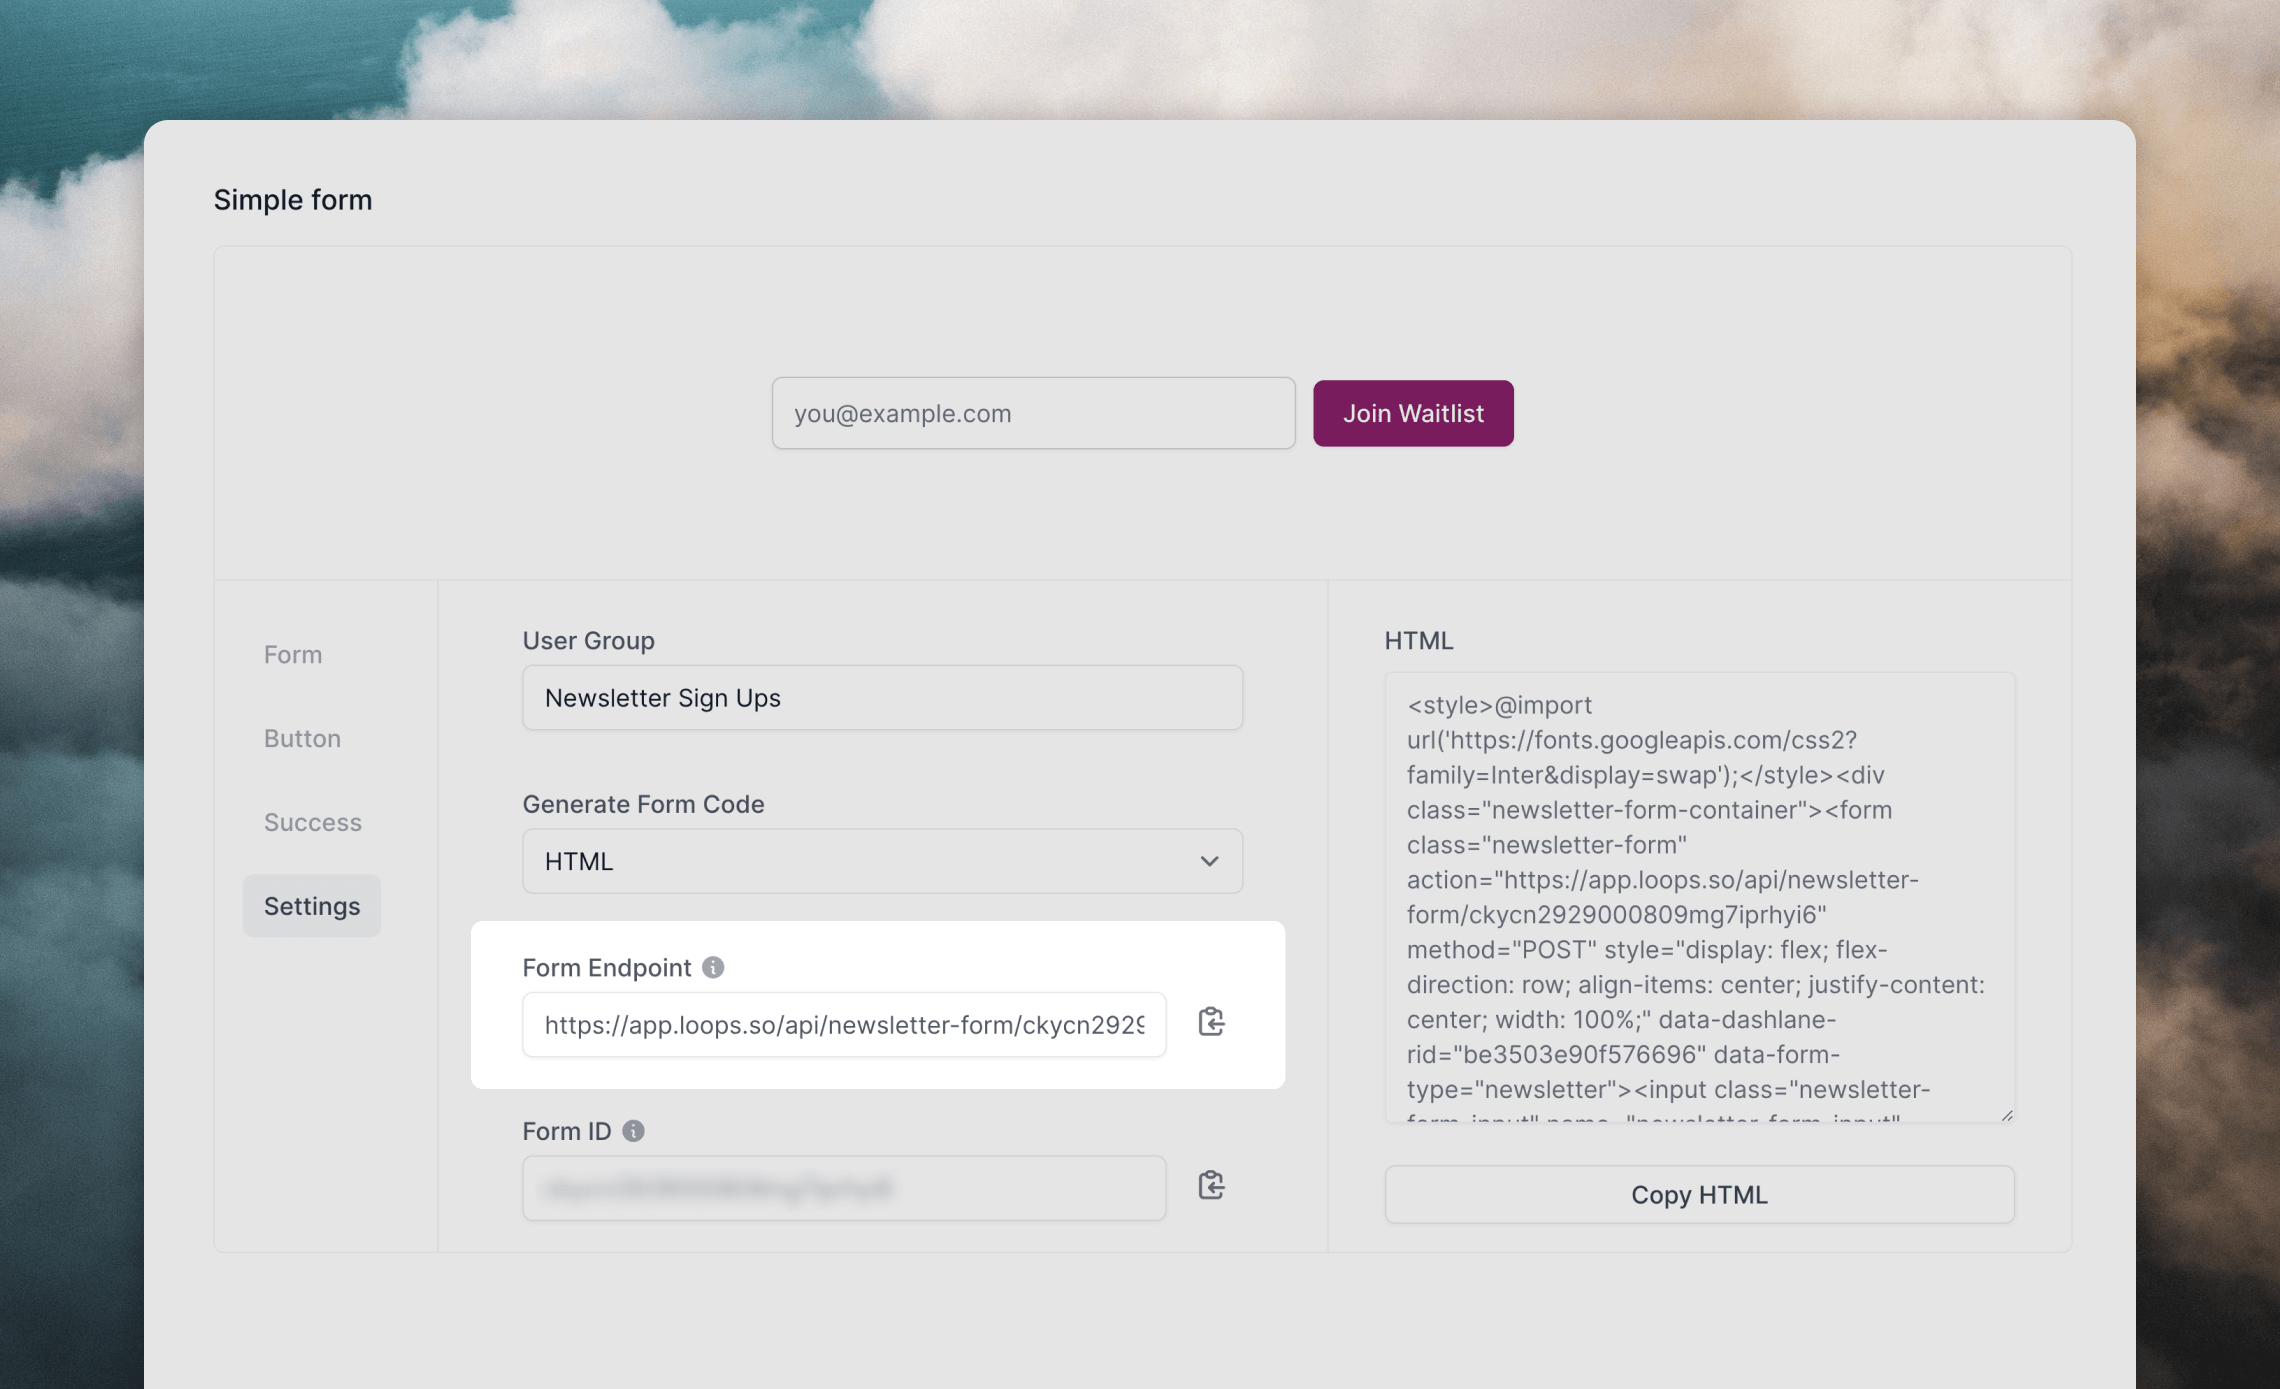
in forms. 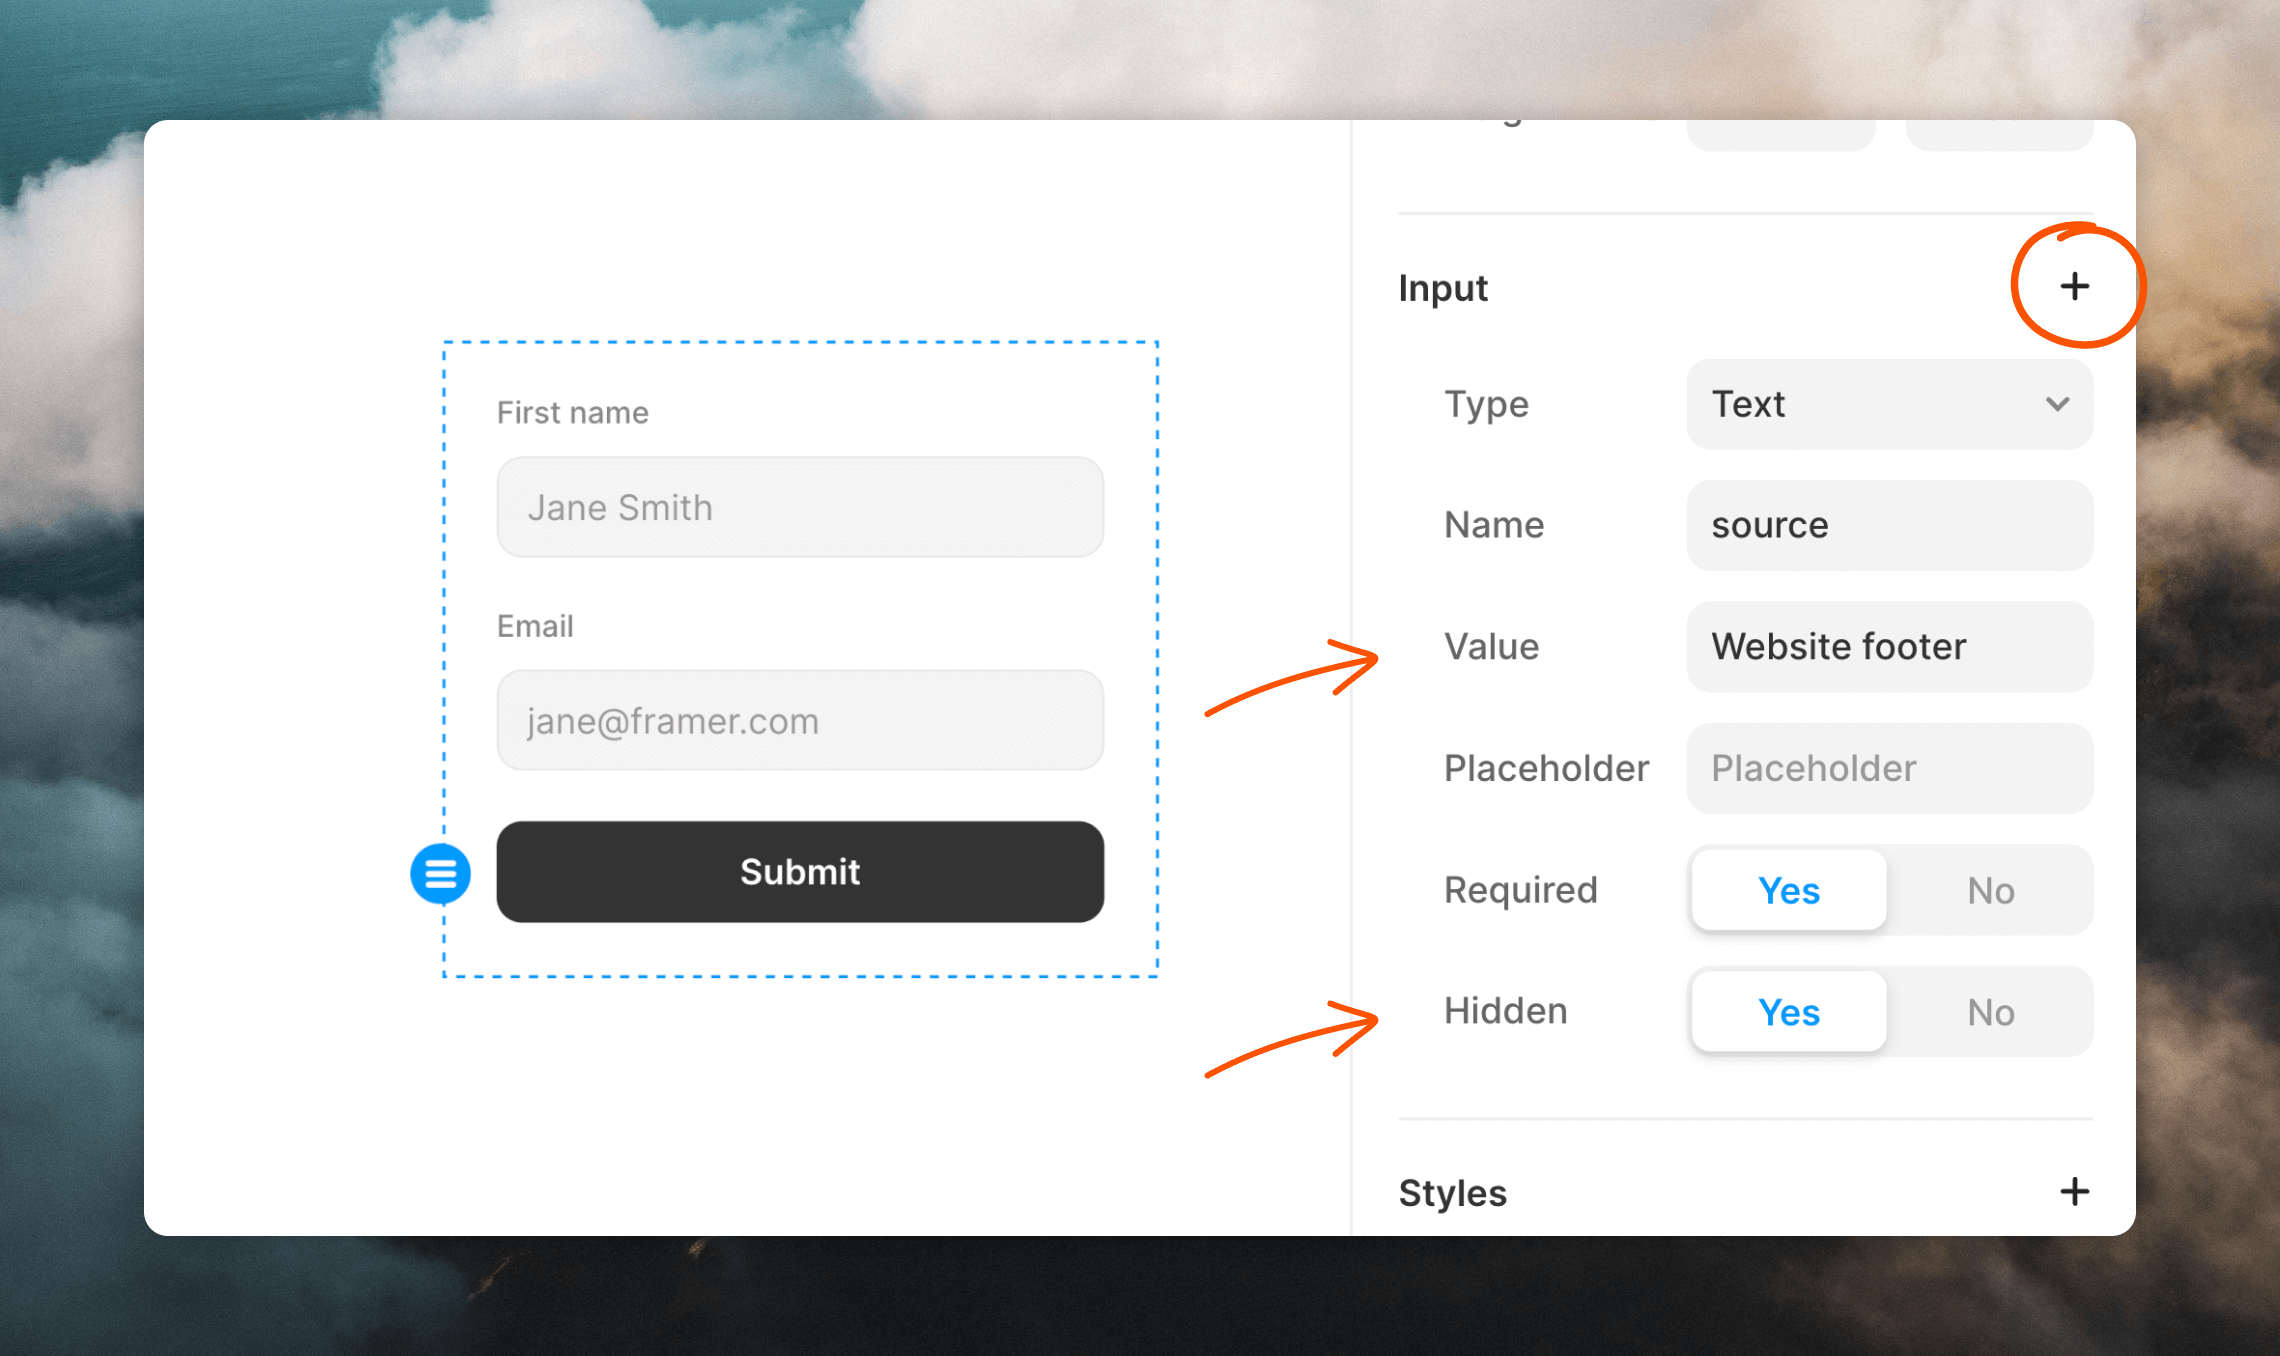 The final step is to set the endpoint to your Loops form URL.
- Go to the Forms page in your Loops account.
- Click on the Settings tab.
- Copy the Form Endpoint.
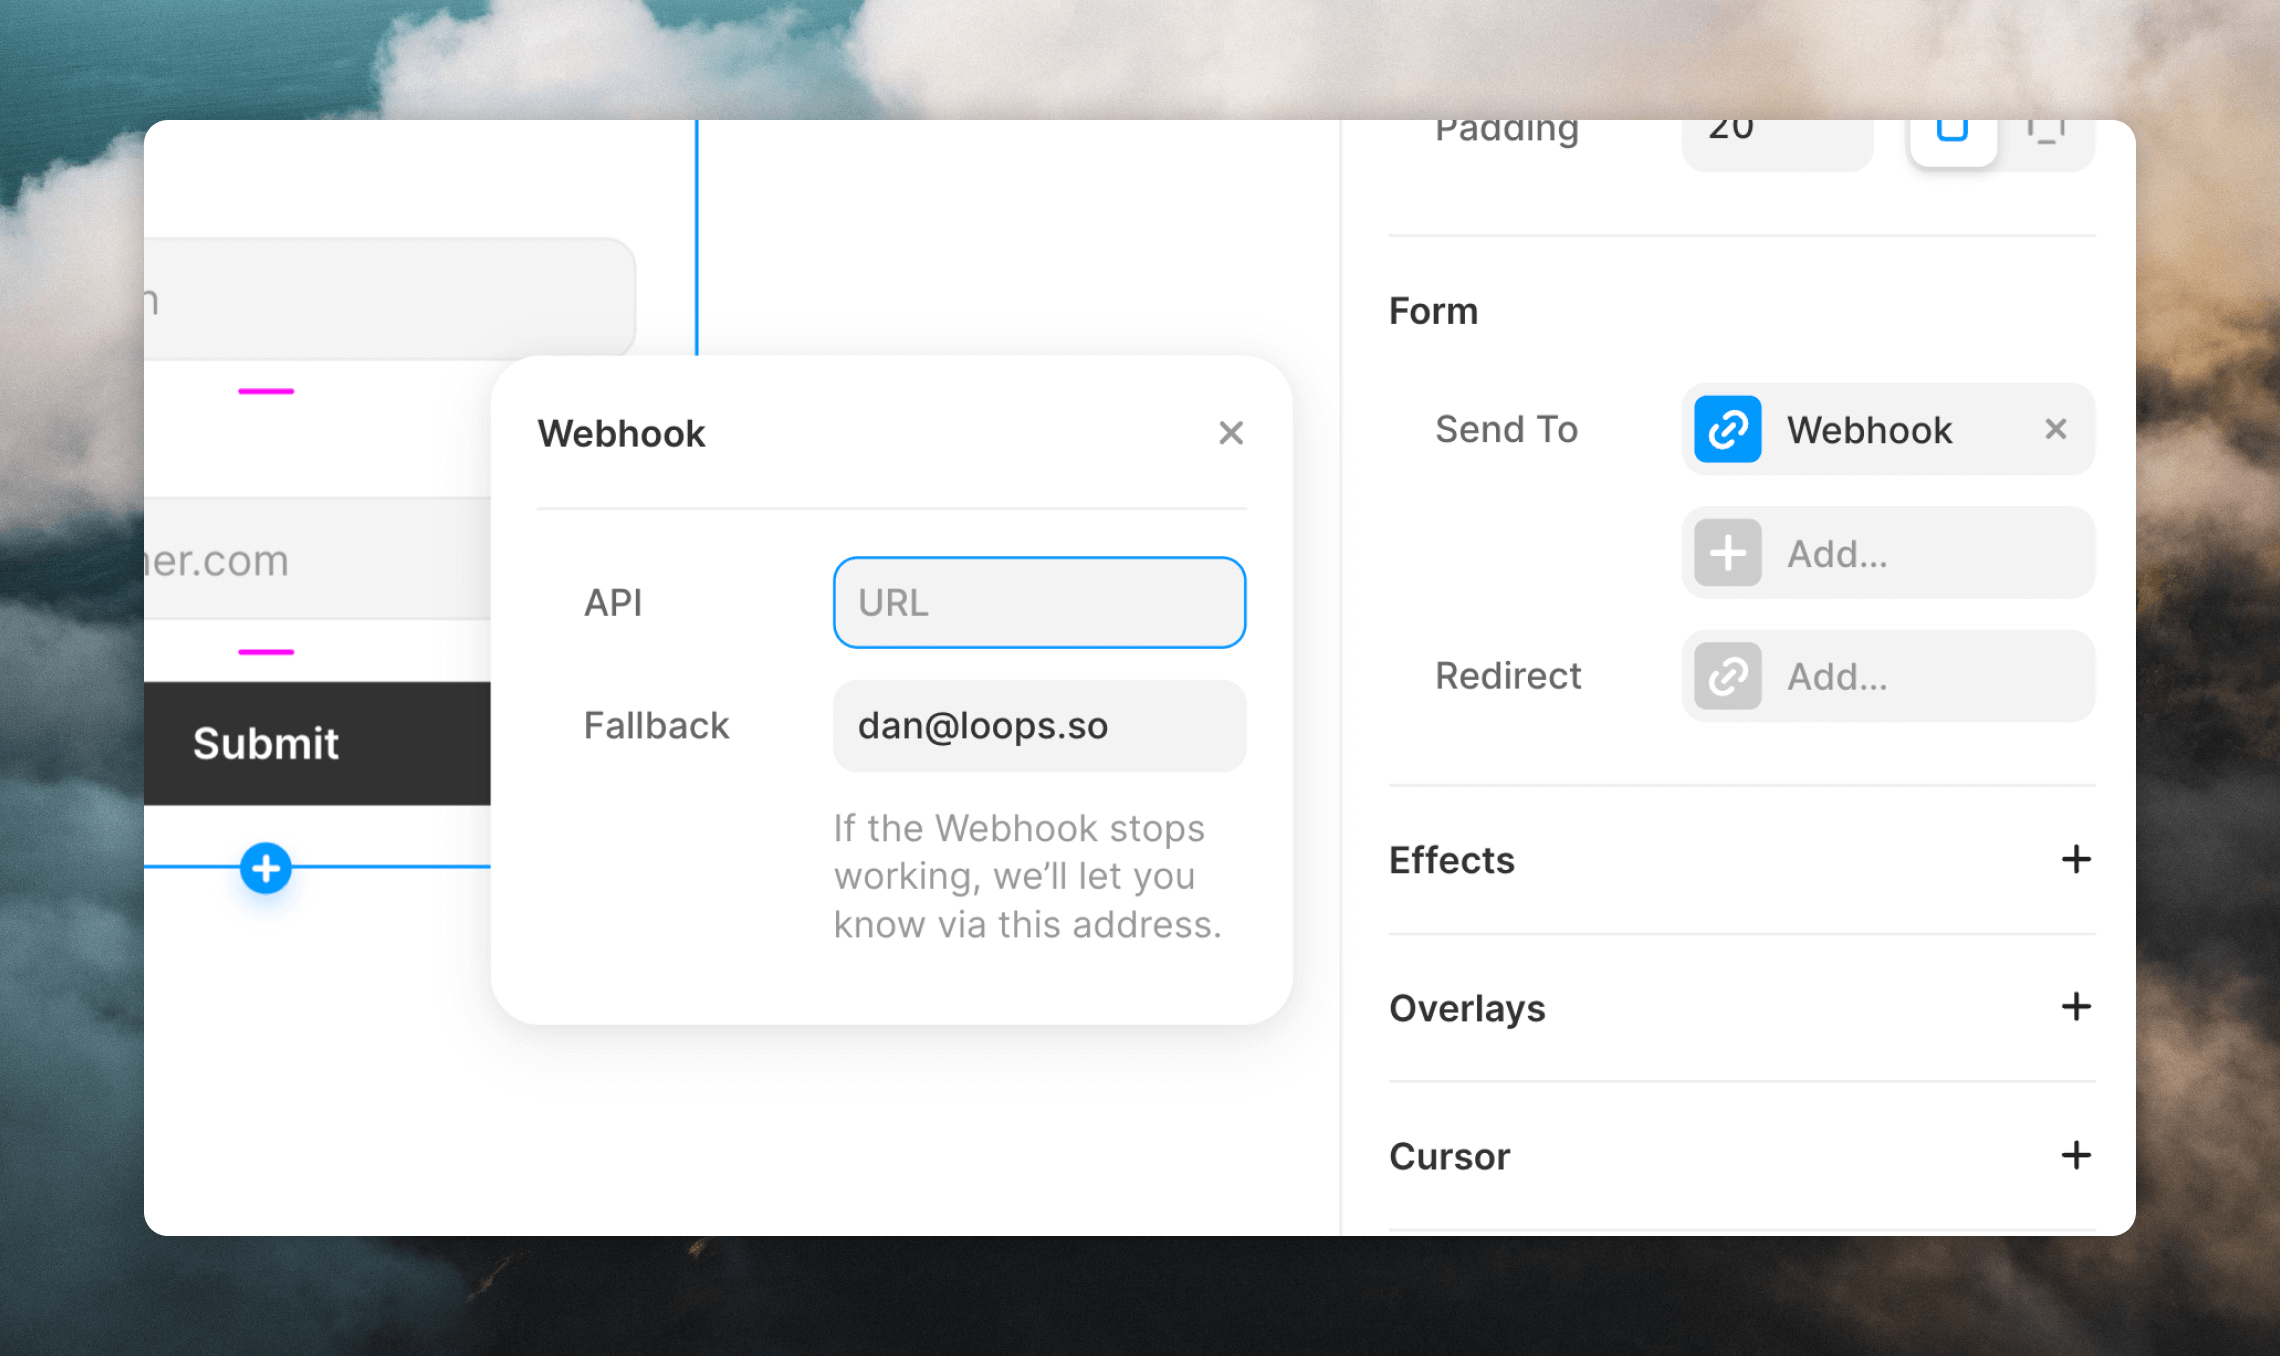
- Back in Framer, select your form. In the Send To option, select “Webhook”. Then paste the URL from Loops into the API field.
Now your form is all set up and can start receiving new subscribers.
Set up a confirmation message
By default a “Thank you” message is shown inside the form button when the form is submitted successfully.
You can opt to use a redirect instead. You can add a confirmation message on another web page and use the Redirect option in the form settings.
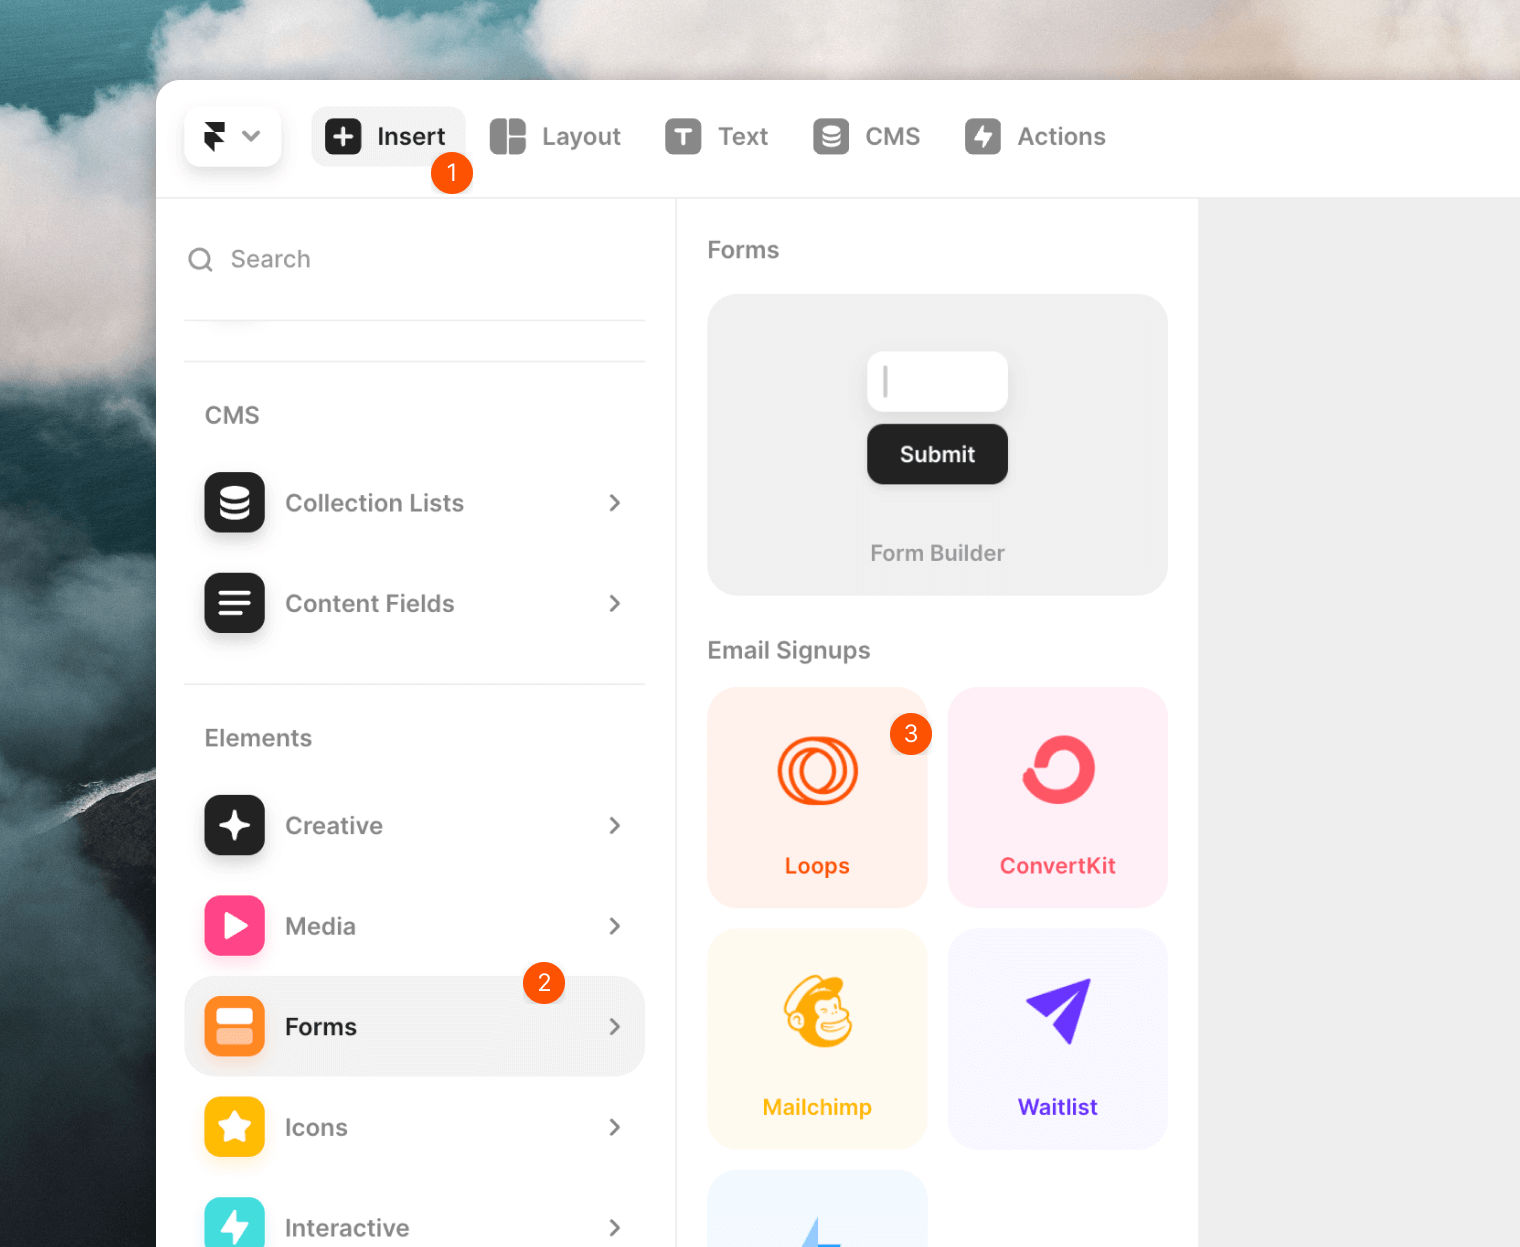
Framer Loops component
Framer has a built-in Loops option for creating simple signup forms with an email address field.
Insert the Loops Component
From Insert -> Forms drag the Loops component into your page. This will add an example form.
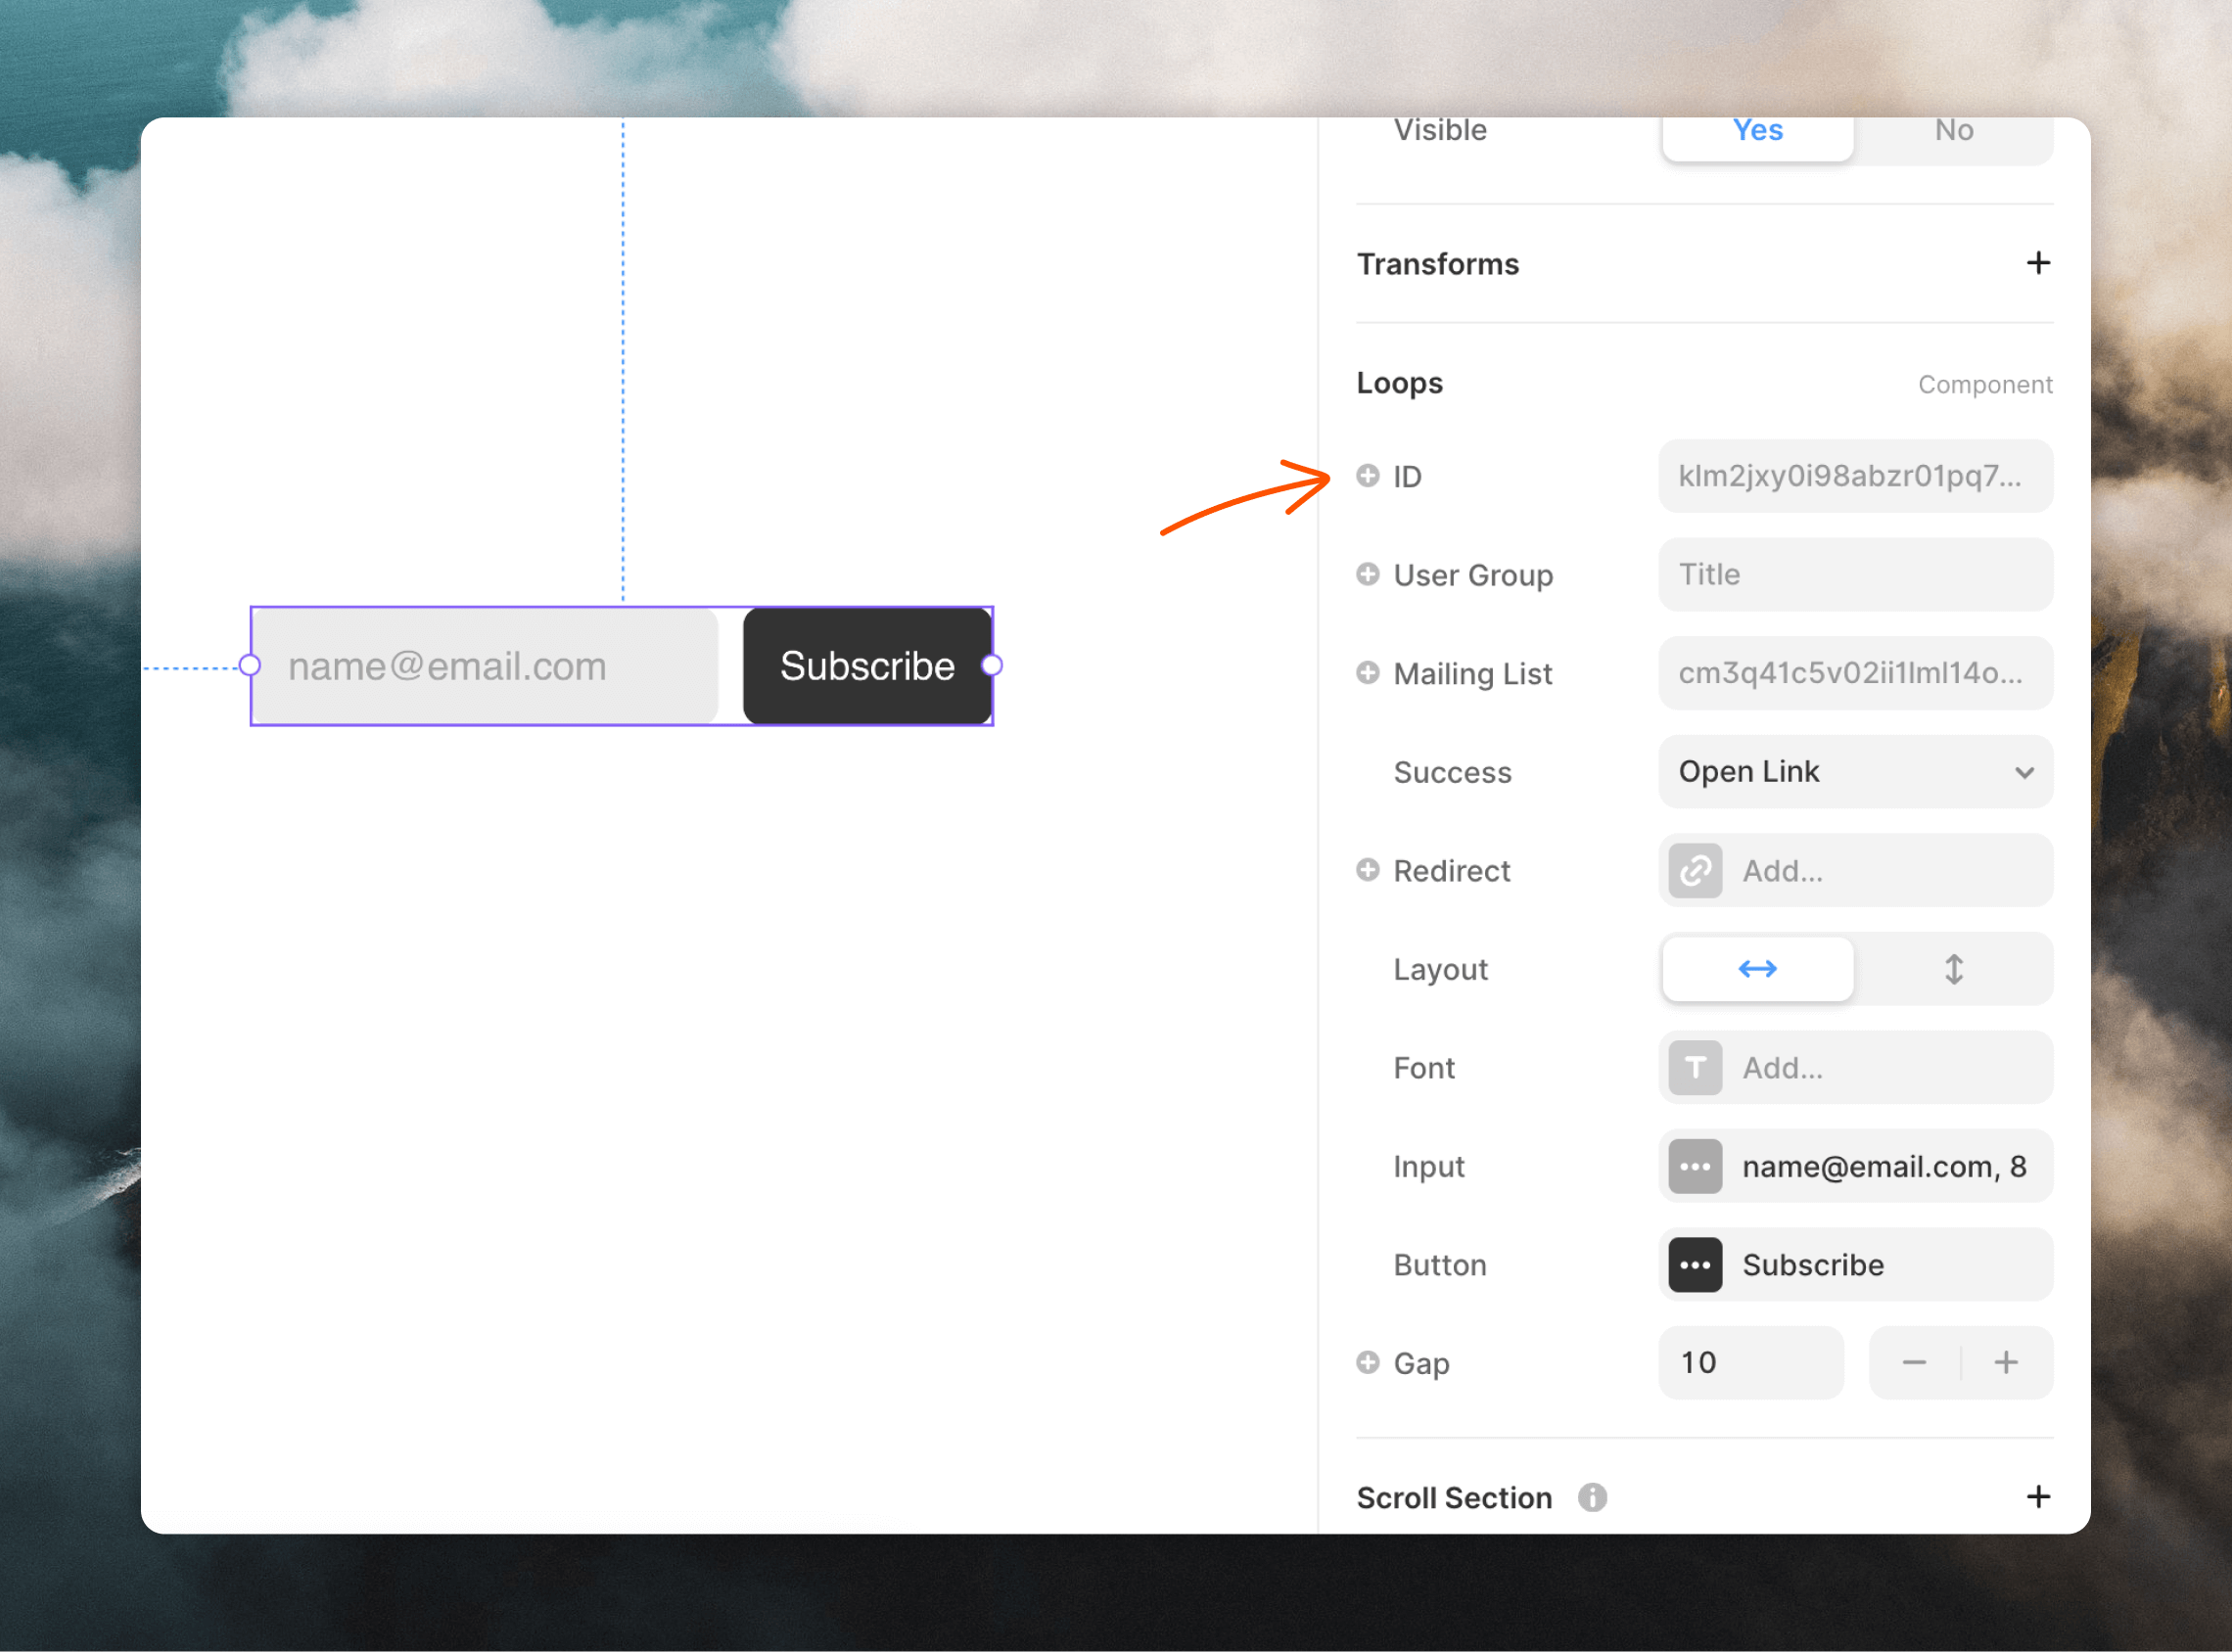
 Next, you need to add your Loops form ID to the ID field.
- Go to the Forms page in your Loops account.
- Click on the Settings tab.
- Copy the Form ID.
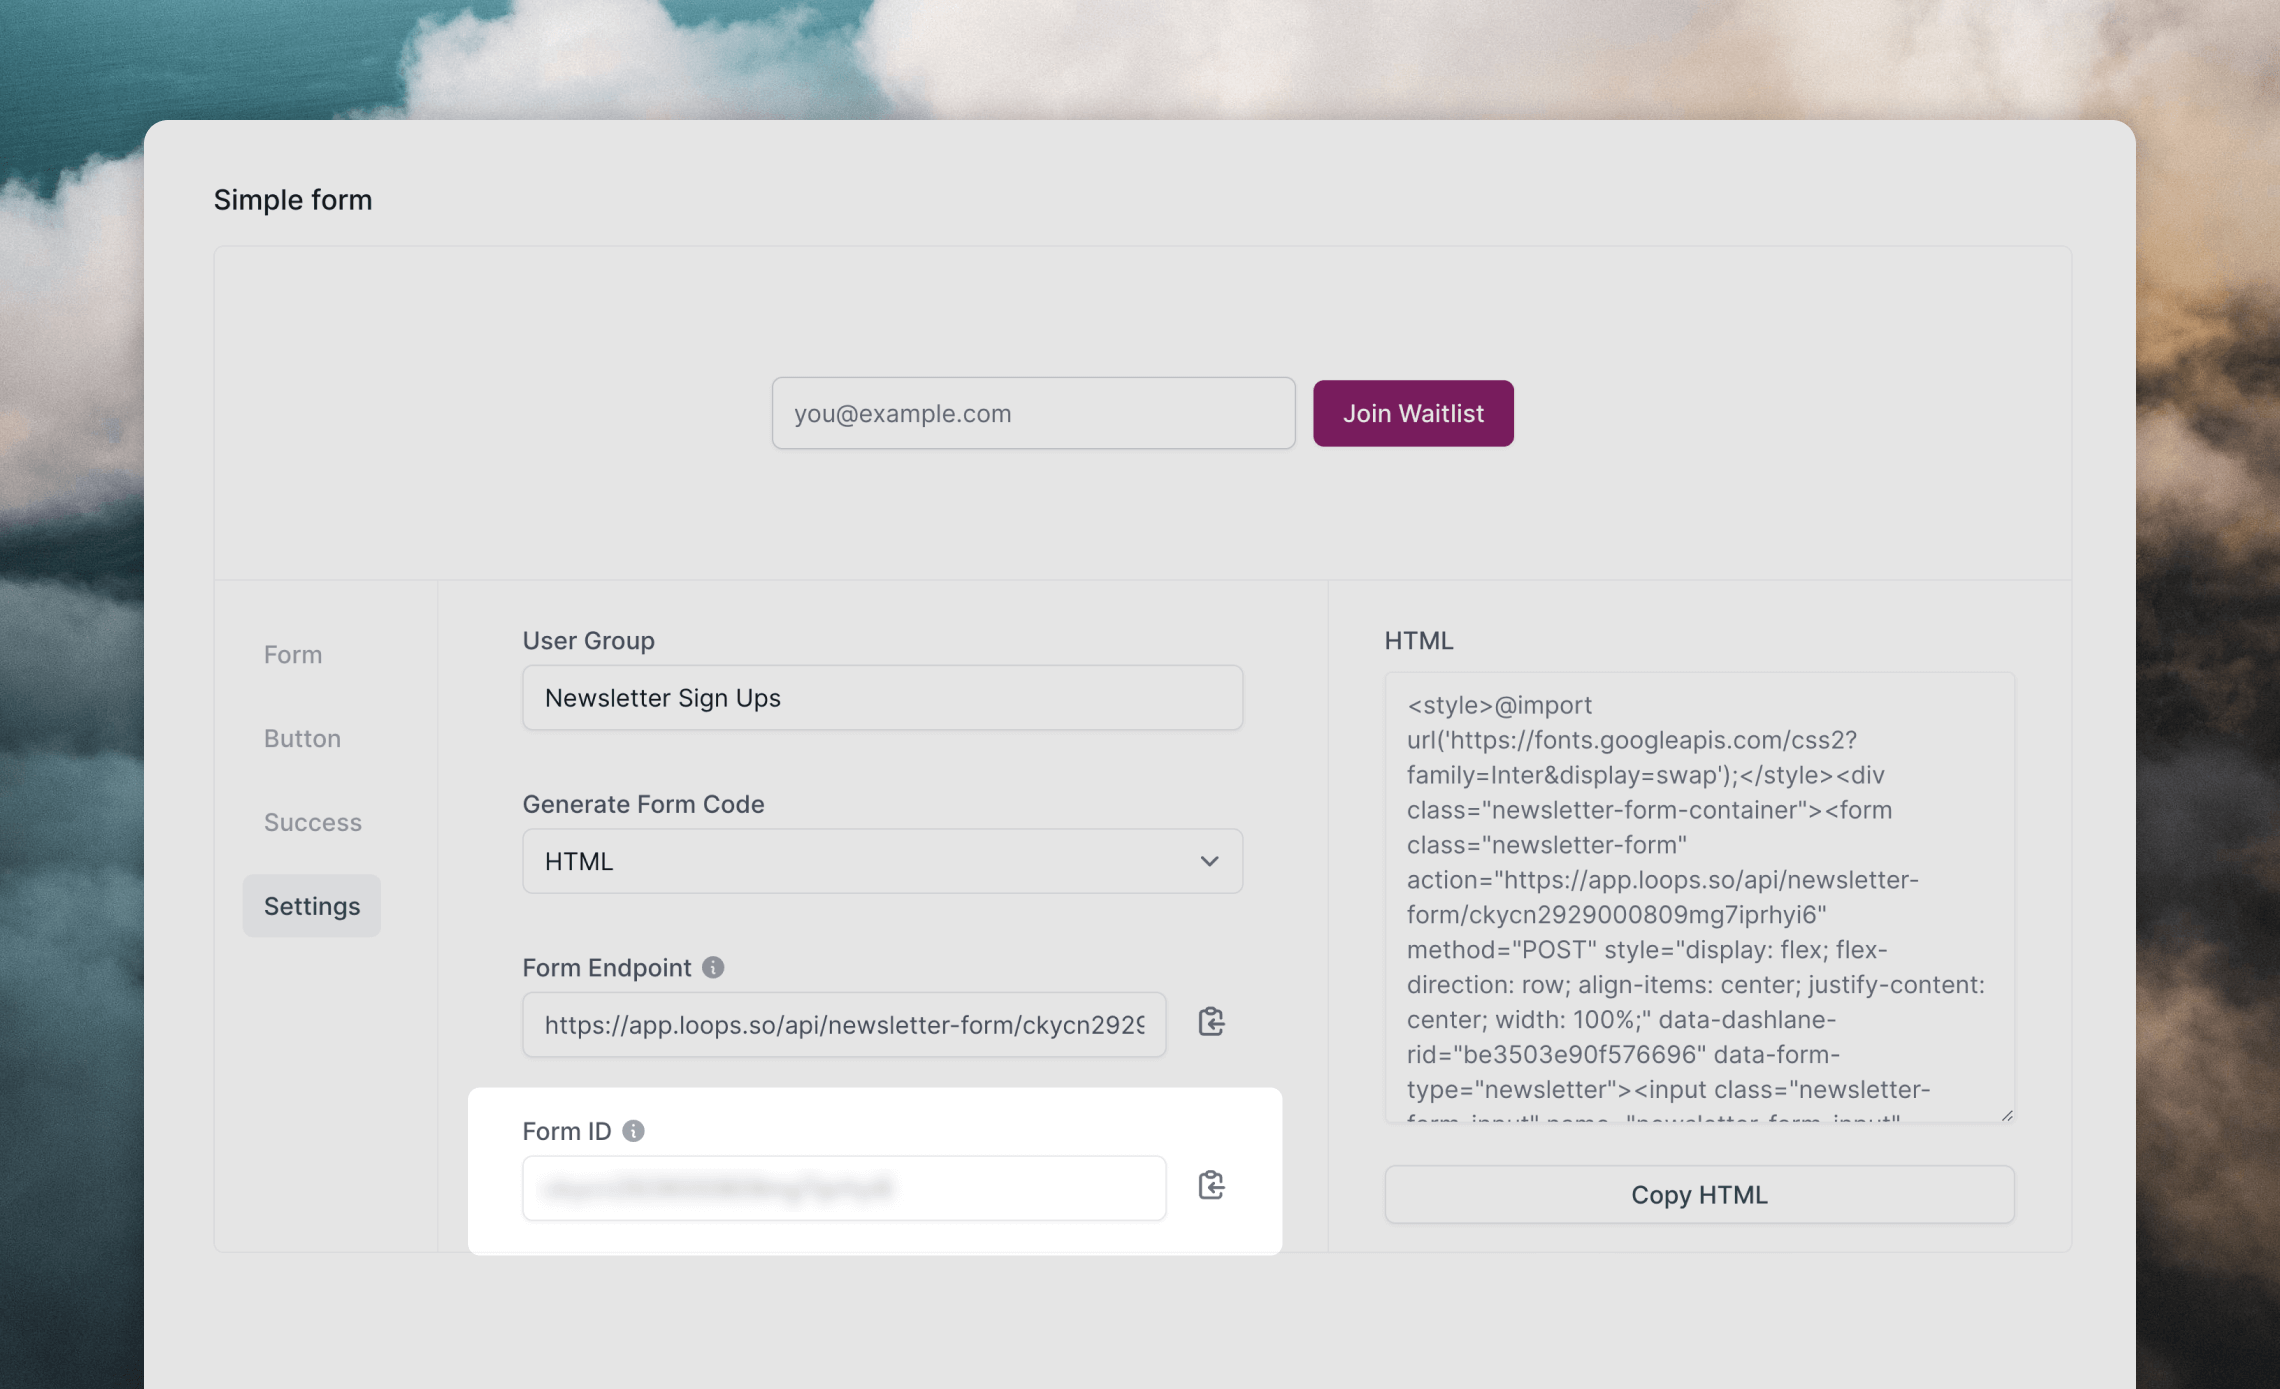
- Paste this ID into the ID field in the Framer component.
- Framer offers two extra fields in the component:
- User Group populates the contact’s
userGroup value in Loops.
- Mailing list can be used to subscribe contacts to your mailing lists. Add here one or more mailing list IDs separated by commas.
Mailing lists need to be marked Public in your Lists
settings in order for them to
work in forms.
Set up a confirmation message
Make sure to also set up a confirmation message by clicking on the Success dropdown.
You can choose to show a message in an overlay with the “Show Overlay” option or redirect the user to another web page with the “Open Link” option.
To add an overlay message, click on the Overlays section header in the right-hand panel, choose between “Relative” and “Fixed” and make sure the Show On selection is “Submit”.
Advanced integration
This option adds a custom component into your Framer site using form code generated by Loops
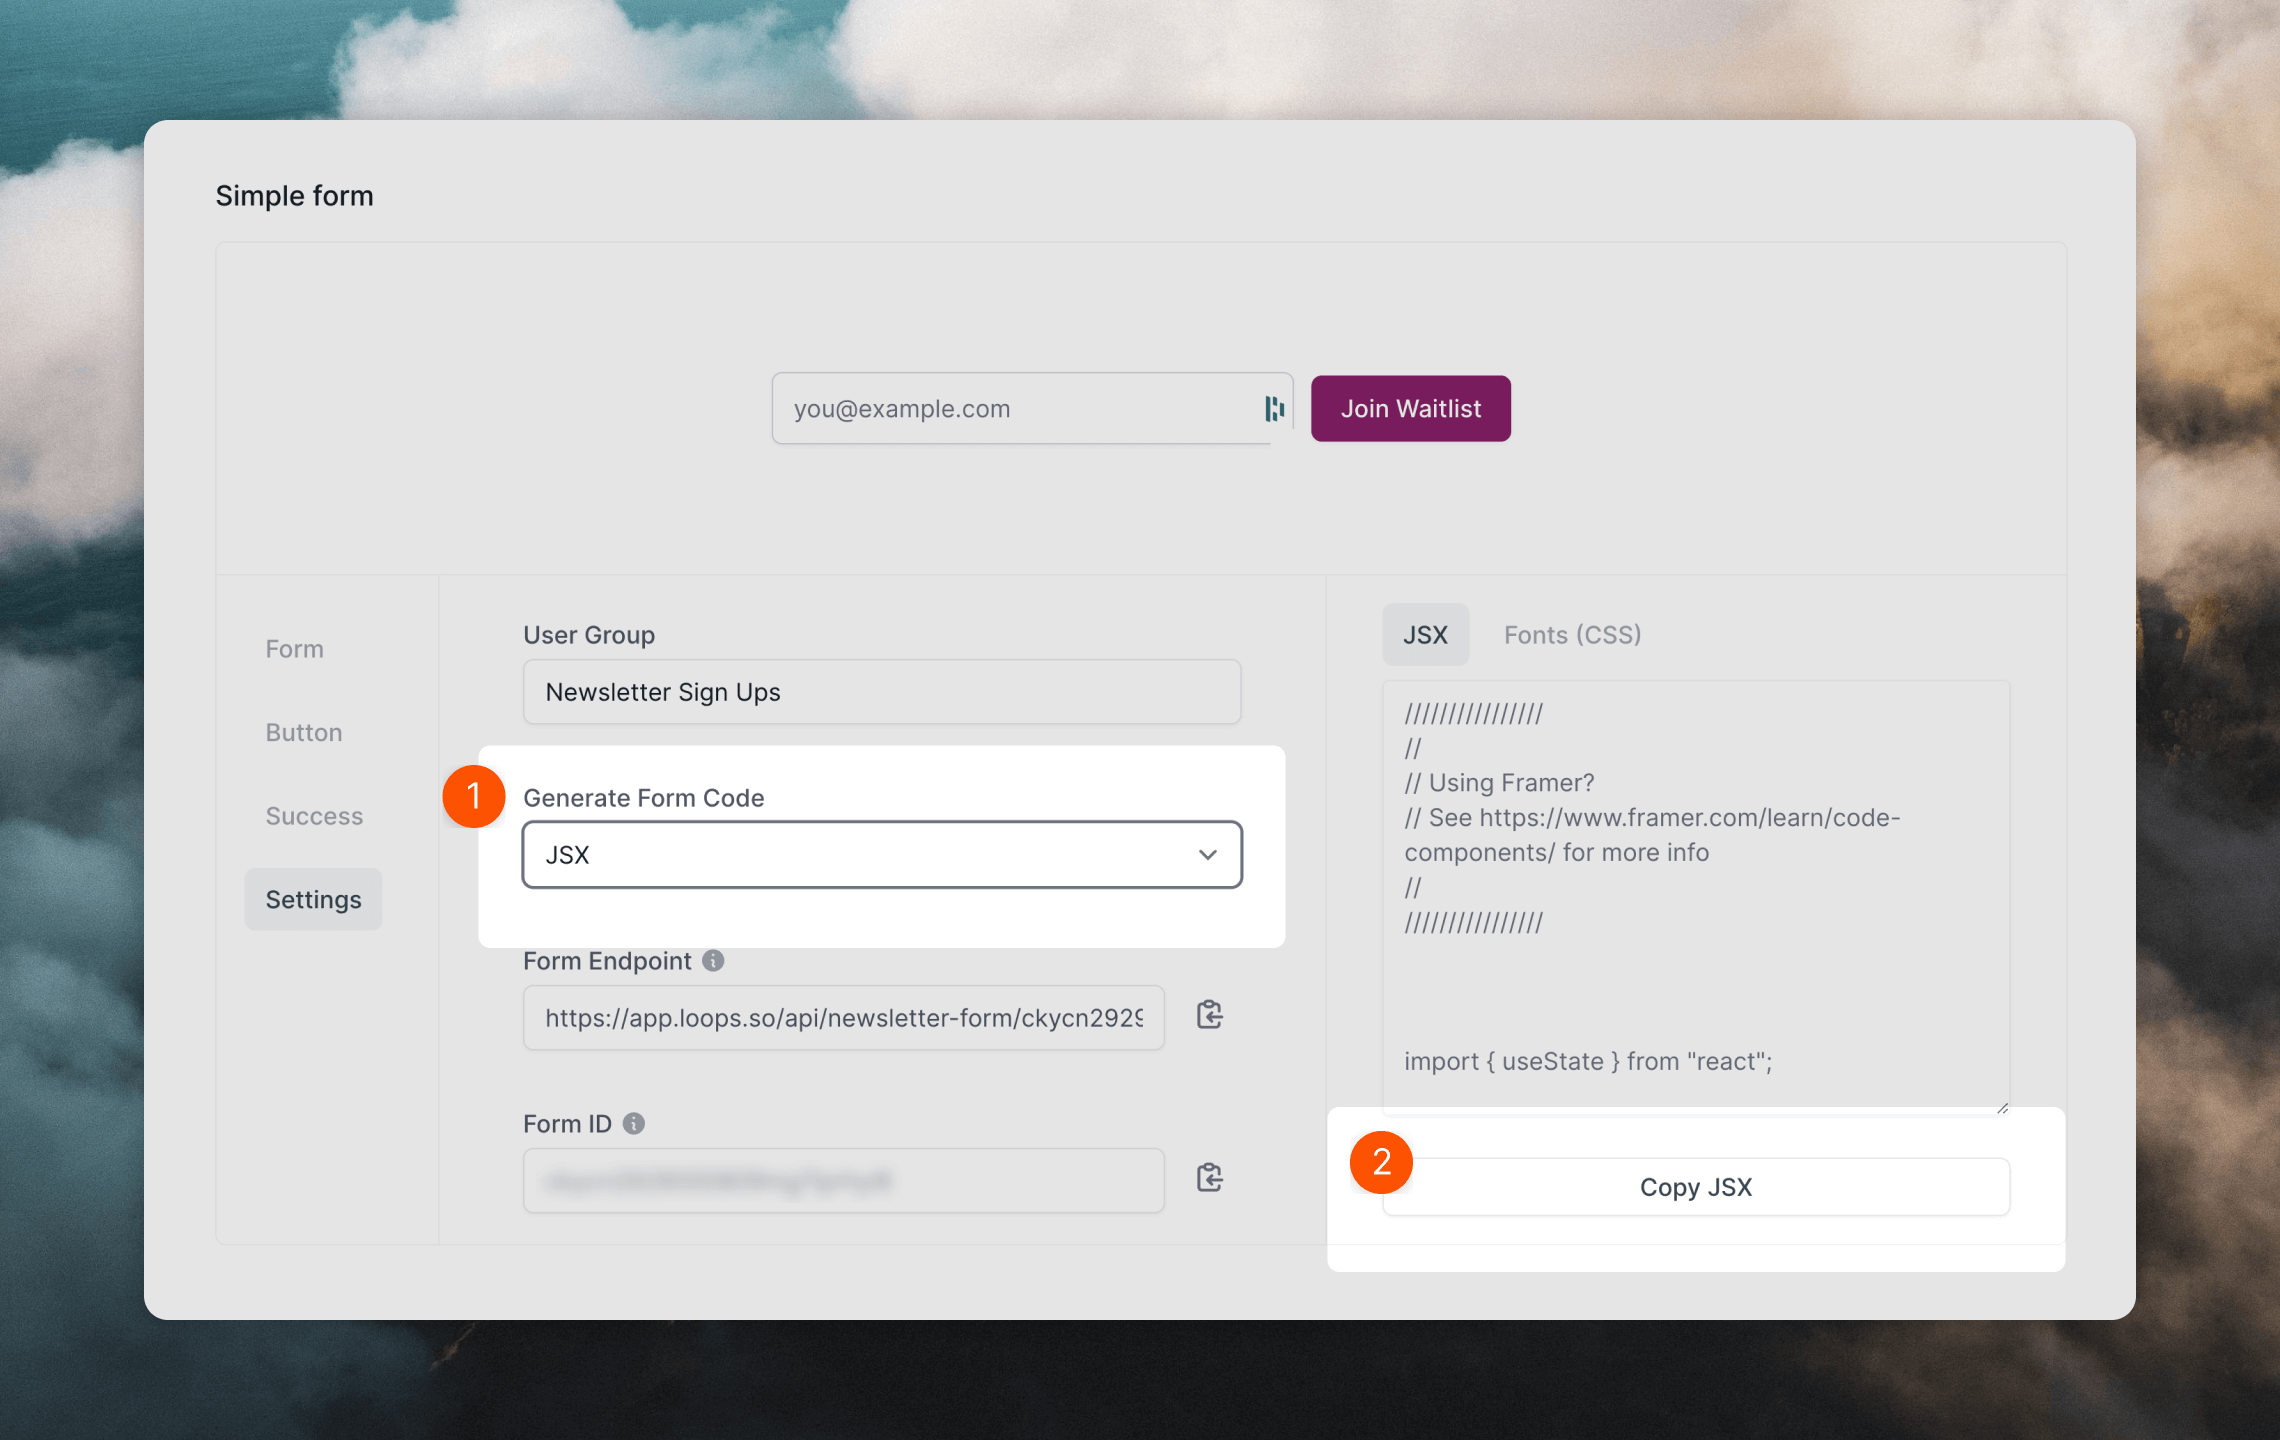
-
Go to the Forms page in your Loops account.
-
Click on the Settings tab.
-
Select “JSX” from the Generate Form Code dropdown (1), then copy the code snippet (2).
Embed the component in Framer
-
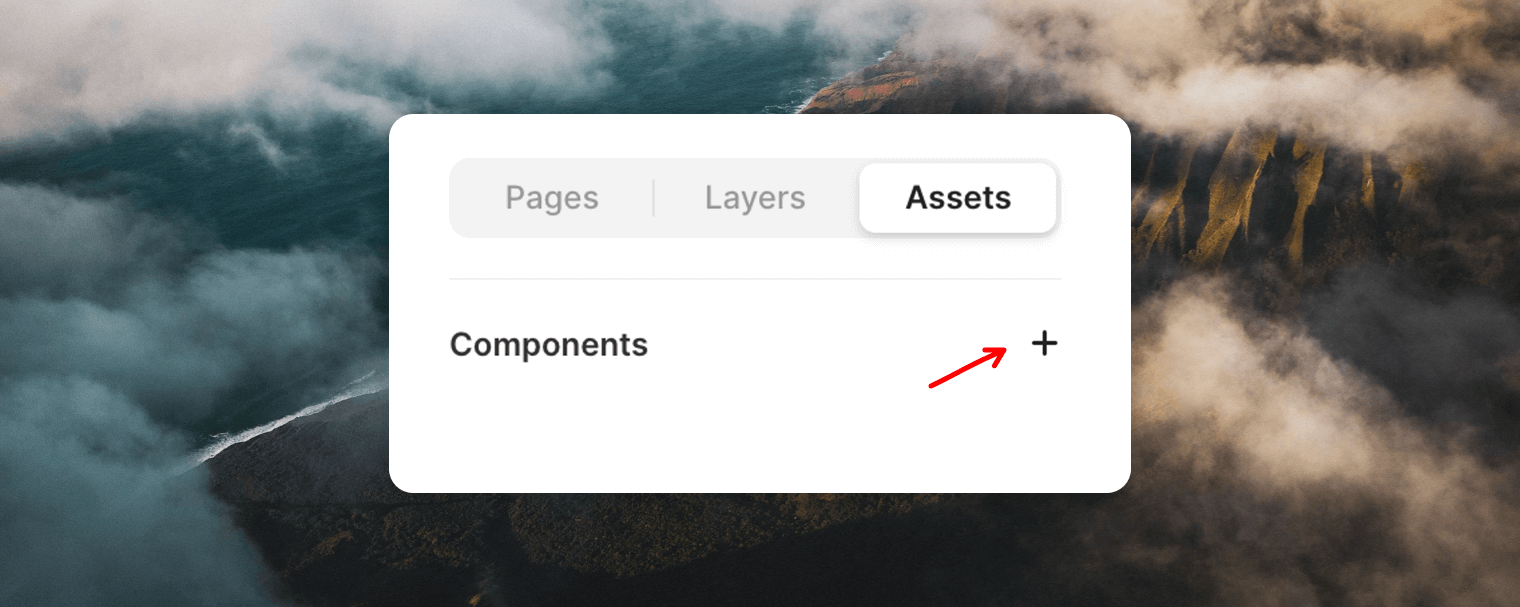
Create a new component. Toggle over to Assets in the Framer side panel then click the
+ button.
-
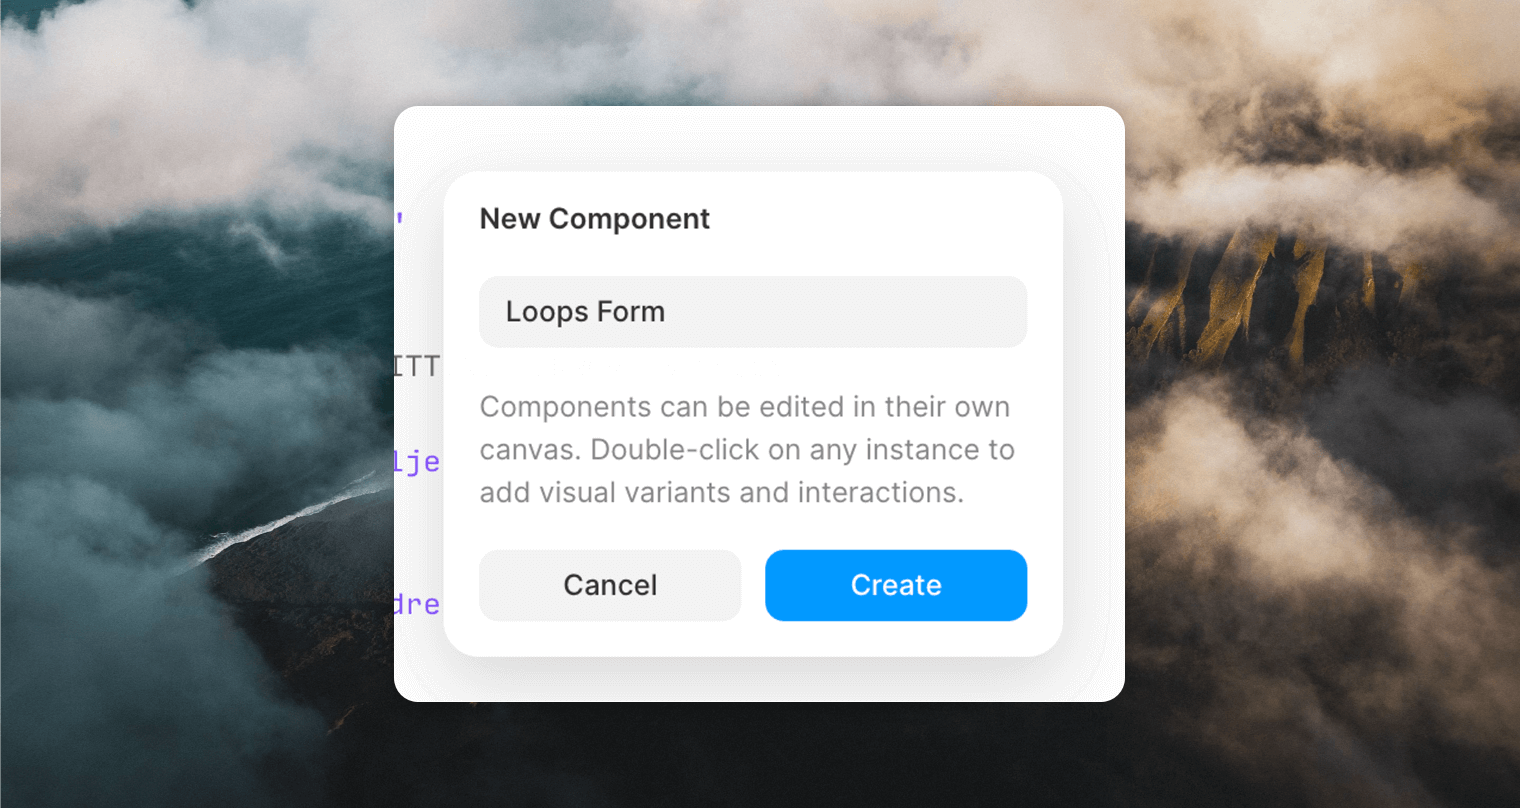
Give your New Component a title.
-
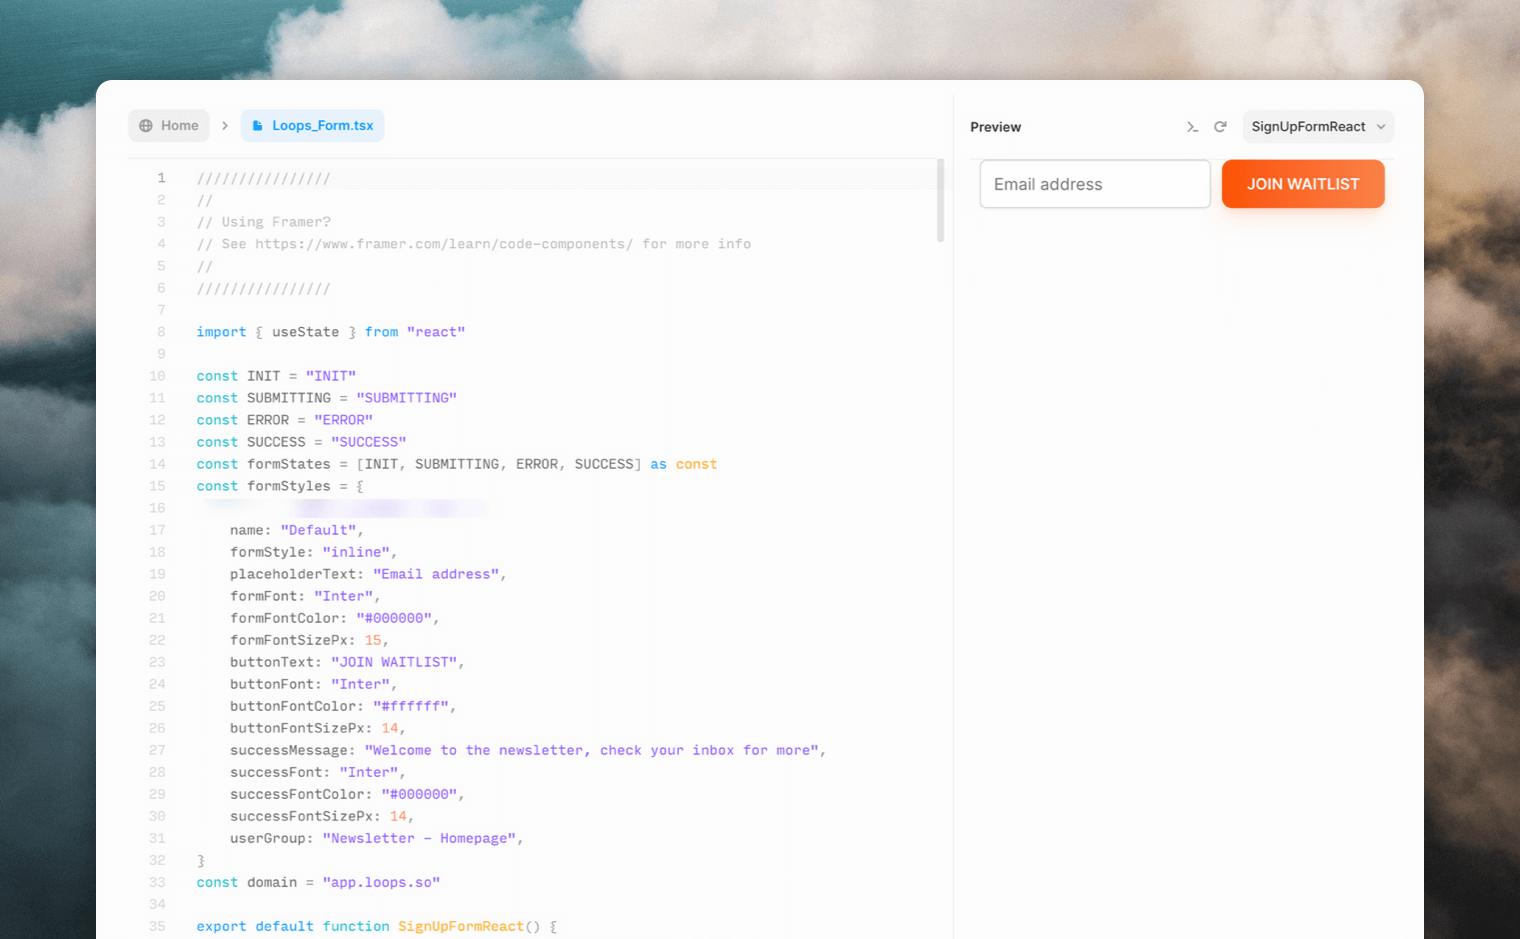
Finally, paste the code copied in from Loops into the code editor. You should see the Preview on the right fill in with a preview of your component.
-
Drag and drop your new asset anywhere on your page to use it :)