Loops is an email platform, that helps you send marketing and transactional emails from our app, API and integrations.With Loops, you can track events and contact properties and then use that information to send emails to increase revenue, engagement or just generally improve your user’s experience of your app.Let’s get started ✨What we’ll be covering…
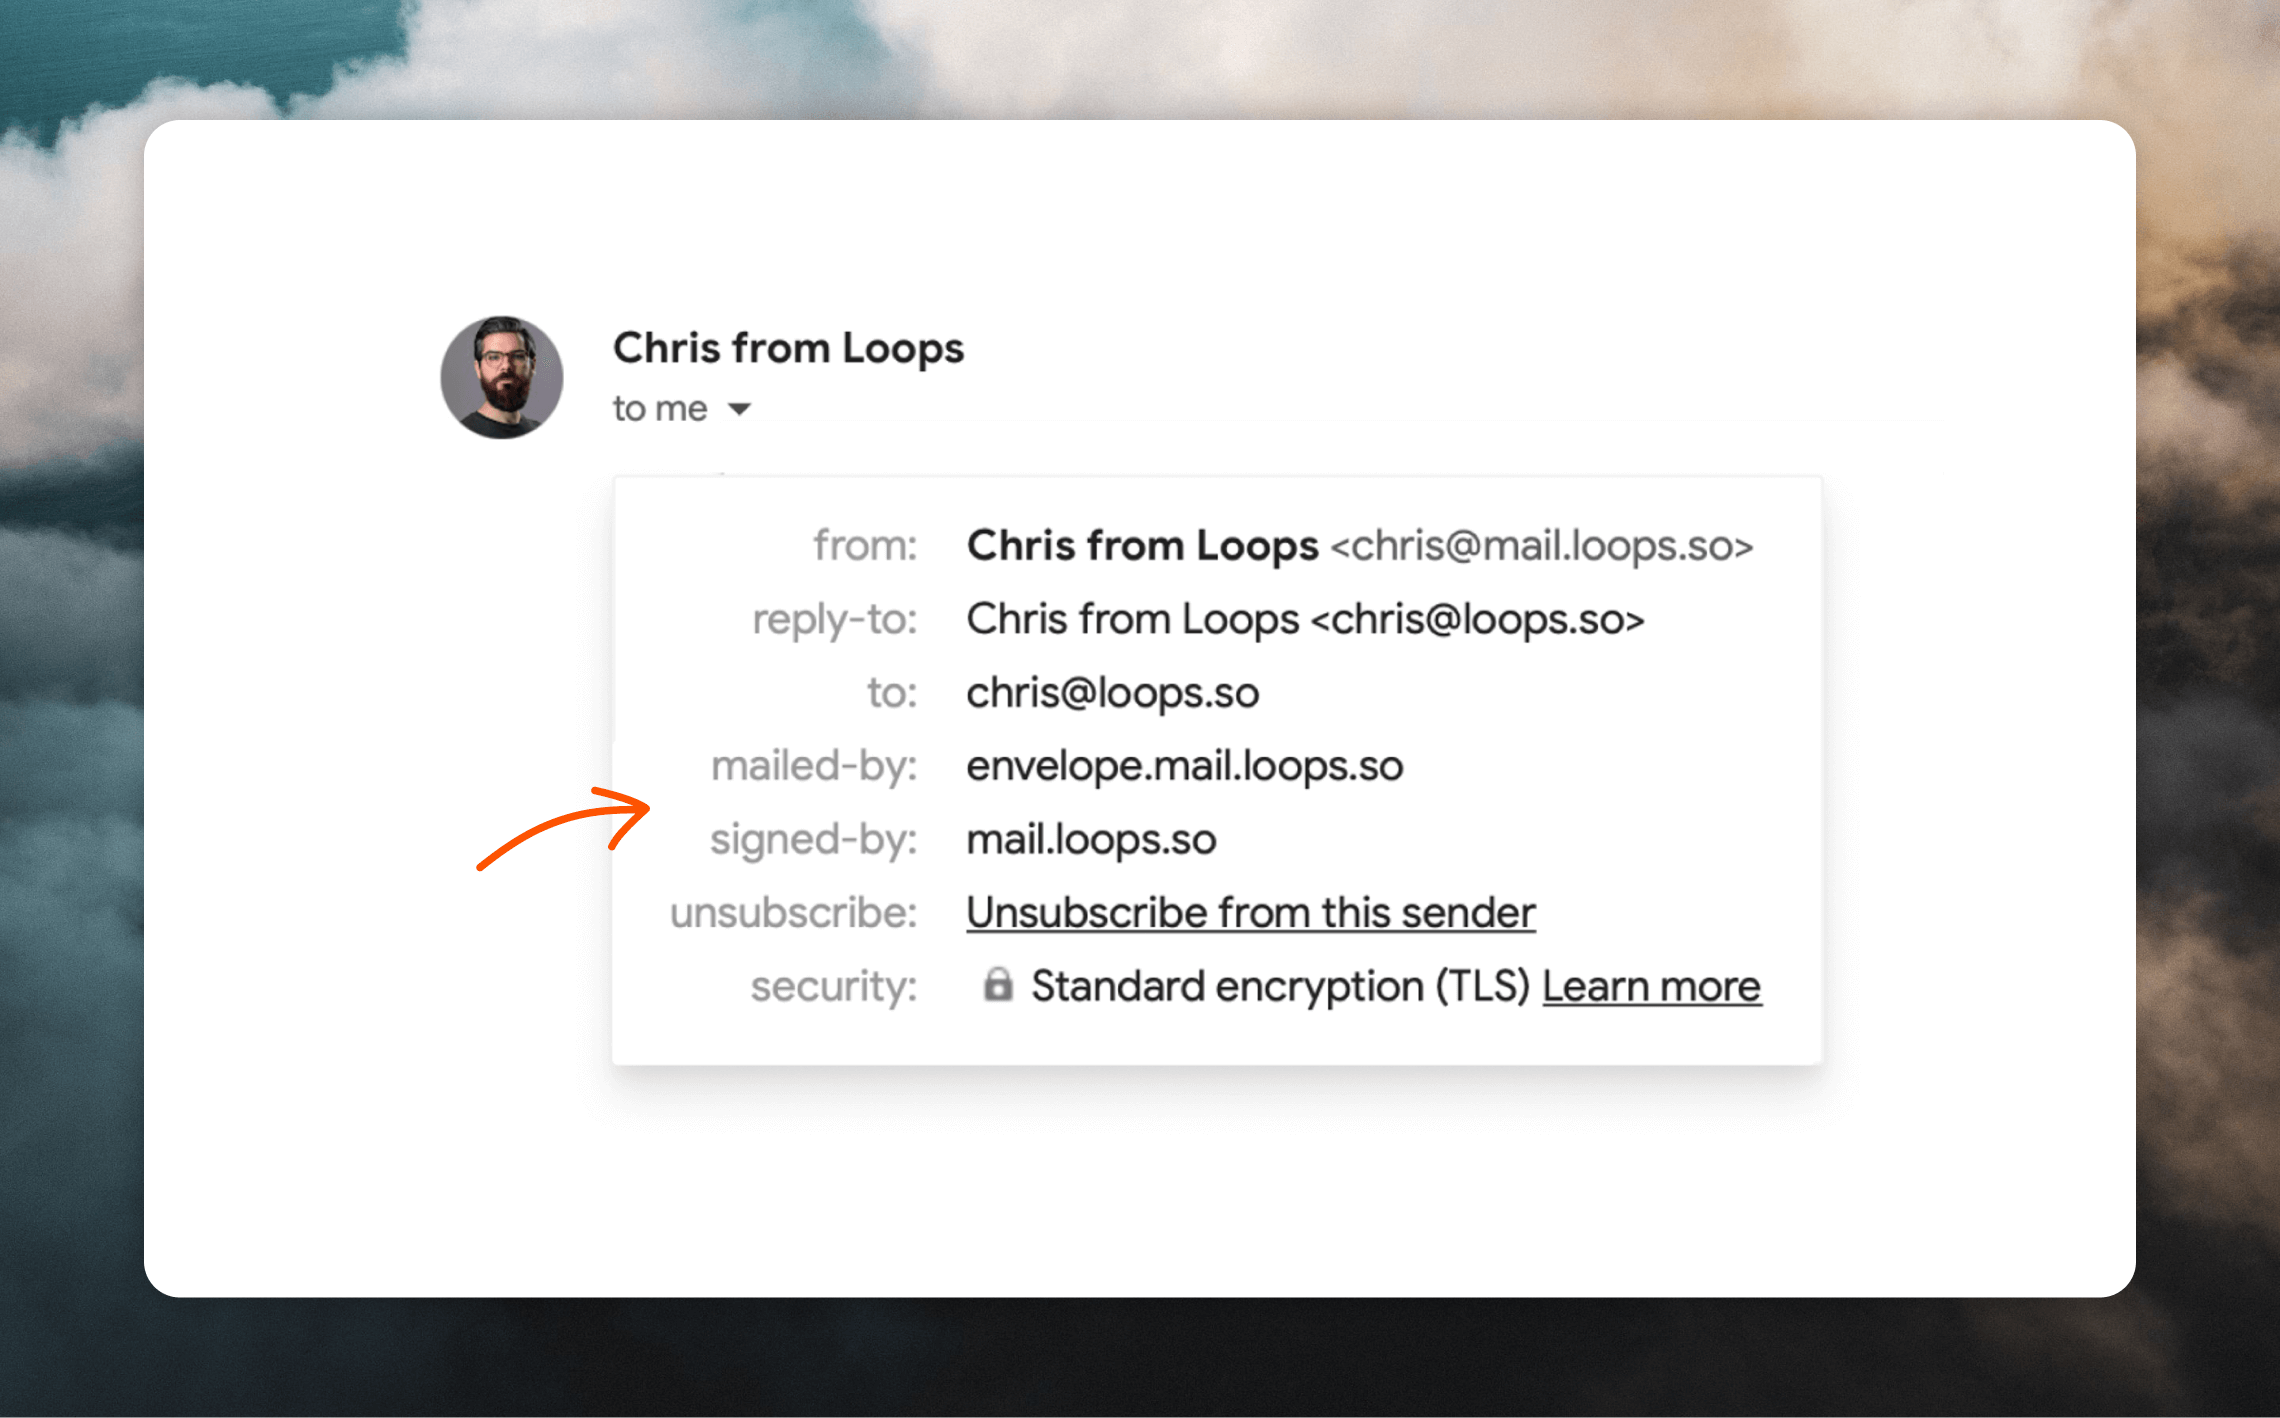
The first step is to set up your domain, so you can send emails through Loops. You need to do this before you can send any emails.We send from your domain so your emails appear as if they are coming from you.We choose to send from a mail.loops.so subdomain but you can send from your root domain if you’d prefer.To set up your domain in Loops, you need to add some MX, TXT and CNAME records to your domain’s DNS settings so that we can verify that you own the domain you want to send emails from.Once you’ve set up your domain records, you’ll be able to start sending emails!You can always send the records to a developer to help you integrate them. Read how to add a member to your team.
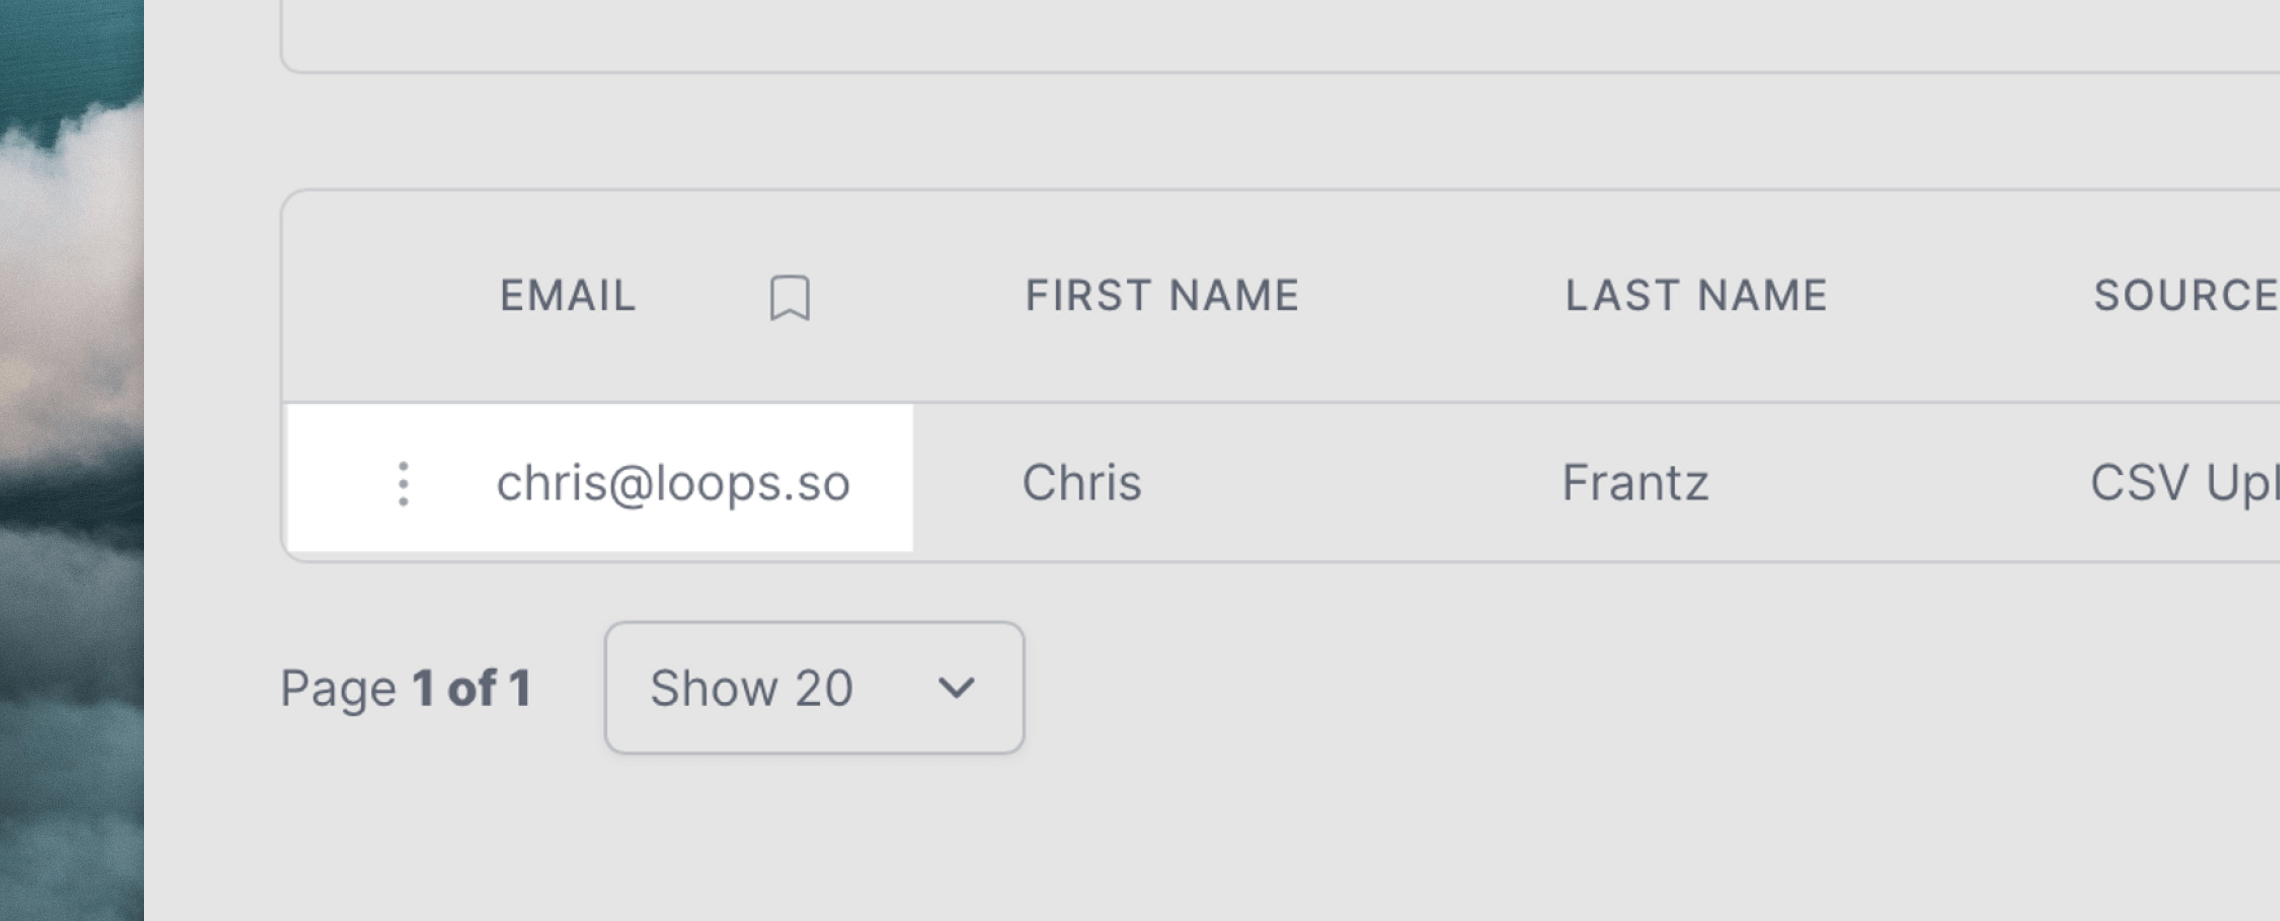
To send marketing and product emails to your contacts, you will need to import those contacts into Loops.Note: this isn’t required if you only plan to use transactional email, as those contacts can be emailed directly via the API.If you have any existing contacts, i.e from a waitlist, your early access users, a database or your audience on a different platform, you can get started by importing them via CSV.You can import contacts via CSV upload, API or through one of our integrations.
The most popular path is to import a CSV of existing contacts, then going
forward automatically add contacts using our API, a form or an integration.
Contacts are unique users in your Loop’s audience. We use email and a unique identifier to distinguish contacts. The only required field a contact must have is an email.
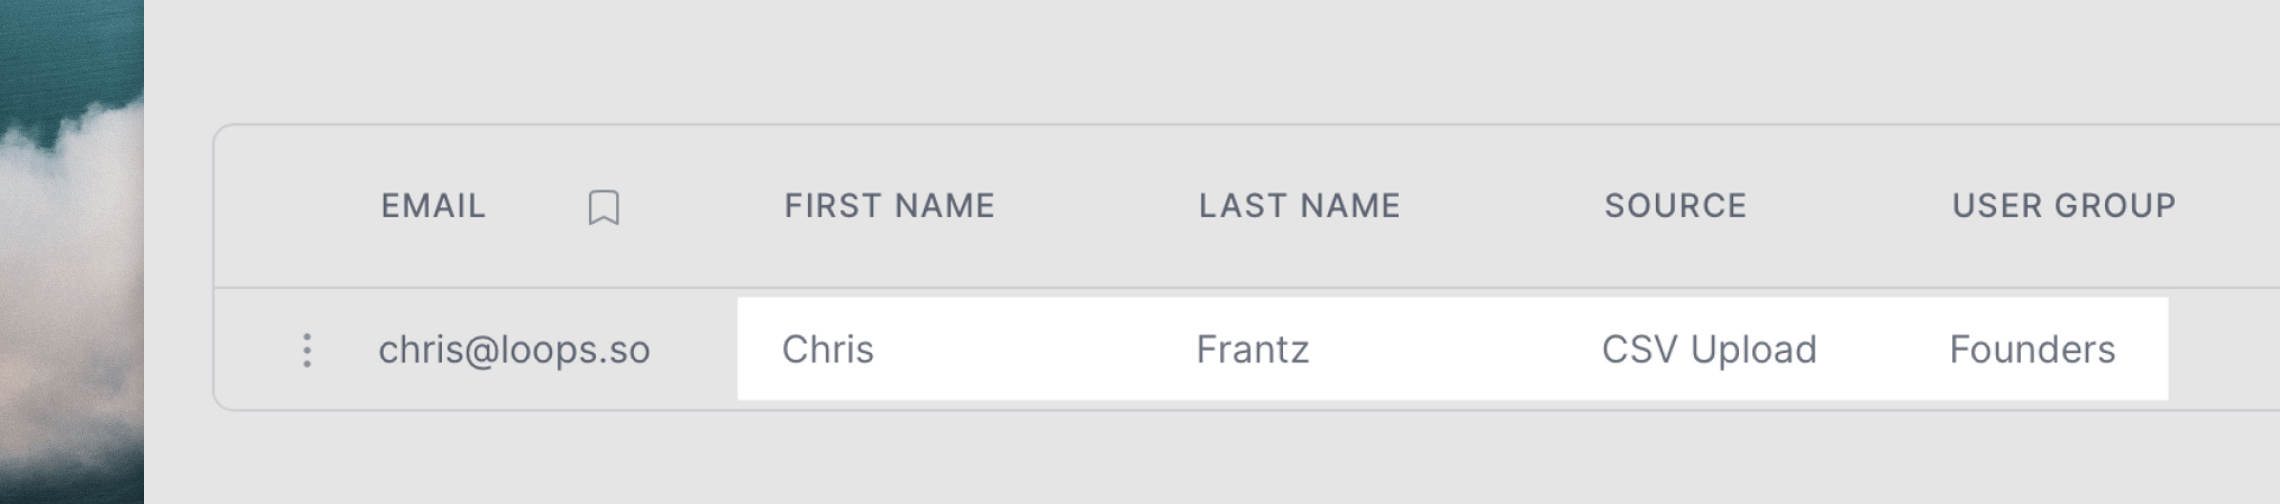
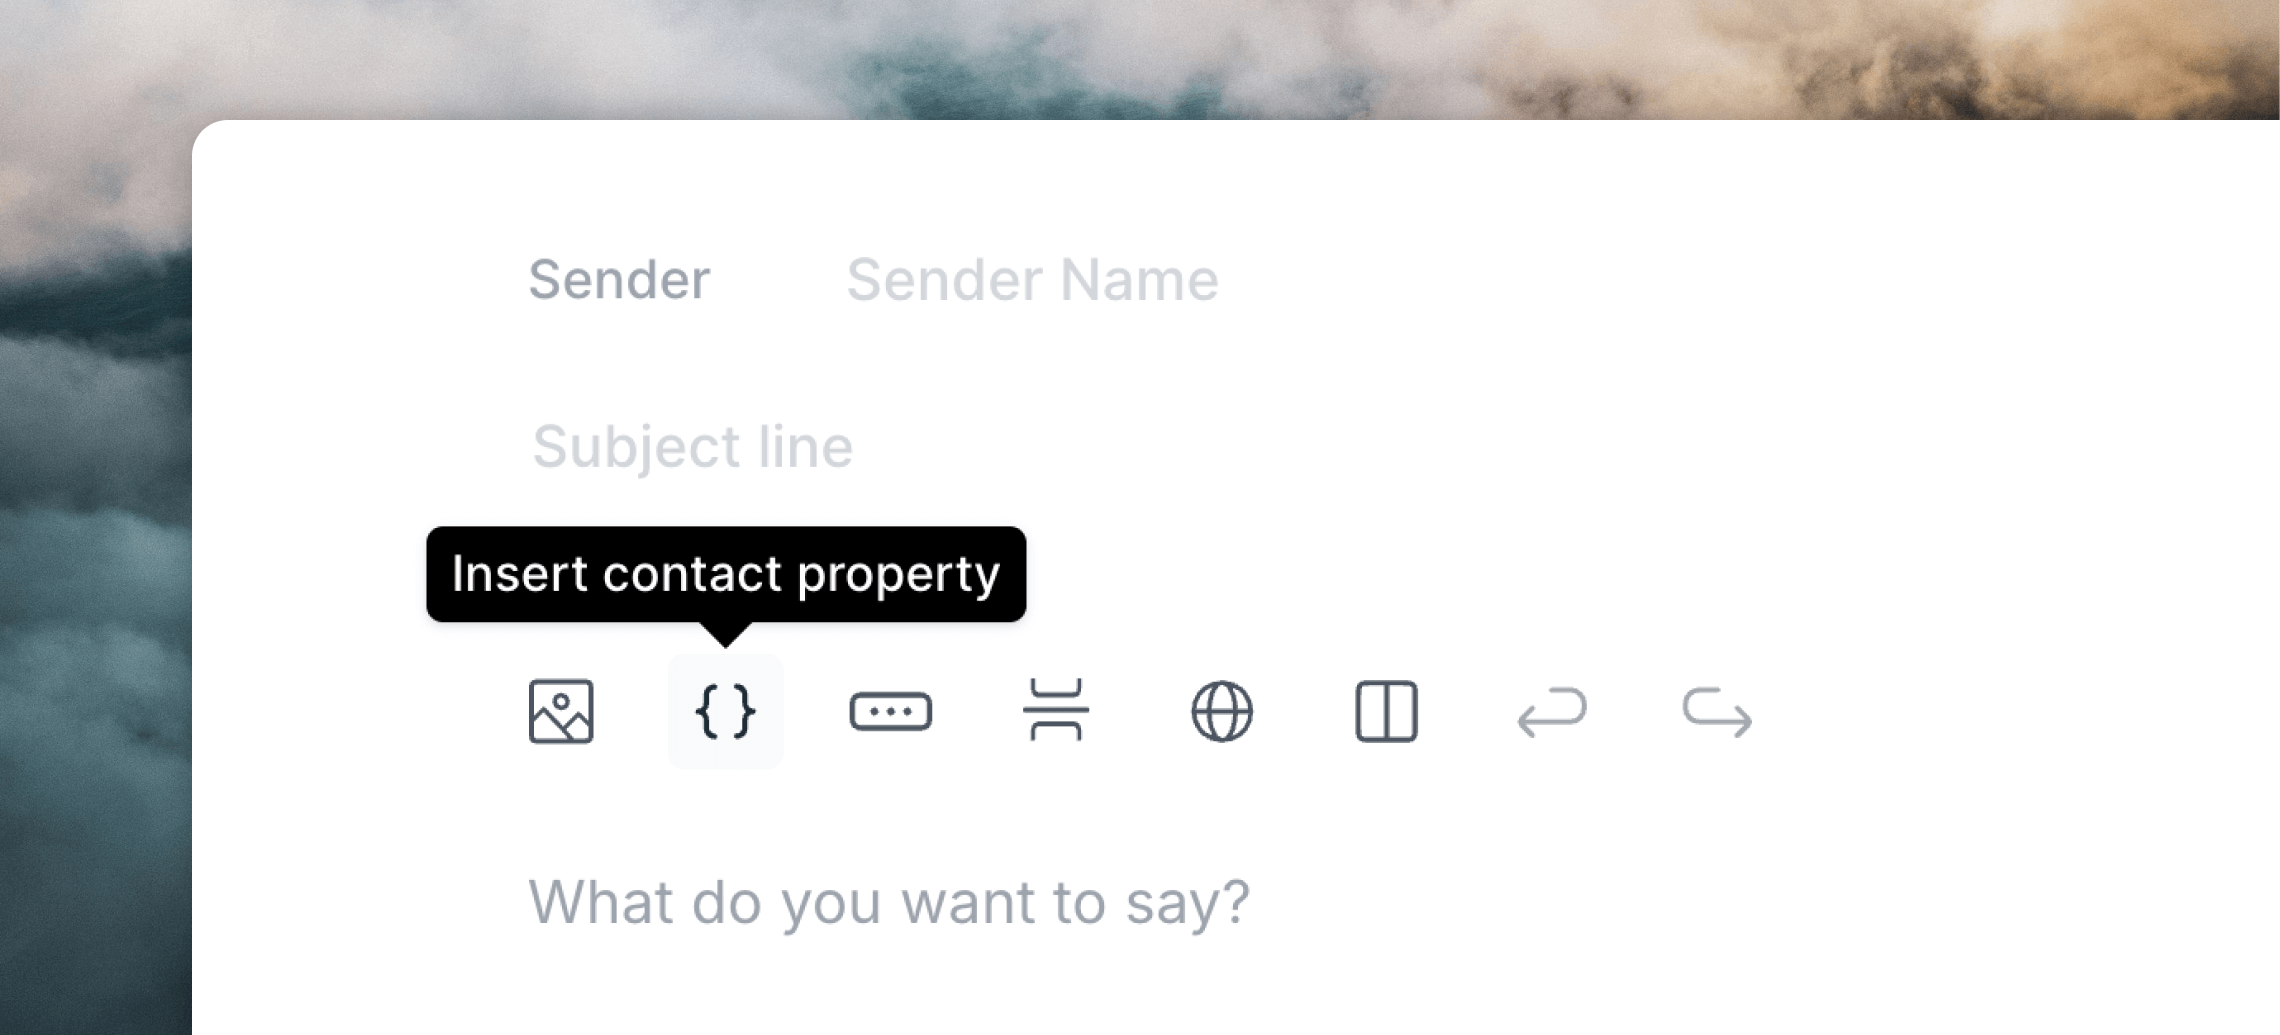
Contact properties are additional pieces of information you can associate with a contact. They can include things like name, location, job title, and more.We provide default properties like name, user group and source, but you are free to add any number of custom properties to your contacts, too.You can use contact properties to segment your audience and send more targeted emails to specific groups.For example, you could send a promotional email only to contacts with a certain job title or to those in a specific user group.
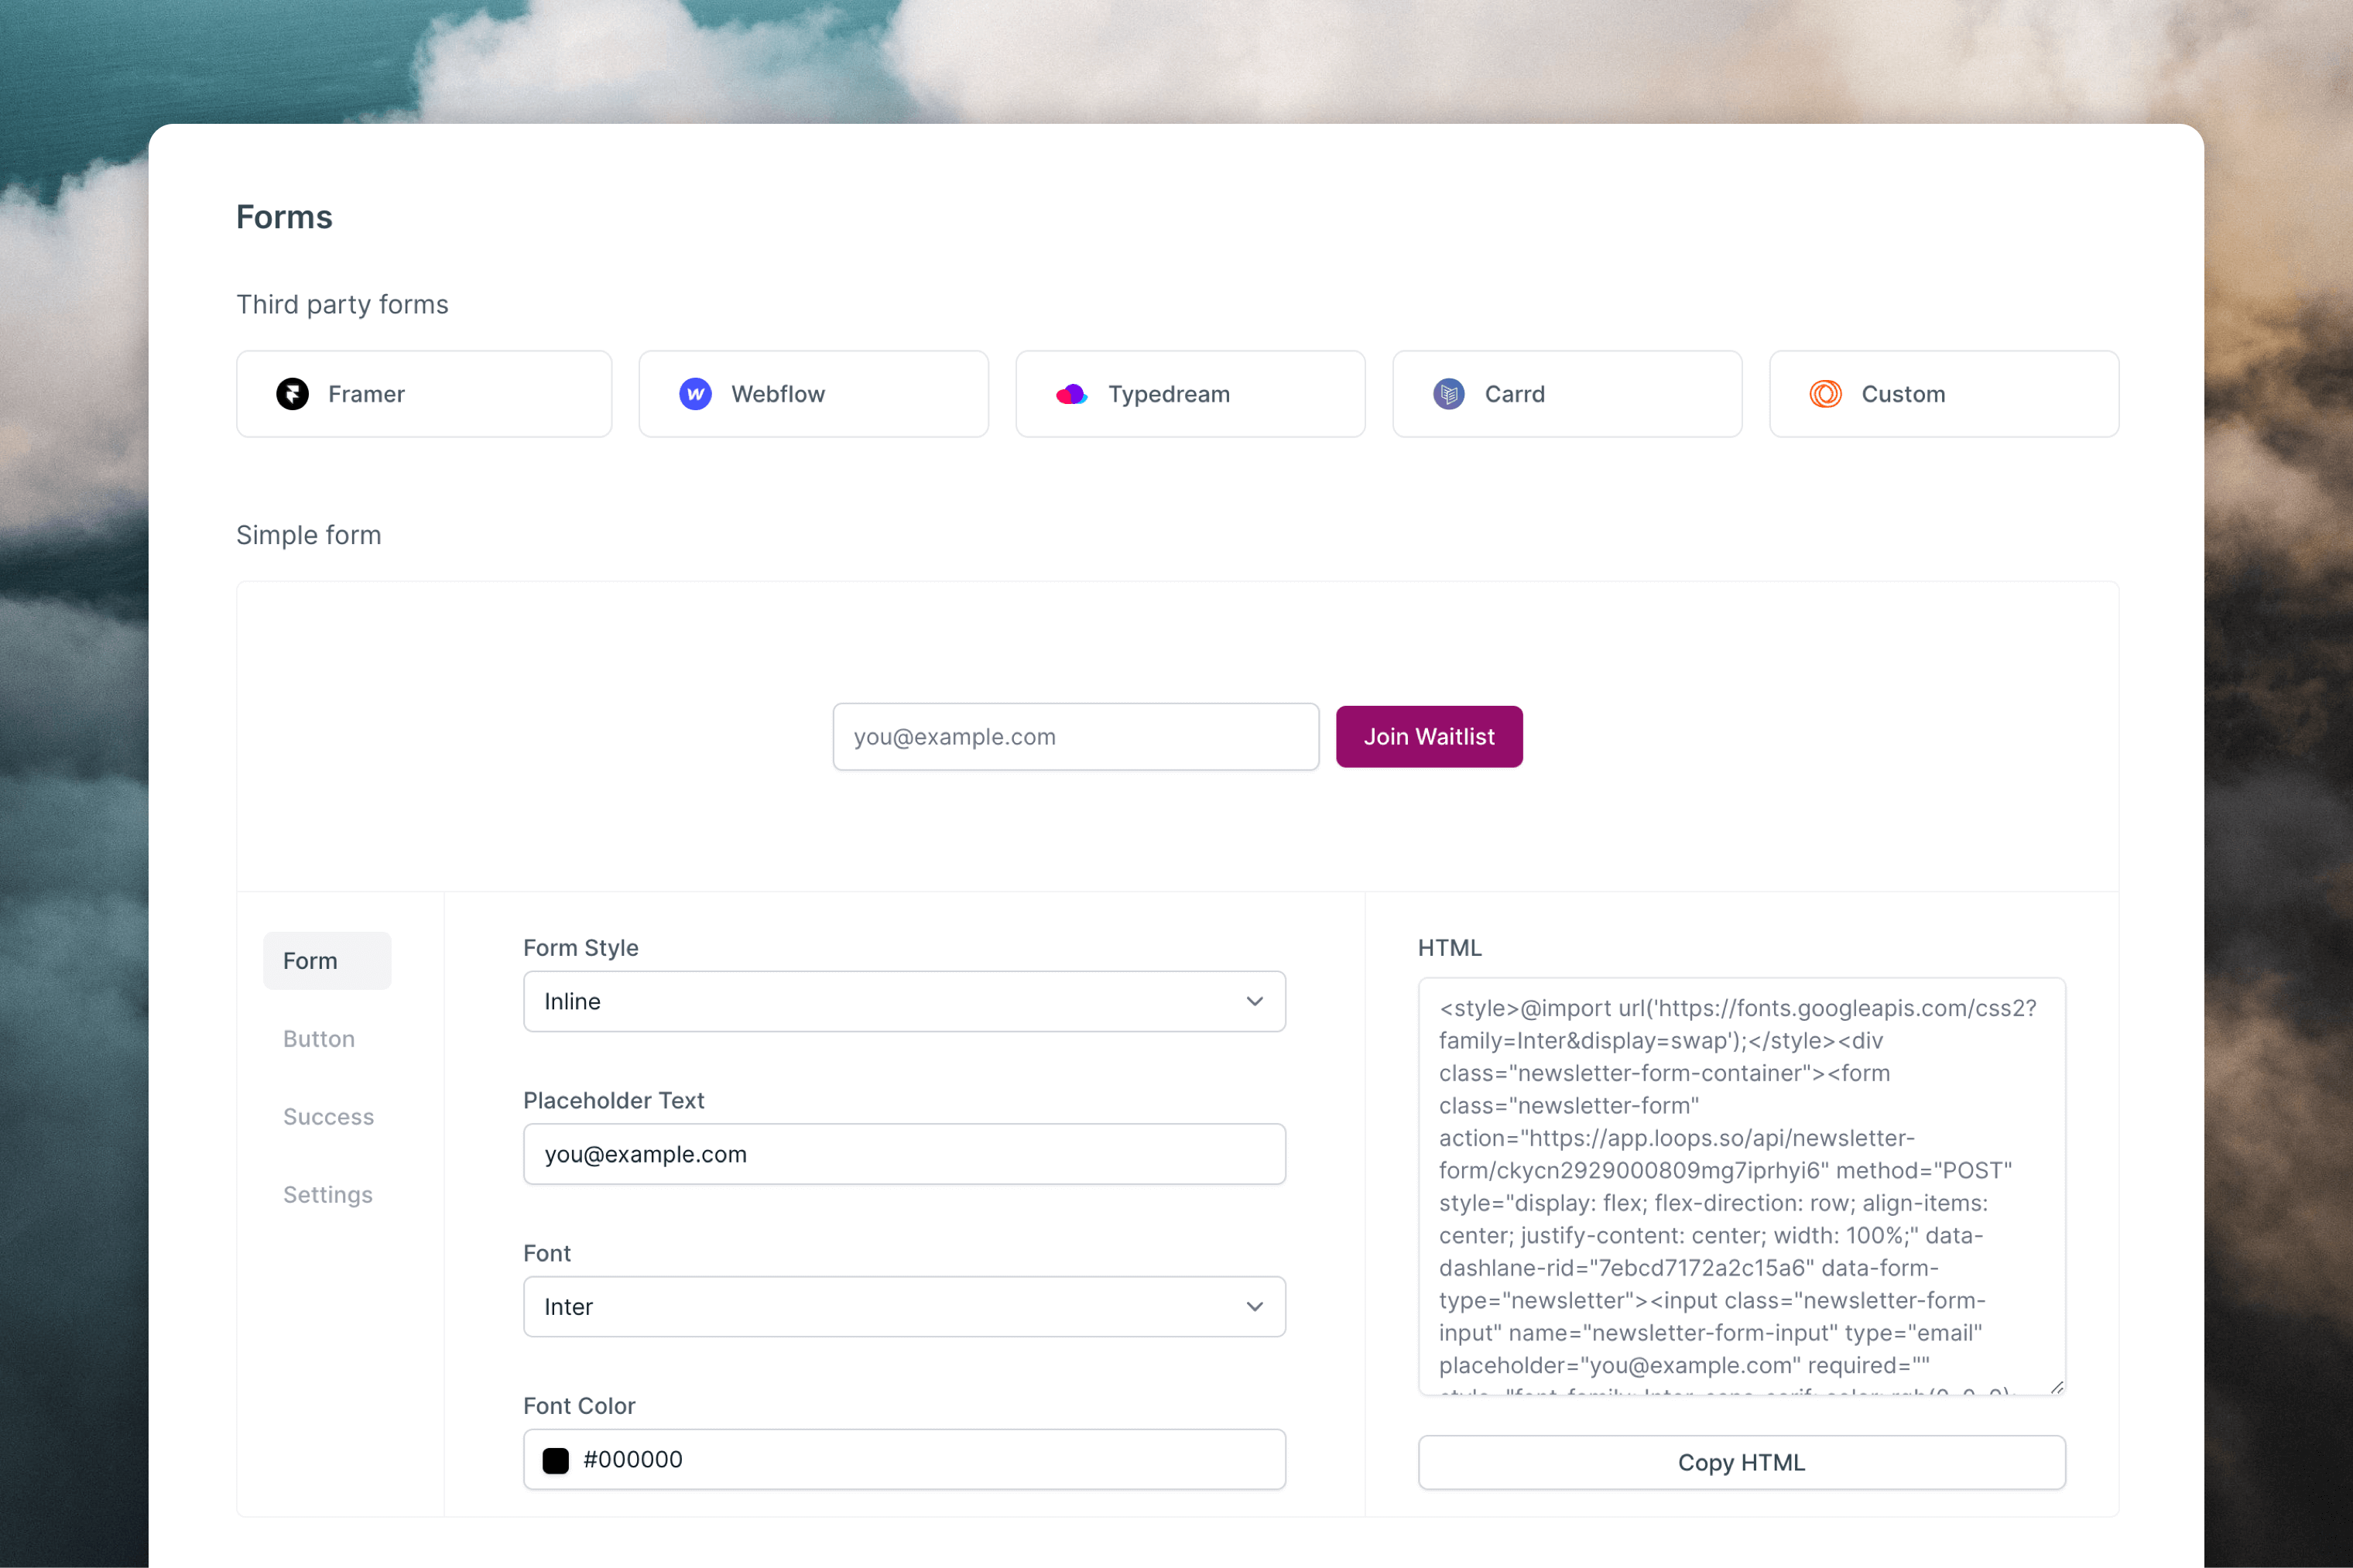
Adding a form to your site is one (popular) way to automatically add new contacts to your Audience.Even if you’re adding contacts programmatically via API or integration, in most cases you’ll also want to have an input form on your page to collect emails for newsletters or product updates.To add a form to your site, head over to the Forms page.You will see a handful of customization options including the form style, placeholder text, success message, font, font color, button color, and more.Make as many changes as you need to create a form that matches your brand.When you have finished customizing your form, simply copy the HTML or JSX that is automatically generated and paste it into your site.For more flexibility, you can create custom HTML forms that work with Loops. Read our full guide about custom forms or check out our form-based integrations.
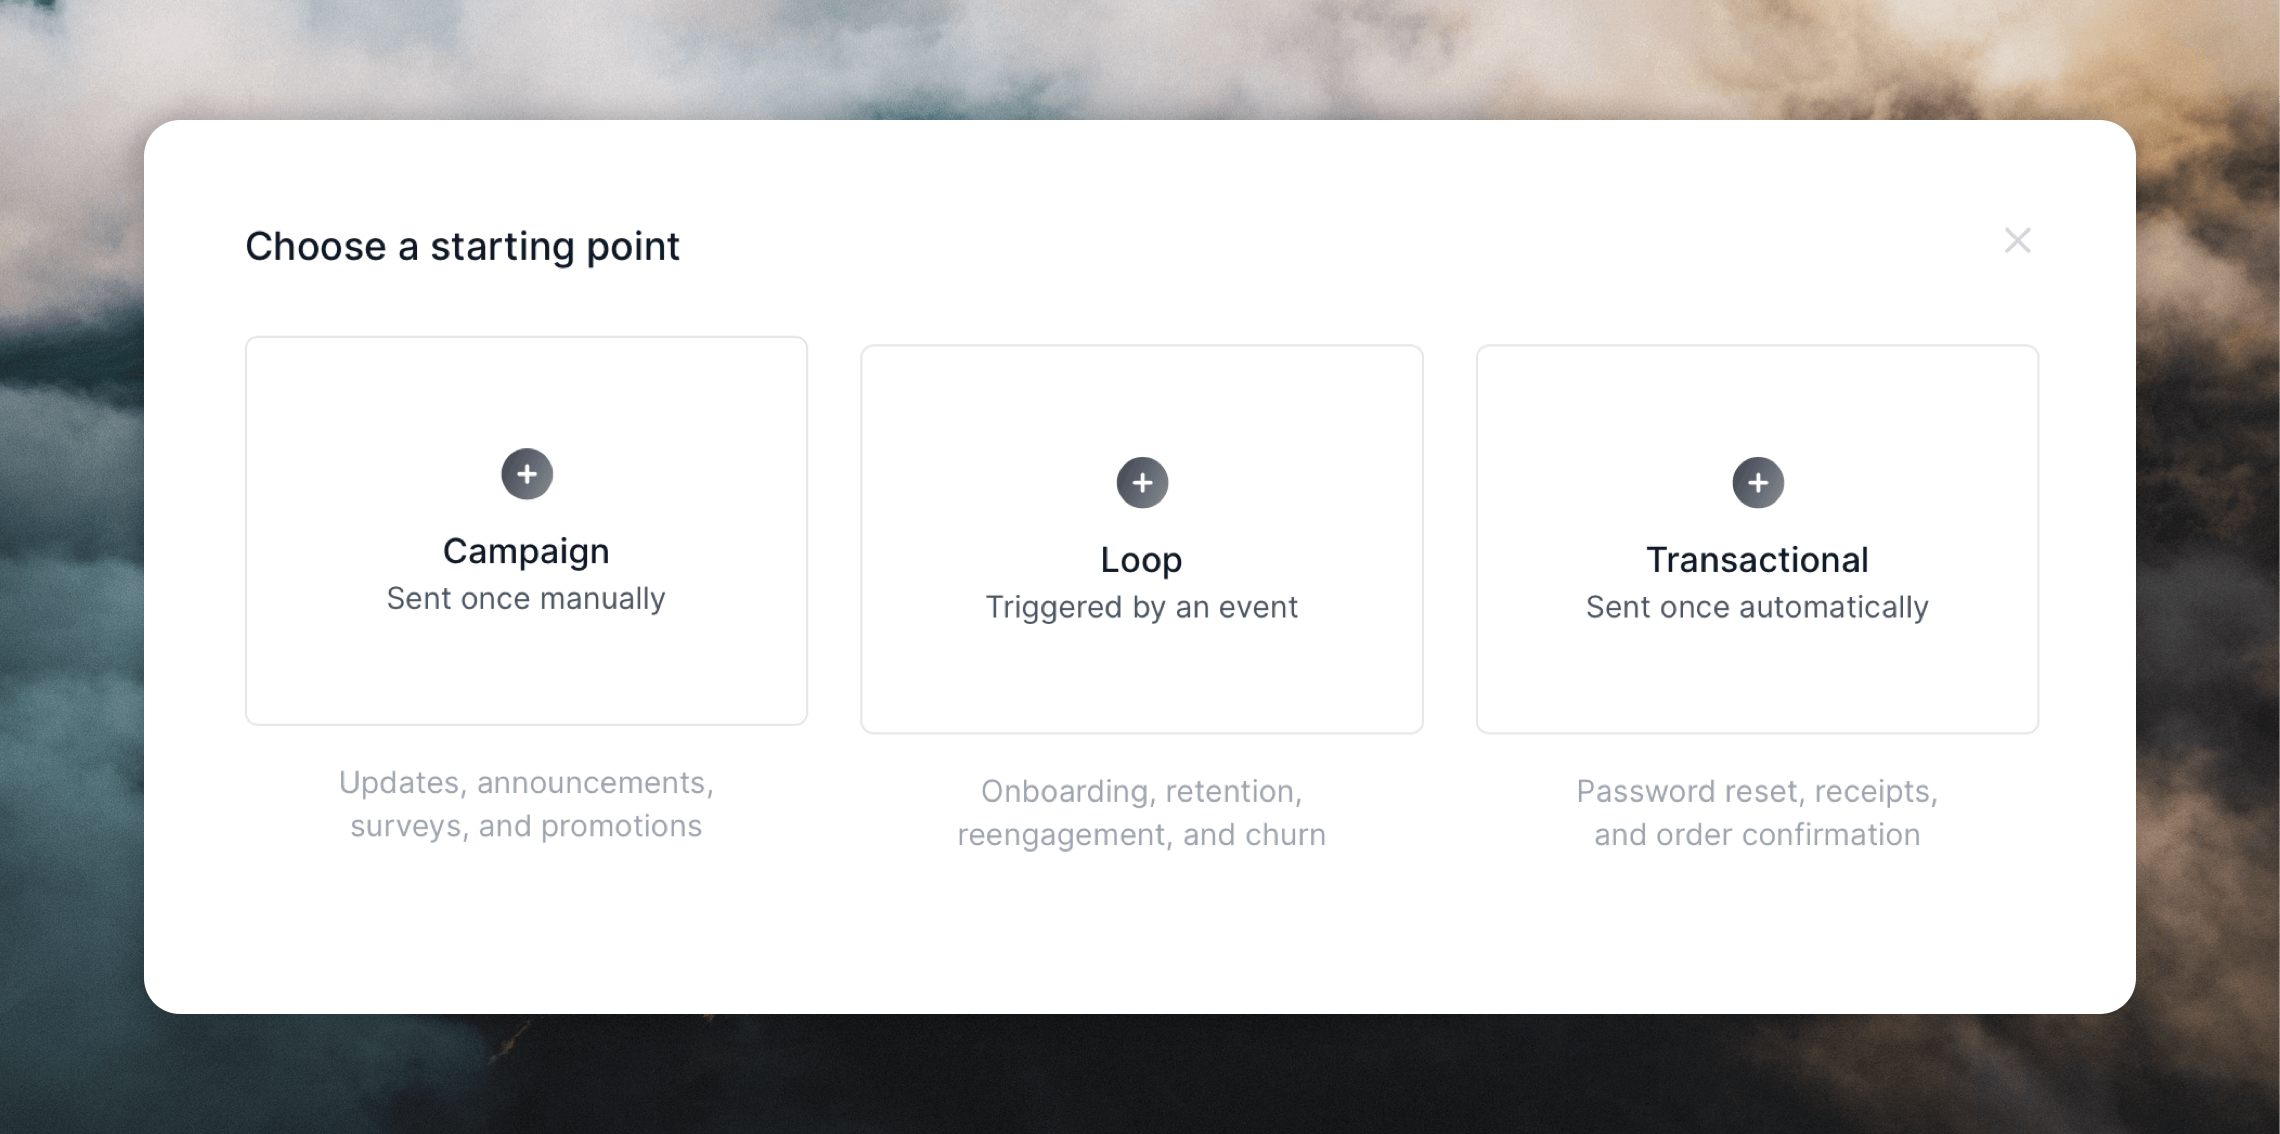
To create your first email, first select the type of content you’ll be sending. You can send email as a campaign, loop or transactional email. You can also choose to start with a Template instead of starting from scratch.Campaigns are single marketing emails sent to a group (e.g. newsletters, product updates, announcements, investor updates), Loops are automated emails sent based on specific triggers or conditions (e.g. onboarding sequences) and Transactional emails are one-off emails sent to a single person (e.g. forgot password, two-factor authorization codes, receipts). Read moreIn this example, we will build a product update (a campaign), which could be sent to your users if you’re building a SaaS. They should be sent monthly or at a faster cadence depending on shipping speed and contain a high-level overview of what you shipped over the last 30 days.To get started, click the Create button on the Home screen, followed by Campaign.Then we’re going to personalize by adding dynamic content and style it to match our brand.
You can preview your email any time by hitting the paper airplane icon in the
top right of the editor window.
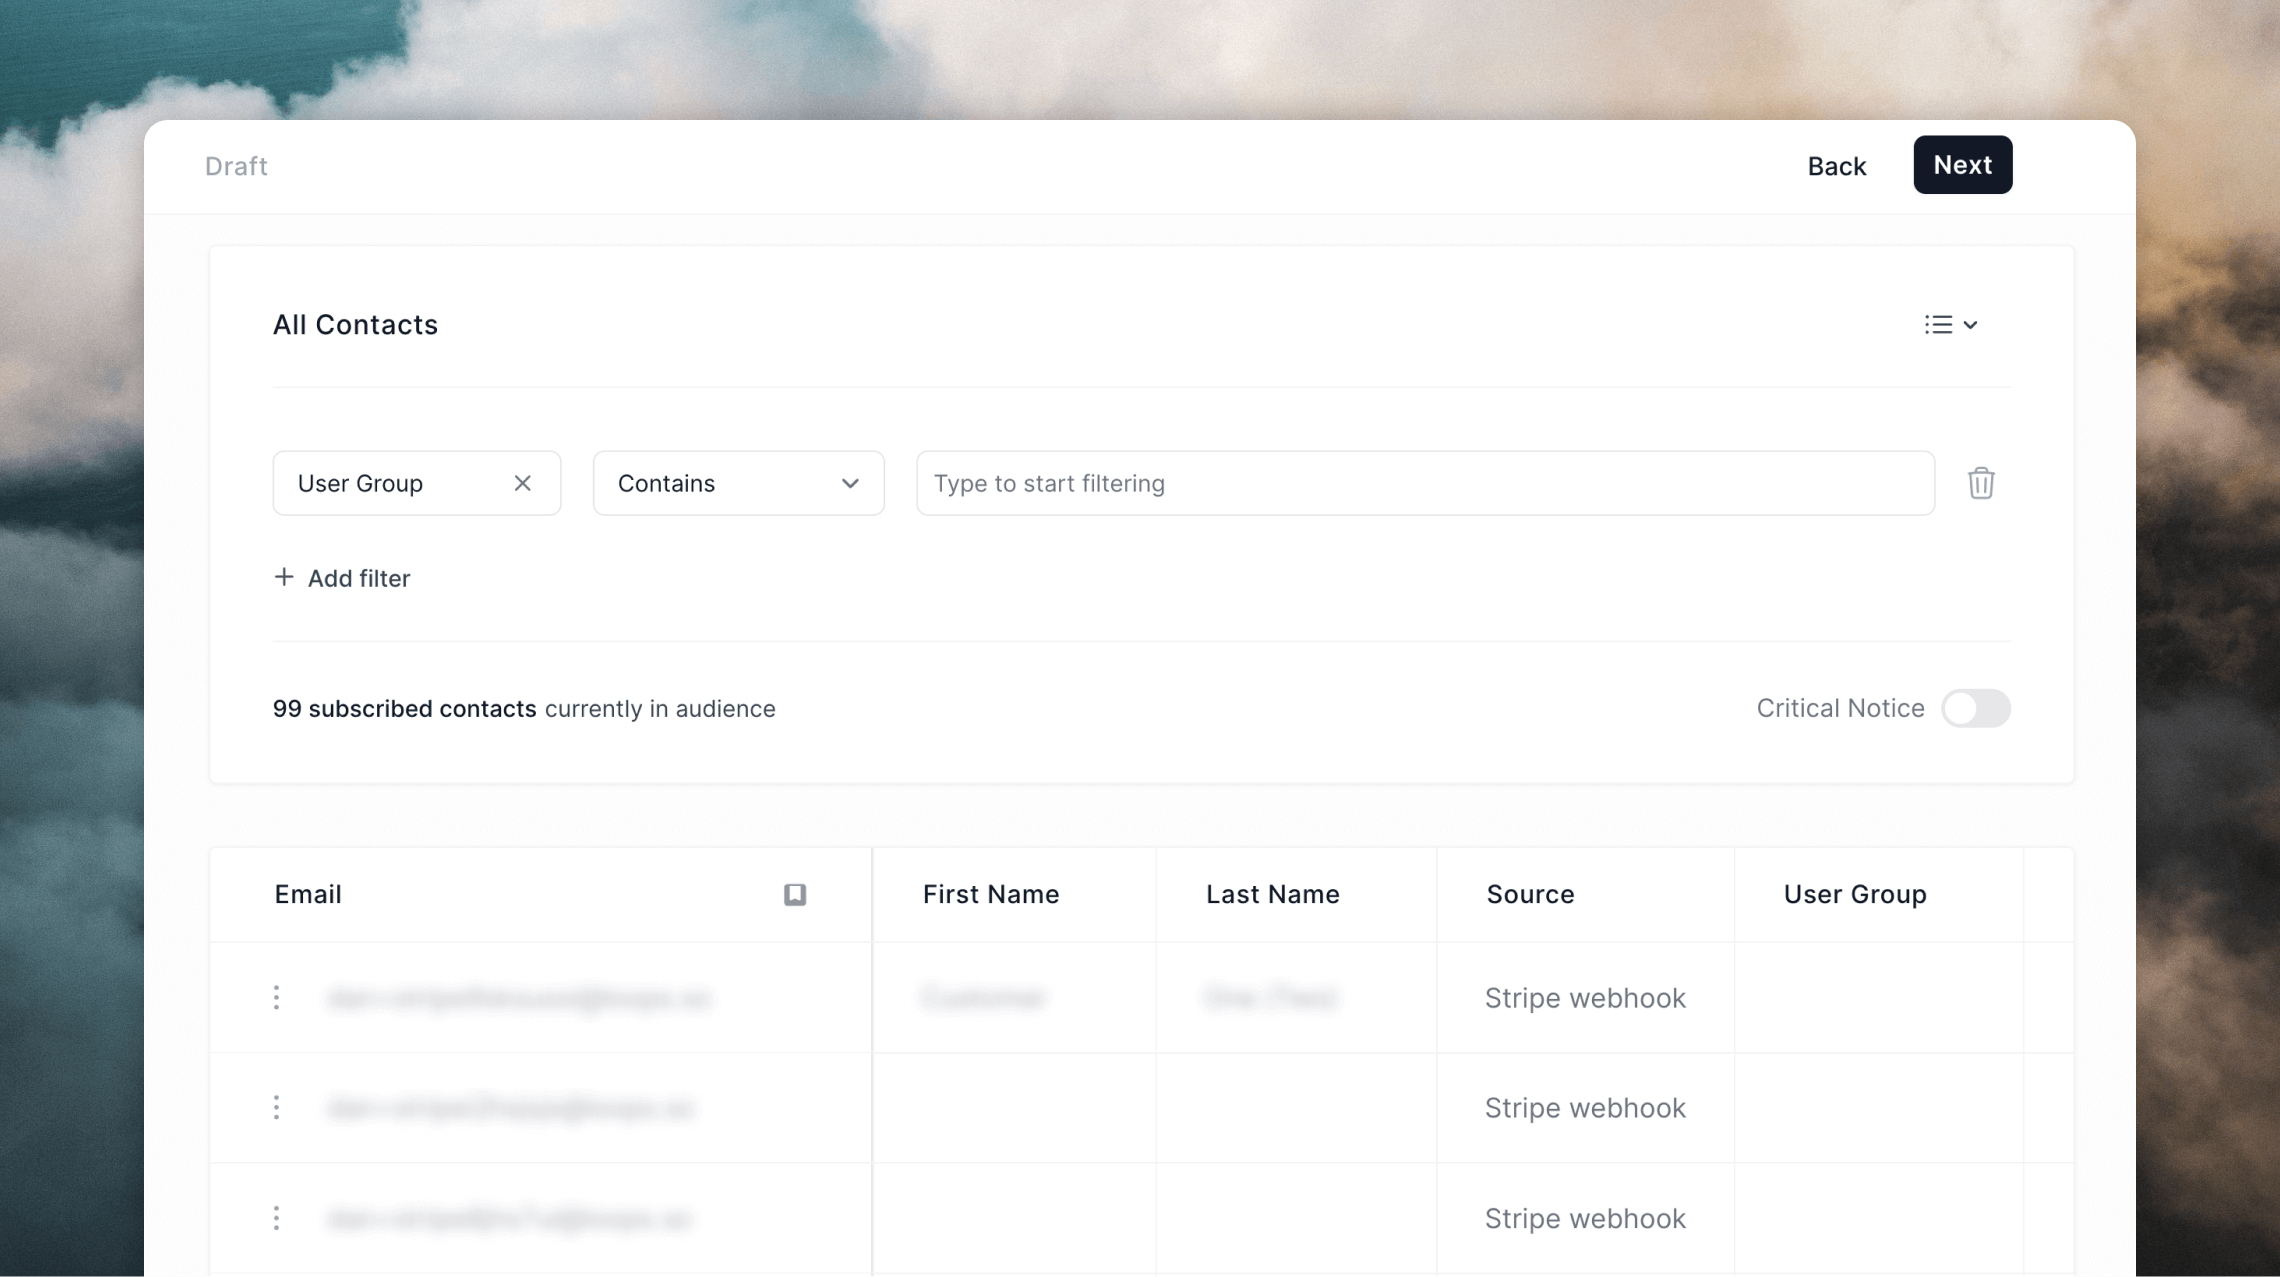
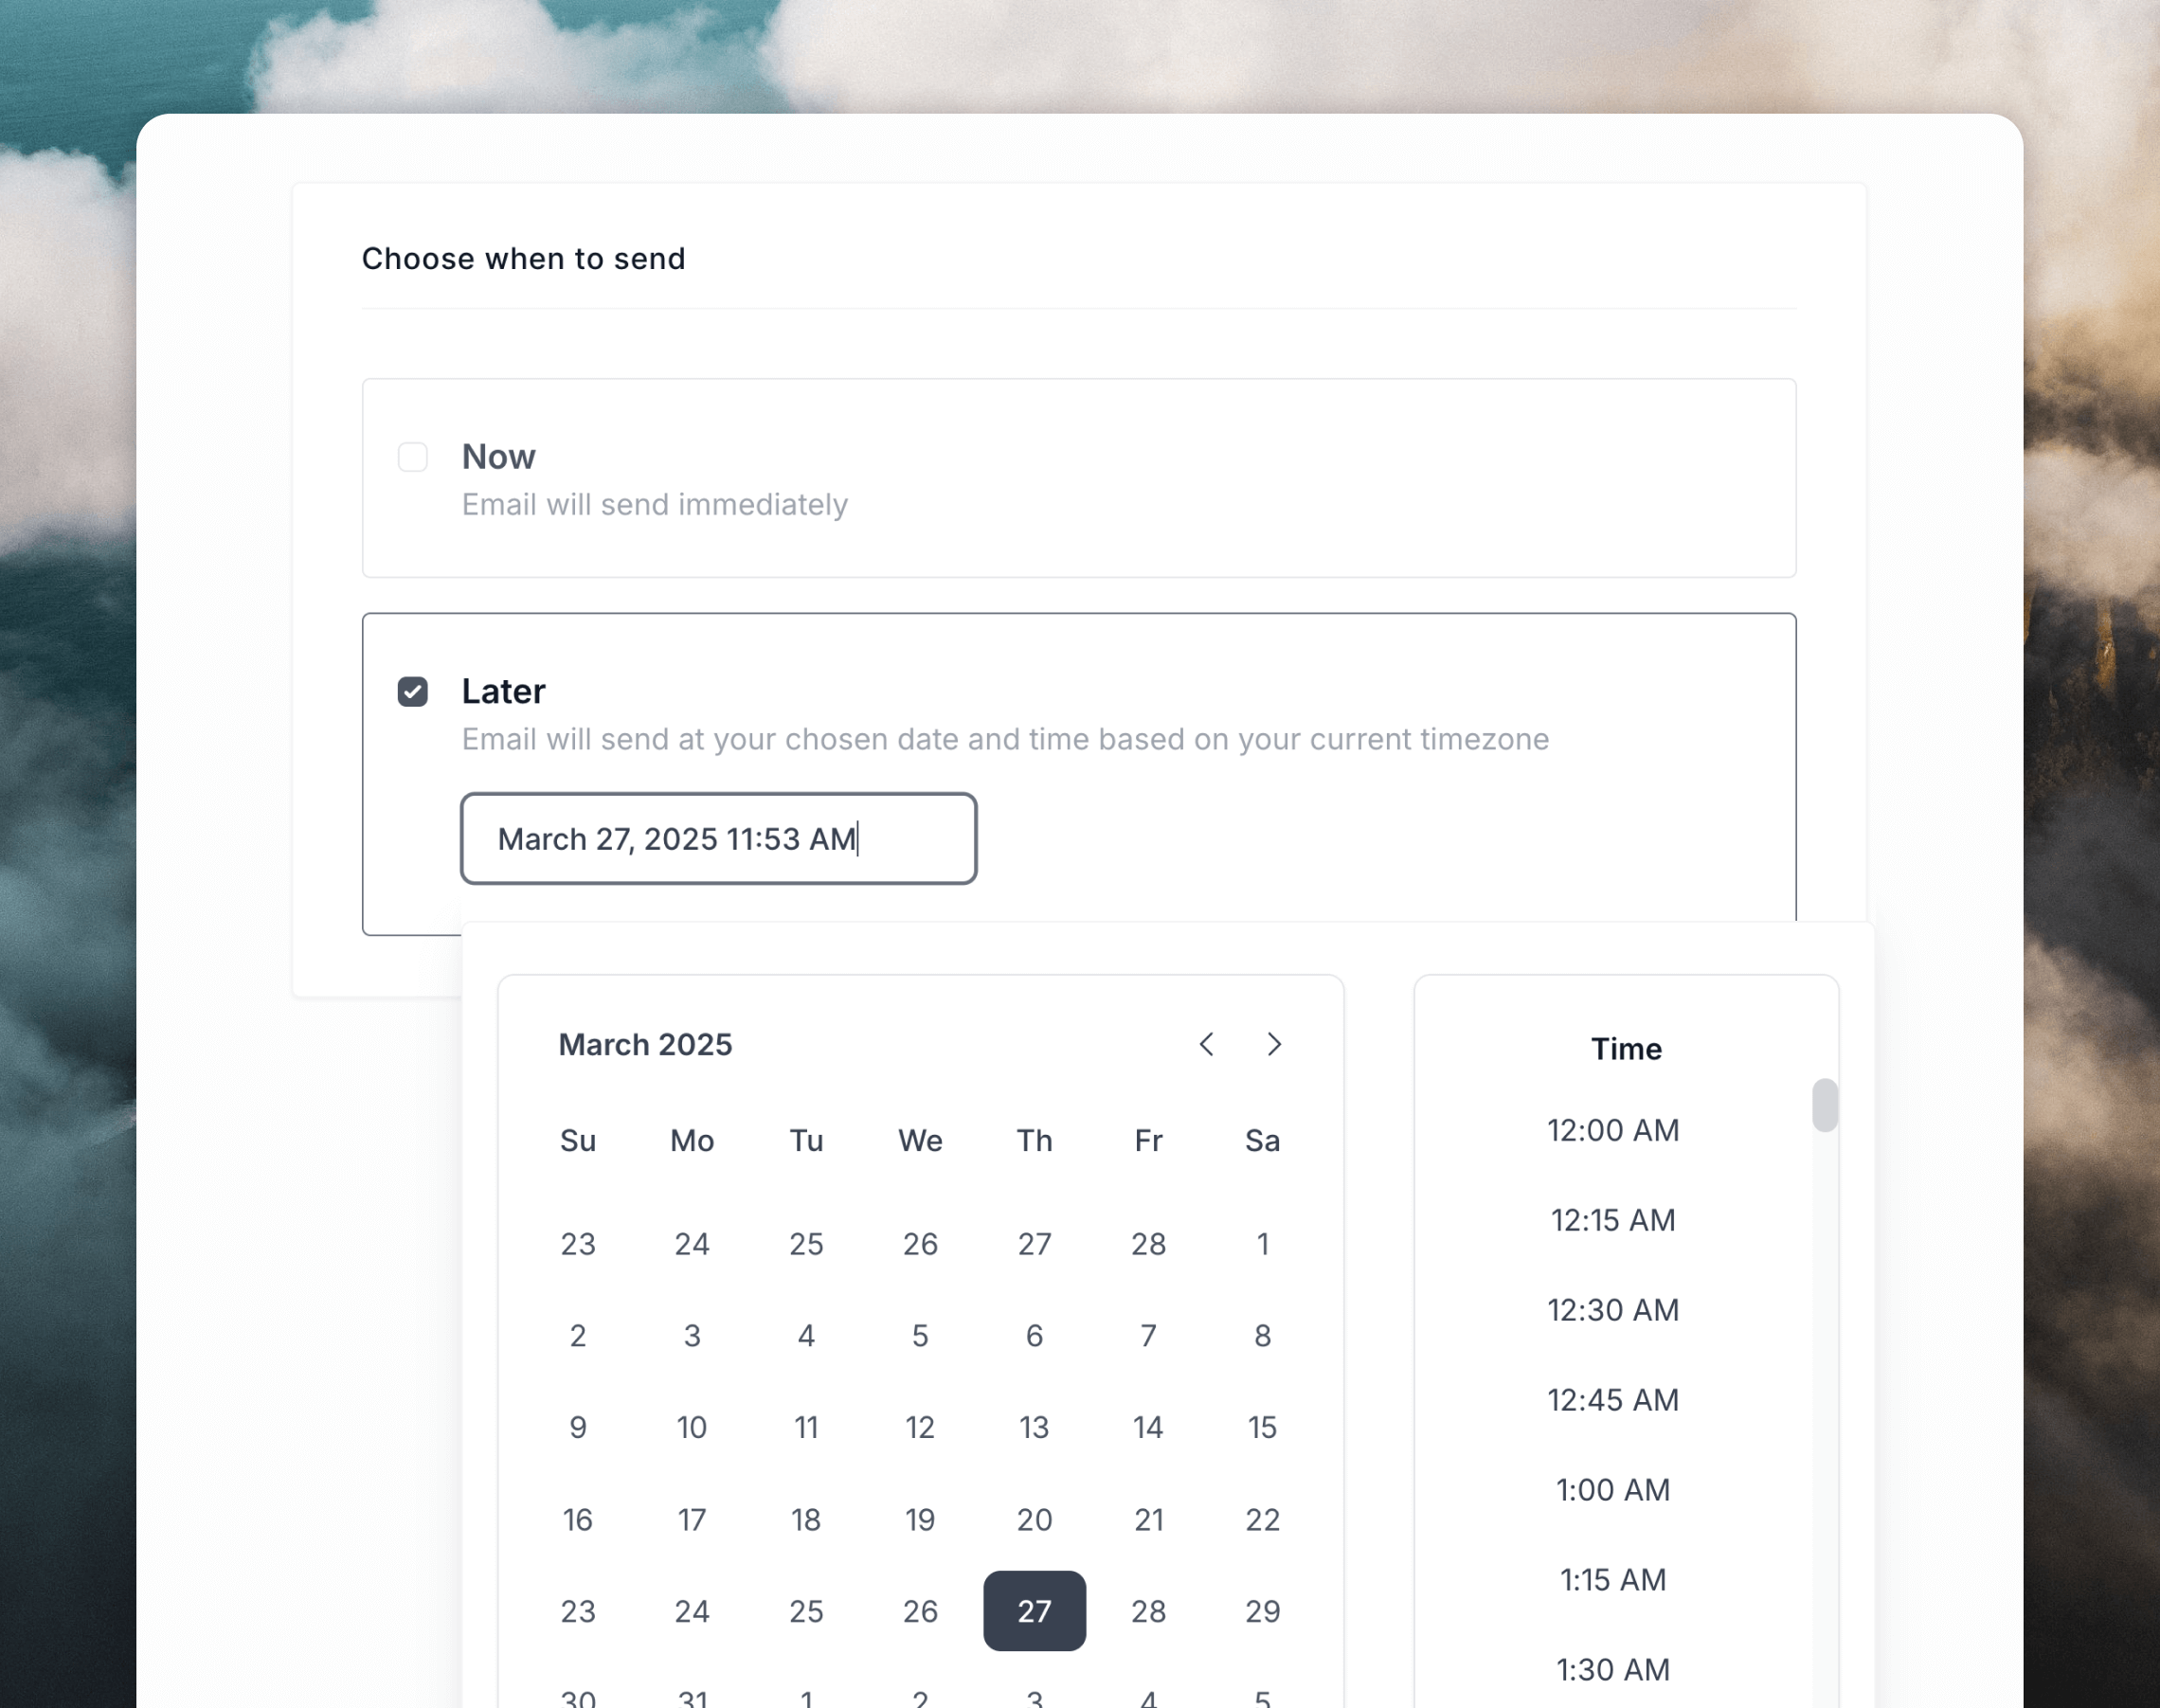
Once you’re finished with the email content, click Next in the top right to choose your audience.Now we’ll select the audience segment to whom we’ll be sending the update.Since we’re sending a product update, we want to send it to our entire audience so we won’t be adding any audience filters.If you’d like to segment your audience, just click Add filter, which will open the filtering options.Click the Next button top right and you’ll see options to send the email immediately or to schedule it for a time in the future.Click Next one last time to see a review of your email and settings (you can also see a preview of your email, too). If you’re happy with how everything looks, click Schedule send on the last page and we’re done!The email is now scheduled to go out.By the way, you can cancel the scheduled send at any time between the send time and now to update it, or you can just send it right away.
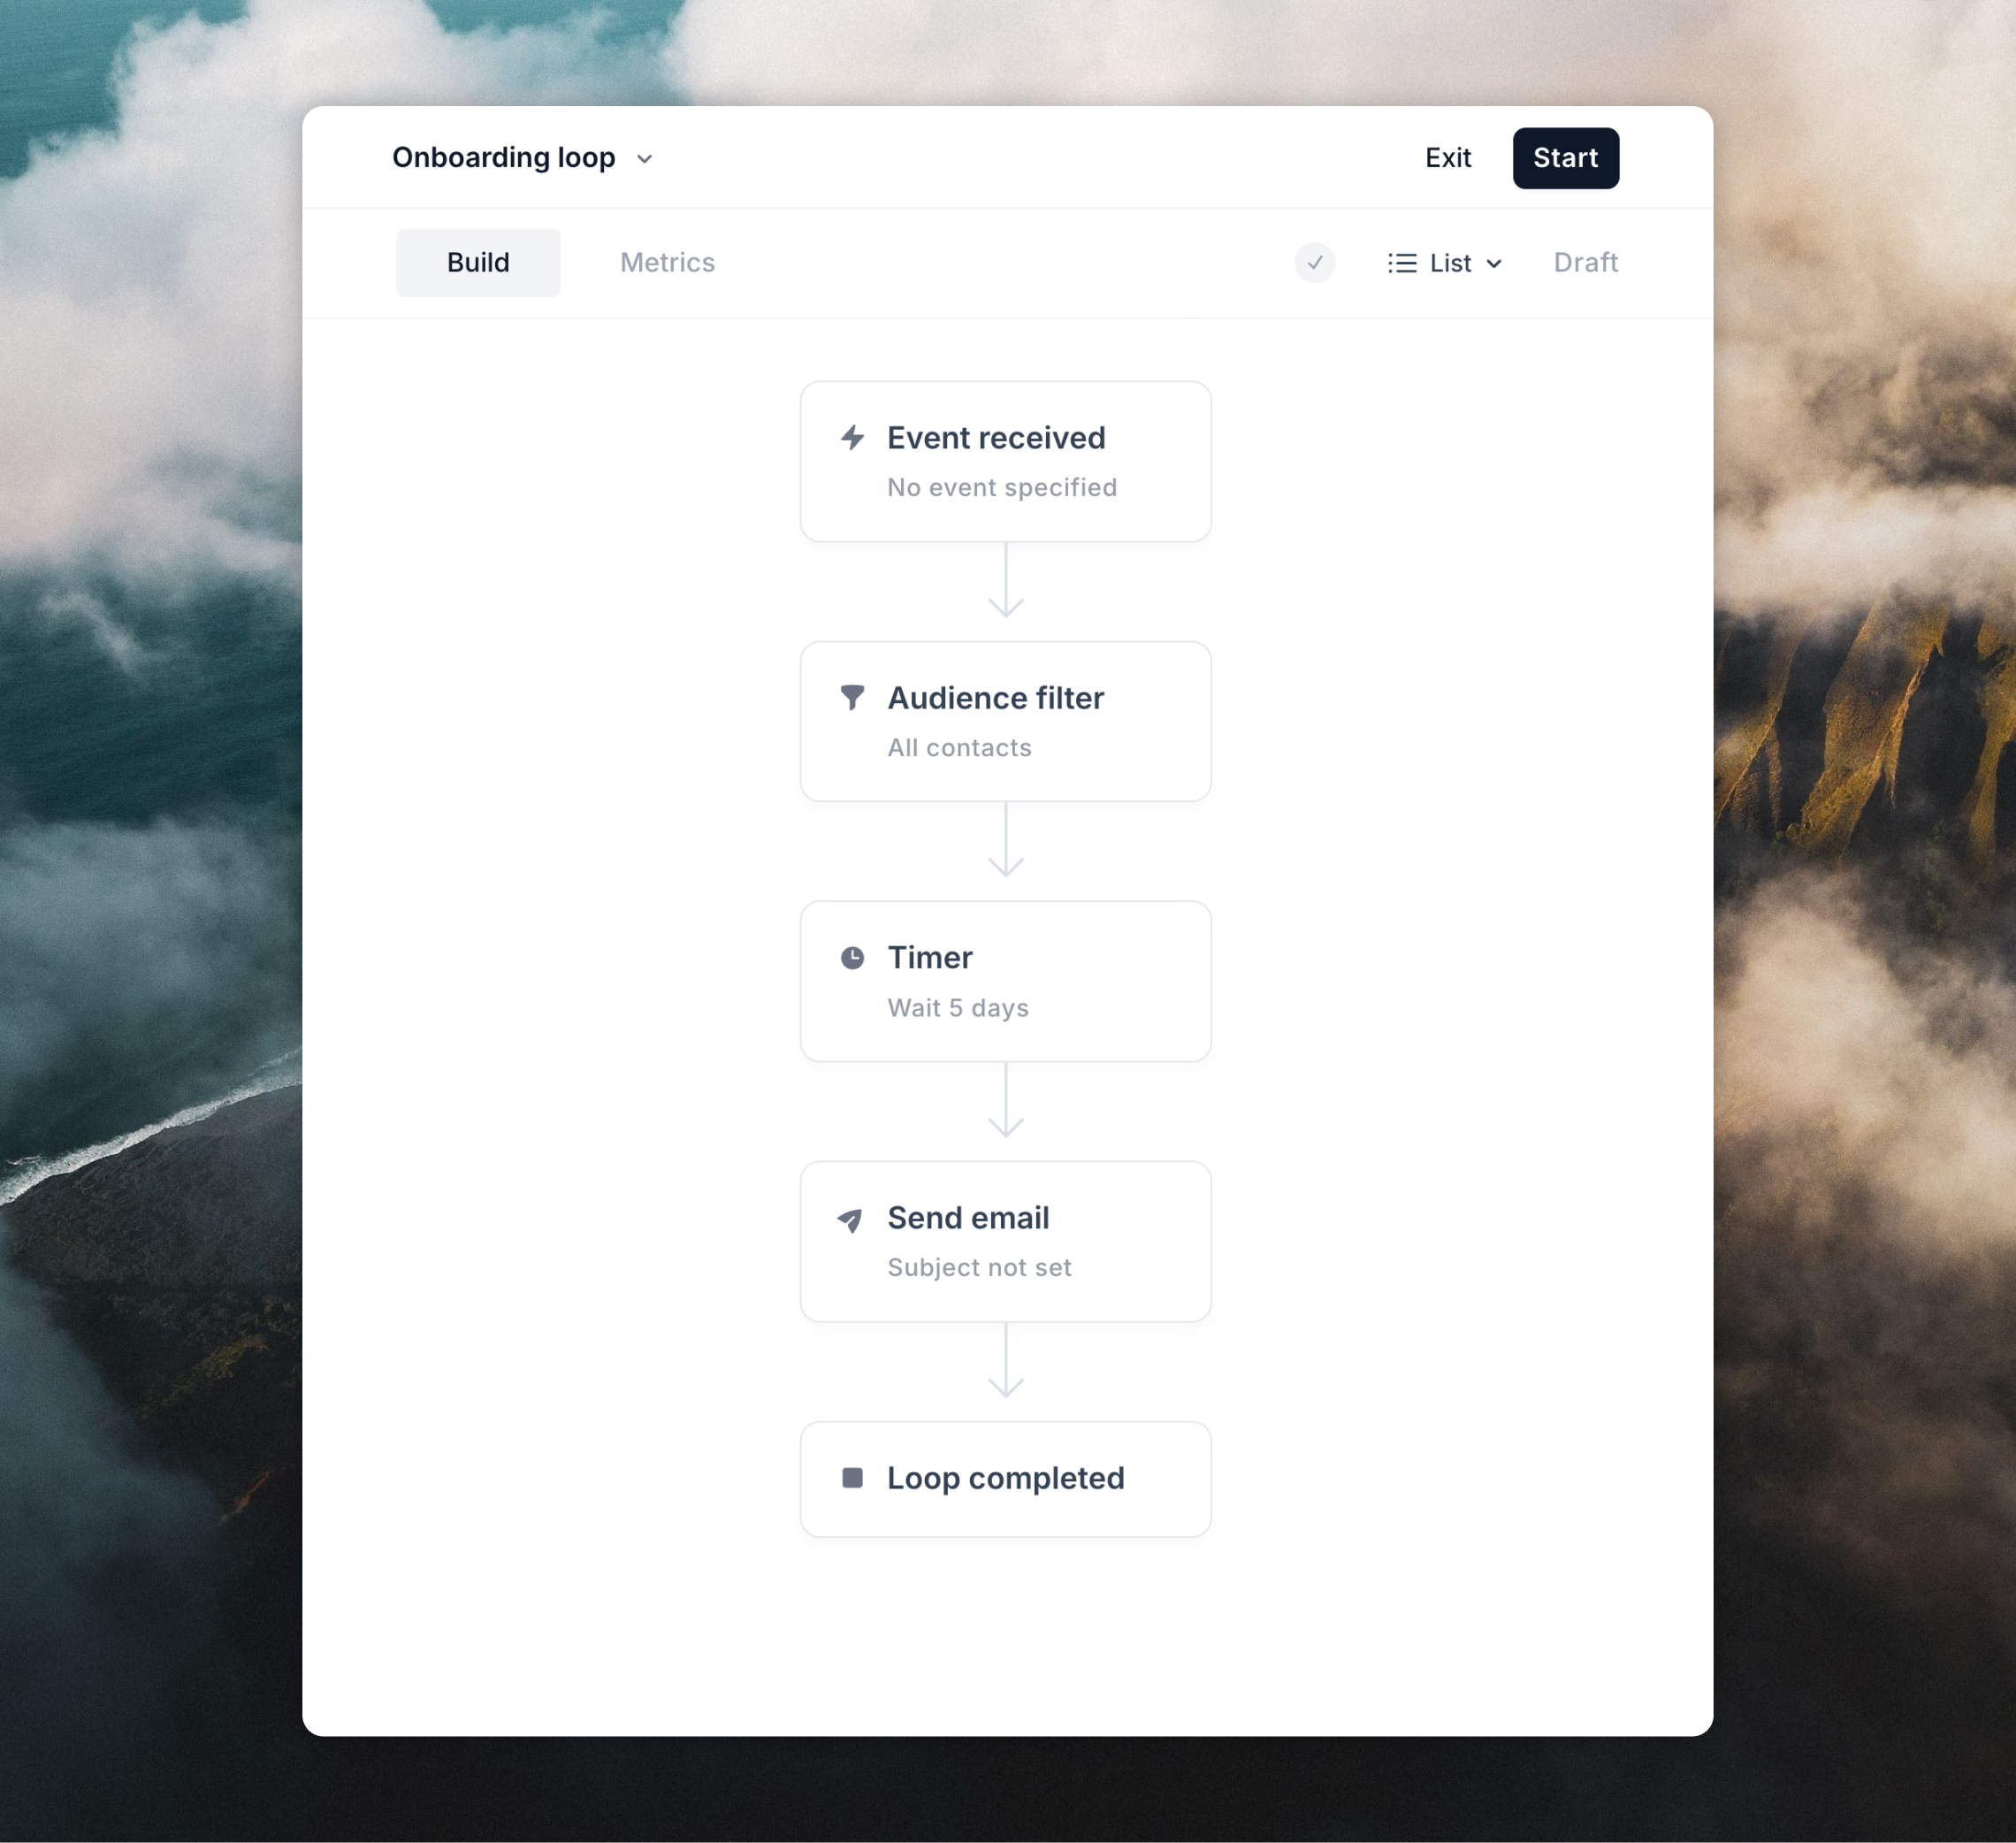
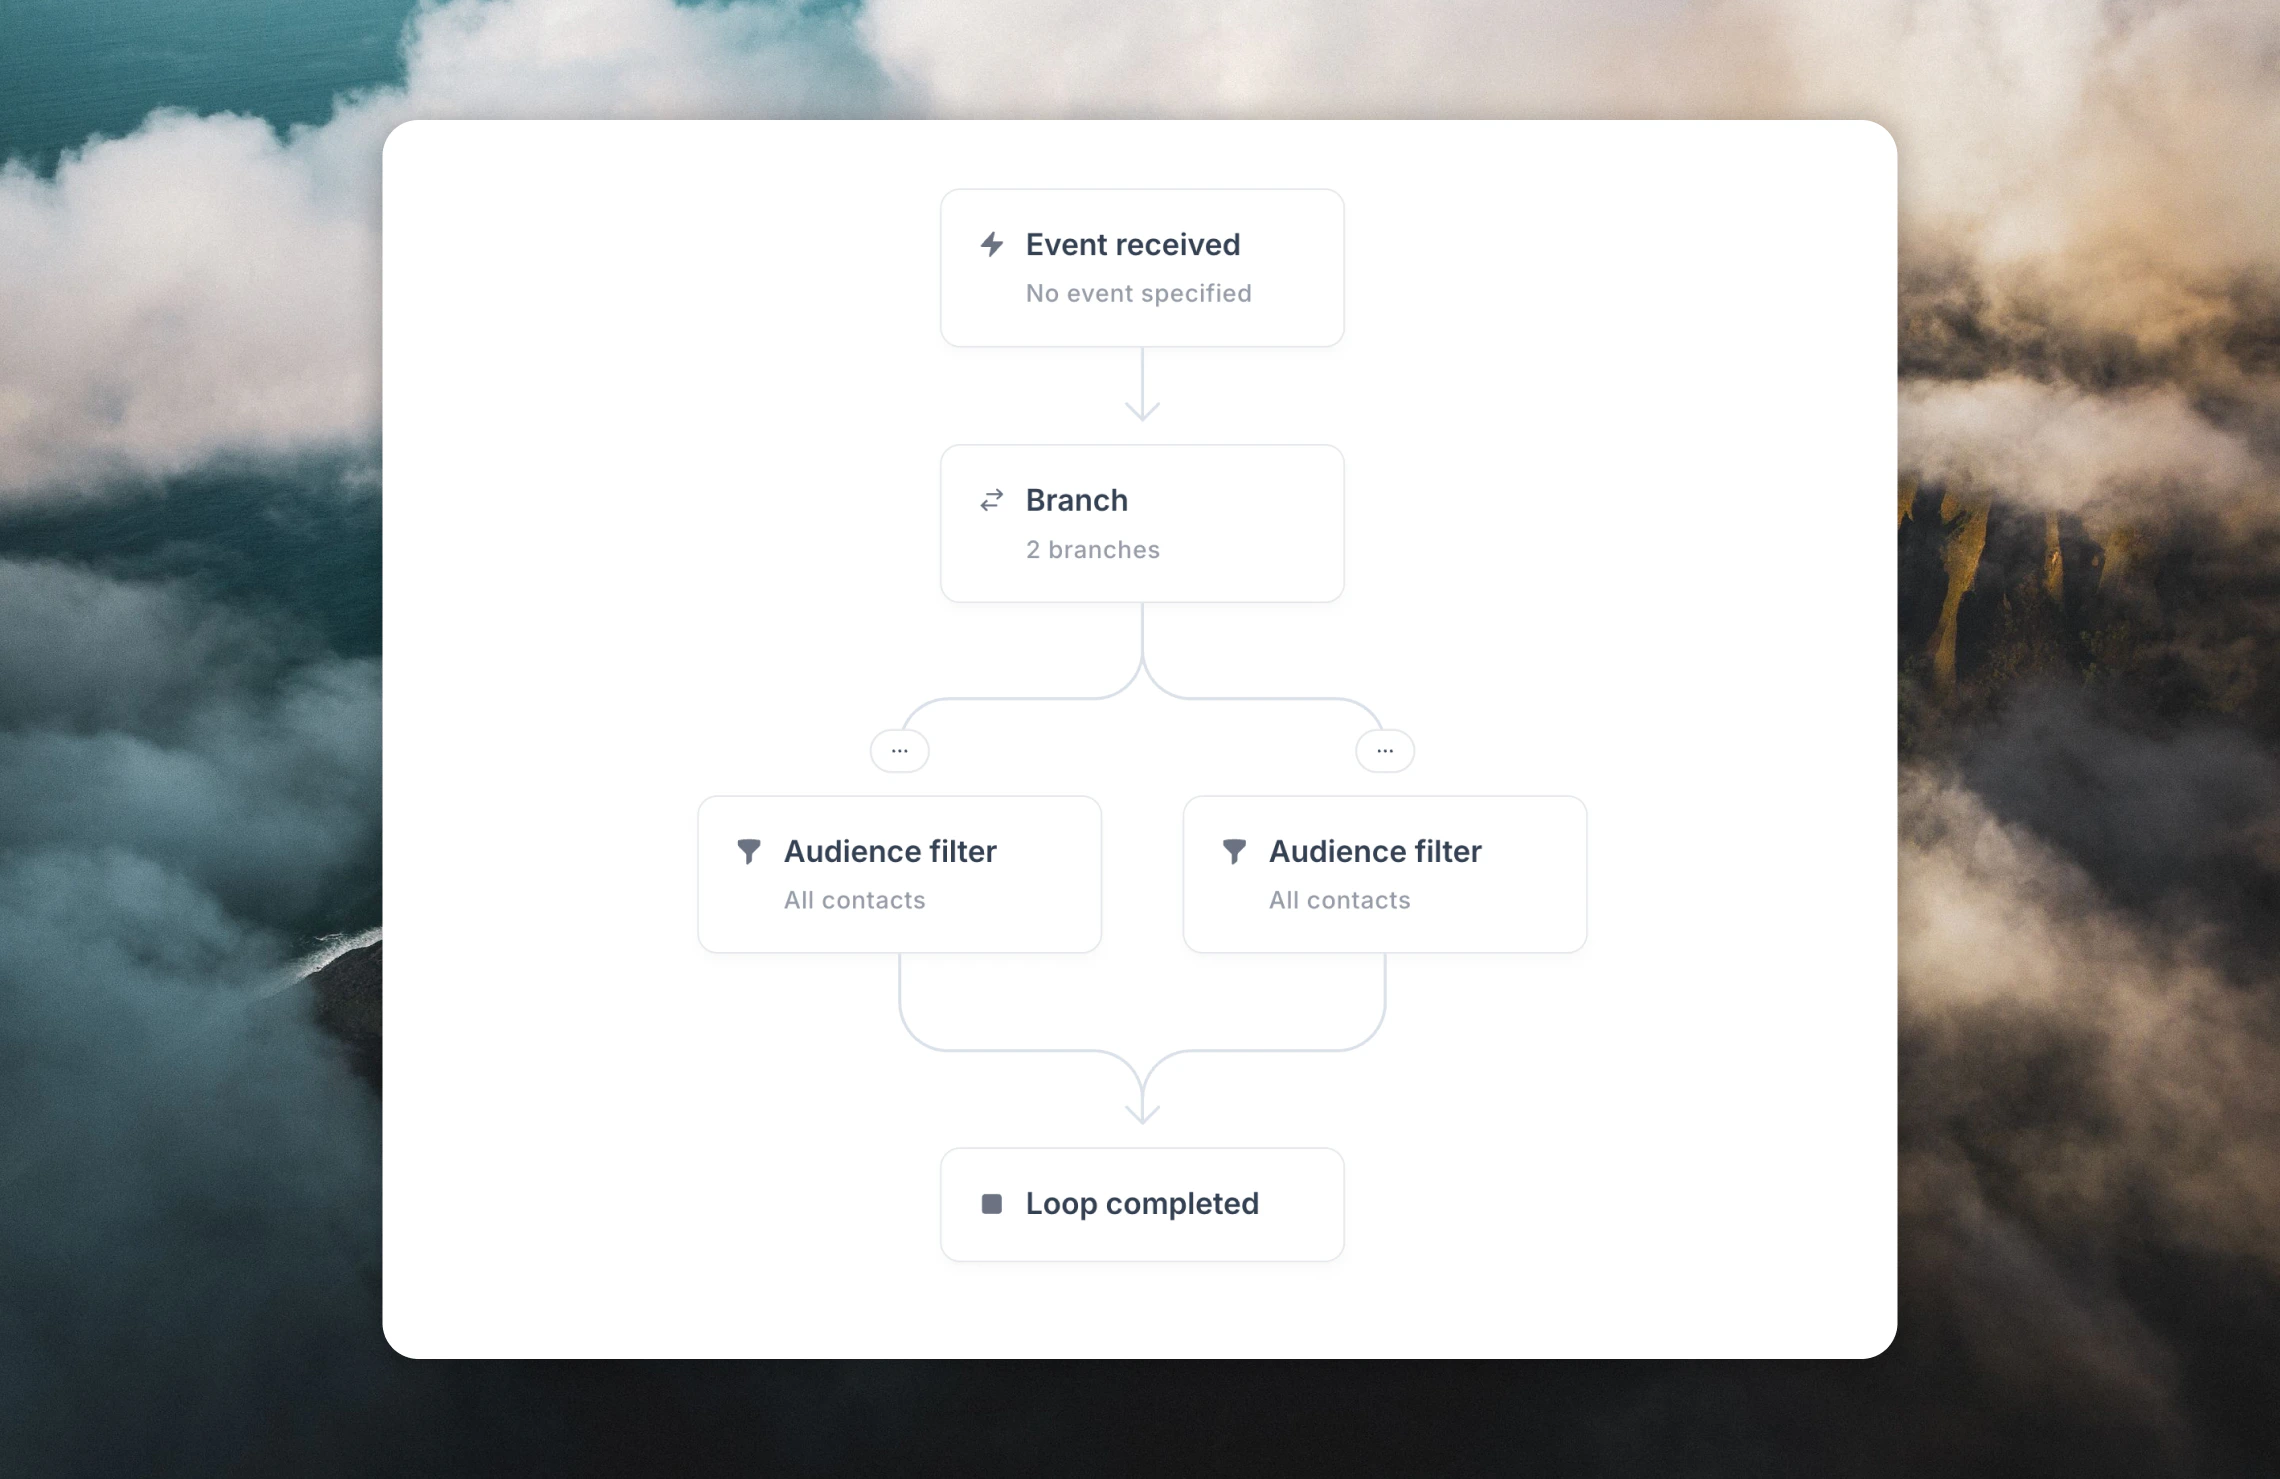
We suggest that new Loops users warm up their new sending domain with a welcome email sequence. A slow ramp up of emails sent to highly-engaged recipients will help prepare your domain for larger campaigns later on (read more).You can create an onboarding or welcome sequence using what we call “loops”.A loop looks like this:Go to the Loops page and click New.We’ll start with the “Introduce yourself” template. This will create a loop with a “Contact added” trigger (meaning every new contact will be added to the loop), with an already-written introduction email ready for you.Edit the email and when you’re ready to make it live, click Start.You can use branches to create more complex workflows, sending contacts down different branches depending on contact properties or even whether they’ve interacted with campaigns you’ve sent from Loops.
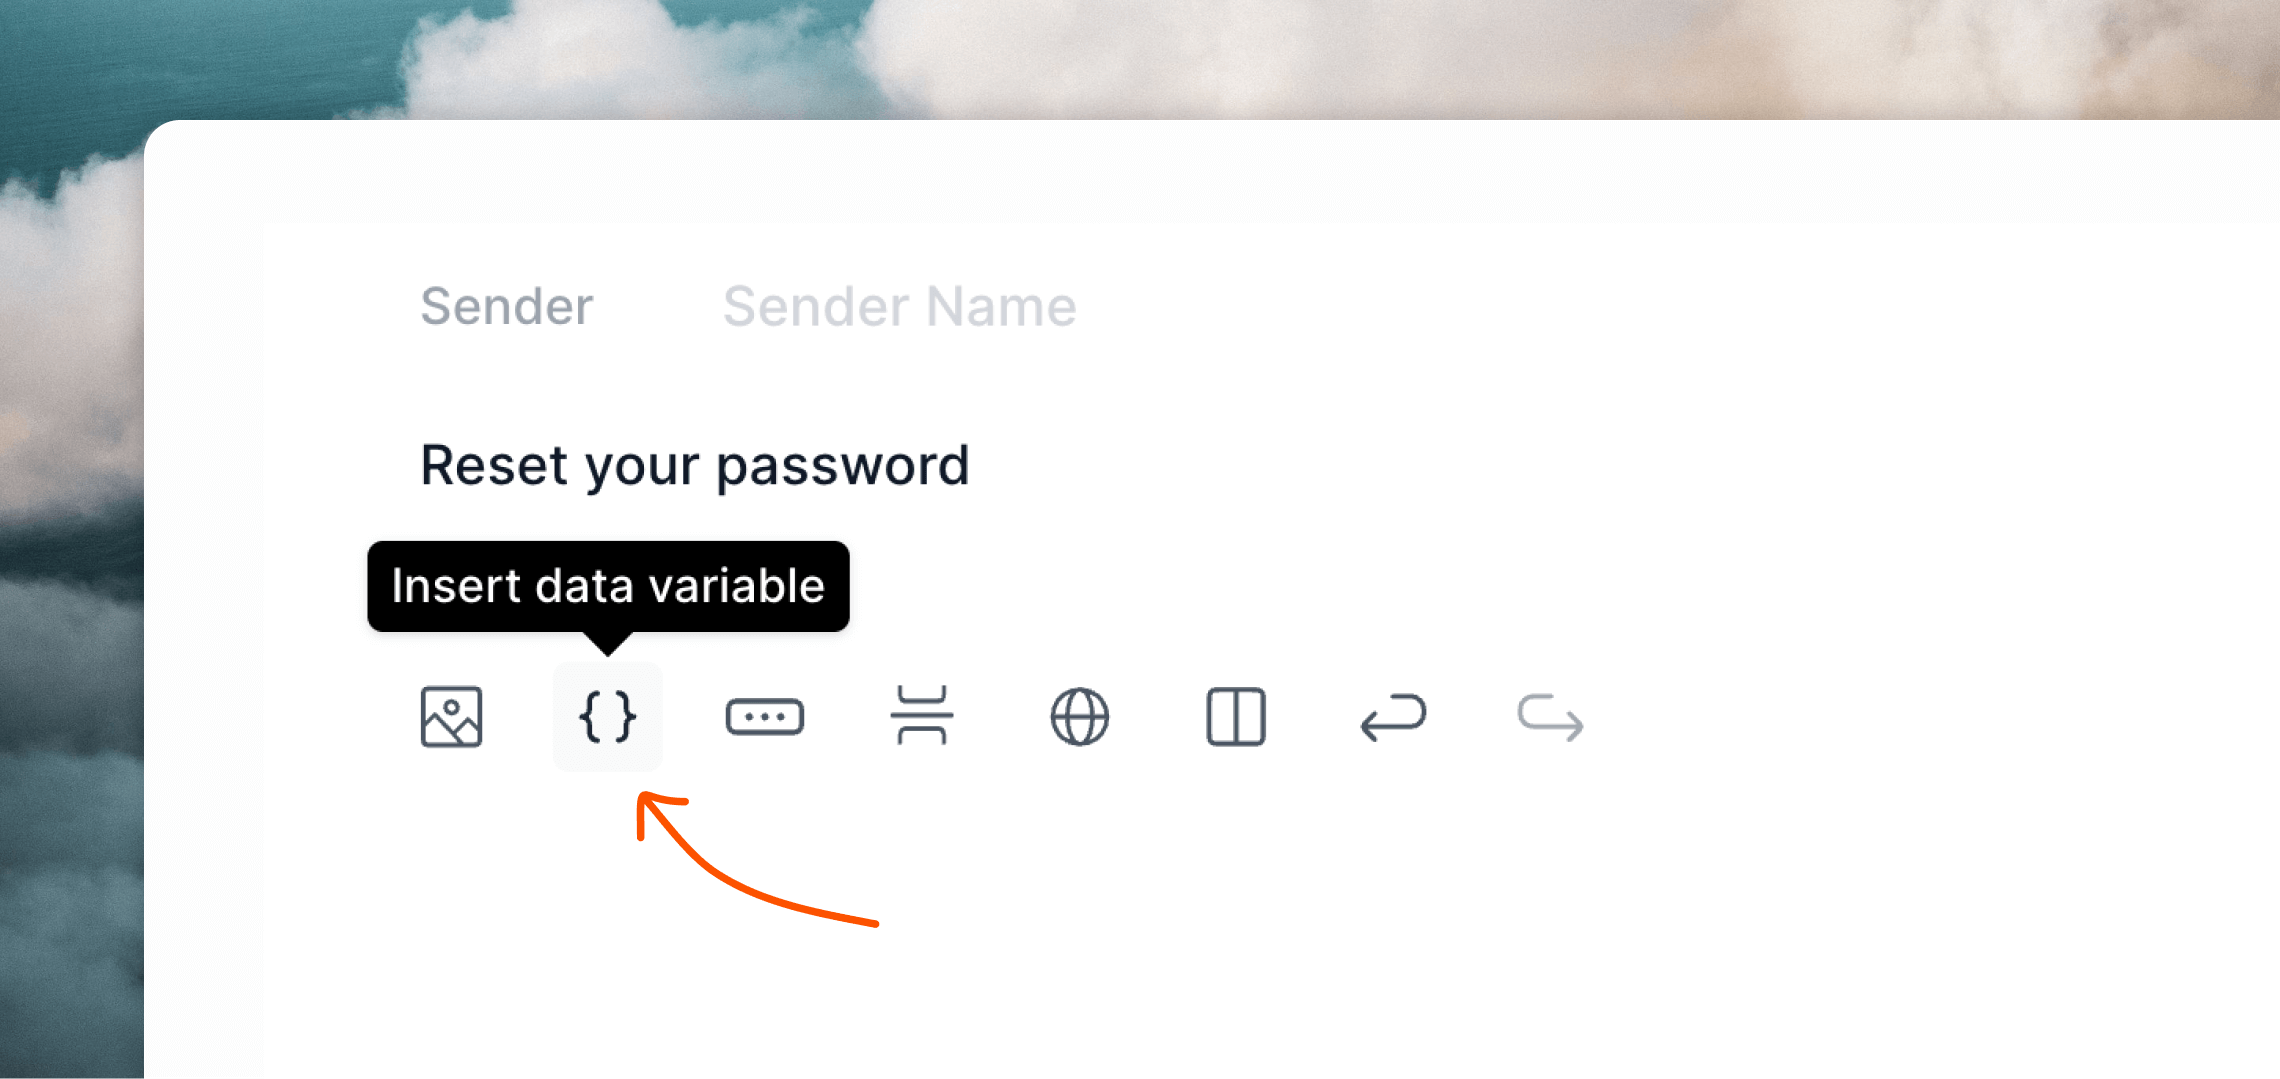
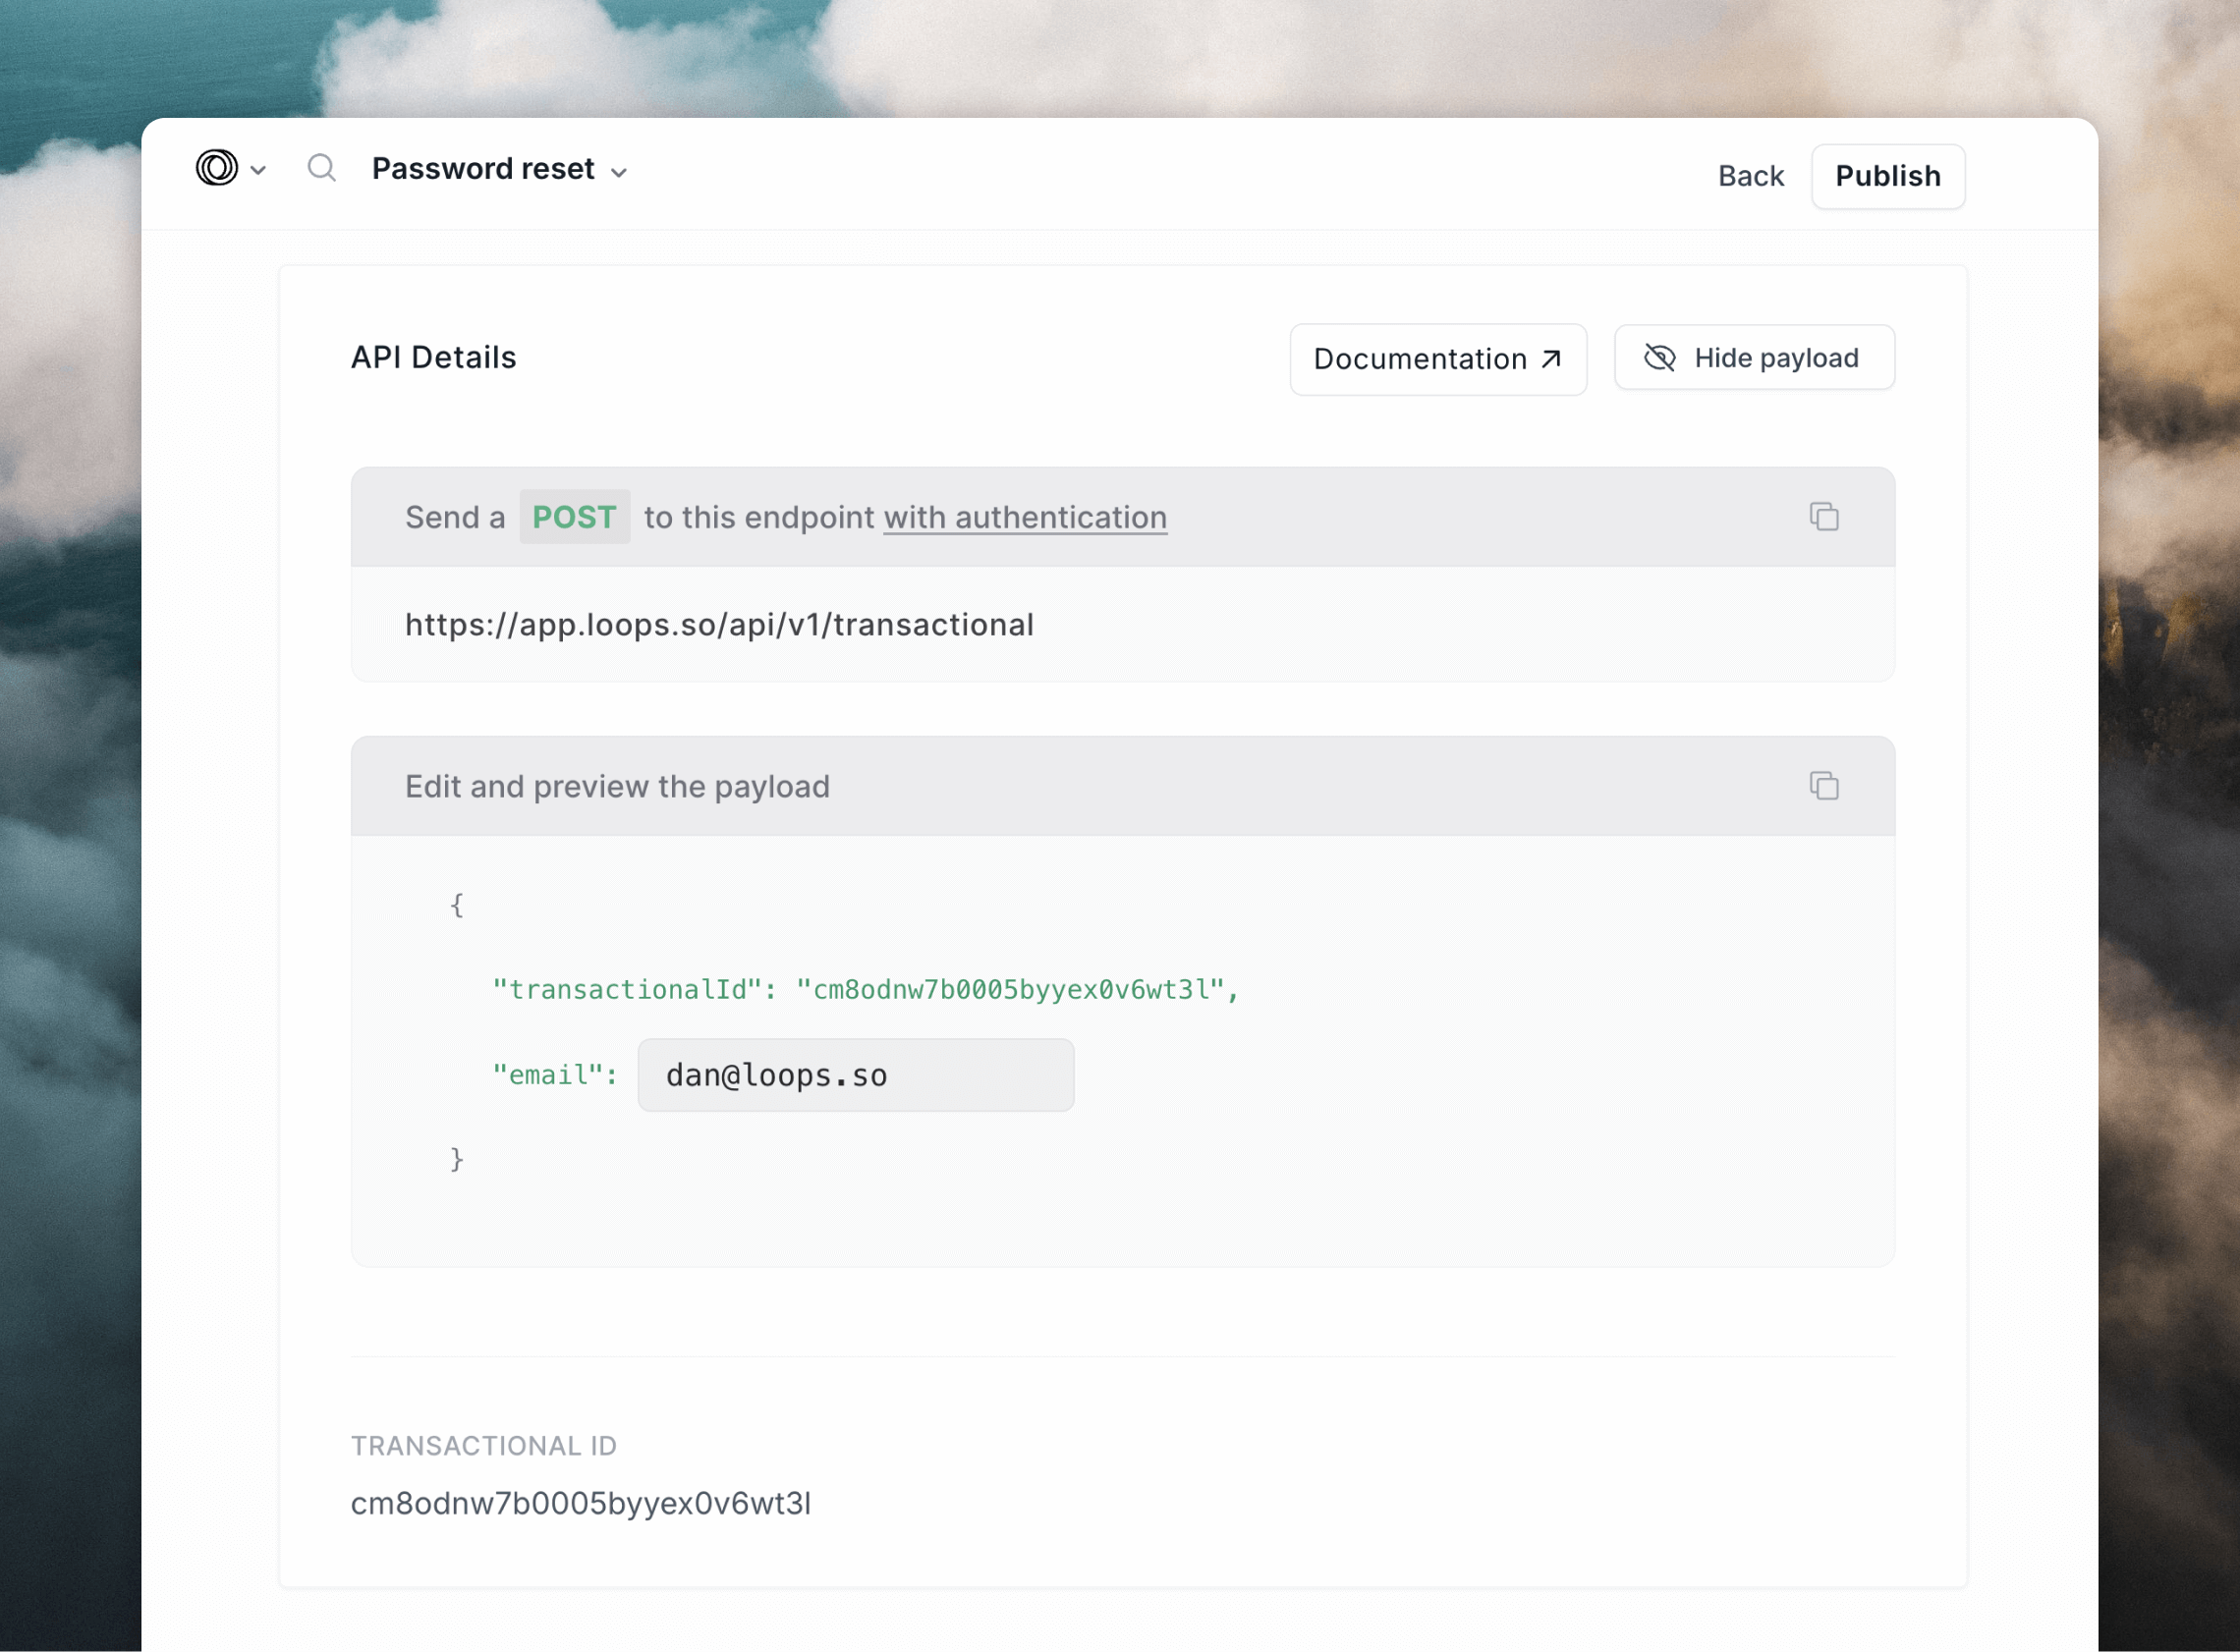
You’ll likely need to send a password reset, login or other automatic email that confirms a user action.These non-promotional emails are considered Transactional emails and are the 1:1 emails that are sent to a single contact via API or integration.They’re included in all paid Loops plans, and also included within the 4,000 monthly sends available in the Free plan.To get started, click the Create button on the Home screen, followed by Transactional.Next, it’s time to write and style your email.We recommend following a similar style across all of your Transactional emails. You can do this by using themes.Let’s create a Password Reset email together.Add copy and styling, and then to add dynamic content click the Insert data variables icon and specify a data variable name.These data variables will be populated with real content when you send the email using the API.Click the Next button top right to view the data needed in your API call.Hit Publish to finalize the email. Copy the payload details and the ID; you’ll need these to send the email using the API.Make an API request to the transactional endpoint (or use an SDK).
POST https://app.loops.so/api/v1/transactional
You will need the payload copied from before. Make sure to include values for all of the data variables you added to the email.
Loops integrates with thousands of other platforms, making it easy to send email to your audience, users or customers, regardless of where they originate.Set up connections to different apps using a tool like Zapier or Make, or create contacts using events from Segment.Our webhook integration for Stripe lets you easily sync customers and send automated emails based on payment events.
Whether you’re sending your very first emails for your business or are switching over from another service, we’re always here to help!Every page of Loops has a small ? widget in the bottom right-hand corner. Click it to receive instant support.💬 Do you prefer live chat? Click and chat!💌 Do you prefer email? Send away🧑💻 Do you prefer a video call? Book it