Install the SDK
The first step is to install the Loops SDK. This is written in TypeScript so you can benefit from strict types when coding.LOOPS_API_KEY.
Then you can import the Loops SDK client like this:
JavaScript SDK
Explore our official JS/TS SDK.
Loops API
Read the Loops API reference.
Server-side only
It is important that you only use the Loops API and SDK from server-side code. If you make calls directly in the browser, you risk exposing your API key, which would give other people read and write access to your Loops account data. Additionally, the Loops API does not support cross-origin requests made from client-side JavaScript. If you want to make calls from the browser—for example, to collect newsletter subscriptions from a form—create proxy endpoints. To add a new contact, create an internal API endpoint and use the Loops API/SDK within it.app/api/contacts/route.ts
Send transactional email
A big use case for using Loops in a Next.js project is to send transactional email to users. These emails are one-off emails, which help users with your product, for example password reset emails and notification emails. To create a transactional email, go to the Transactional page in Loops. Click Create or select a template. Create the email in the editor, which gives you rich formatting options and components.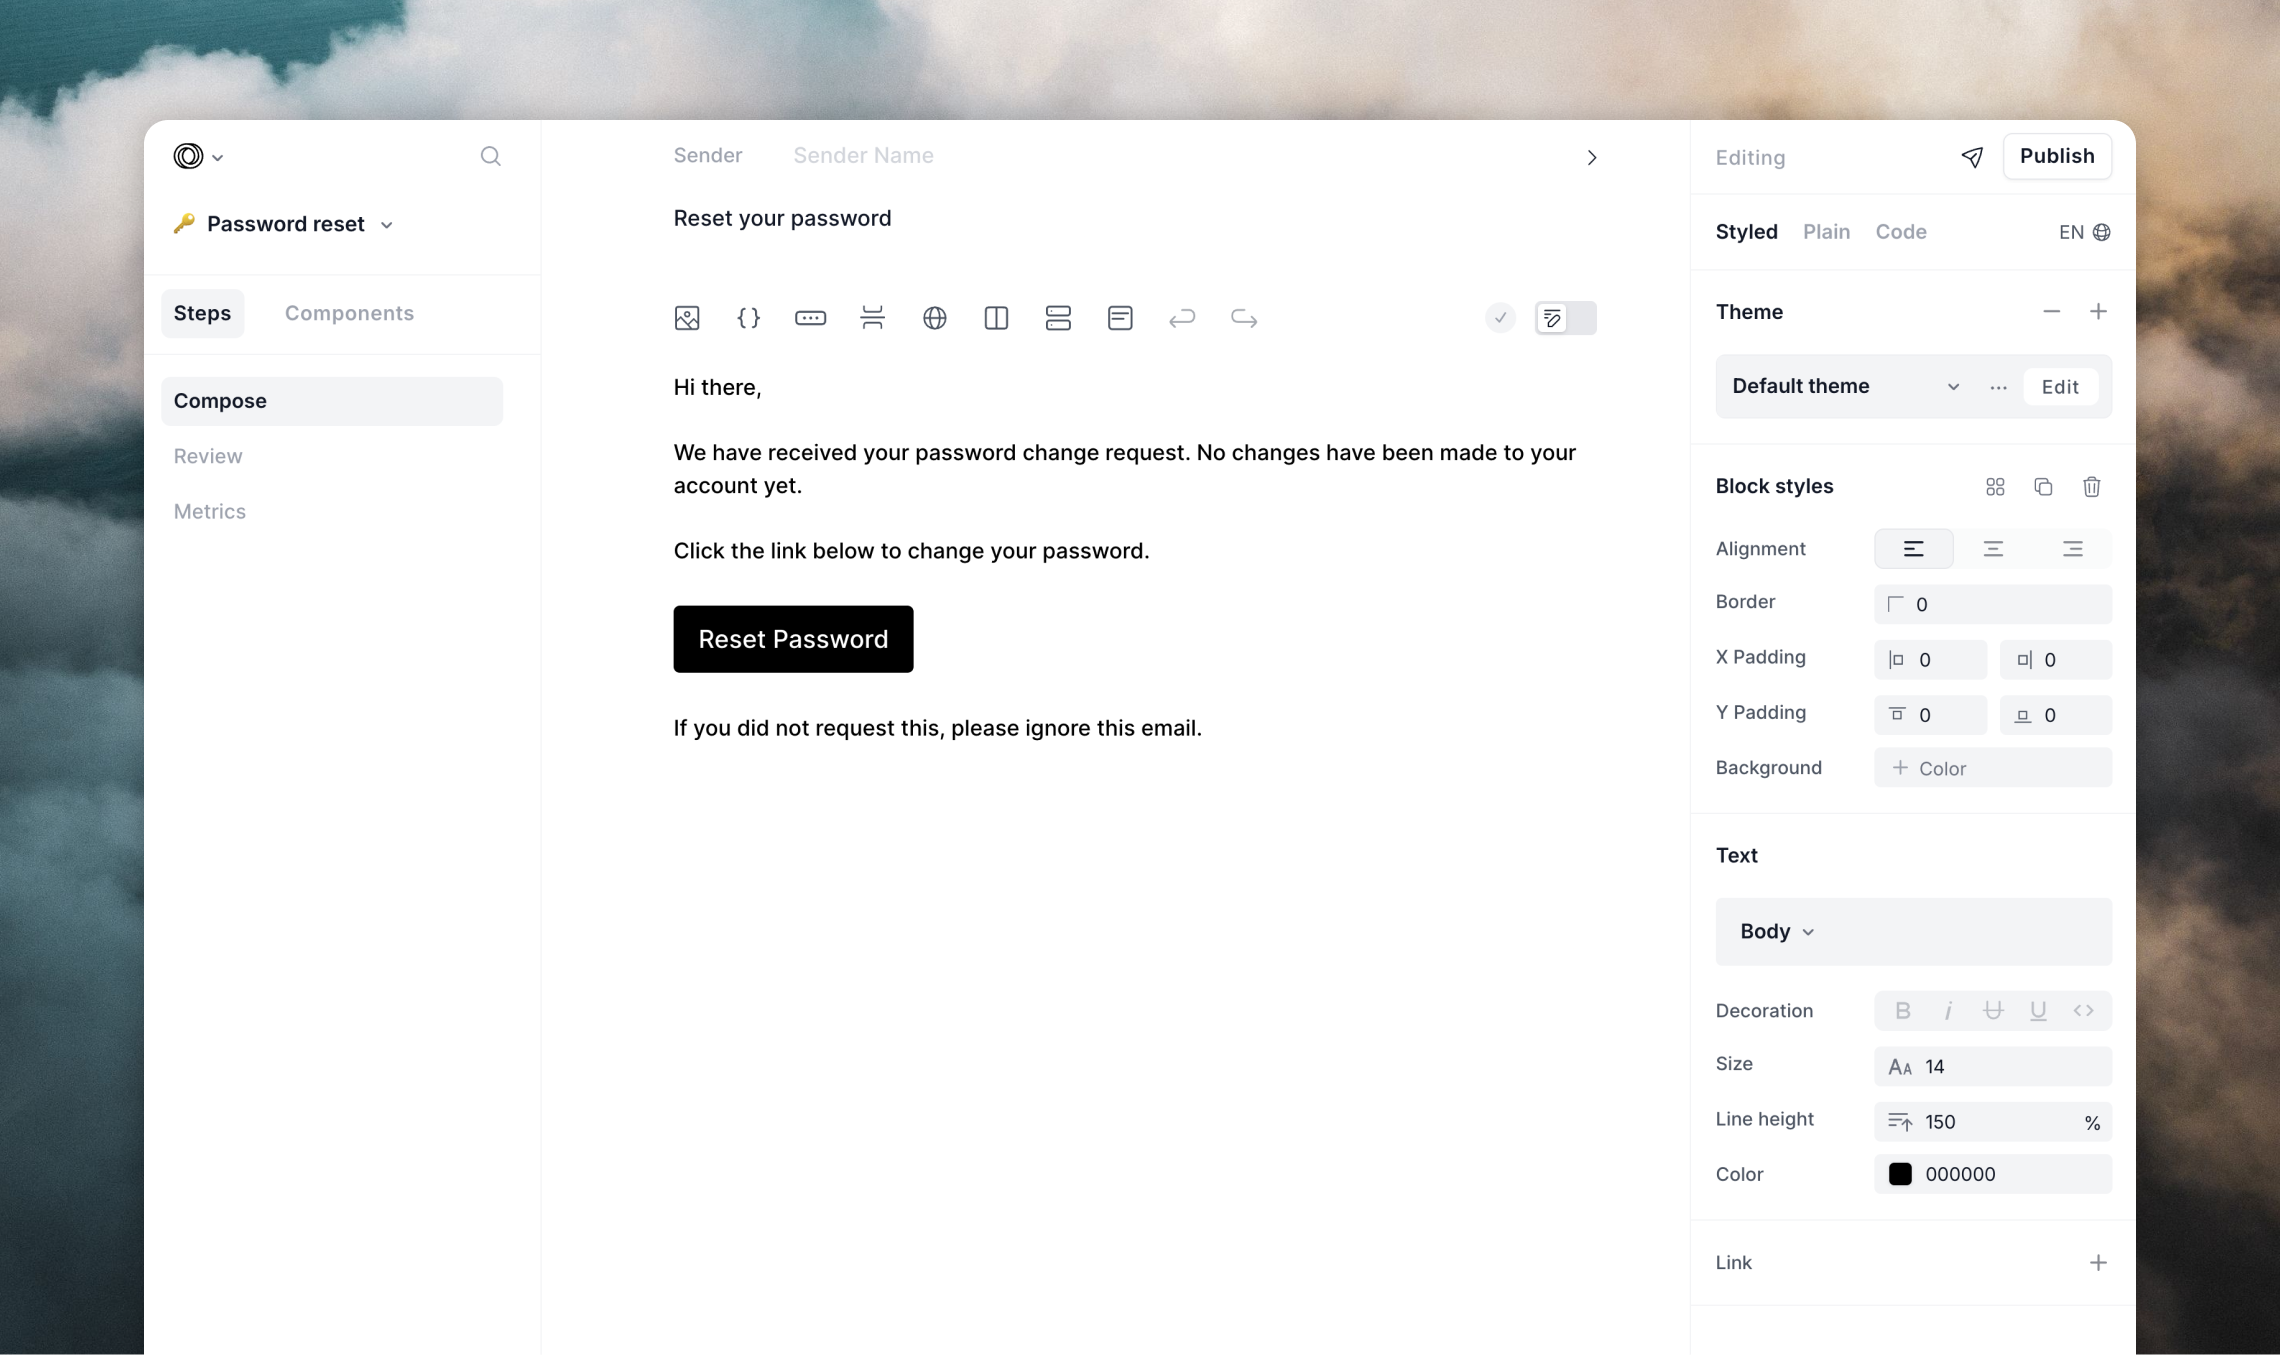
sendTransactionalEmail() and include values for each of the data variables you added to your email.
success boolean telling you if the email was sent successfully. If it was not, you’ll also receive an error message.
sendTransactionalEmail()
Read more in the SDK docs.
Sync users to Loops
Another main use case for teams using Loops is to keep their Loops audience updated when user data changes in their application. To do this you can use theupdateContact() method.
For example, you may store custom data in Loops like subscription plan level or user usage information that you include in emails. You can update contacts in Loops like this:
contactProperties object and the expected response from the updateContact method.
updateContact()
Read more in the SDK docs.
Trigger workflows with events
A third example of using the Loops SDK is to trigger workflows. Workflows are automated email sequences, which can send multiple emails to contacts. You can trigger these emails using events, and you can send events to Loops using the SDK. For example, you may have a workflow that you send to new users after they have completed an onboarding flow in your app. First, create a new workflow using the “Event received” trigger. Add emails, timers and audience filters to your workflow as you wish. Then to trigger this email sequence, send an event to Loops. If your event name iscompletedOnboarding, your call would look like this…
sendEvent()
Read more in the SDK docs.
Using the API instead
If you prefer, you can use the Loops API directly instead of using the SDK. For example, you can send a transactional email like this:API Reference
Read through our API documentation.