Create transactional emails in Loops
The first step is to create transactional templates in Loops for each auth message. In this guide we have three example emails for the Email & Password, Magic Link and Email OTP authentication methods. For the authentication method you are using, you should create transactional emails for these emails in Loops. Include data variables for the data that will be passed from Better Auth. You can add data variables by typing ”{”, via the{} button above the editor, or by using the / slash menu.
Email & Password data variables
Depending on the authentication method you are using, you will need to add different data variables to your emails.Verification email
This email is sent when a user is requested to verify their email address.verificationUrltoken
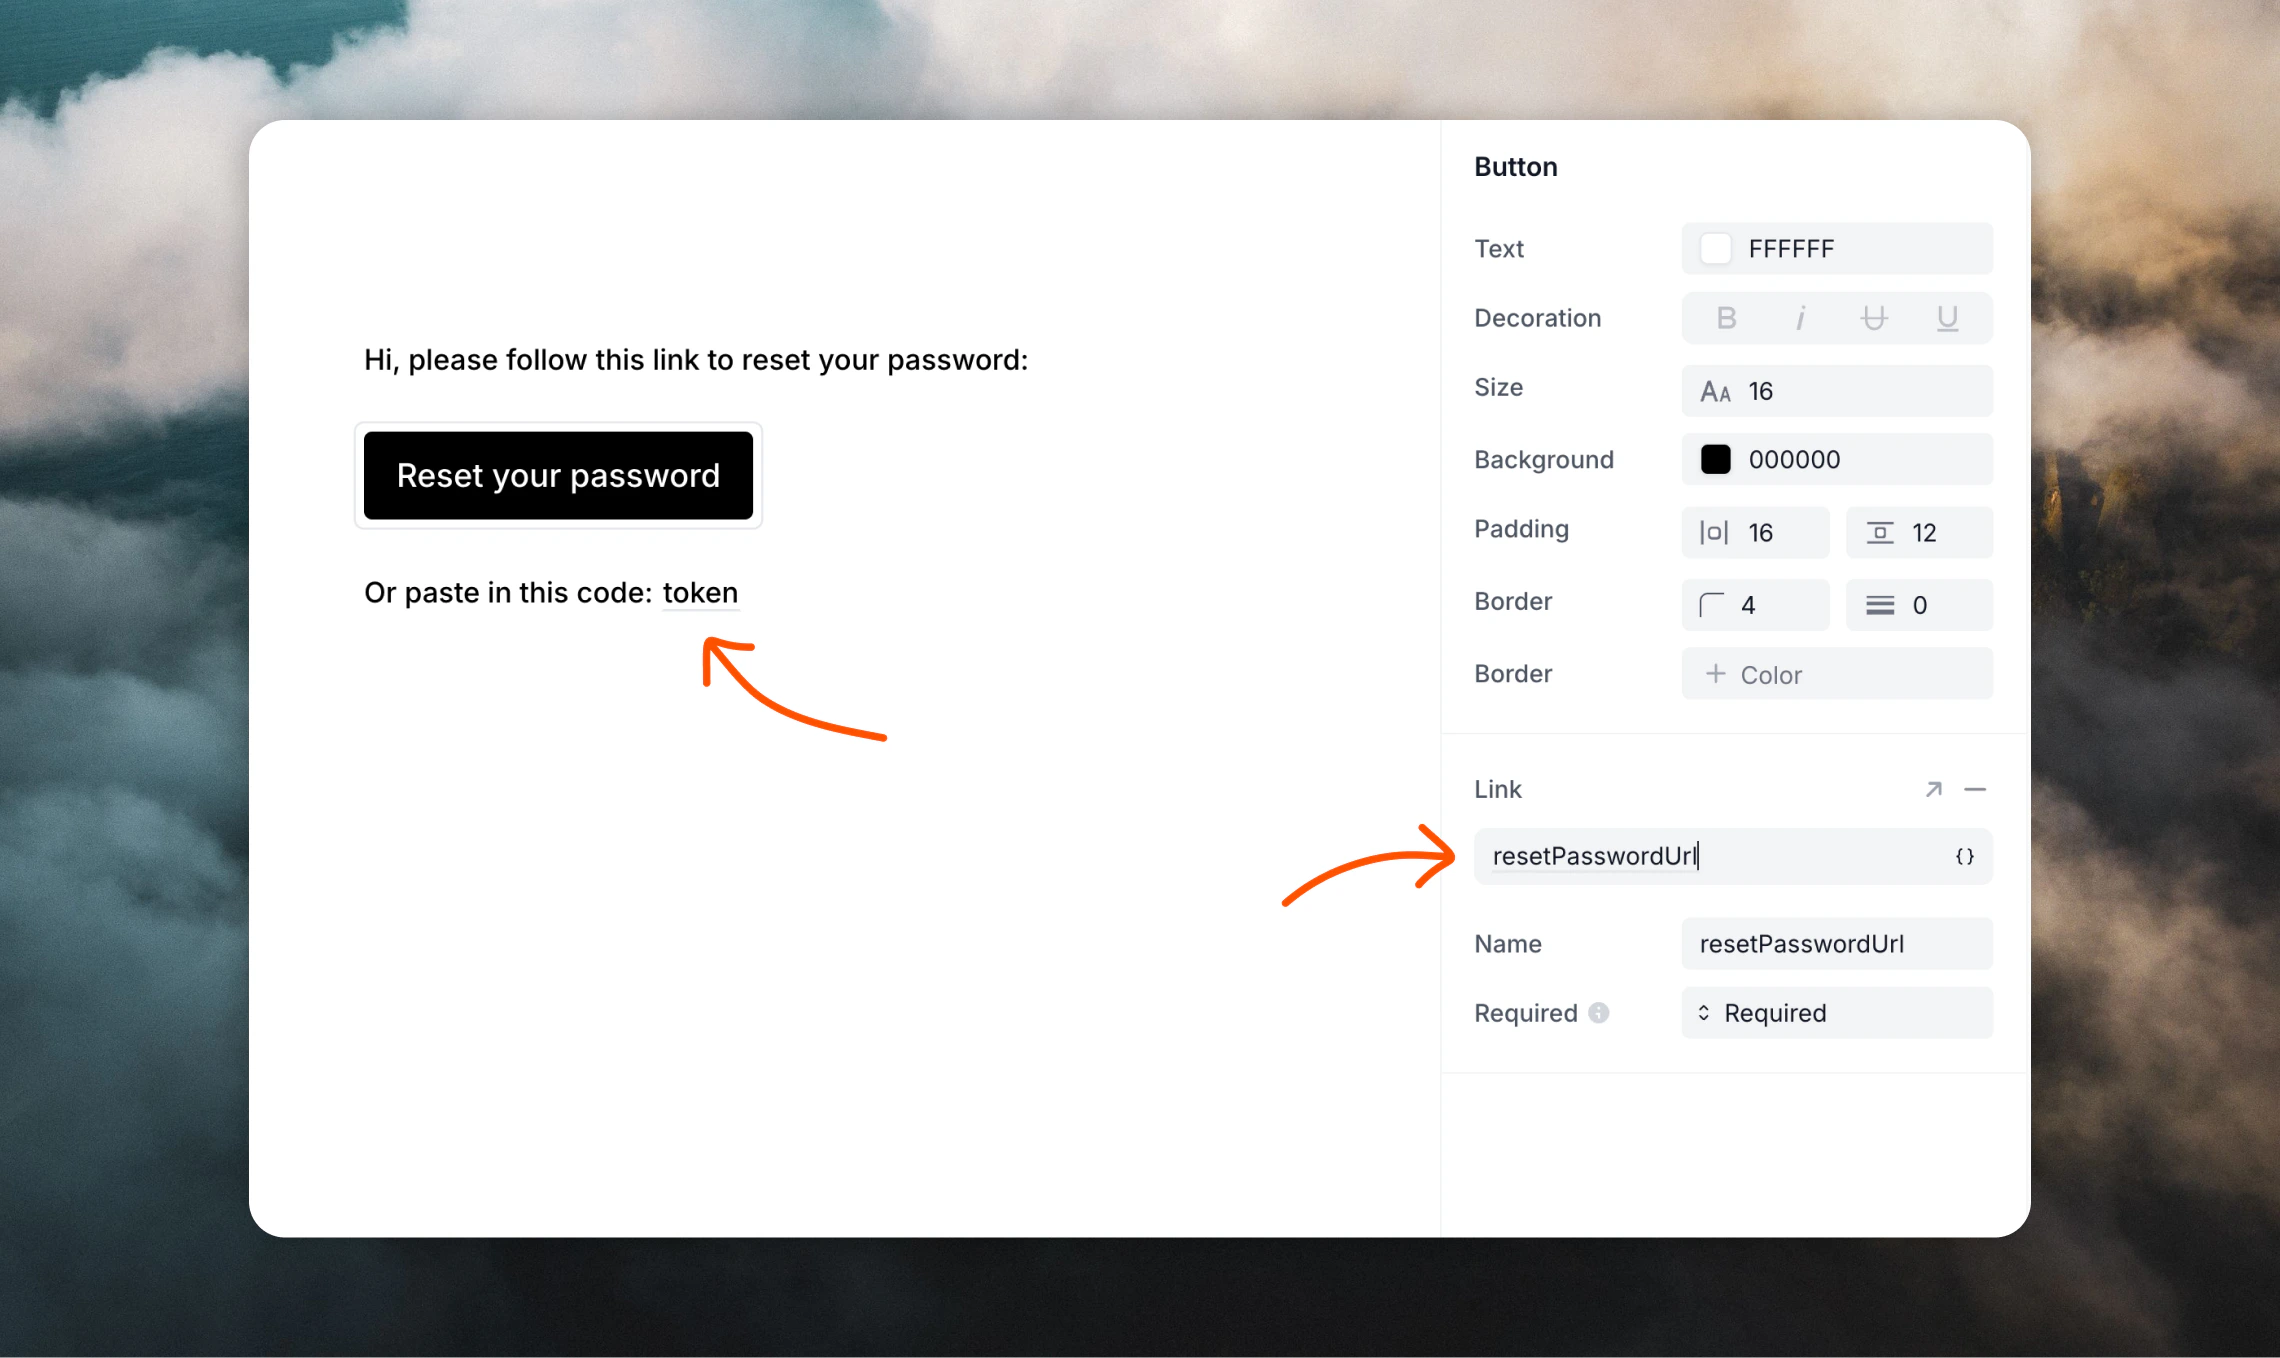
Password reset email
This email is sent when a user requests to reset their password.resetPasswordUrltoken
Magic link data variables
This email is sent when a user signs in with a magic link.magicLinkUrltoken
Email OTP data variables
Sign in email
This email is sent when a user signs in using an email OTP.otpCode
Email verification email
This email is sent when a user needs to verify their email using an email OTP.otpCode
Password reset email
This email is sent when a user resets their password using an email OTP.otpCode
Add the Loops SDK
Install the Loops SDK in your project. This will allow you to send transactional emails via Loops..env file.
You can create an API key from your API Settings page.
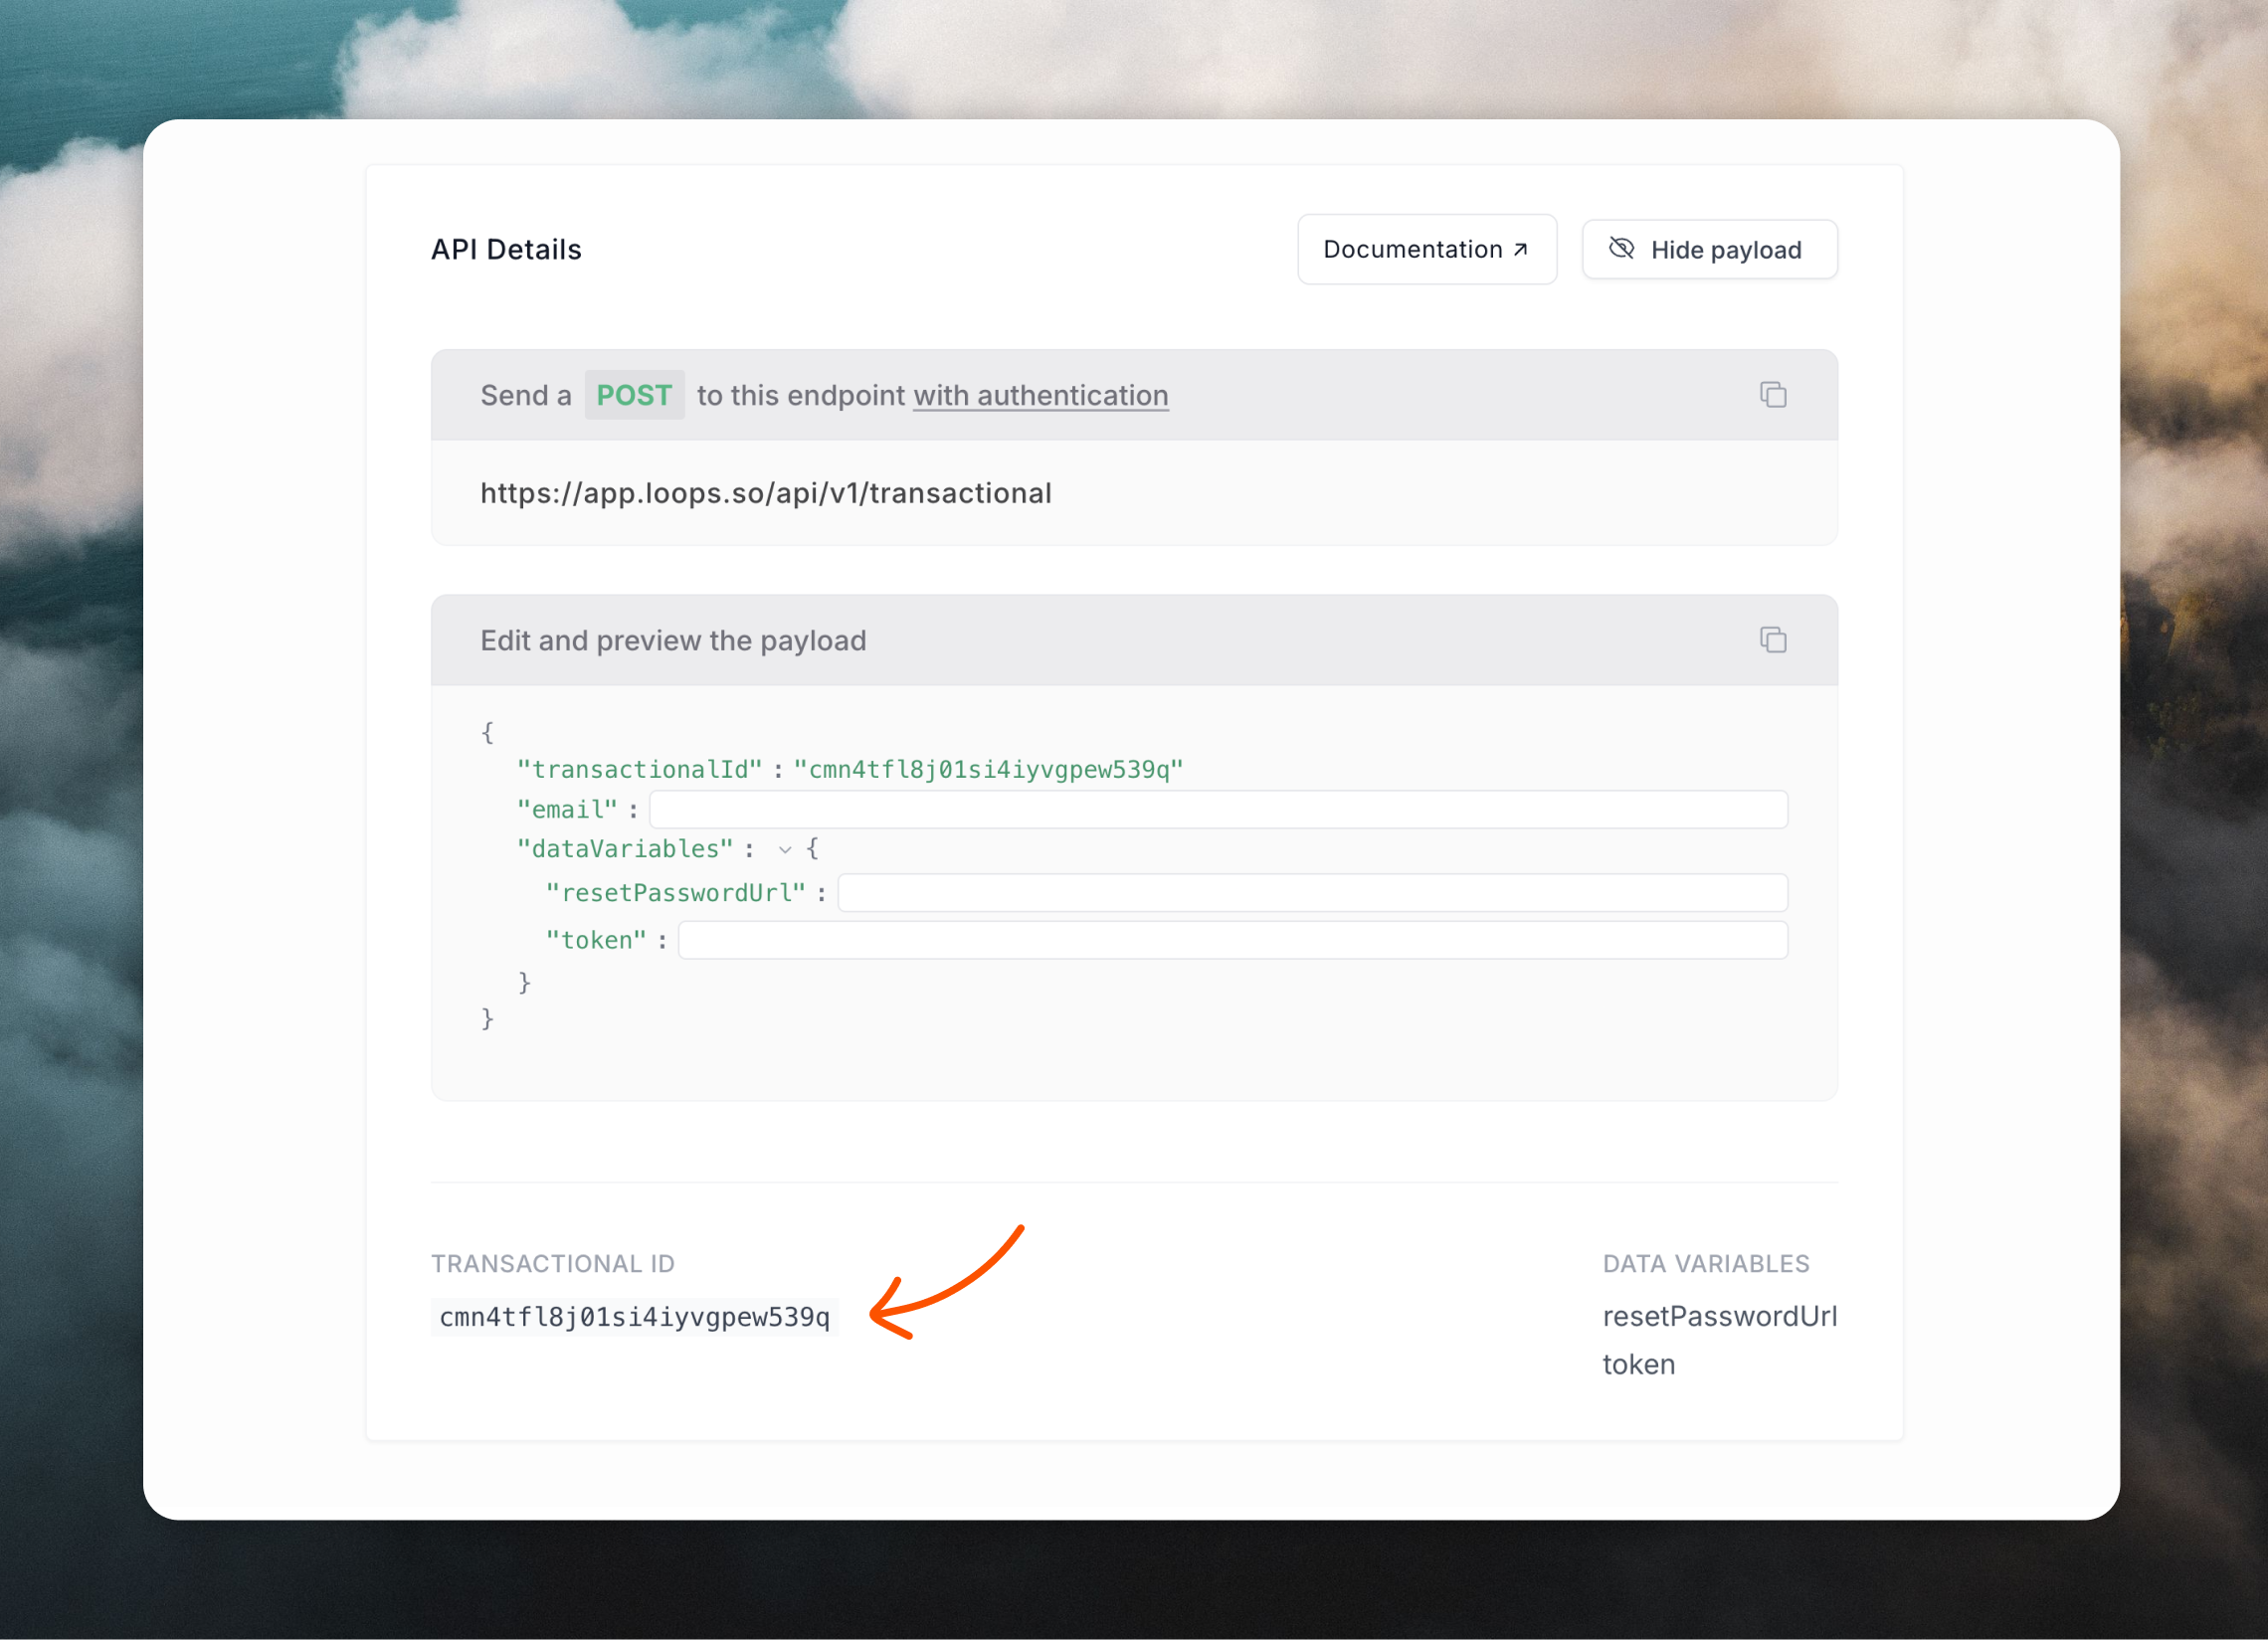
The transactional IDs are the IDs of the transactional emails you created in the previous step. (These are not all required, you will only need the ones for the authentication method you are using.)
Create a Loops server helper
Next, create a helper function to keep email sending logic clean and reusable. This helper will be used in the next step to configure Better Auth to send emails through Loops.lib/loops.ts
Configure Better Auth to send through Loops
In your Better Auth config, enable the authentication method you want to use and add callbacks to send emails. Inside thesendLoopsTransactionalEmail() calls, we populate the content for the data variables you added in your Loops emails.
Better Auth recommends not awaiting email sends in these callbacks to reduce timing-attack risk and keep auth responses fast, so we use
void. If your platform supports background work (for example waitUntil), you can use that instead.Password reset
For this email, make sure thatemailAndPassword.enabled is set to true, then add a sendResetPassword callback containing our sendLoopsTransactionalEmail() helper function.
Better Auth docs
auth.ts
Email verification
For this email, add asendVerificationEmail callback containing our sendLoopsTransactionalEmail() helper function.
Better Auth docs
auth.ts
Magic link plugin
Add themagicLink plugin to your Better Auth config and add a sendMagicLink callback containing our sendLoopsTransactionalEmail() helper function.
Better Auth docs
auth.ts
Email OTP plugin
Add theemailOTP plugin to your Better Auth config and add a sendVerificationOTP callback containing our sendLoopsTransactionalEmail() helper function.
There are three types of OTP emails: sign in, email verification and password reset, so you will need to create an email template for each type in Loops.
Better Auth docs
auth.ts
Call Better Auth from your app
Now your app is set up to send Better Auth emails through Loops. For example, Loops will send a transactional when you sign in a user with an email OTP:Troubleshooting
If your emails are not sending:- Confirm each transactional email in Loops is Published
- Confirm each data variable name in your Better Auth code matches the name of the data variable in your Loops email
- Check that you’re using a valid Loops API, from the correct account
- Check that your sending domain is verified in Loops
Read more
Send transactional email
Loops API endpoint used to send transactional emails.
Send emails from Bolt.new
Read our guide for sending emails from Bolt.new.
Integrations
Integrate Loops into lots more platforms.