Onboarding welcome workflow
The first step is to set up a welcome email sent to users after they sign up to your application or subscribe to your list. Recipients of these emails are expecting the email and are most likely to engage with it. For example, new users who sign up could expect a welcome email from you, welcoming them to your platform and explaining some initial steps to get them started. Here is an example of the email we at Loops send out to new users: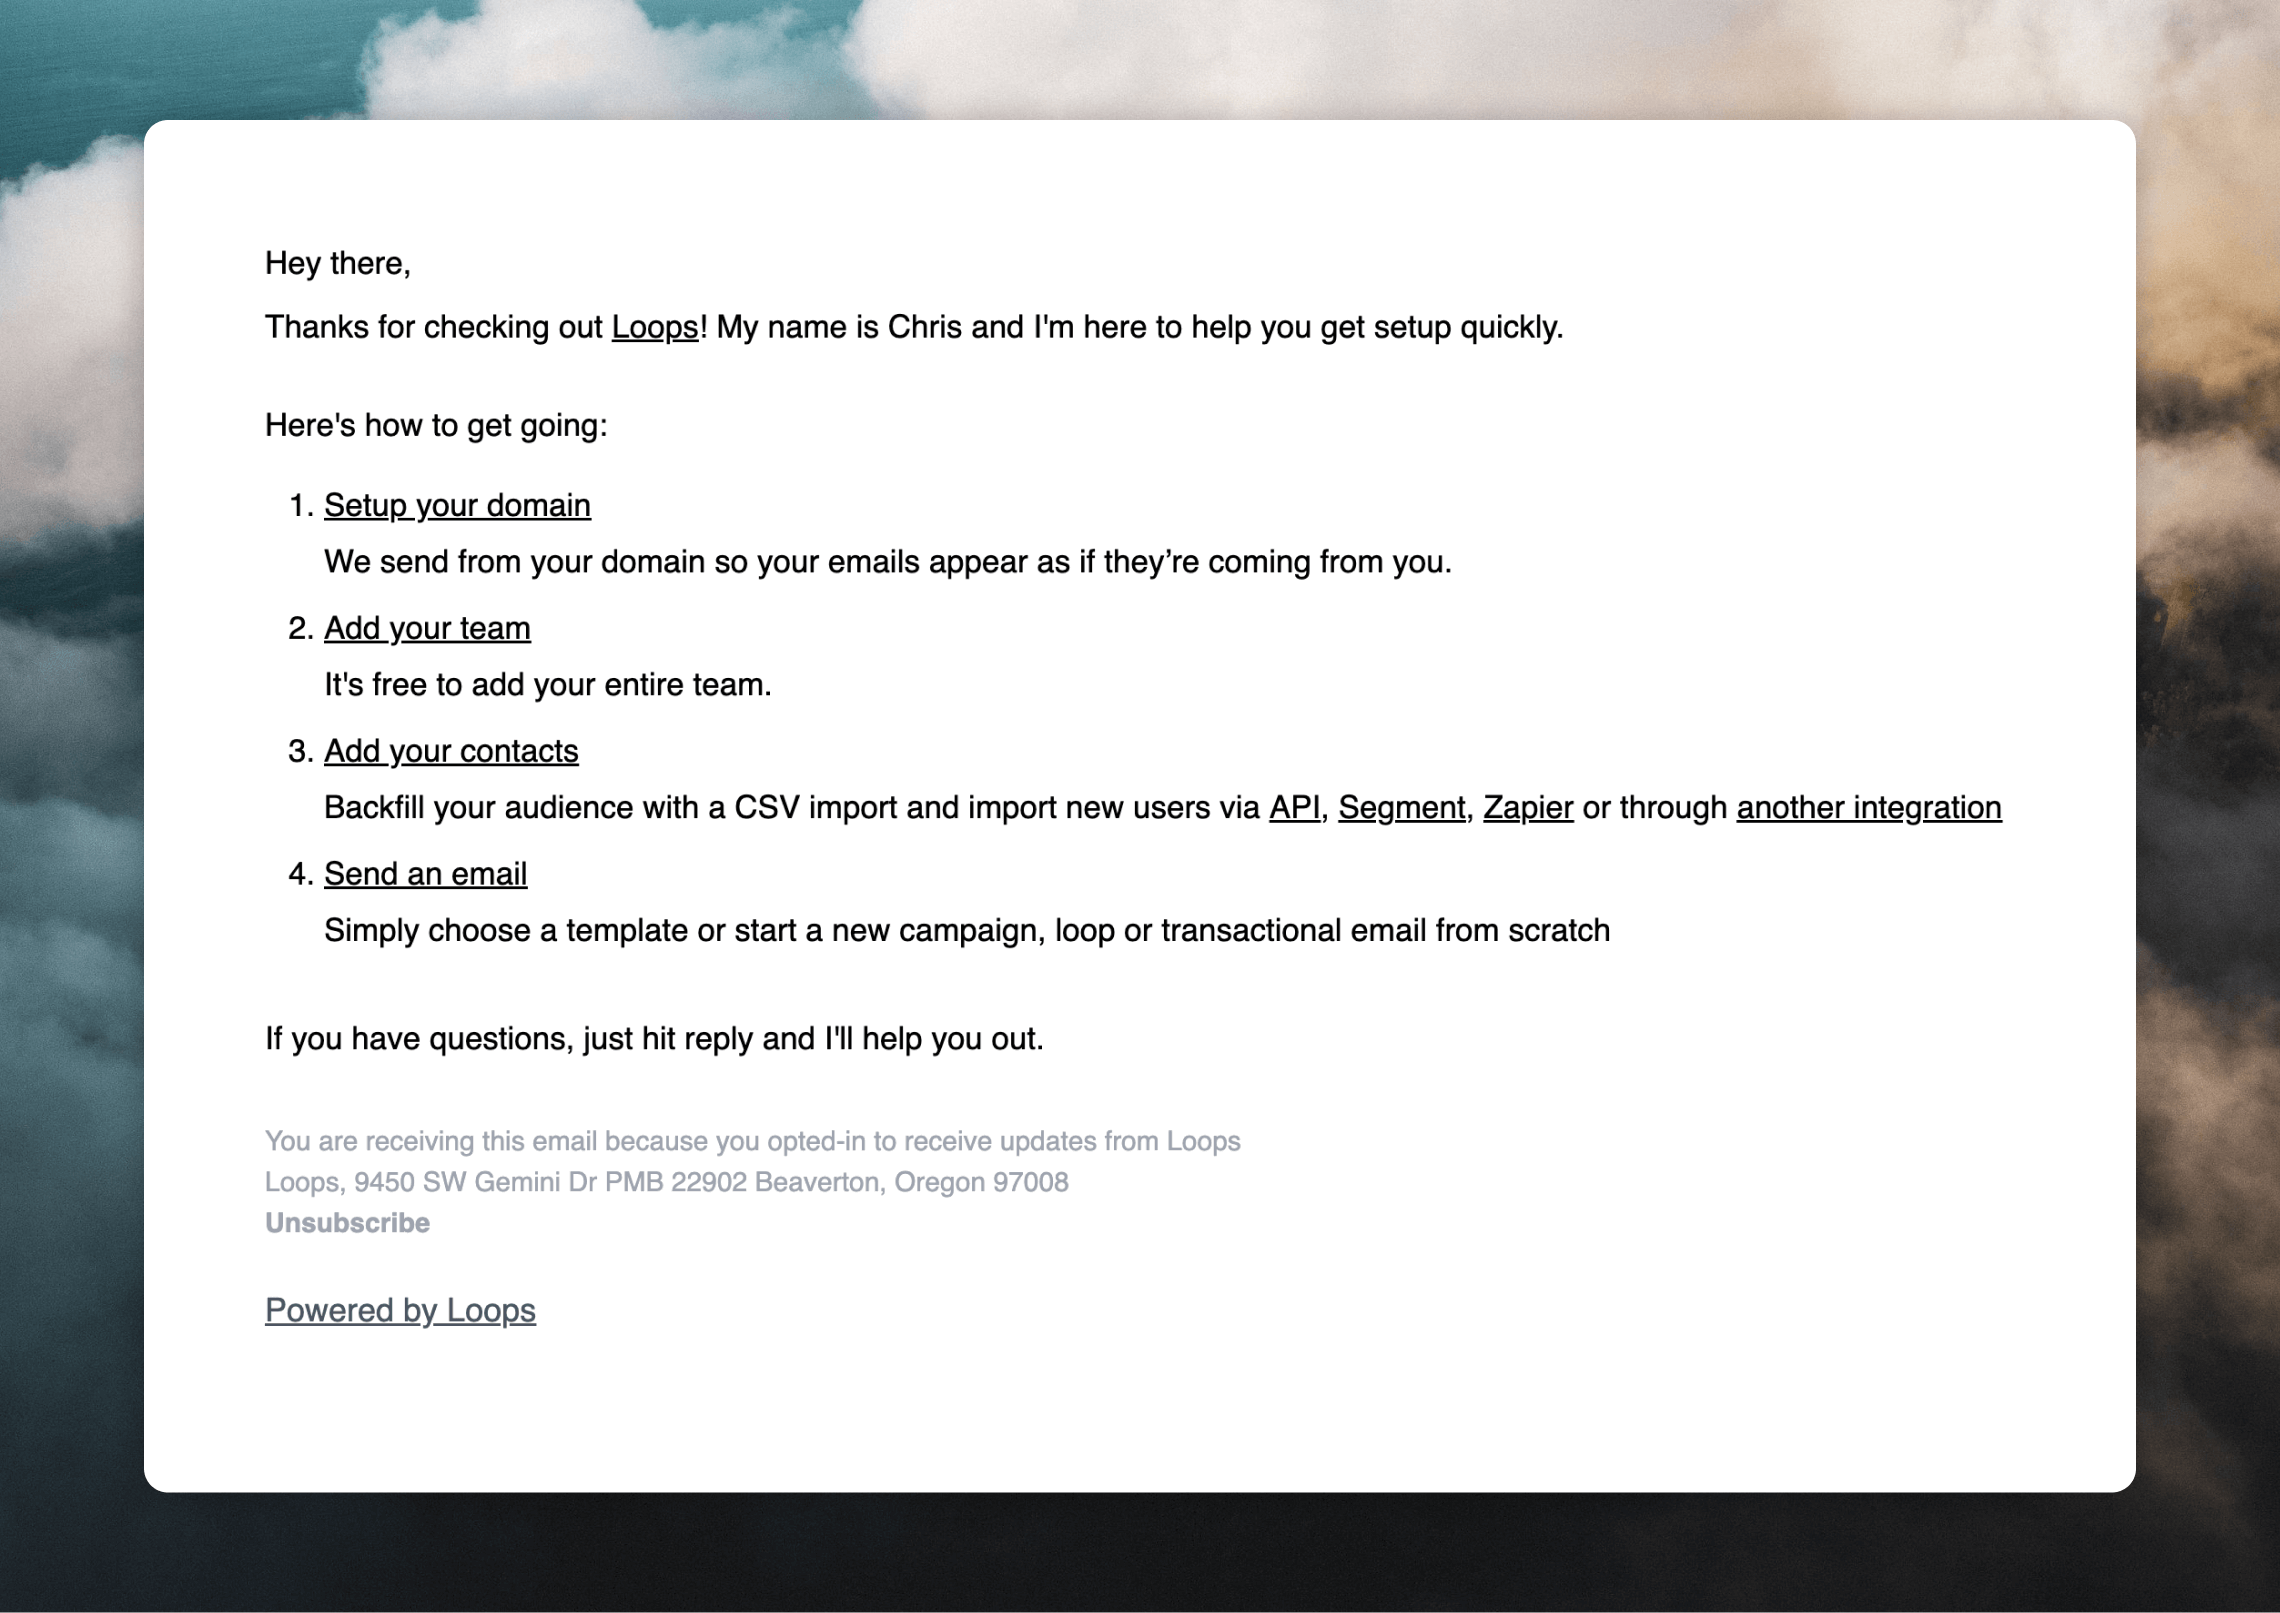
Workflow templates
Check out our library of useful templates for creating welcome emails.
Creating a welcome workflow in Loops
1
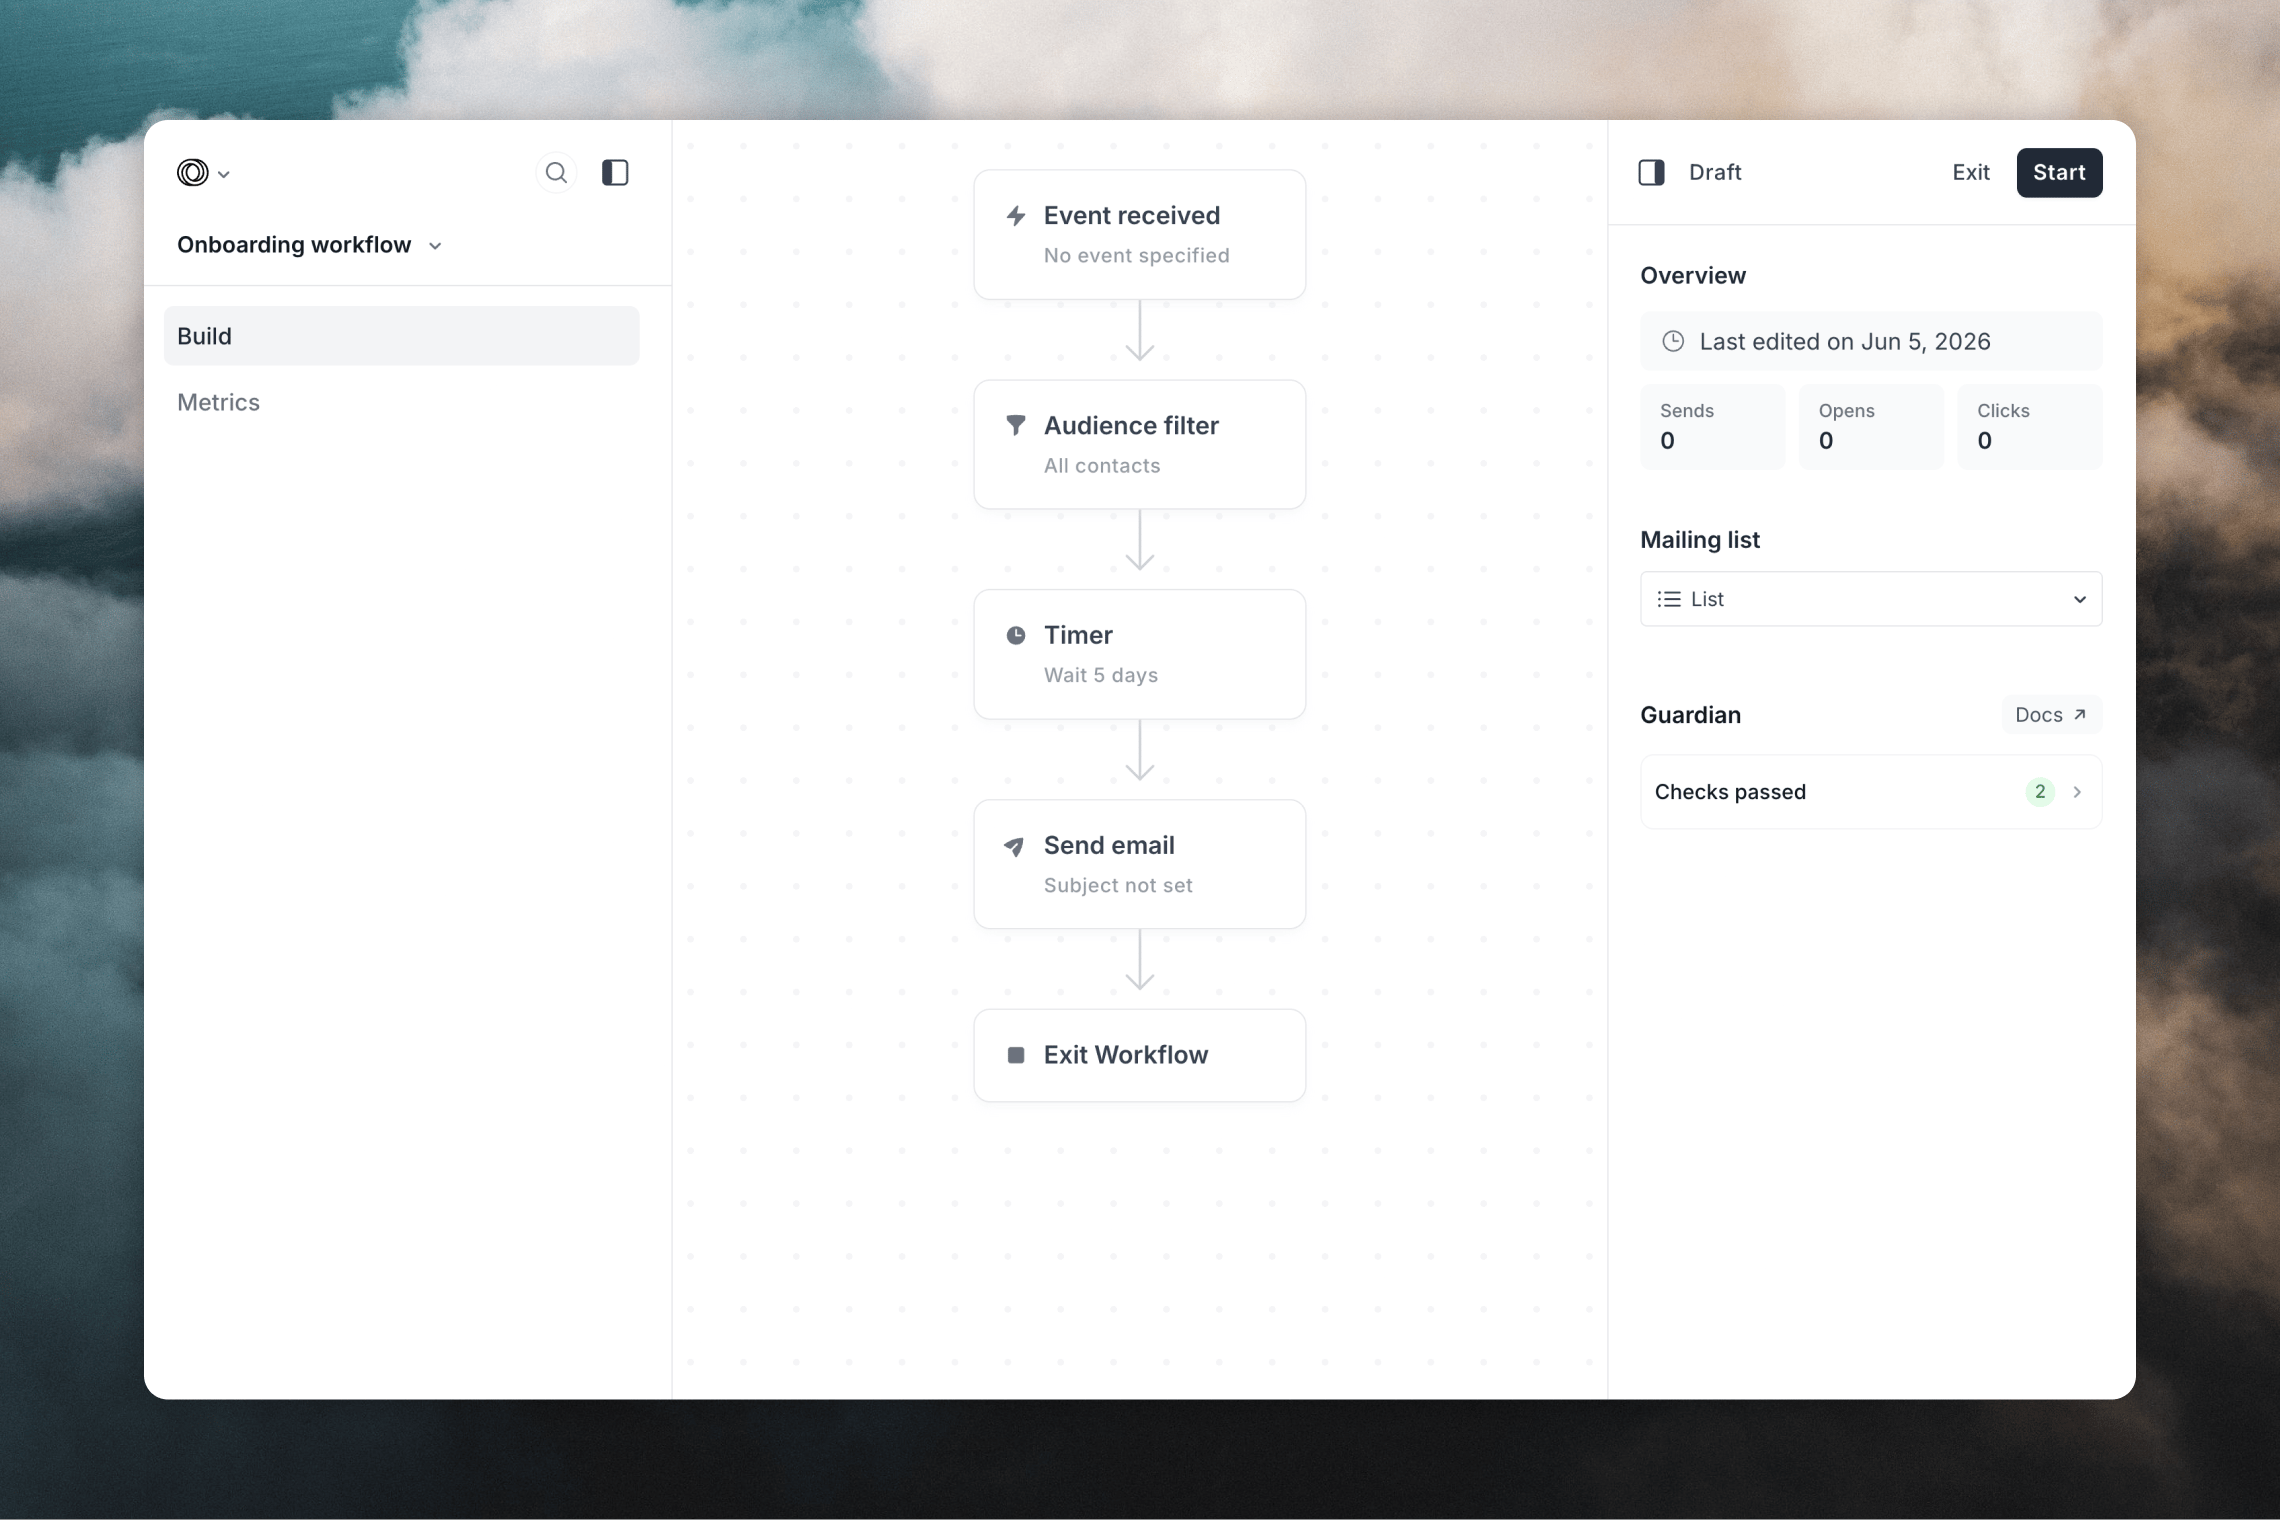
Create a workflow
Go to your Workflows page and click New, or select from one of our ready-made templates.
2
Set the trigger
Set your trigger to Contact added if you want the workflow to fire for every new contact. You can also set a filter to only send to contacts with a specific tag or property, or specifically target it to a specific list.Select Event received if you want to trigger the workflow based on something happening in an external platform.
3
Add an email
Next, write your email by clicking on the Send email node, then Create email in the inspector panel on the right-hand side.
Make sure to make your workflow active by clicking Start in the inspector panel header on desktop, or in the top nav on mobile.
Transactional emails
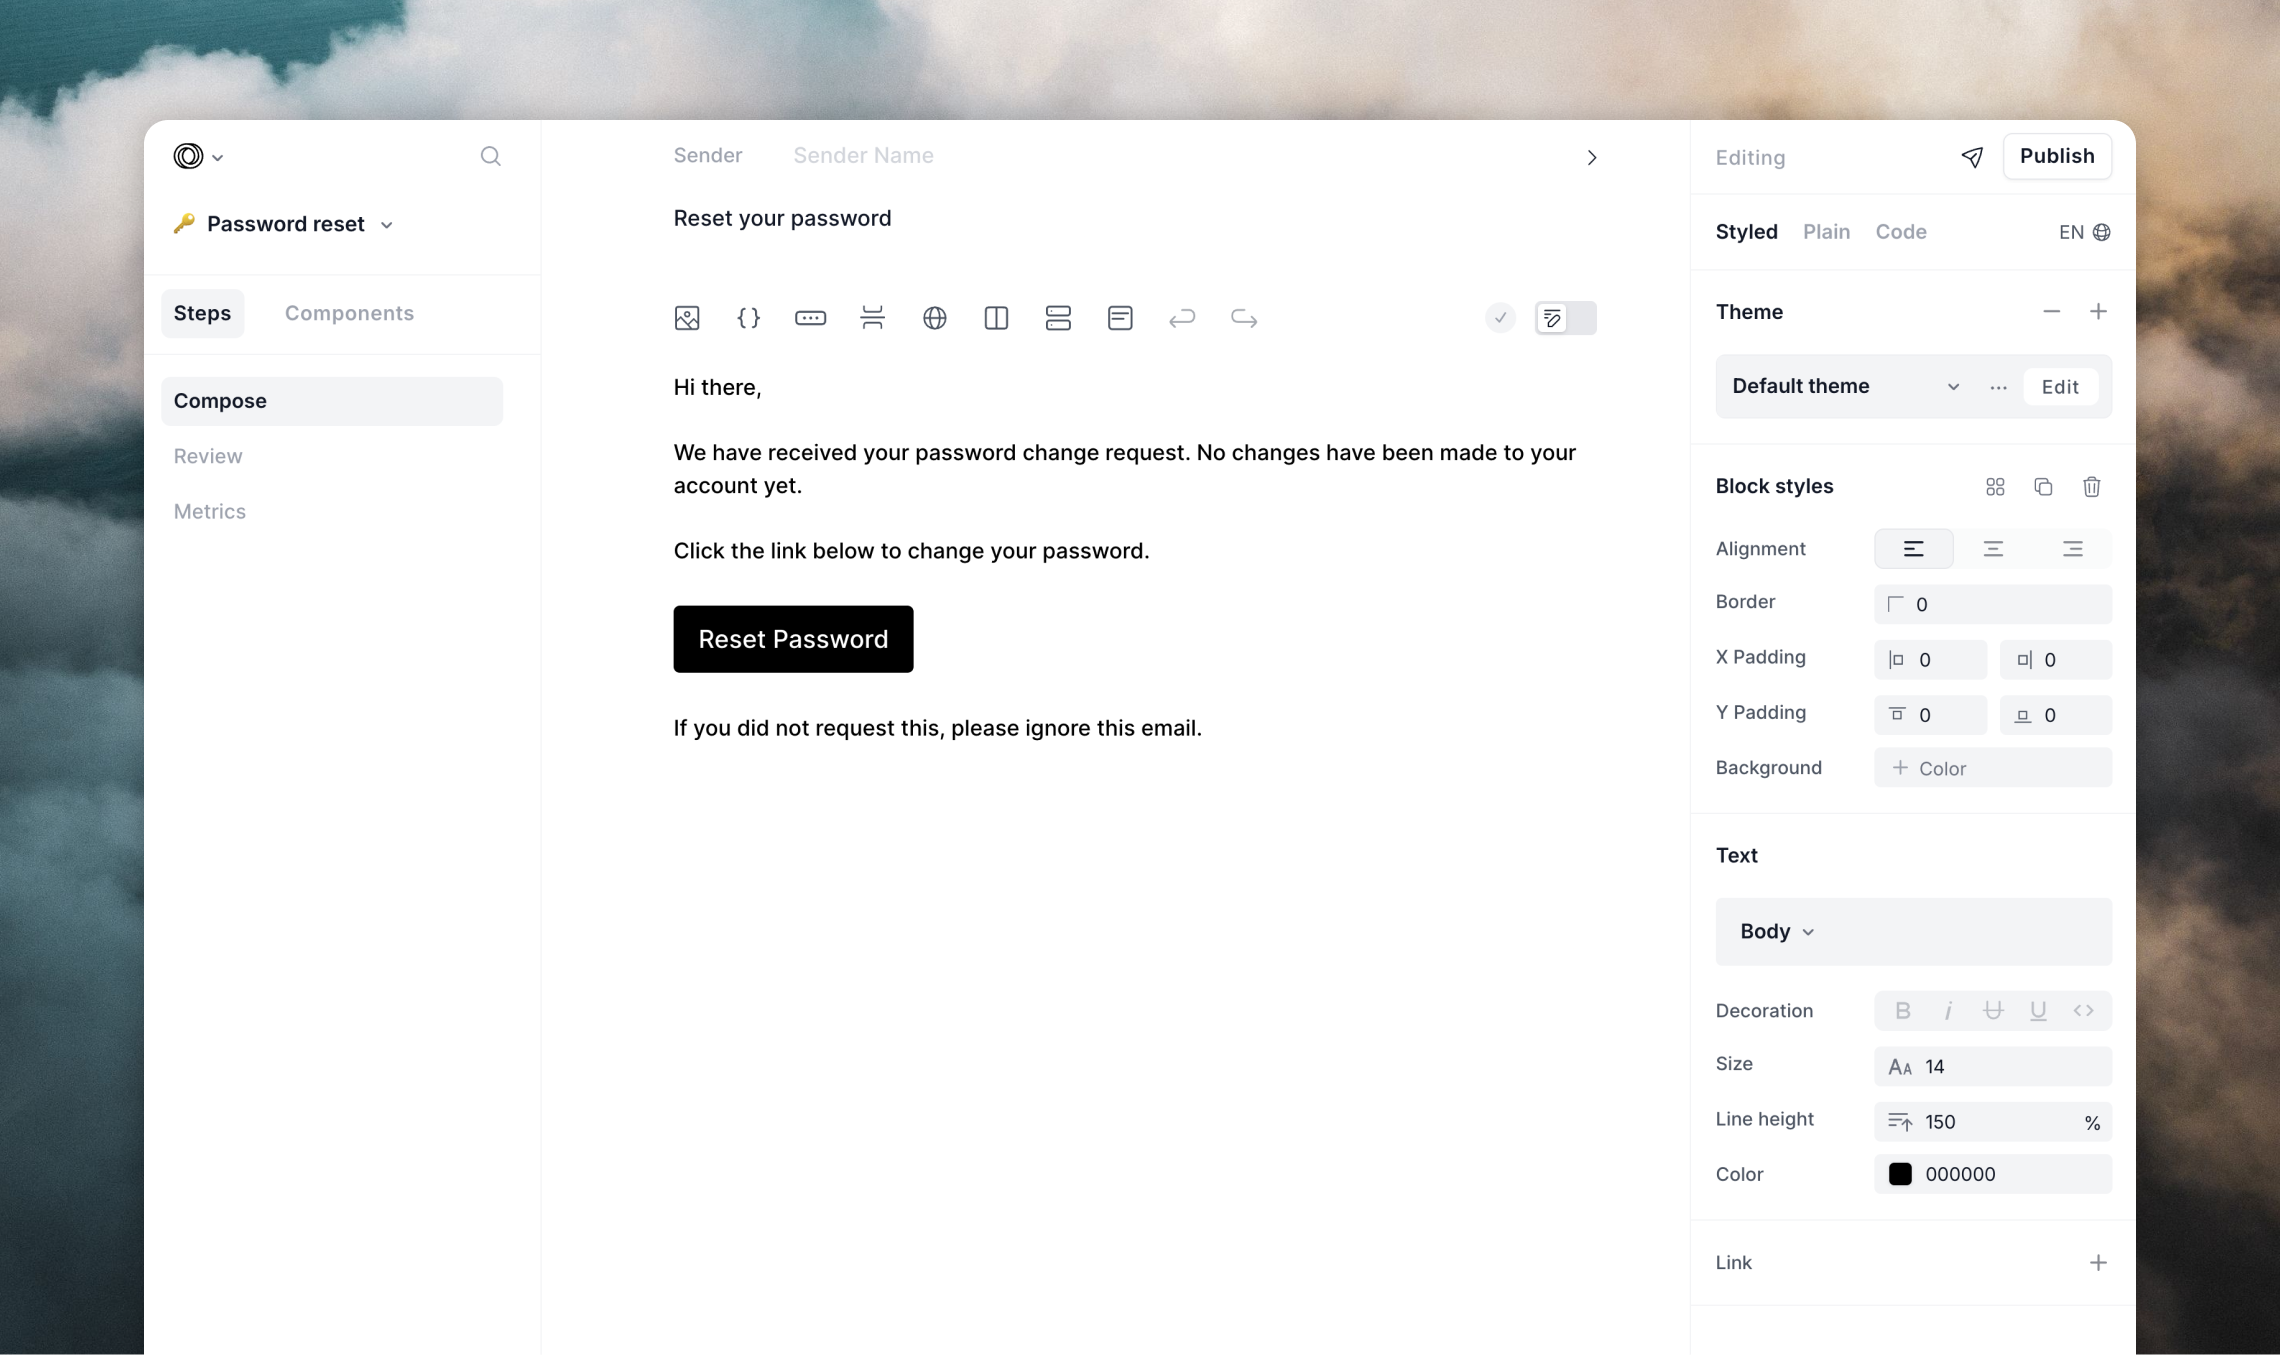
Transactional emails are by definition emails that are sent to users because of an action they took or need to take to use your platform. Since all emails from Loops send from a single domain, we can also use these emails to build our sender reputation. We recommend starting with these essential transactional emails:- Login verification emails
- Password reset emails
- Account confirmation emails
Transactional templates
Check out our library of useful transactional email templates.
Targeted campaign
Once your welcome workflow has been active and sending for 2 or 3 days, you should see an open rate of around 40% on the first email after the welcome email. Now you can start to send a campaign to a small list of engaged users. Here are two recommended approaches:- Target recent signups using the
createdAtproperty to find users added in the last 3 days - Target active users by syncing login data to track your most engaged users
- Campaign open rate should be above 30%
- Welcome workflow open rate should stay above 40%
- If either drops below these thresholds, pause sending and re-evaluate
Sending a campaign to active users in Loops
1
Define and label "active" users
You can use the default
createdAt contact property, or you can create custom contact properties and use the API or an integration to update contacts when an event happens in your account (e.g. a log in).For example, you could use the name lastActive and choose the “Date” field type. Then whenever the user does a major action in your application, update the contact with a new lastActive value:2
Send the campaign to your segment
Once you have created your campaign in Loops, you need to specify the audience based on your chosen date field.In the “Audience” tab, choose “Last Active” (or “Created At”), then “After” and then pick the date three days ago from the date field.