> ## Documentation Index
> Fetch the complete documentation index at: https://loops.so/docs/llms.txt
> Use this file to discover all available pages before exploring further.
# Supabase integration
> Sync contacts and send emails triggered by events in Supabase.
If you are looking to send Supabase authentication emails with Loops, check
out our [Supabase SMTP docs](/smtp/supabase).
Our Supabase integration lets you:
* Create and update contacts
* Send events to trigger workflows
Our Supabase integration is built on top of our [Incoming webhooks](/integrations/incoming-webhooks) feature. This system lets you send webhooks from supported platforms directly to Loops so you can easily sync users and customers as well as send automated emails.
[Please read our guide about incoming webhooks](/integrations/incoming-webhooks)
With Supabase, you can keep your user data synced to Loops so you can send emails to your userbase.
## Supported events
We accept the following database events for the `auth.users` table:
* `INSERT`
* `UPDATE`
* `DELETE`
[Supabase database webhooks docs](https://supabase.com/docs/guides/database/webhooks)
Events from other tables will be ignored.
## Synced data
For `INSERT` and `UPDATE` events, we sync the following Supabase data to your Loops contacts:
* User ID
* Email address
* First and last name (optional)
We use the IDs of Supabase users to match contacts in your Loops audience. If the user ID is not found in Loops, we will create a new contact.
First and last names are populated from metadata in the `auth.users` table. Key names should be `first_name` and `last_name`.
```javascript theme={"dark"}
const { data, error } = await supabase.auth.signUp({
email: "test@example.com",
password: "example-password",
options: {
data: {
first_name: "John",
last_name: "Doe",
},
},
});
```
More information about metadata in Supabase can be found in the [Supabase documentation](https://supabase.com/docs/guides/auth/managing-user-data?queryGroups=language\&language=js#adding-and-retrieving-user-metadata).
`DELETE` events can be used to delete or unsubscribe your Supabase users from your Loops audience.
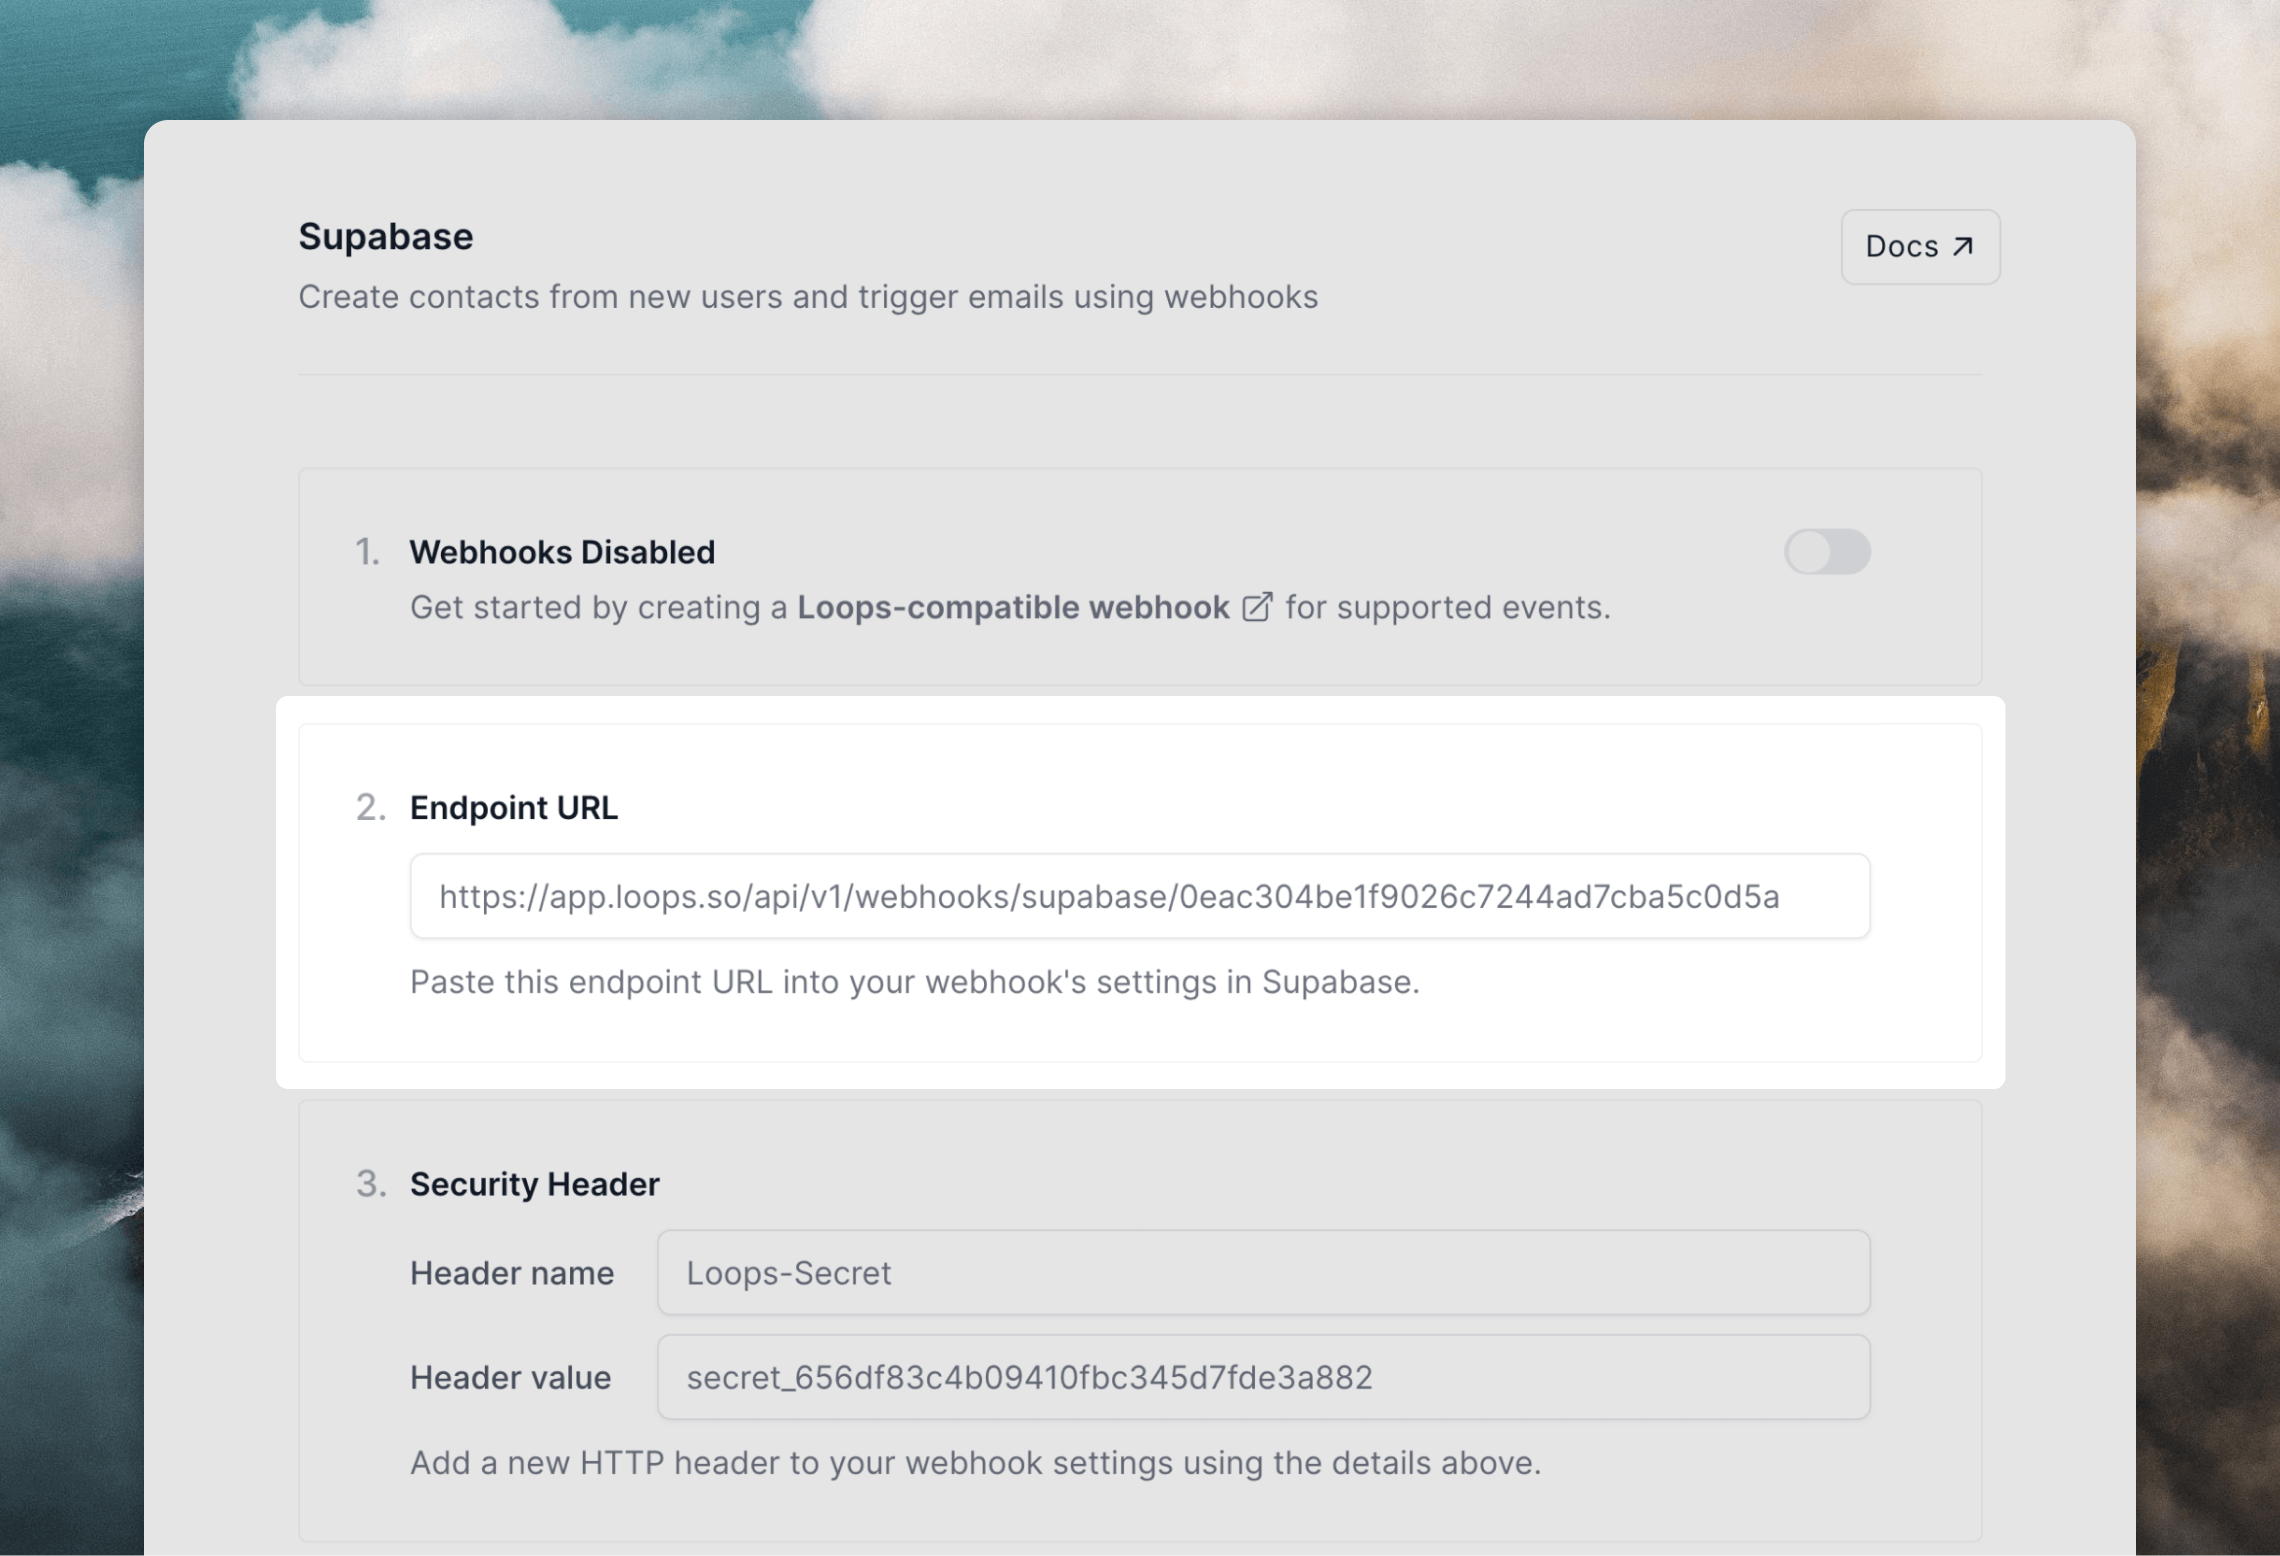
## Create a webhook endpoint in Loops
[Follow the instructions here](/integrations/incoming-webhooks#create-webhook-endpoints-in-loops) to create a new webhook endpoint, which will allow you to send webhook events directly to Loops.
 ## Create a database hook in Supabase
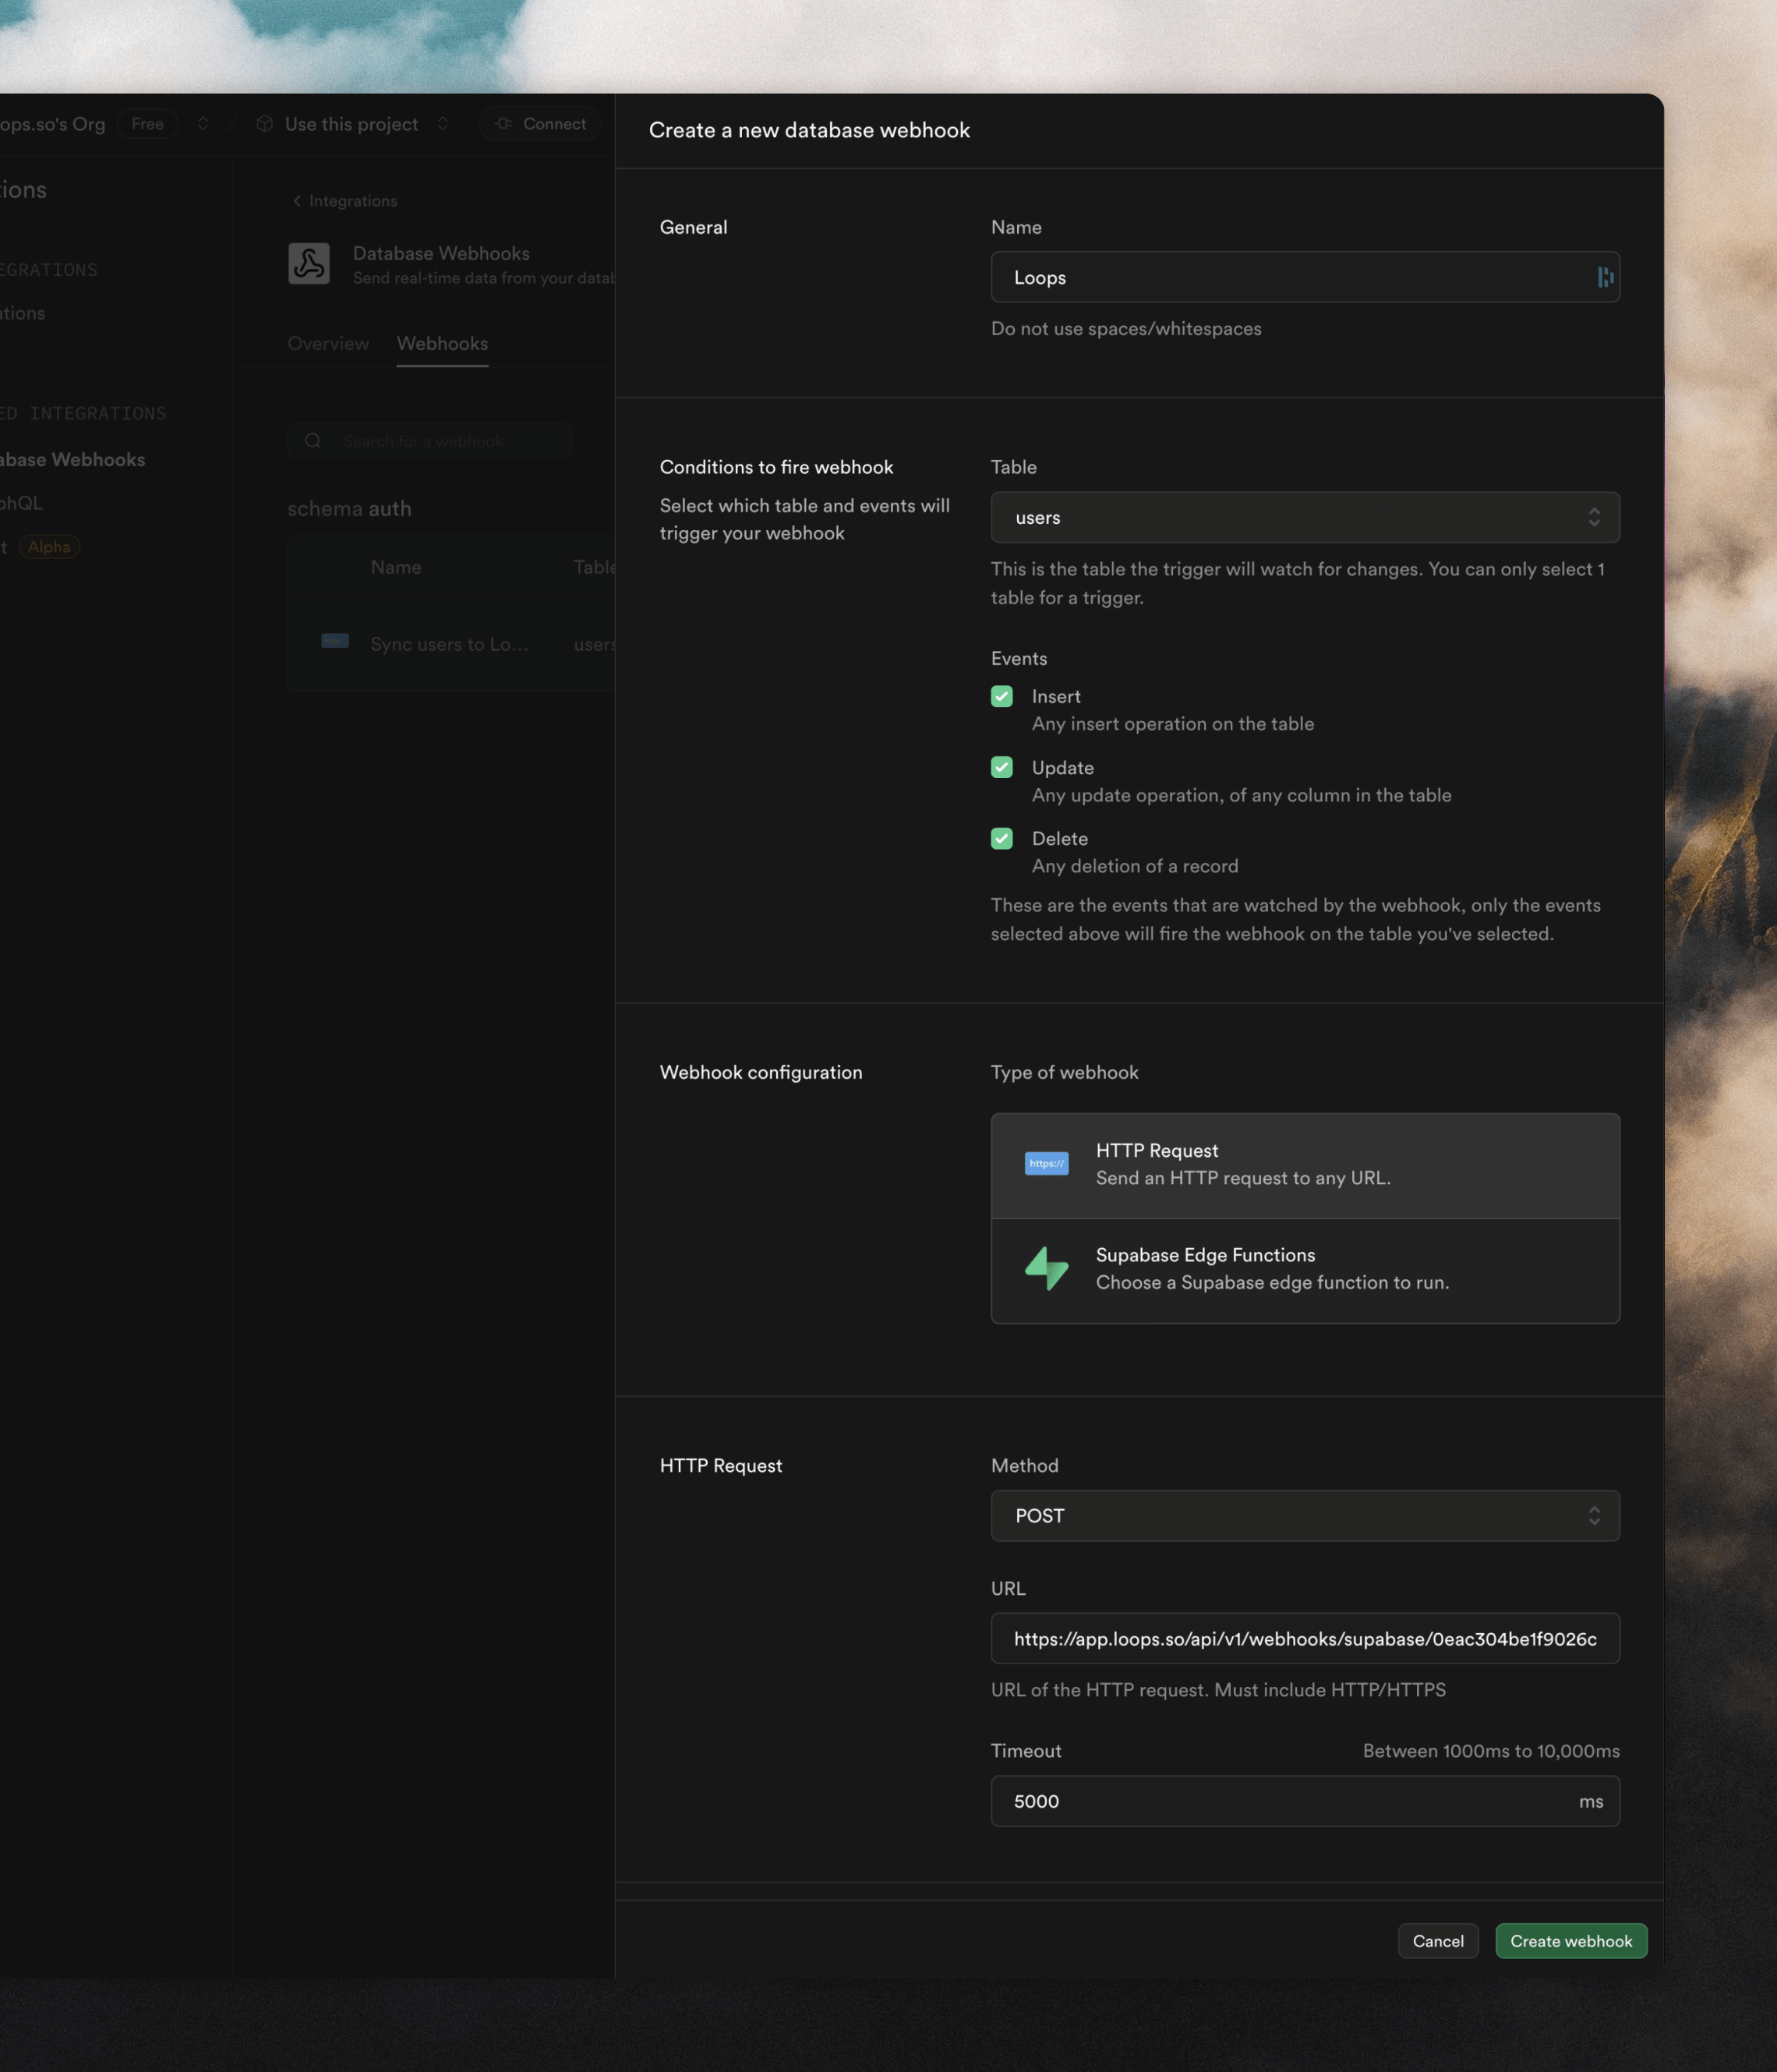
Next, you need to set up database hooks in Supabase.
Inside a project in Supabase, go to [Integrations -> Database Webhooks -> Webhooks](https://supabase.com/dashboard/project/_/integrations/webhooks/webhooks) and click **Create a new hook**.
Give a name to your webhook, select "auth users" from the **Table** dropdown, and select the event(s) you want to get webhooks for.
Make sure **HTTP Request** is selected in the **Webhook configuration** section. In the **HTTP Request** section, paste in the endpoint URL from Loops into the **URL** field.
## Create a database hook in Supabase
Next, you need to set up database hooks in Supabase.
Inside a project in Supabase, go to [Integrations -> Database Webhooks -> Webhooks](https://supabase.com/dashboard/project/_/integrations/webhooks/webhooks) and click **Create a new hook**.
Give a name to your webhook, select "auth users" from the **Table** dropdown, and select the event(s) you want to get webhooks for.
Make sure **HTTP Request** is selected in the **Webhook configuration** section. In the **HTTP Request** section, paste in the endpoint URL from Loops into the **URL** field.
 The last step is to secure requests with a header. In the **HTTP Headers** section, click **+ Add a new header**. From the **Secret header** section in Loops, paste in the **Header name** ("Loops-Secret") and **Header value** values into the form.
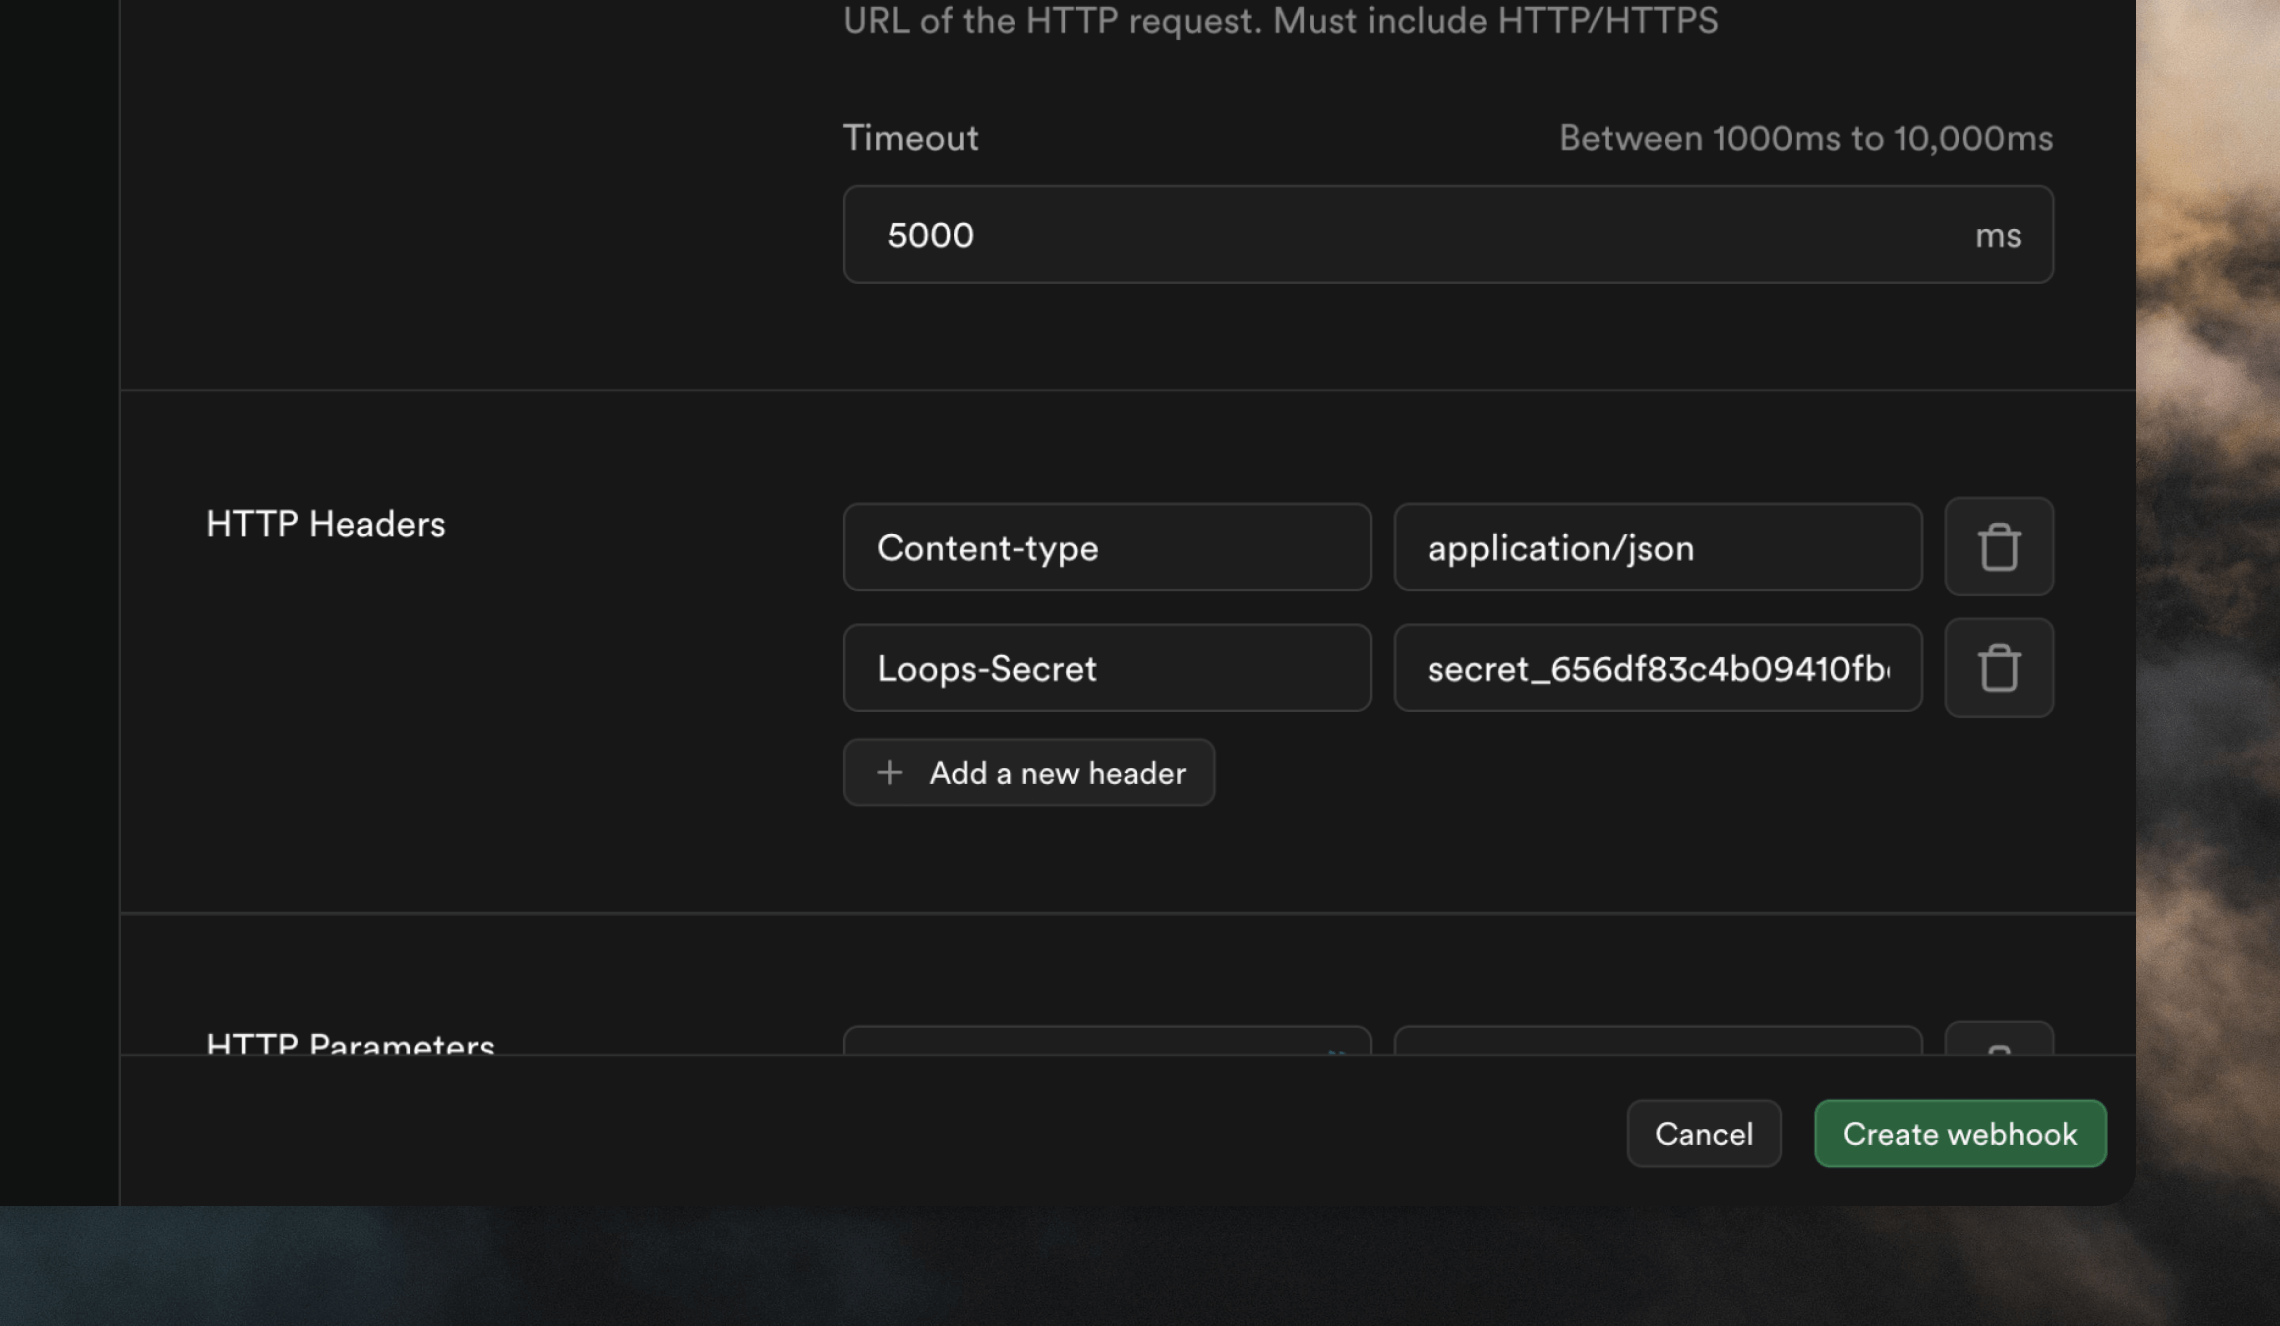 Click **Create webhook** to finish.
## Testing Supabase webhooks
You can test a user webhooks by creating, editing and deleting users from the [Authentication -> Users](https://supabase.com/dashboard/project/_/auth/users) page in Supabase, or by signing up in your application.
On Loops' end, you will see new contacts appear in your [Audience](https://app.loops.so/audience) page, and triggered events in the [Events](https://app.loops.so/settings?page=events) page.
Click **Create webhook** to finish.
## Testing Supabase webhooks
You can test a user webhooks by creating, editing and deleting users from the [Authentication -> Users](https://supabase.com/dashboard/project/_/auth/users) page in Supabase, or by signing up in your application.
On Loops' end, you will see new contacts appear in your [Audience](https://app.loops.so/audience) page, and triggered events in the [Events](https://app.loops.so/settings?page=events) page.