> ## Documentation Index
> Fetch the complete documentation index at: https://loops.so/docs/llms.txt
> Use this file to discover all available pages before exploring further.
# Recipe: Scheduled digest email
> How to send a daily, weekly or monthly email with a summary of what's happened in your app.
This email type may also be referred to as a "rollup" email or a "summary" email. The idea is to send a single email that summarizes what's happened in your app over a period of time.
These kinds of digest emails are a great way to keep your users engaged with your app.
The best way to do it today is a workflow with an [event trigger](/workflows/triggers) set to fire “every time” with an event payload containing the updated property you’d like to send.
Then at the end of the day, week or month you can trigger a digest email with a summary of the events that happened.
## Create the workflow and event
Go to the [Workflows](https://app.loops.so/loops) page and create a new workflow.
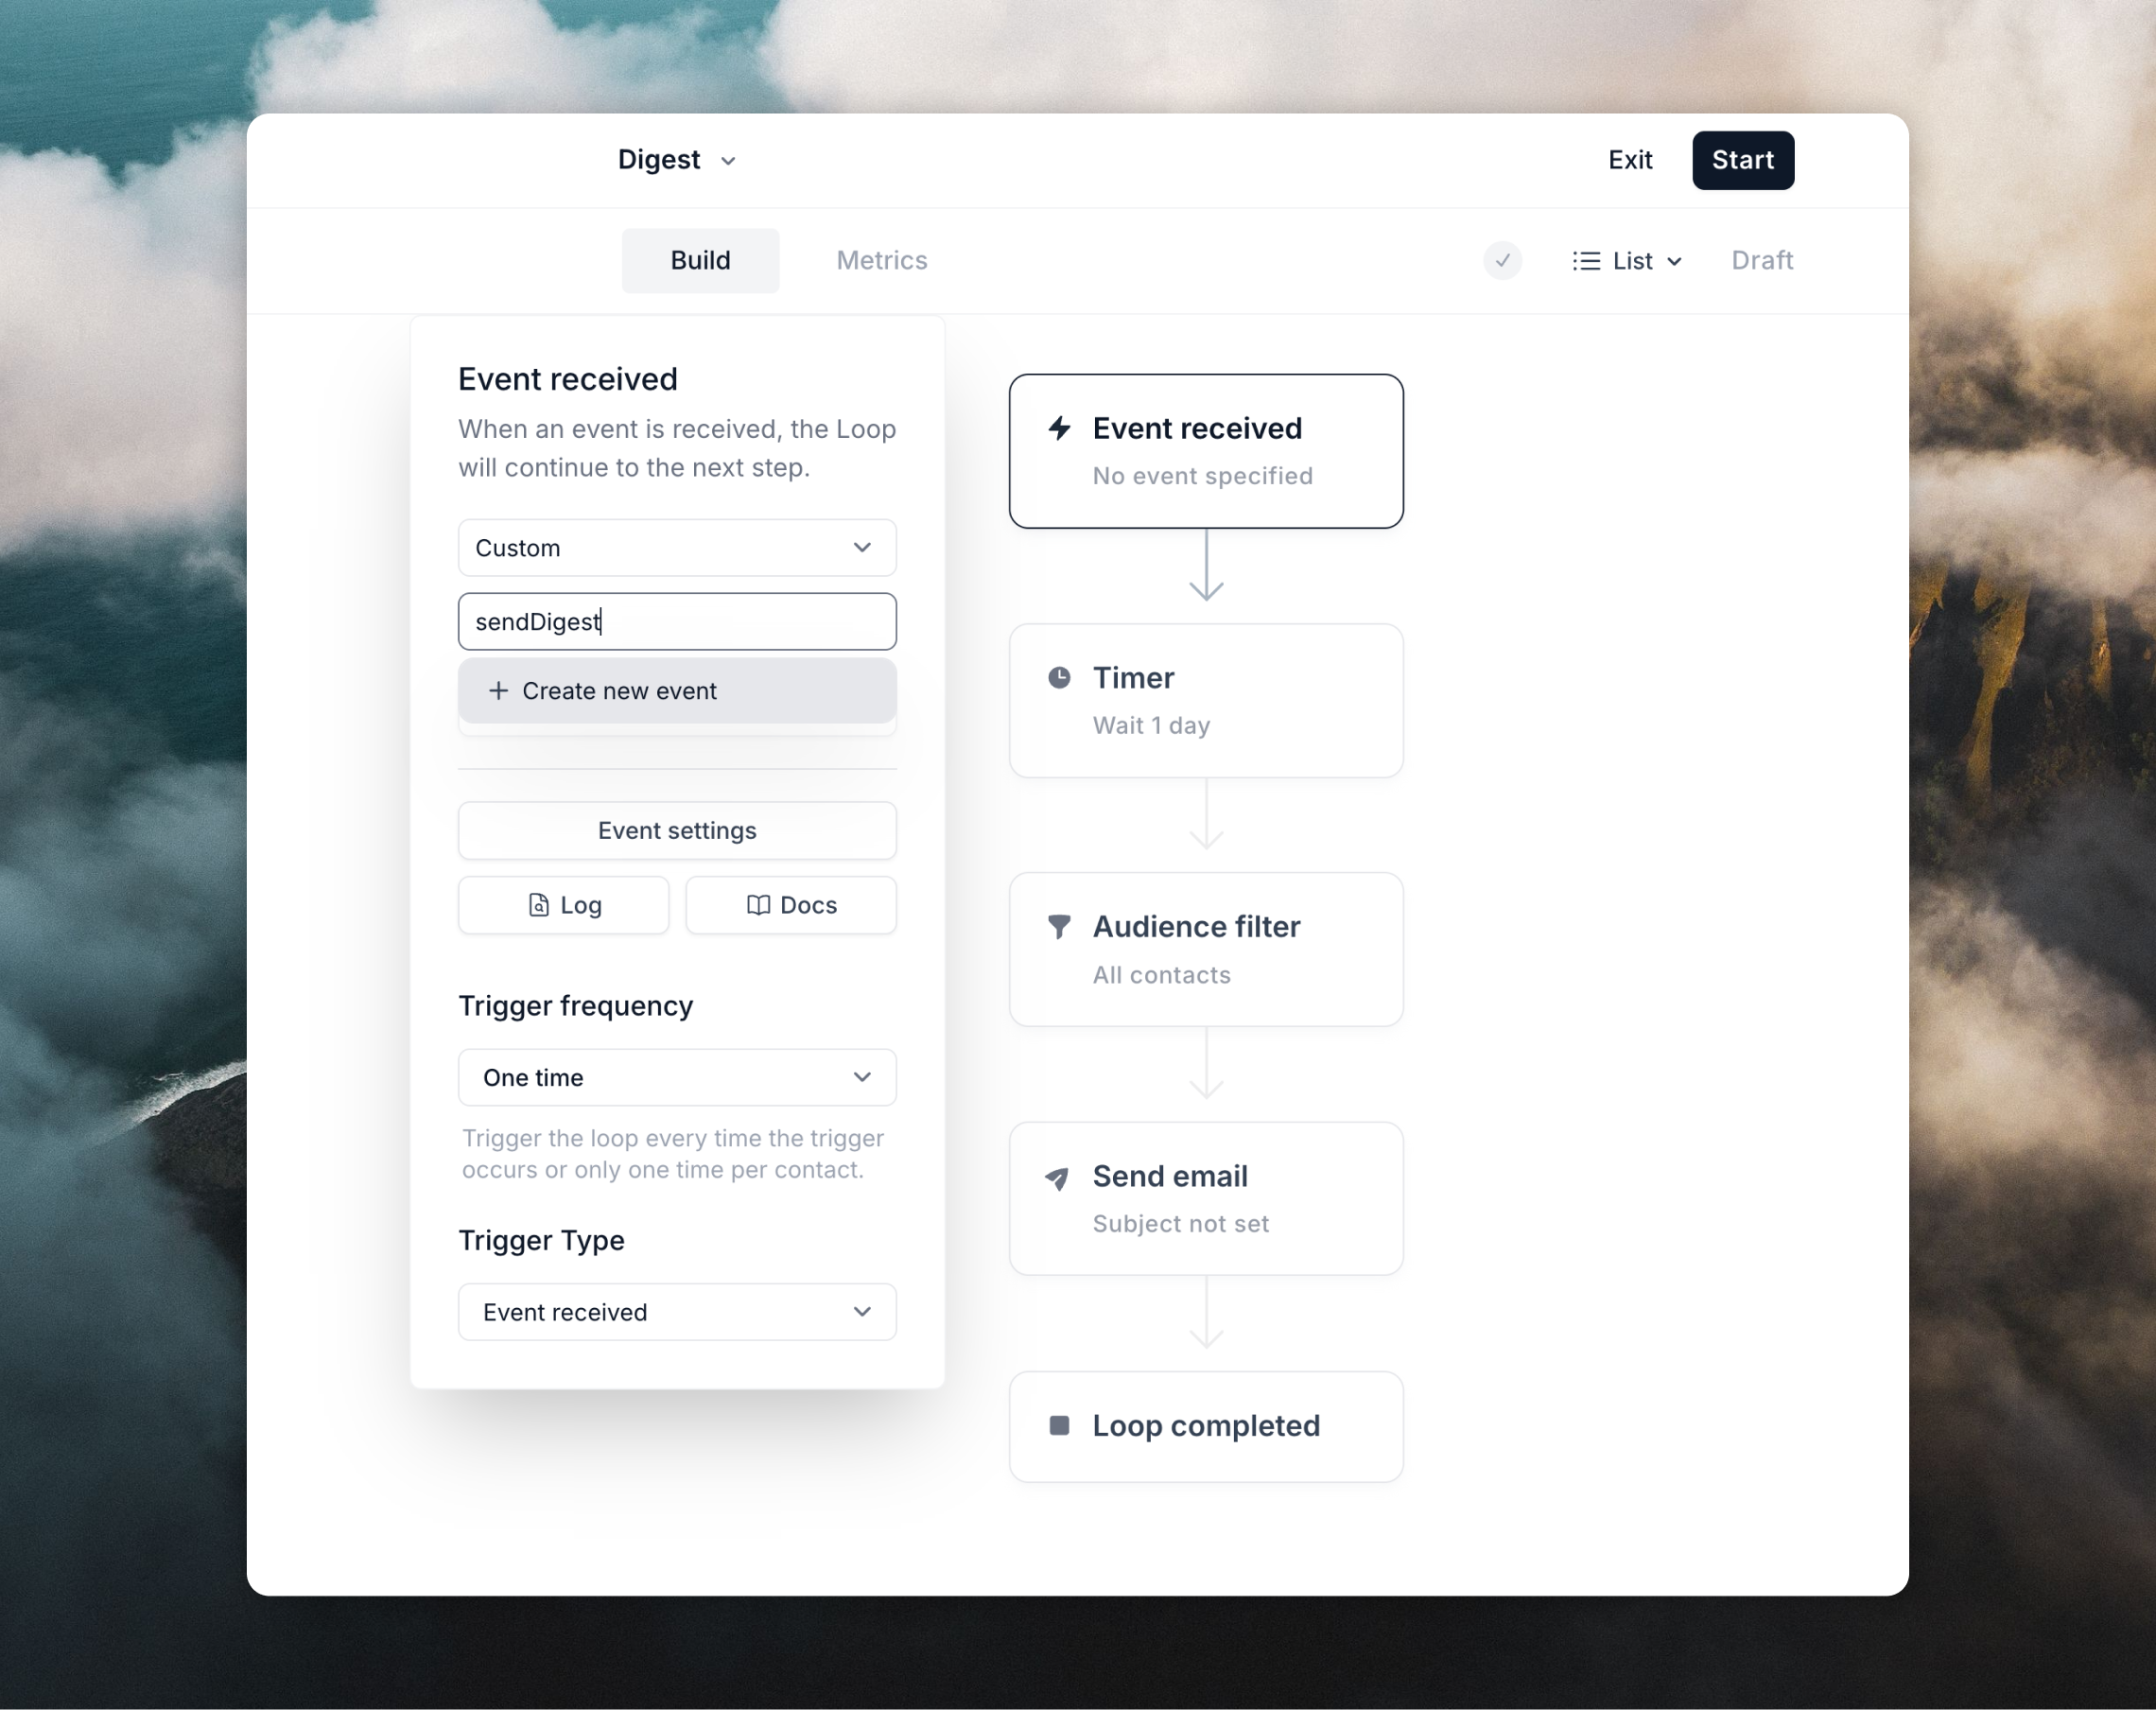
Choose the **Event is fired** trigger. You will enter the workflow editor.
Click on the **Event received** node and type the name of your event. You can reuse an existing event or create a new one from this input.
For example, you can use a name like `sendDigest` and then click **+ Create new event**.
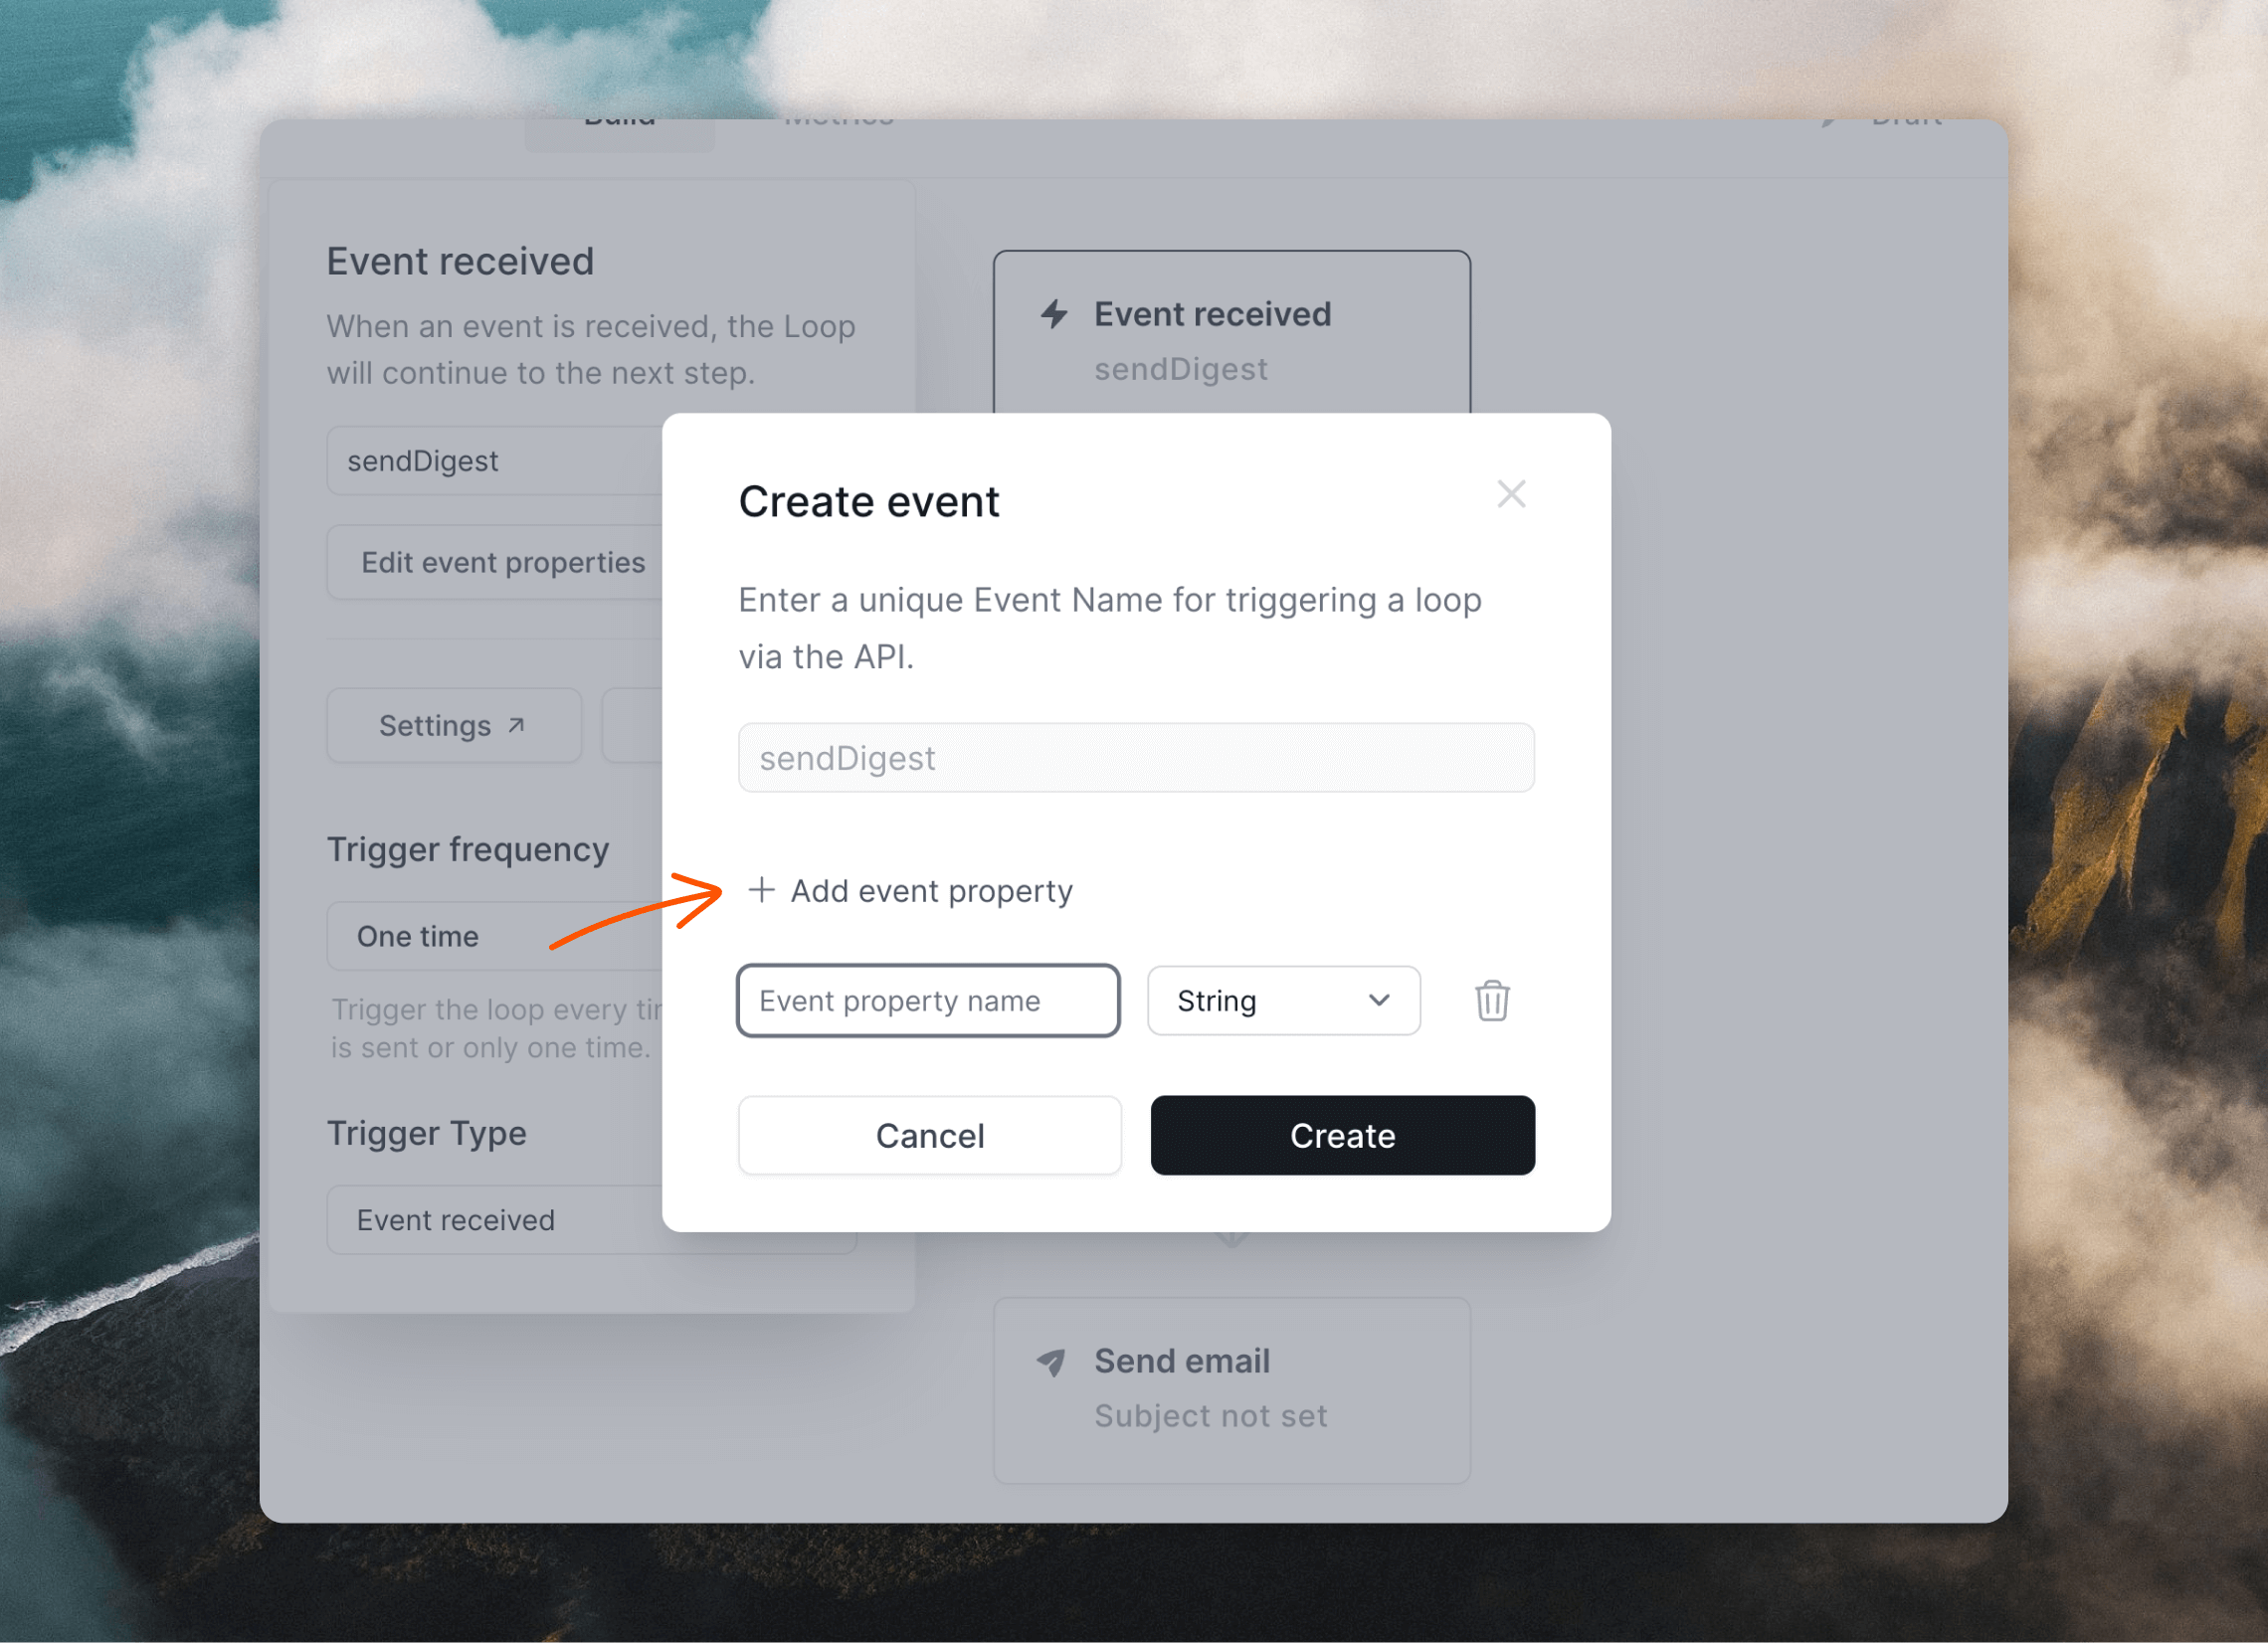
 Next, click on the **Edit event properties** button to add [properties](/events/properties) to your event. Properties are extra pieces of data that you can attach to each event. This data is then made available in every email you send.
In the event editor overlay, click **+ Add event property** and add any properties you want to include in your digest email.
Next, click on the **Edit event properties** button to add [properties](/events/properties) to your event. Properties are extra pieces of data that you can attach to each event. This data is then made available in every email you send.
In the event editor overlay, click **+ Add event property** and add any properties you want to include in your digest email.
 Make sure the "Trigger frequency" dropdown in the **Event received** node has **Every time** selected, so that each event triggers an email.
## Create your email
The next step is to create the email you send to each contact.
Click on the **Send email** node and then **Create email**. This will open the email editor, where you can [create your email](/creating-emails/editor).
When you want to add the event properties you created in the previous step, click the `⚡️` button above the editor (1) and then configure in the **Event Property** editor panel (2).
Make sure the "Trigger frequency" dropdown in the **Event received** node has **Every time** selected, so that each event triggers an email.
## Create your email
The next step is to create the email you send to each contact.
Click on the **Send email** node and then **Create email**. This will open the email editor, where you can [create your email](/creating-emails/editor).
When you want to add the event properties you created in the previous step, click the `⚡️` button above the editor (1) and then configure in the **Event Property** editor panel (2).
 In the right-hand panel, you will see a list allowing you to insert available event properties [into your email](/creating-emails/personalizing-emails).
Make sure to [add fallback values](/creating-emails/personalizing-emails#fallback-values) for every property; if an event doesn't have a value for a property in your email, the email will not send. Fallback values make sure that emails are sent to every contact.
When you've finished creating your email, click **Start** in the top right. This will make your workflow active and you can start triggering it by sending events.
## Trigger events
To send events to Loops you can use an [integration](/integrations), an [SDK](/sdks) or [our API](/api-reference/intro).
You can install [Loops skills](/skills) to help your coding agents use the Loops CLI, API and SDKs to create campaigns, manage contacts, send events, and send transactional emails.
With the API, it's just a case of making a request to the [Send event endpoint](/api-reference/send-event) containing the contact's details, the event name and your event properties.
```json theme={"dark"}
{
"eventName": "sendDigest",
"email": "test@example.com",
"eventProperties": {
...
}
}
```
## Learn more
Learn about creating email workflows.
Read more about triggering emails with events.
Learn how to add dynamic data to your emails.
Find out how to send events using our API.
In the right-hand panel, you will see a list allowing you to insert available event properties [into your email](/creating-emails/personalizing-emails).
Make sure to [add fallback values](/creating-emails/personalizing-emails#fallback-values) for every property; if an event doesn't have a value for a property in your email, the email will not send. Fallback values make sure that emails are sent to every contact.
When you've finished creating your email, click **Start** in the top right. This will make your workflow active and you can start triggering it by sending events.
## Trigger events
To send events to Loops you can use an [integration](/integrations), an [SDK](/sdks) or [our API](/api-reference/intro).
You can install [Loops skills](/skills) to help your coding agents use the Loops CLI, API and SDKs to create campaigns, manage contacts, send events, and send transactional emails.
With the API, it's just a case of making a request to the [Send event endpoint](/api-reference/send-event) containing the contact's details, the event name and your event properties.
```json theme={"dark"}
{
"eventName": "sendDigest",
"email": "test@example.com",
"eventProperties": {
...
}
}
```
## Learn more
Learn about creating email workflows.
Read more about triggering emails with events.
Learn how to add dynamic data to your emails.
Find out how to send events using our API.