> ## Documentation Index
> Fetch the complete documentation index at: https://loops.so/docs/llms.txt
> Use this file to discover all available pages before exploring further.
# Uploading a custom email
> Use Loops with Emailify, Email Love or MJML.
While we do support importing MJML, we recommend using our editor to create
your emails. It's the easiest way to create beautiful emails that work across
all email clients.
## Overview
We allow uploading of custom-coded emails created using a markup language called MJML.
You can upload custom MJML for [all three types of emails](/types-of-emails) in Loops (campaigns, workflows and transactional emails).
When uploading custom email, make sure the email is in a `.zip` file with the following folder structure:
```bash yourEmail.zip theme={"dark"}
index.mjml
img
|_img1.png
|_img1.png
```
Important: Please make sure the MJML file is titled `index.mjml`
**MJML**
MJML is a markup language that helps you create responsive emails. It's an established framework that helps you create beautiful emails that work across all email clients. You can read more about it at [mjml.io](https://mjml.io/)
**Figma** (via the Emailify and Email Love plugins)
Sometimes you just want that special touch to an email that only Figma can give you. We get it! That's why we support plugins [Emailify](https://www.figma.com/community/plugin/910671699871076601/emailify-html-email-builder) and [Email Love](https://www.figma.com/community/plugin/1387891288648822744/email-love-html-email-builder), which help you create beautiful emails in Figma then export into Loops.
## MJML
If you have your MJML ready, there is one step you need to complete before you can upload it into Loops...
### Add an unsubscribe URL
In your email code, you have to insert an unsubscribe link. This keeps you compliant with email sending restrictions.
All you need to do is add a `{unsubscribe_link}` tag into your MJML. When the email is sent, we will insert a contact-specific URL into this tag, which the contact can click to unsubscribe.
```HTML theme={"dark"}
Unsubscribe
```
### Add dynamic content
You may want to add dynamic content (for example, a contact property or event property) into your email. You can do this using dynamic content tags.
When the email is sent, Loops will replace this tag with the actual value.
Remember to use camelCase format when typing your event property tags.
For example, adding a first name [contact property](/contacts/properties) (in campaigns and workflows) can be added like this:
```
Hello {firstName},
```
In workflows triggered by events you can add [event properties](/events/properties) with an `EVENT_PROPERTY:` prefix:
```
Hello {EVENT_PROPERTY:firstName},
```
In transactional emails you can add [data variables](/transactional#add-data-variables) with a `DATA_VARIABLES:` prefix:
```
Hello {DATA_VARIABLE:firstName},
```
[Read more about dynamic content tags](/creating-emails/personalizing-emails#dynamic-tag-syntax)
### Add arrays
You can add [arrays](/creating-emails/editor#arrays) to your email by using the `` tag.
The `variable` attribute is the name of the data variable you want to use for your array.
The `variable-type` attribute should be `DATA_VARIABLE` for transactional emails.
Inside the array tag you can add content, which will be repeated for each item in the array.
You can add dynamic content to the item by using our [dynamic tag syntax](/creating-emails/personalizing-emails#dynamic-tag-syntax). You must use a prefix like `items[].` for array-scoped data variables, where `items` matches the `variable` attribute of your array tag.
This example has one array-scoped data variable `items[].price` (only available within the array) and one "global" data variable `userId` (available throughout the email).
```html theme={"dark"}
{DATA_VARIABLE:items[].price} - {DATA_VARIABLE:userId}
```
## Emailify
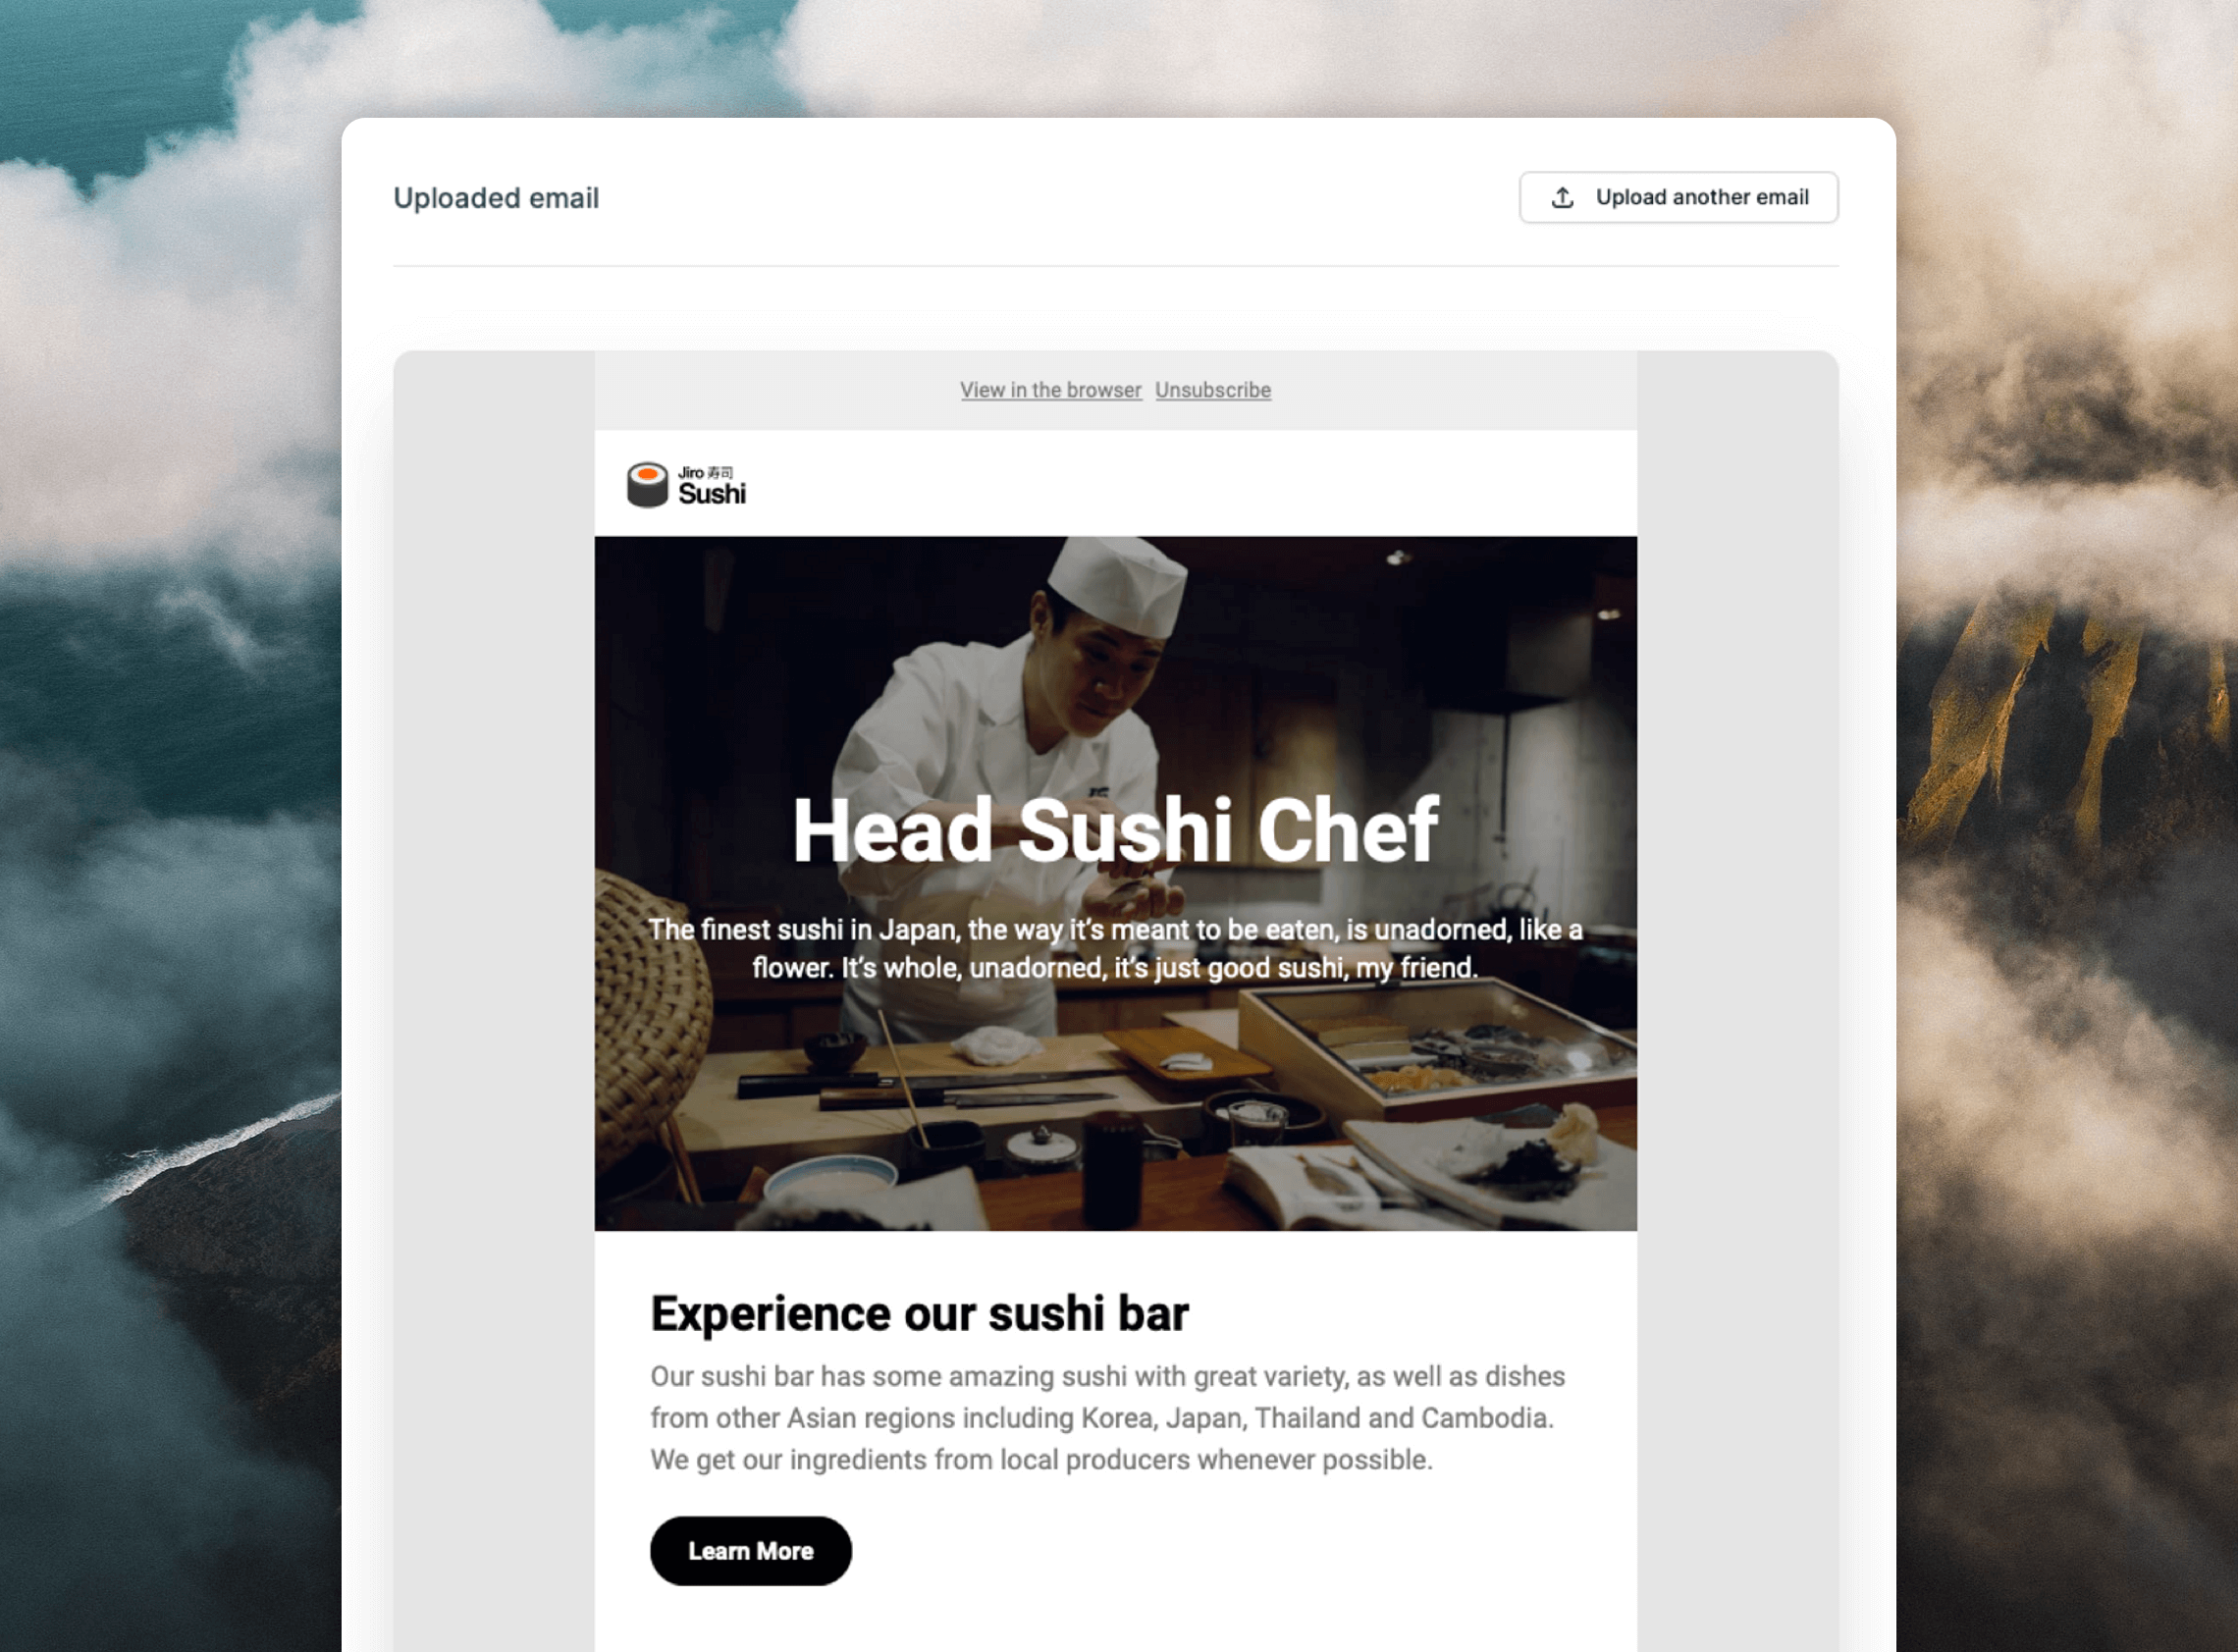
Using Emailify, you can create well-designed emails inside Figma, then easily export them ready for Loops.
Download the free [Emailify plugin for Figma](https://www.figma.com/community/plugin/910671699871076601/emailify-html-email-builder) and launch it.
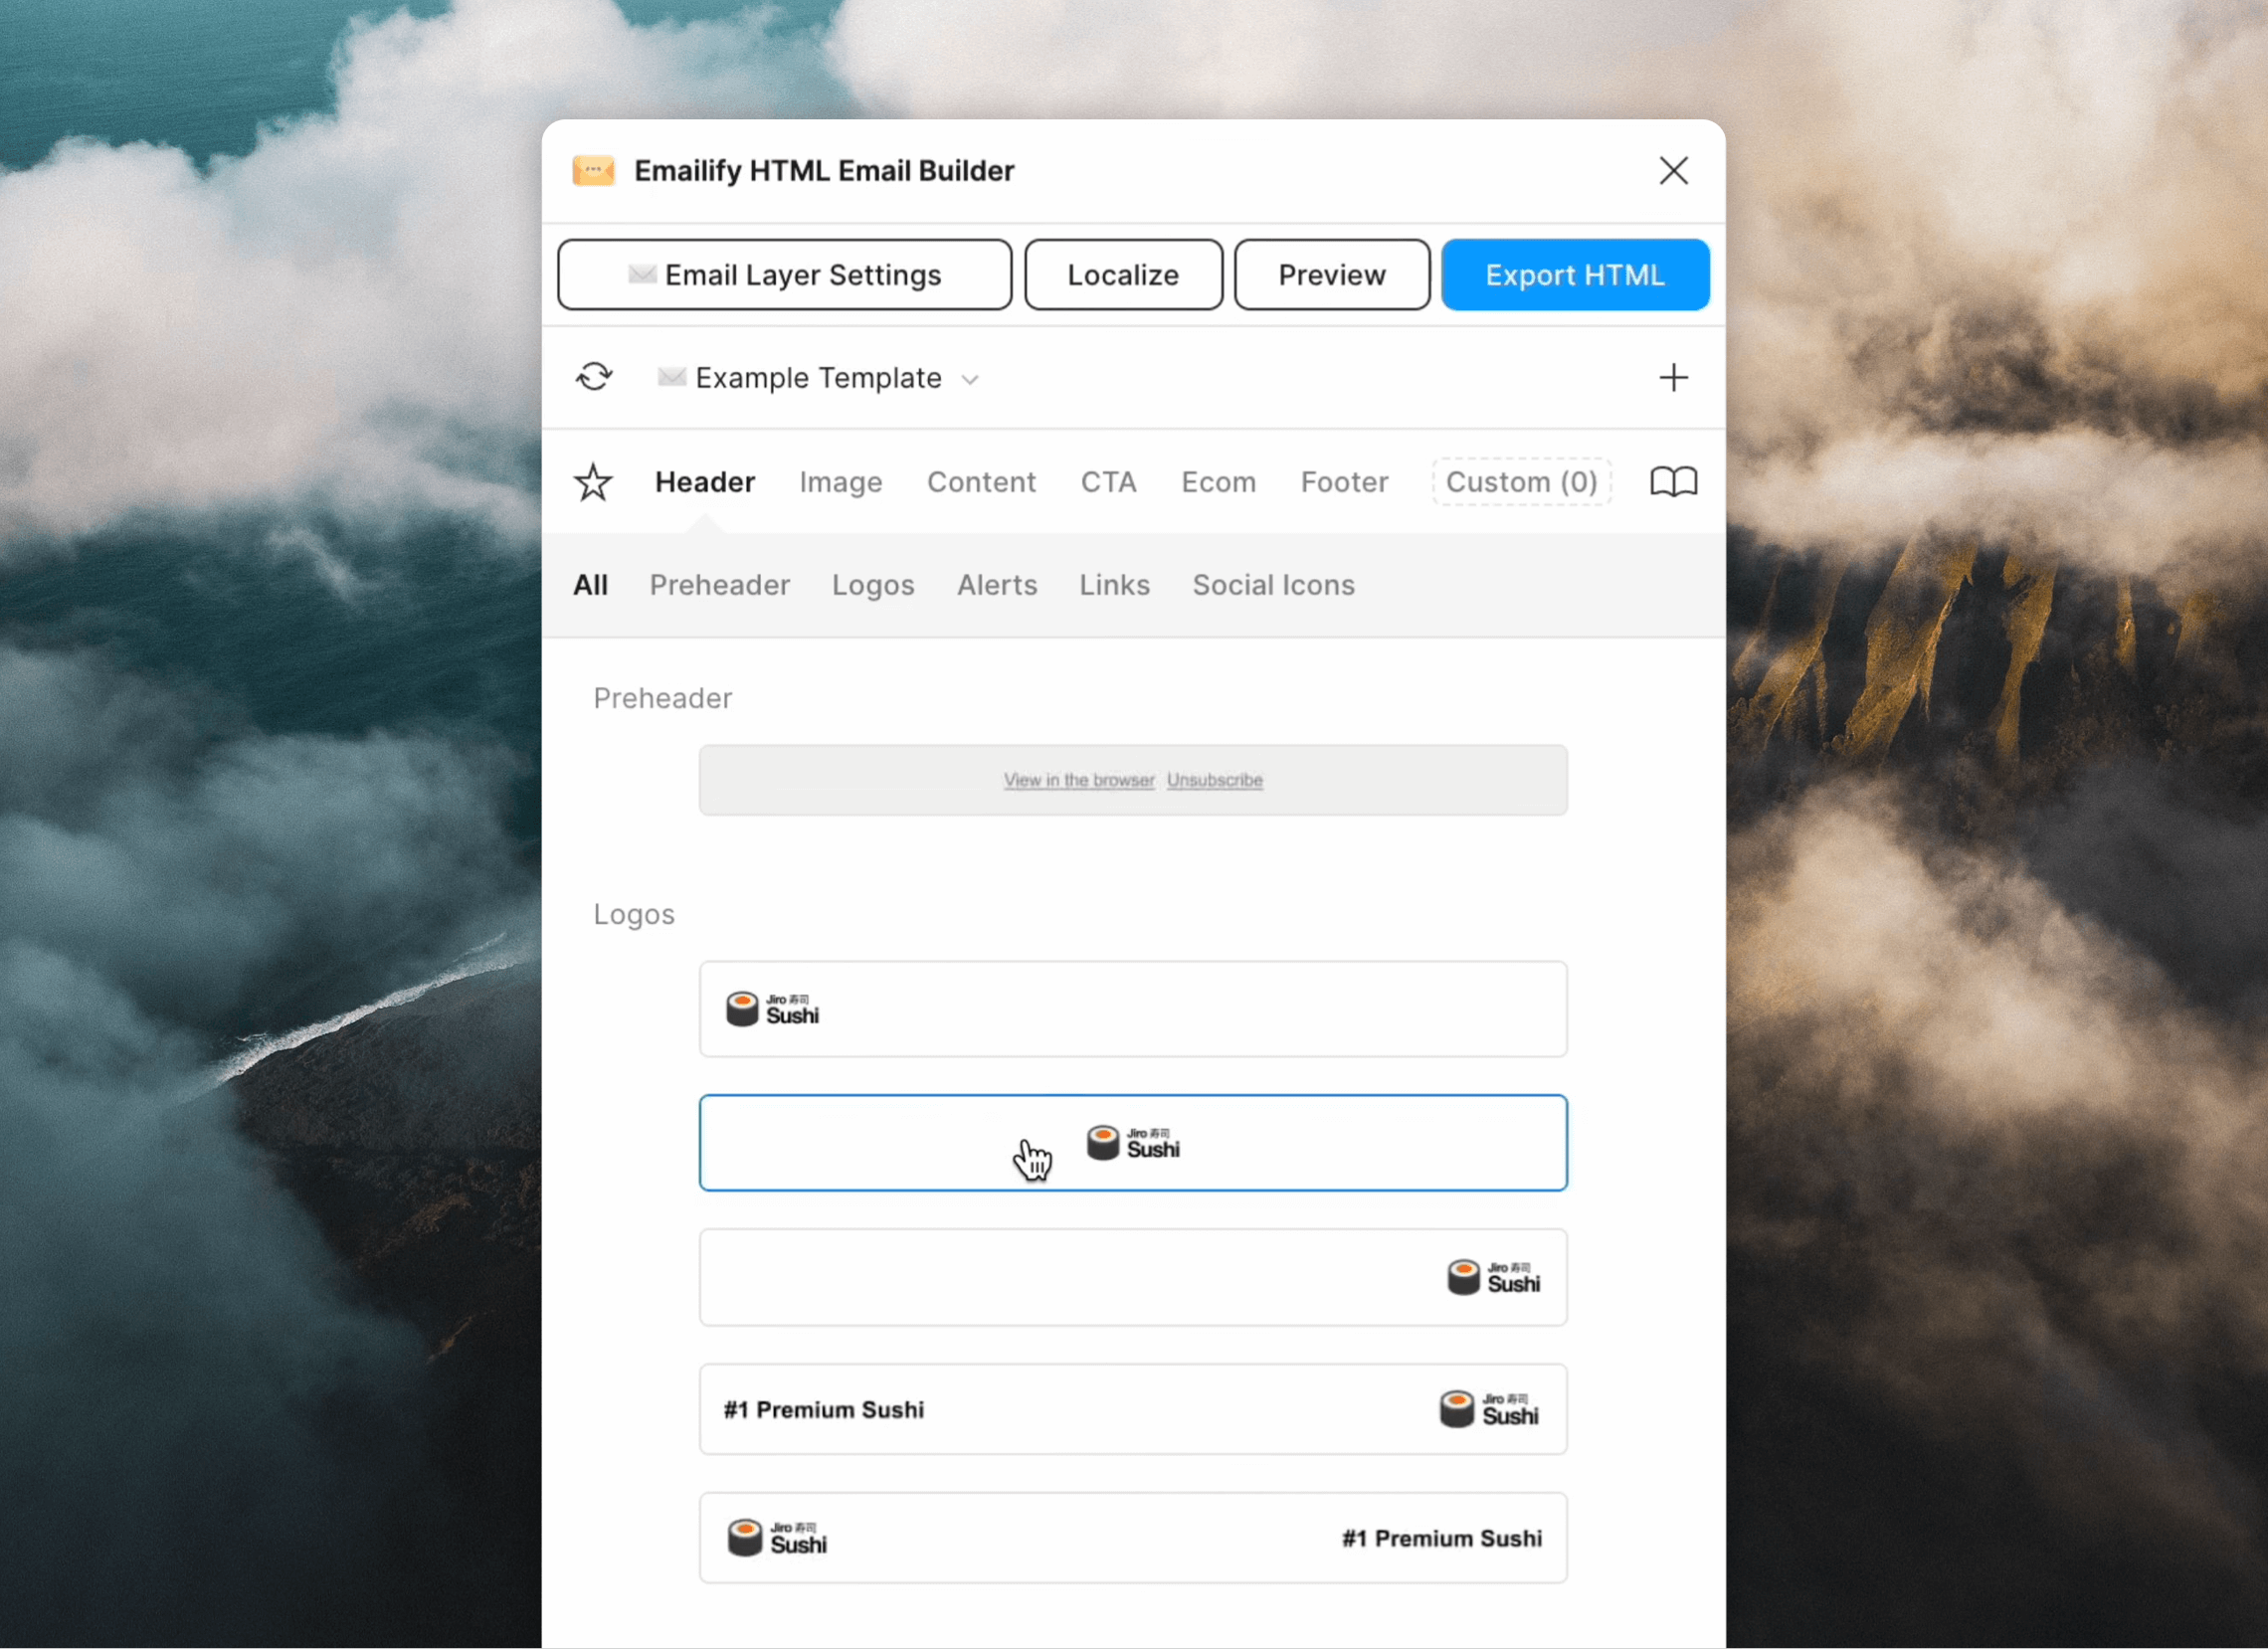
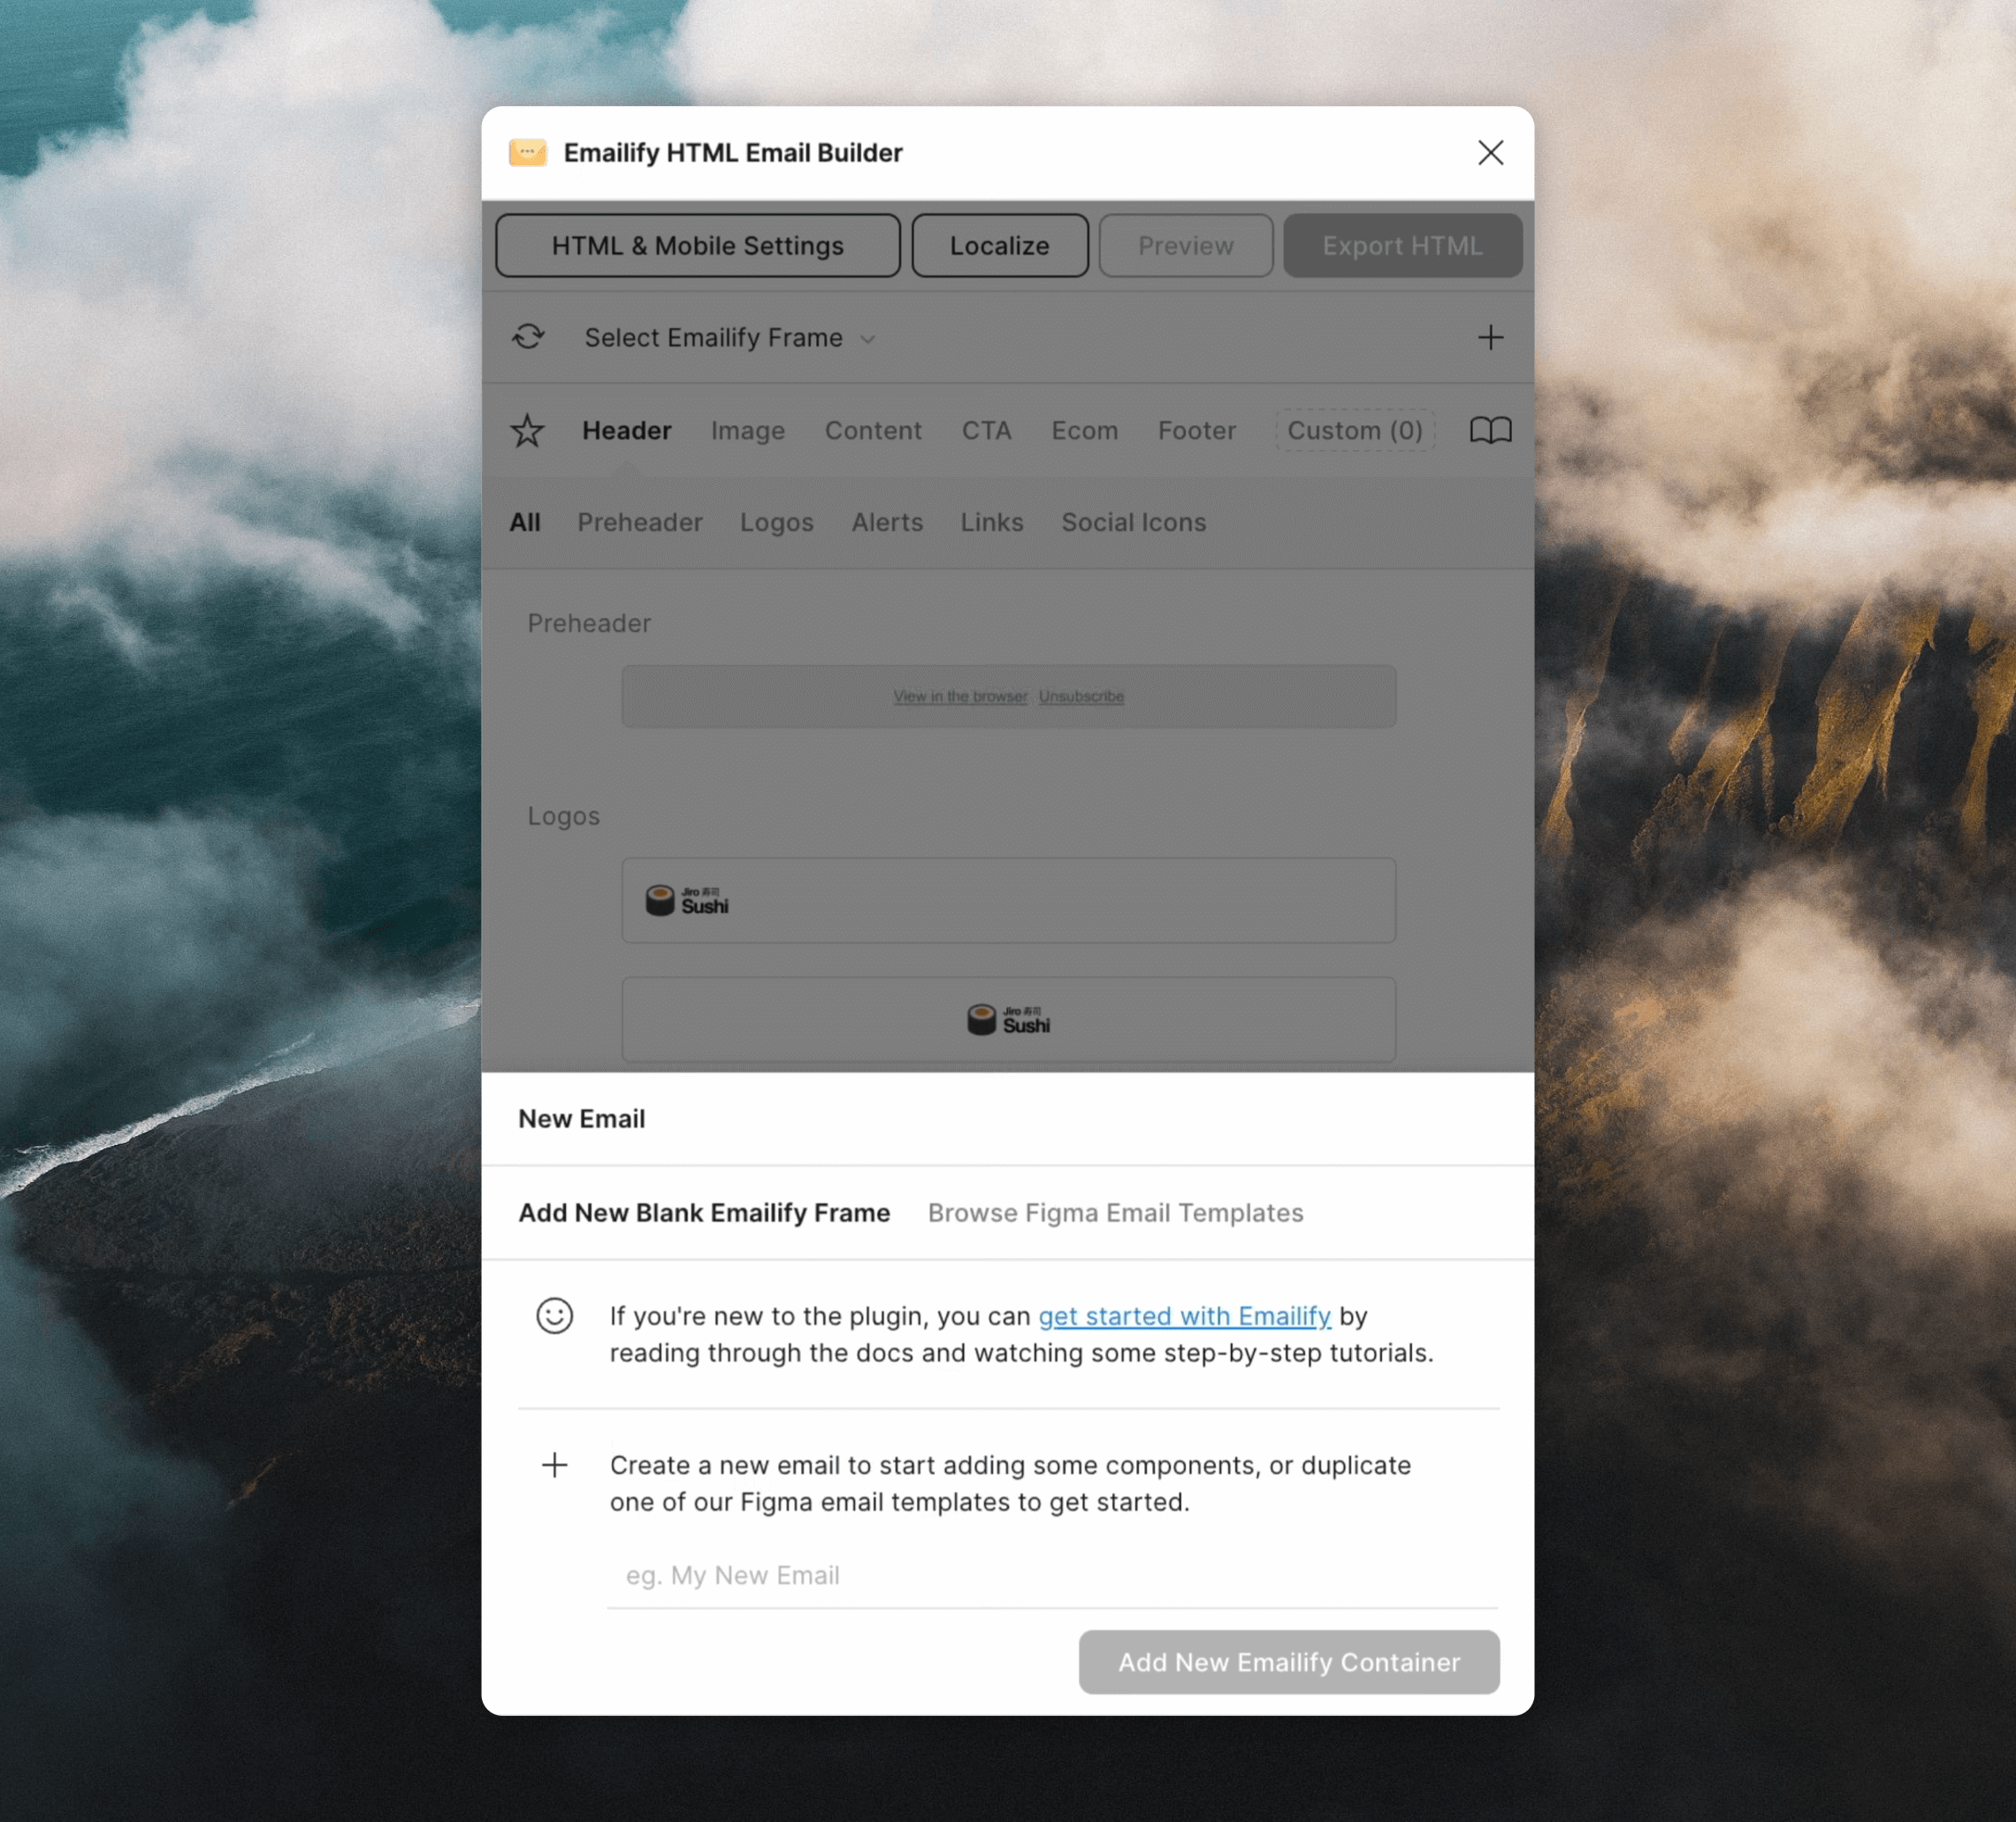 ### Add blocks to your email
To build your email you can drag and drop pre-made blocks provided by Emailify.
Once added you can customize each block.
### Add blocks to your email
To build your email you can drag and drop pre-made blocks provided by Emailify.
Once added you can customize each block.
 Loops will automatically host all of your email images so they
can be reliably displayed to your audience. This feature results in an odd
quirk that you should be aware of:
Any text in your email that matches the path to one of your images will be replaced with the new path provided by Loops.
**For example:** `img/myImage.jpg` will be replaced with something like: `https://something.com/lkjn98s08hbAF/img/lkwekHBlhk78kasj.jpg`
For most situations this won't be an issue, only text that exactly matches the path to one of your images will be replaced.
### Add dynamic content
You may want to add dynamic content (for example, a contact property) into your email. You can do this using dynamic content tags.
For example, adding a first name value can be added like this:
```
Hello {firstName},
```
In workflows you can also add event properties with an `EVENT_PROPERTY:` prefix:
```
Hello {EVENT_PROPERTY:firstName},
```
In transactional emails you can add data variables with a `DATA_VARIABLES:` prefix:
```
Hello {DATA_VARIABLE:firstName},
```
[Read more about dynamic content tags](/creating-emails/personalizing-emails#dynamic-tag-syntax)
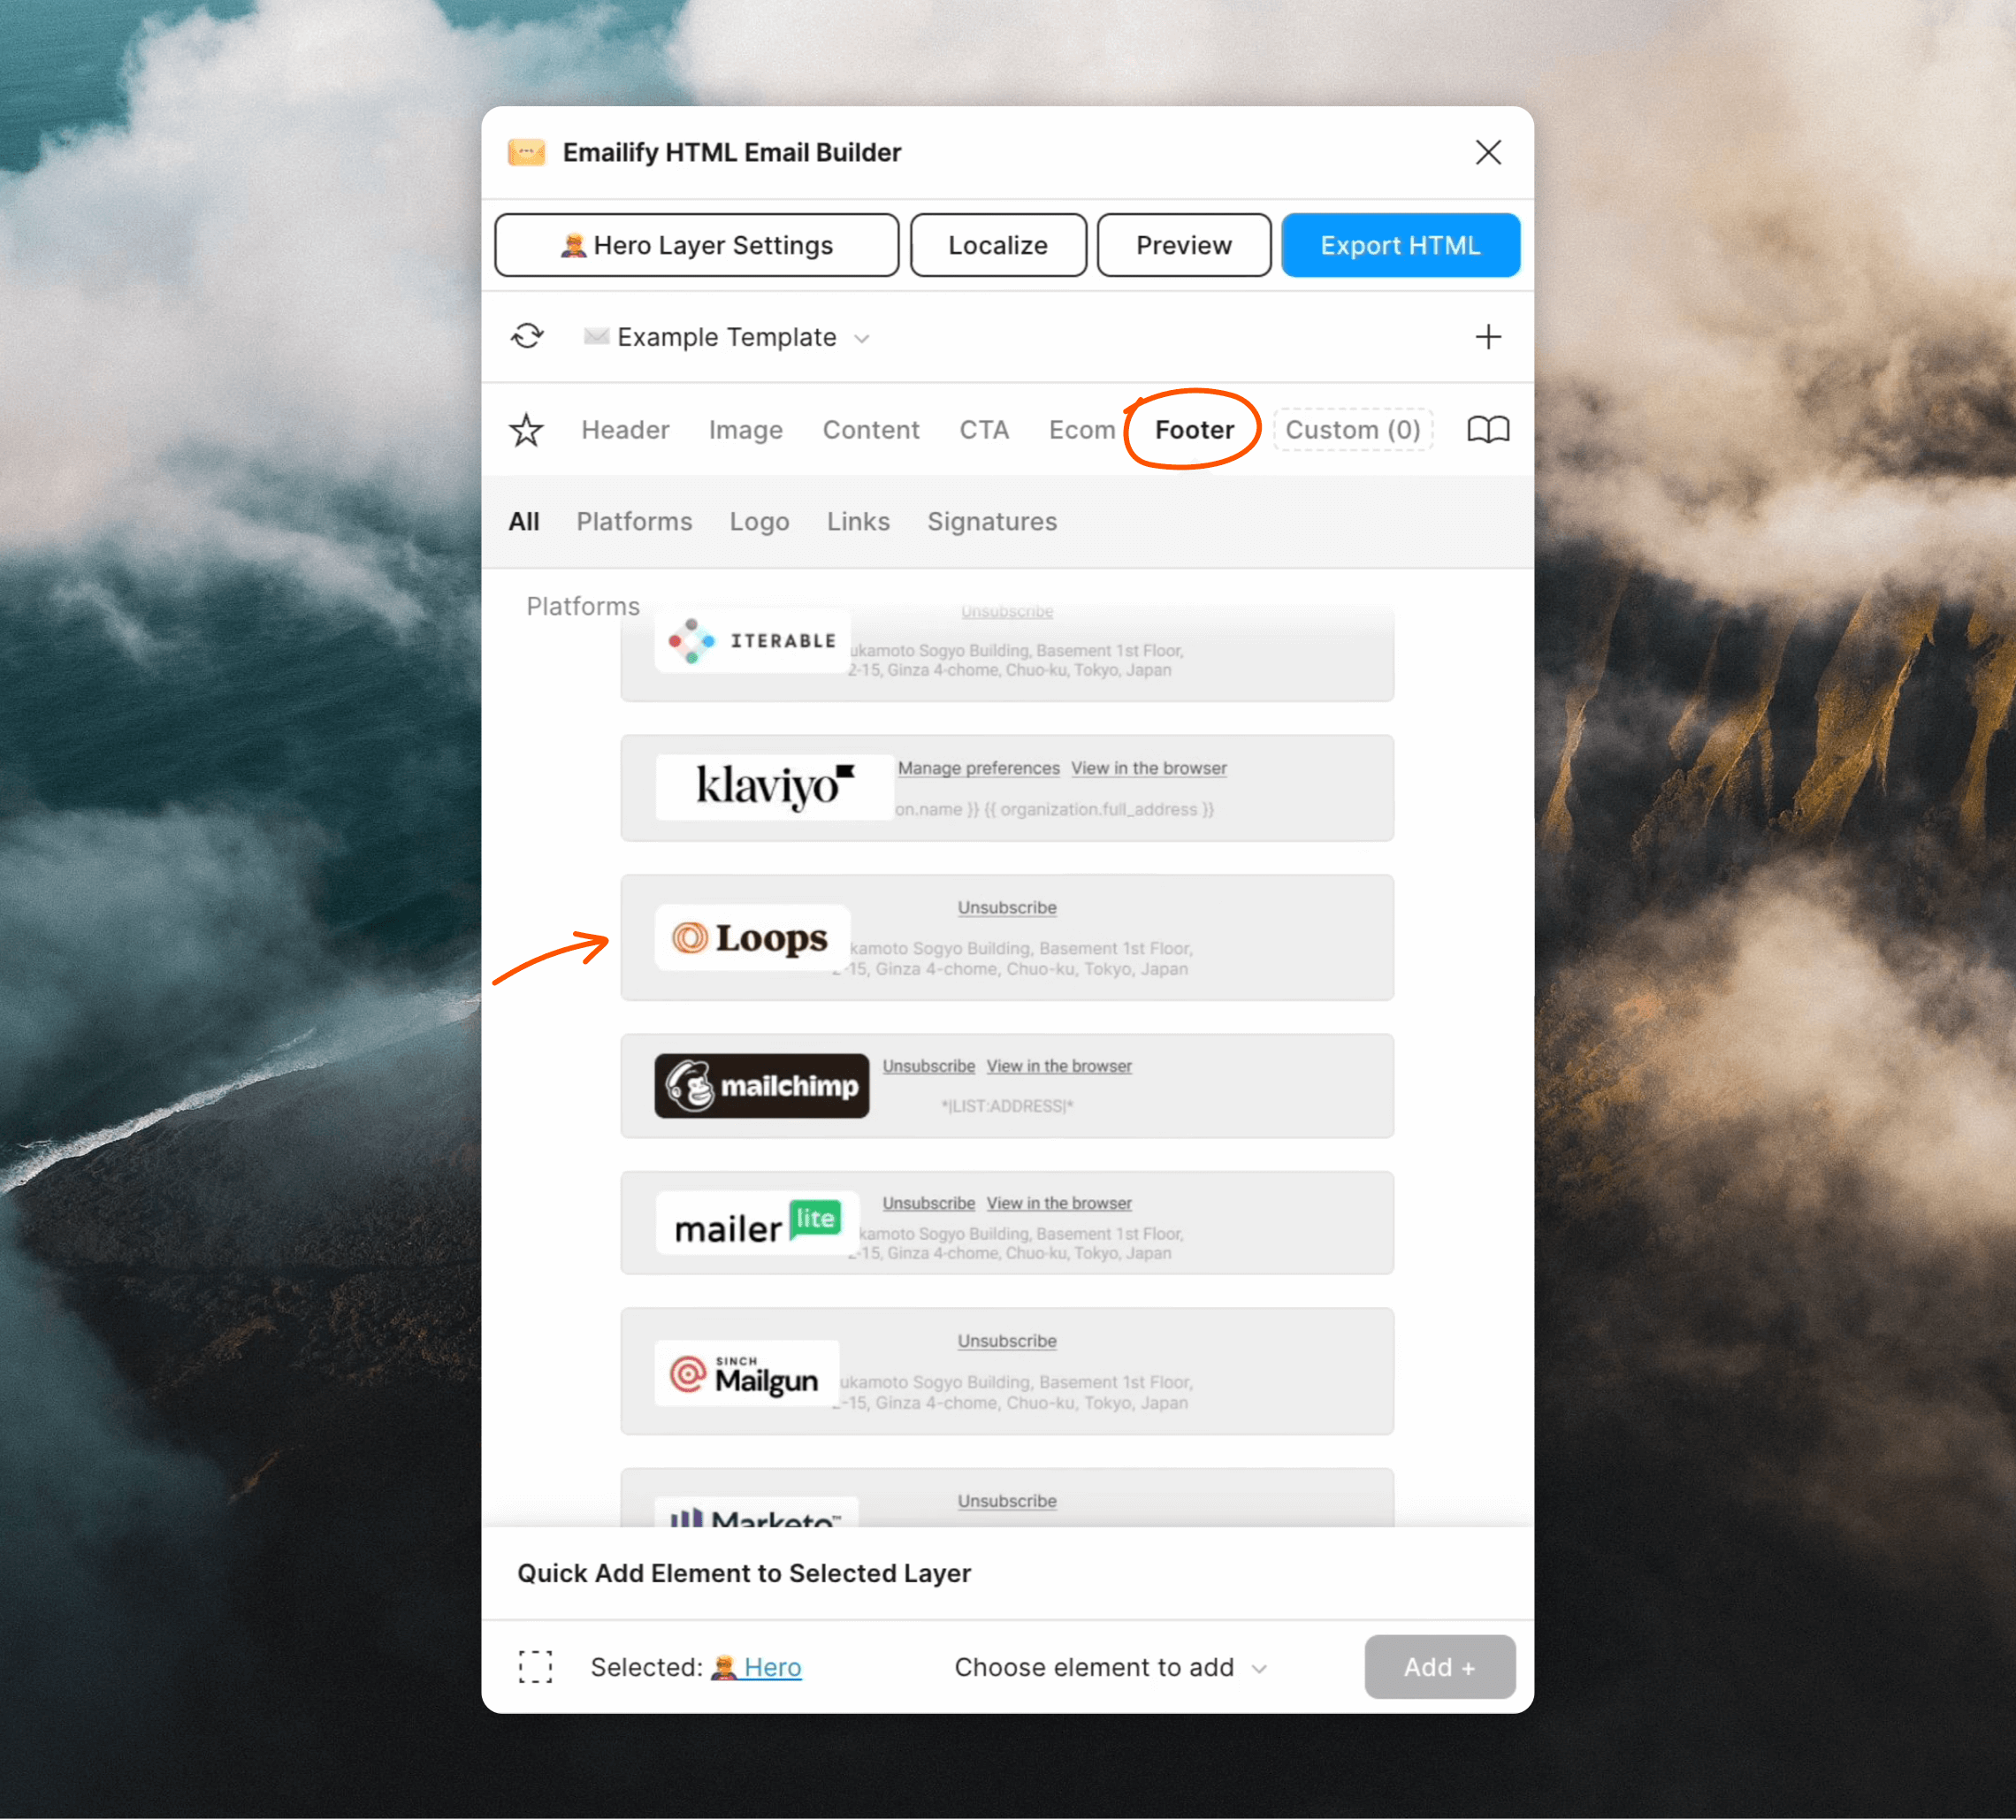
### Add the Loops footer
While creating your email, you need to include an unsubscribe link.
To do this manually, add a link with the URL `{unsubscribe_link}`.
Alternatively, Emailify contains a pre-made Loops footer. Click **Footer**, scroll down until you see the Loops logo and click.
Loops will automatically host all of your email images so they
can be reliably displayed to your audience. This feature results in an odd
quirk that you should be aware of:
Any text in your email that matches the path to one of your images will be replaced with the new path provided by Loops.
**For example:** `img/myImage.jpg` will be replaced with something like: `https://something.com/lkjn98s08hbAF/img/lkwekHBlhk78kasj.jpg`
For most situations this won't be an issue, only text that exactly matches the path to one of your images will be replaced.
### Add dynamic content
You may want to add dynamic content (for example, a contact property) into your email. You can do this using dynamic content tags.
For example, adding a first name value can be added like this:
```
Hello {firstName},
```
In workflows you can also add event properties with an `EVENT_PROPERTY:` prefix:
```
Hello {EVENT_PROPERTY:firstName},
```
In transactional emails you can add data variables with a `DATA_VARIABLES:` prefix:
```
Hello {DATA_VARIABLE:firstName},
```
[Read more about dynamic content tags](/creating-emails/personalizing-emails#dynamic-tag-syntax)
### Add the Loops footer
While creating your email, you need to include an unsubscribe link.
To do this manually, add a link with the URL `{unsubscribe_link}`.
Alternatively, Emailify contains a pre-made Loops footer. Click **Footer**, scroll down until you see the Loops logo and click.
 You are then free to edit the text and design of the footer (just leave the link URL value as-is).
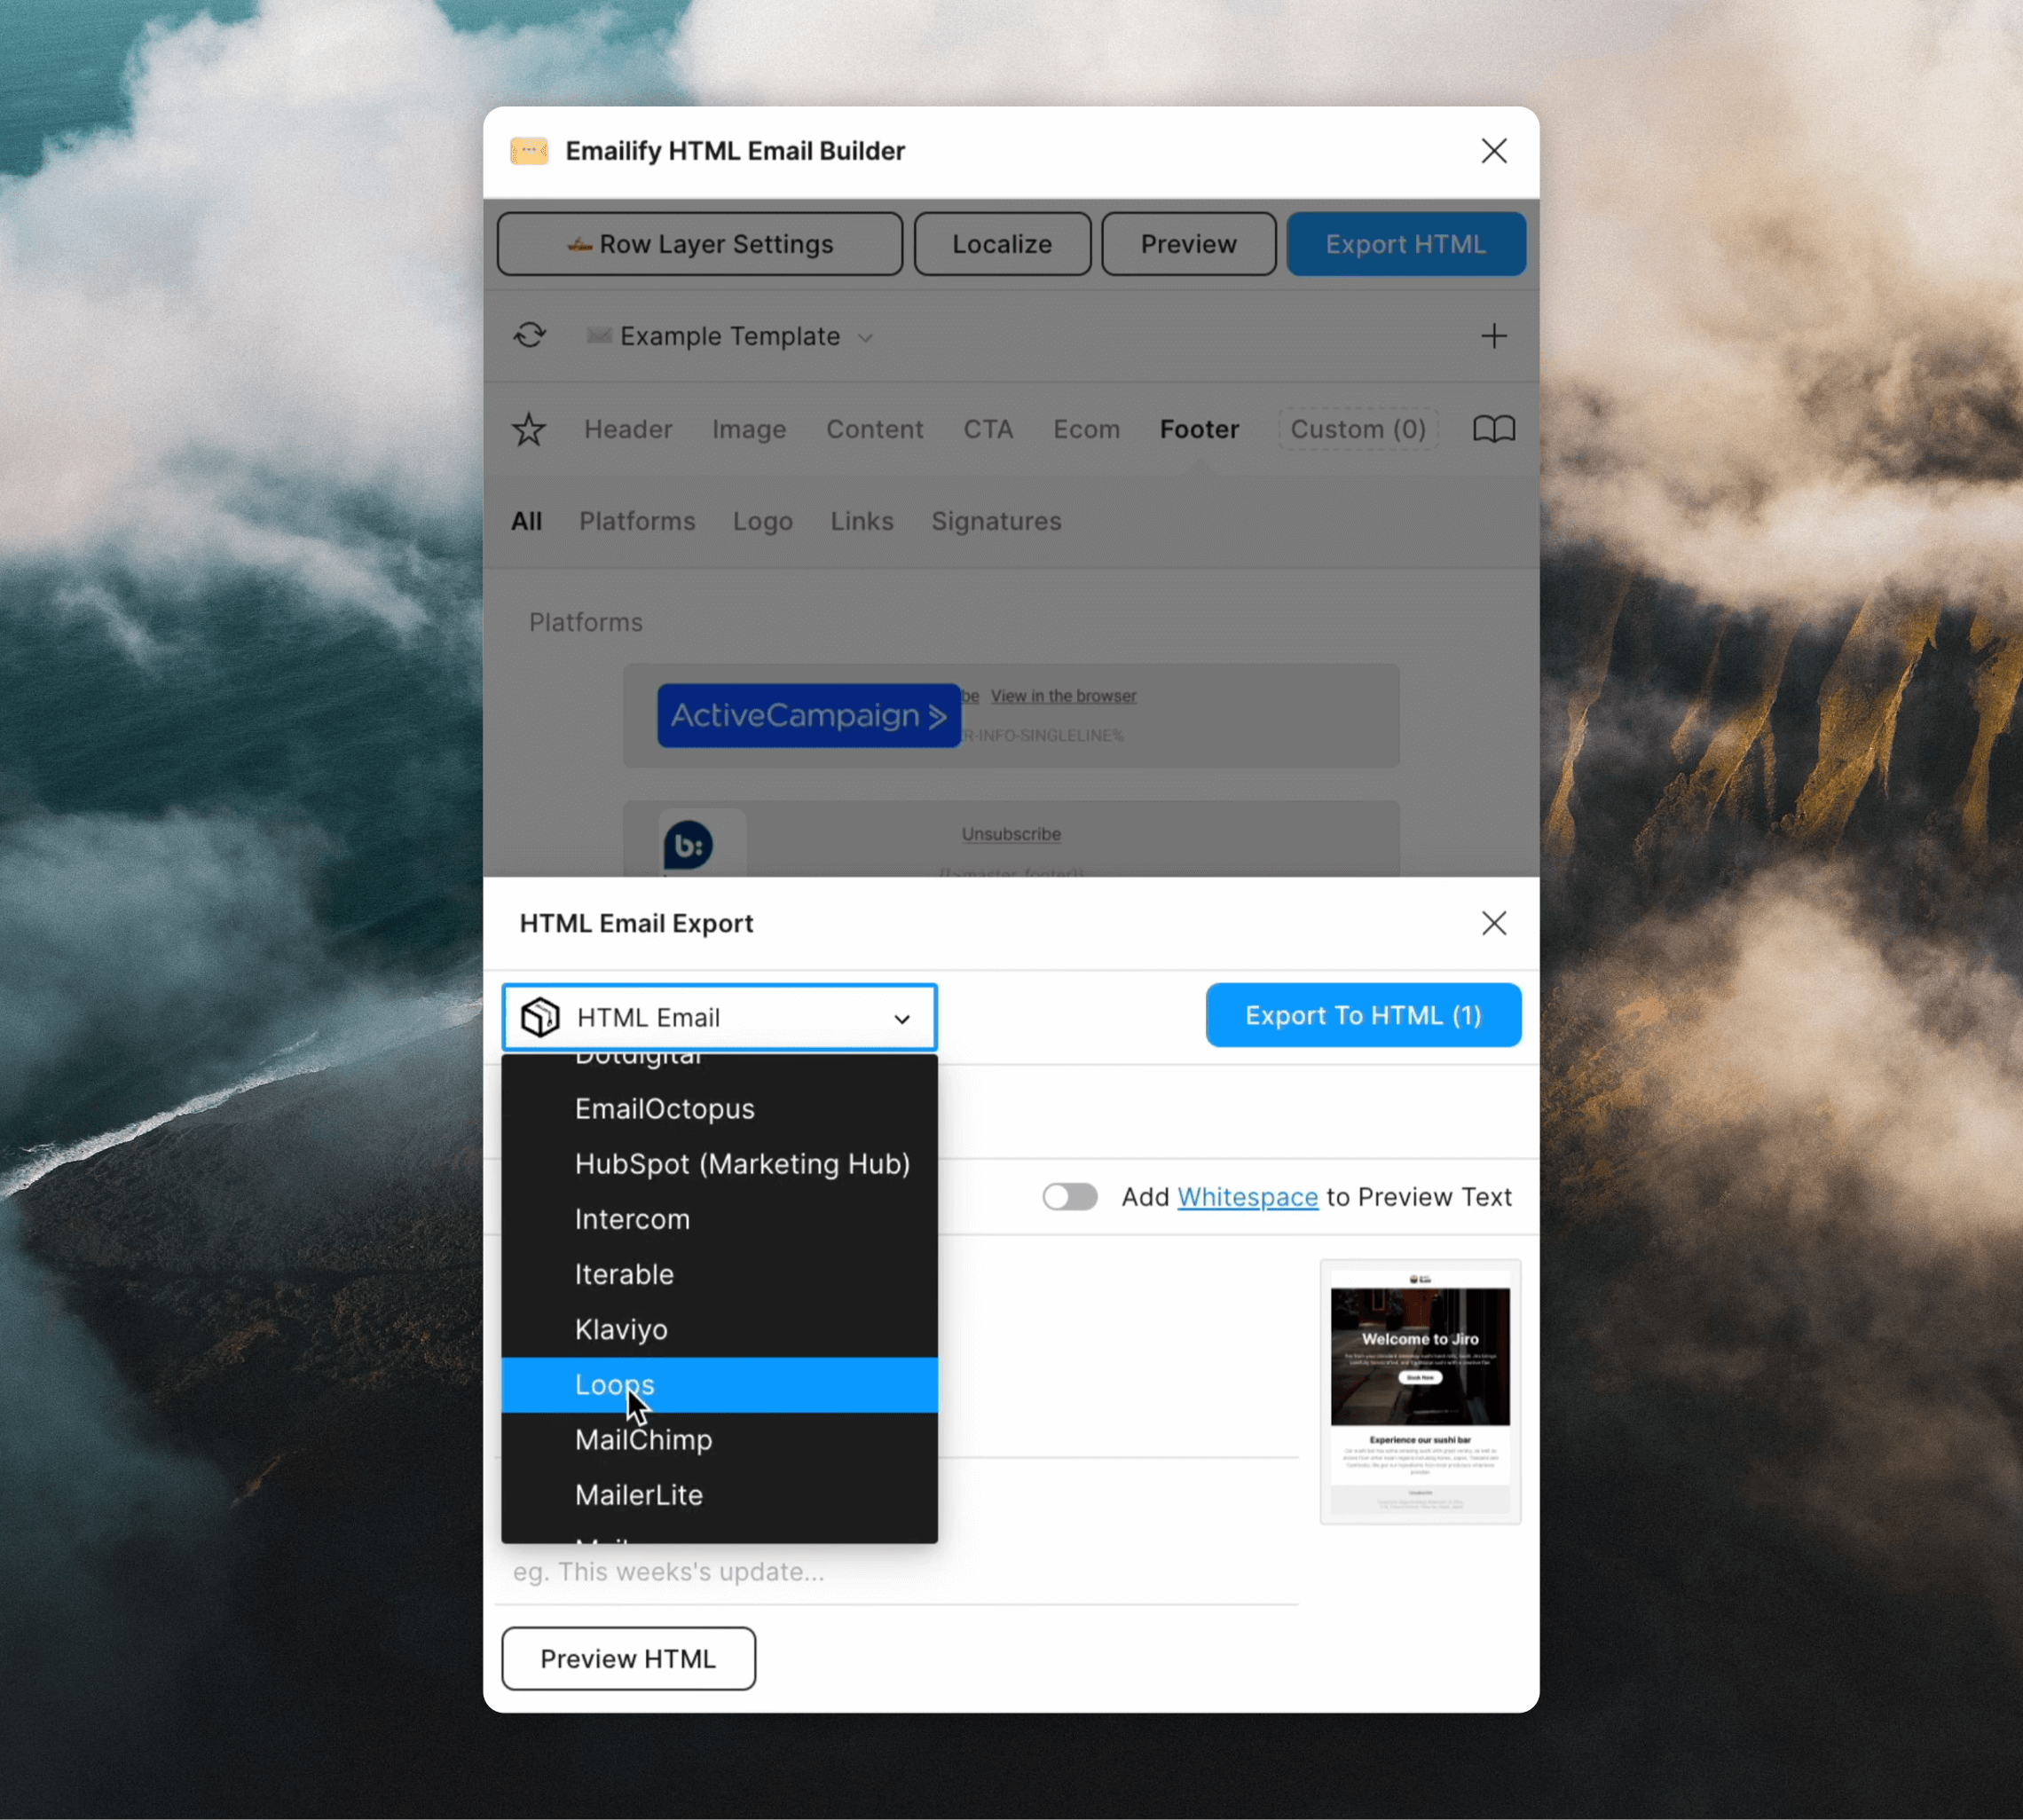
### Export your email
When you're ready to export, click on **Export HTML** in the top right.
Then in the dropdown select **Loops**, which will generate Loops-friendly MJML.
You can add a Subject and Preview text in this step, too.
You are then free to edit the text and design of the footer (just leave the link URL value as-is).
### Export your email
When you're ready to export, click on **Export HTML** in the top right.
Then in the dropdown select **Loops**, which will generate Loops-friendly MJML.
You can add a Subject and Preview text in this step, too.
 When you're ready, click the **Export for Loops** button and wait for the code to be generated.
To download your files click on the **Download your .zip file** button.
When you're ready, click the **Export for Loops** button and wait for the code to be generated.
To download your files click on the **Download your .zip file** button.
 ## Email Love
Email Love is a Figma Plugin that enables you to design and export responsive and accessible HTML emails directly from Figma. Email Love includes an “Export for Loops” option that downloads an MJML file that can easily be imported into Loops.
[Download the Email Love Figma Plugin](https://www.figma.com/community/plugin/1387891288648822744/email-love-html-email-builder)
## Email Love
Email Love is a Figma Plugin that enables you to design and export responsive and accessible HTML emails directly from Figma. Email Love includes an “Export for Loops” option that downloads an MJML file that can easily be imported into Loops.
[Download the Email Love Figma Plugin](https://www.figma.com/community/plugin/1387891288648822744/email-love-html-email-builder)
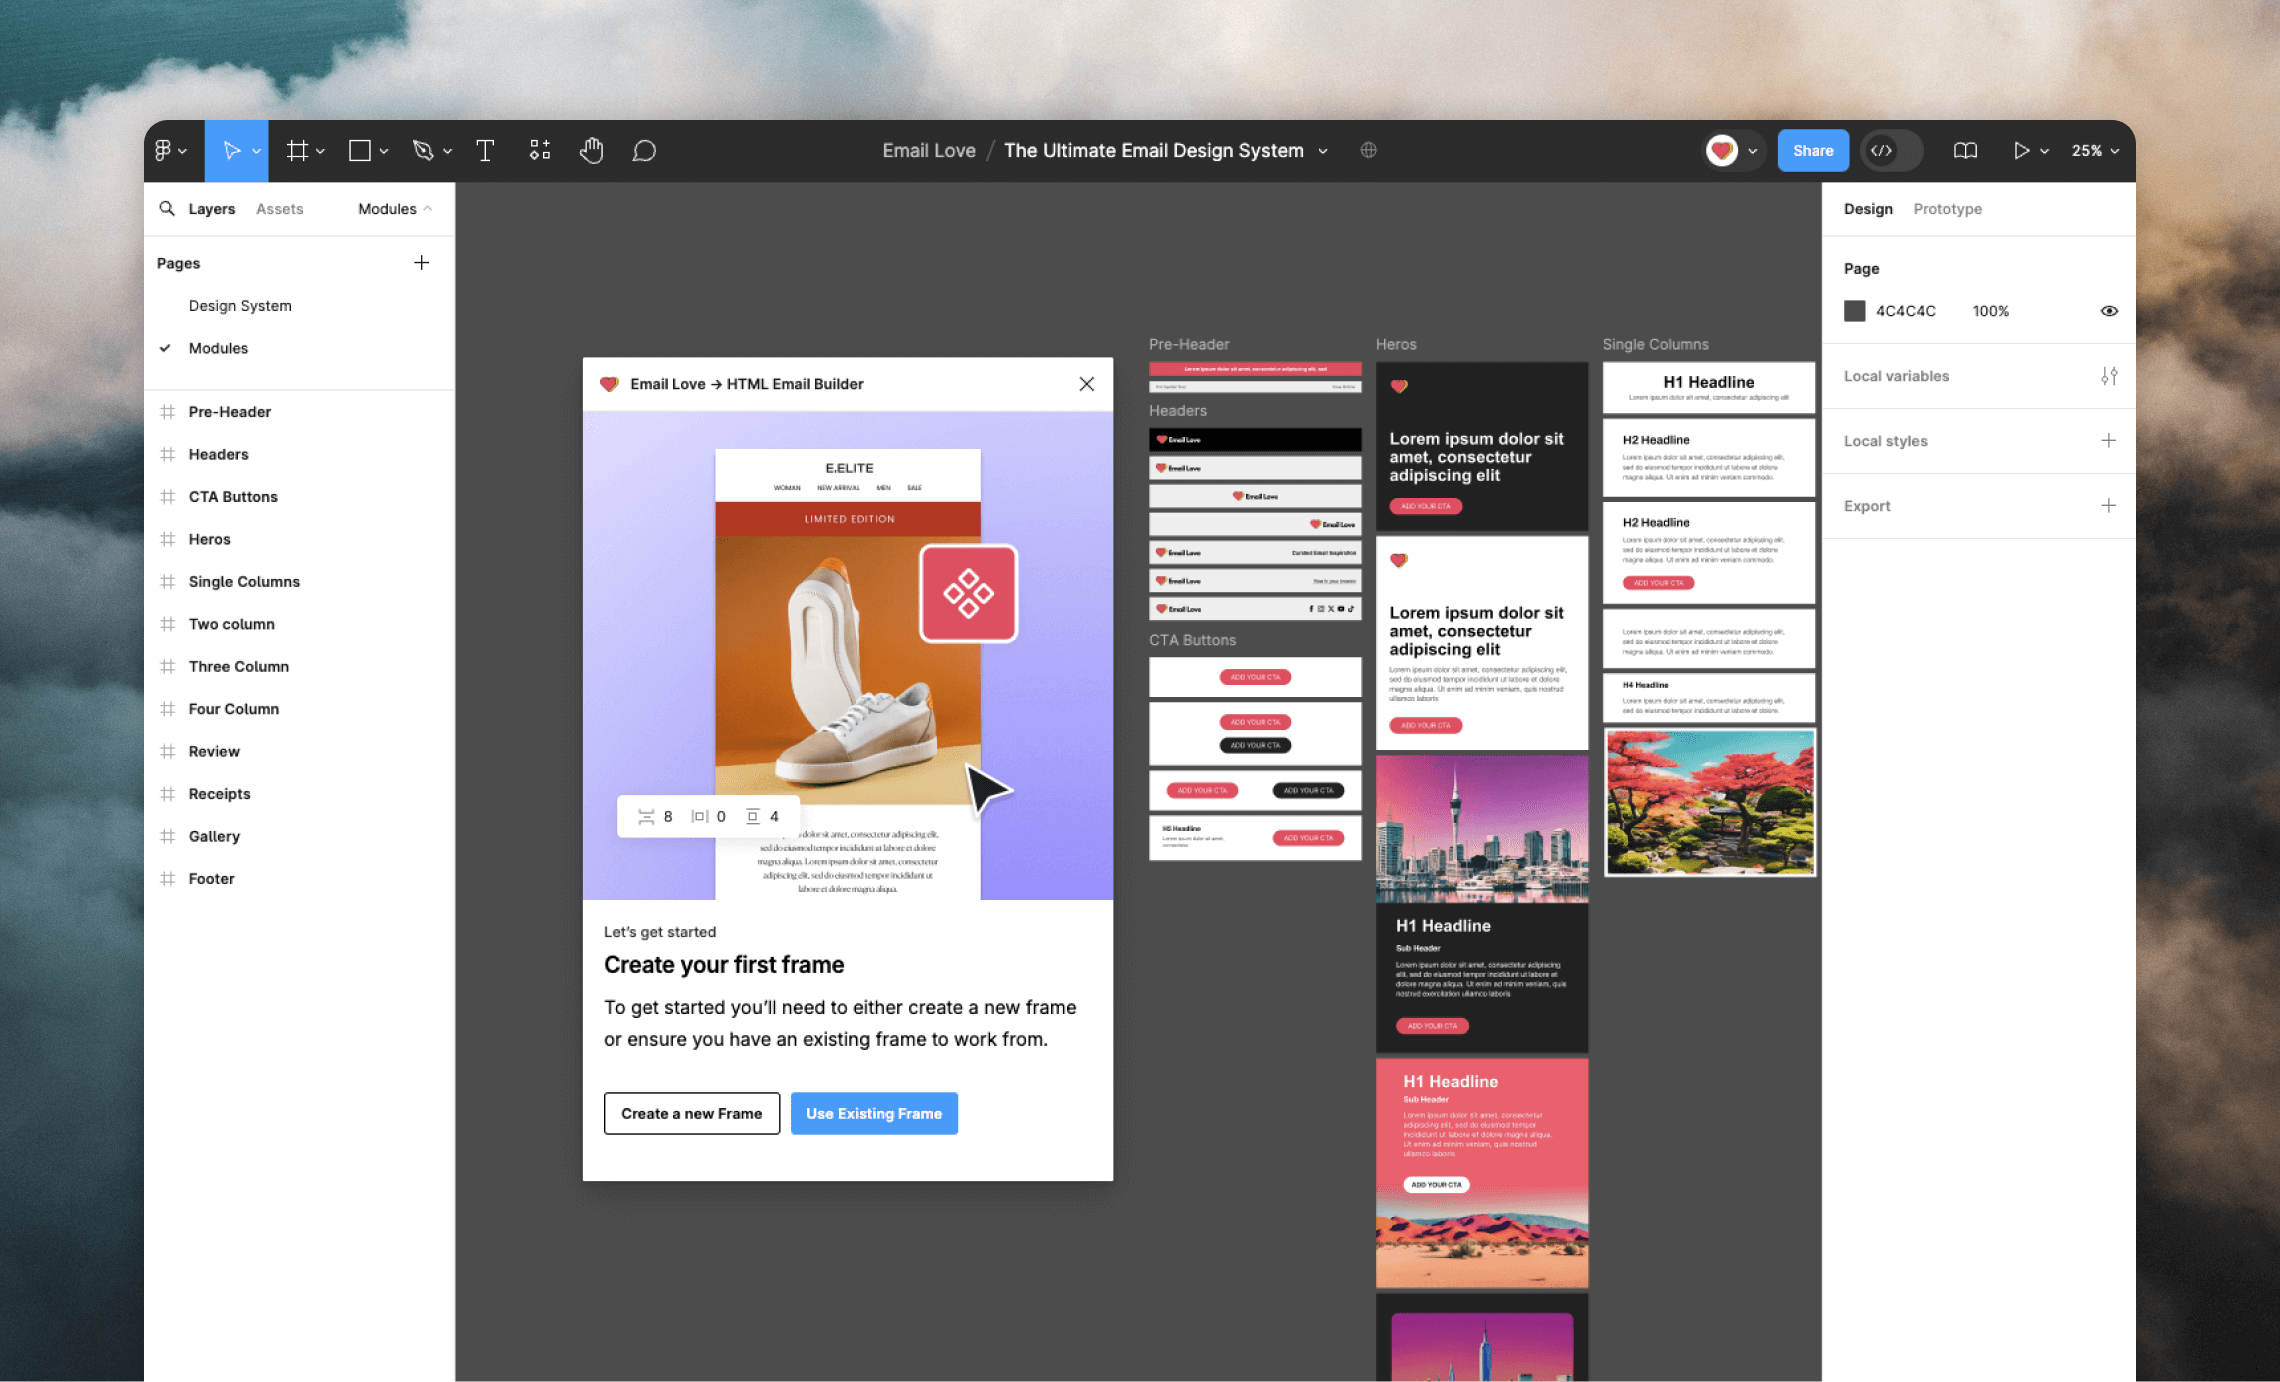 To run the plugin, click the **Actions** menu in the Figma toolbar, then under the **Plugins & Widgets** tab select **Email Love -> HTML Email Builder**.
### Add components to your email
You can now start designing your email template using Email Love’s pre-built components.
Select the frame you created in the previous section (where you want components to be added). From the plugin pane select one of the component types and then the component you want to add.
To run the plugin, click the **Actions** menu in the Figma toolbar, then under the **Plugins & Widgets** tab select **Email Love -> HTML Email Builder**.
### Add components to your email
You can now start designing your email template using Email Love’s pre-built components.
Select the frame you created in the previous section (where you want components to be added). From the plugin pane select one of the component types and then the component you want to add.
 ### Customize components
You can customize every component you add to your design. Each component features layers and frames that replicate the structure of MJML. For example, selecting **mj-section** in a header component enables you to update the background color and selecting **mj-image** in the header enables you to update the logo.
Go through each component and update the text, images, and styles as you wish.
### Add an unsubscribe link
For campaign and workflow emails you need to include an unsubscribe link in your email.
If you add a **Footer** component Email Love will automatically add a Loops unsubscribe link at the time of export.
Alternatively you can code an unsubscribe link manually by adding a link element with the URL `{unsubscribe_link}`.
```HTML theme={"dark"}
Unsubscribe
```
### Add dynamic content
You may want to add dynamic content (for example, a contact property) into your email. You can do this using dynamic content tags.
For example, adding a first name value can be added like this:
```
Hello {firstName},
```
In workflows you can also add event properties with an `EVENT_PROPERTY:` prefix:
```
Hello {EVENT_PROPERTY:firstName},
```
In transactional emails you can add data variables with a `DATA_VARIABLES:` prefix:
```
Hello {DATA_VARIABLE:firstName},
```
[Read more about dynamic content tags](/creating-emails/personalizing-emails#dynamic-tag-syntax)
### Export for Loops
When your email is finished, click on the frame you want to export. Click **Export** and select "Loops" from the **Export** dropdown. Then click **Export to Loops** to generate a ZIP containing MJML and any included images, which you can then upload into Loops.
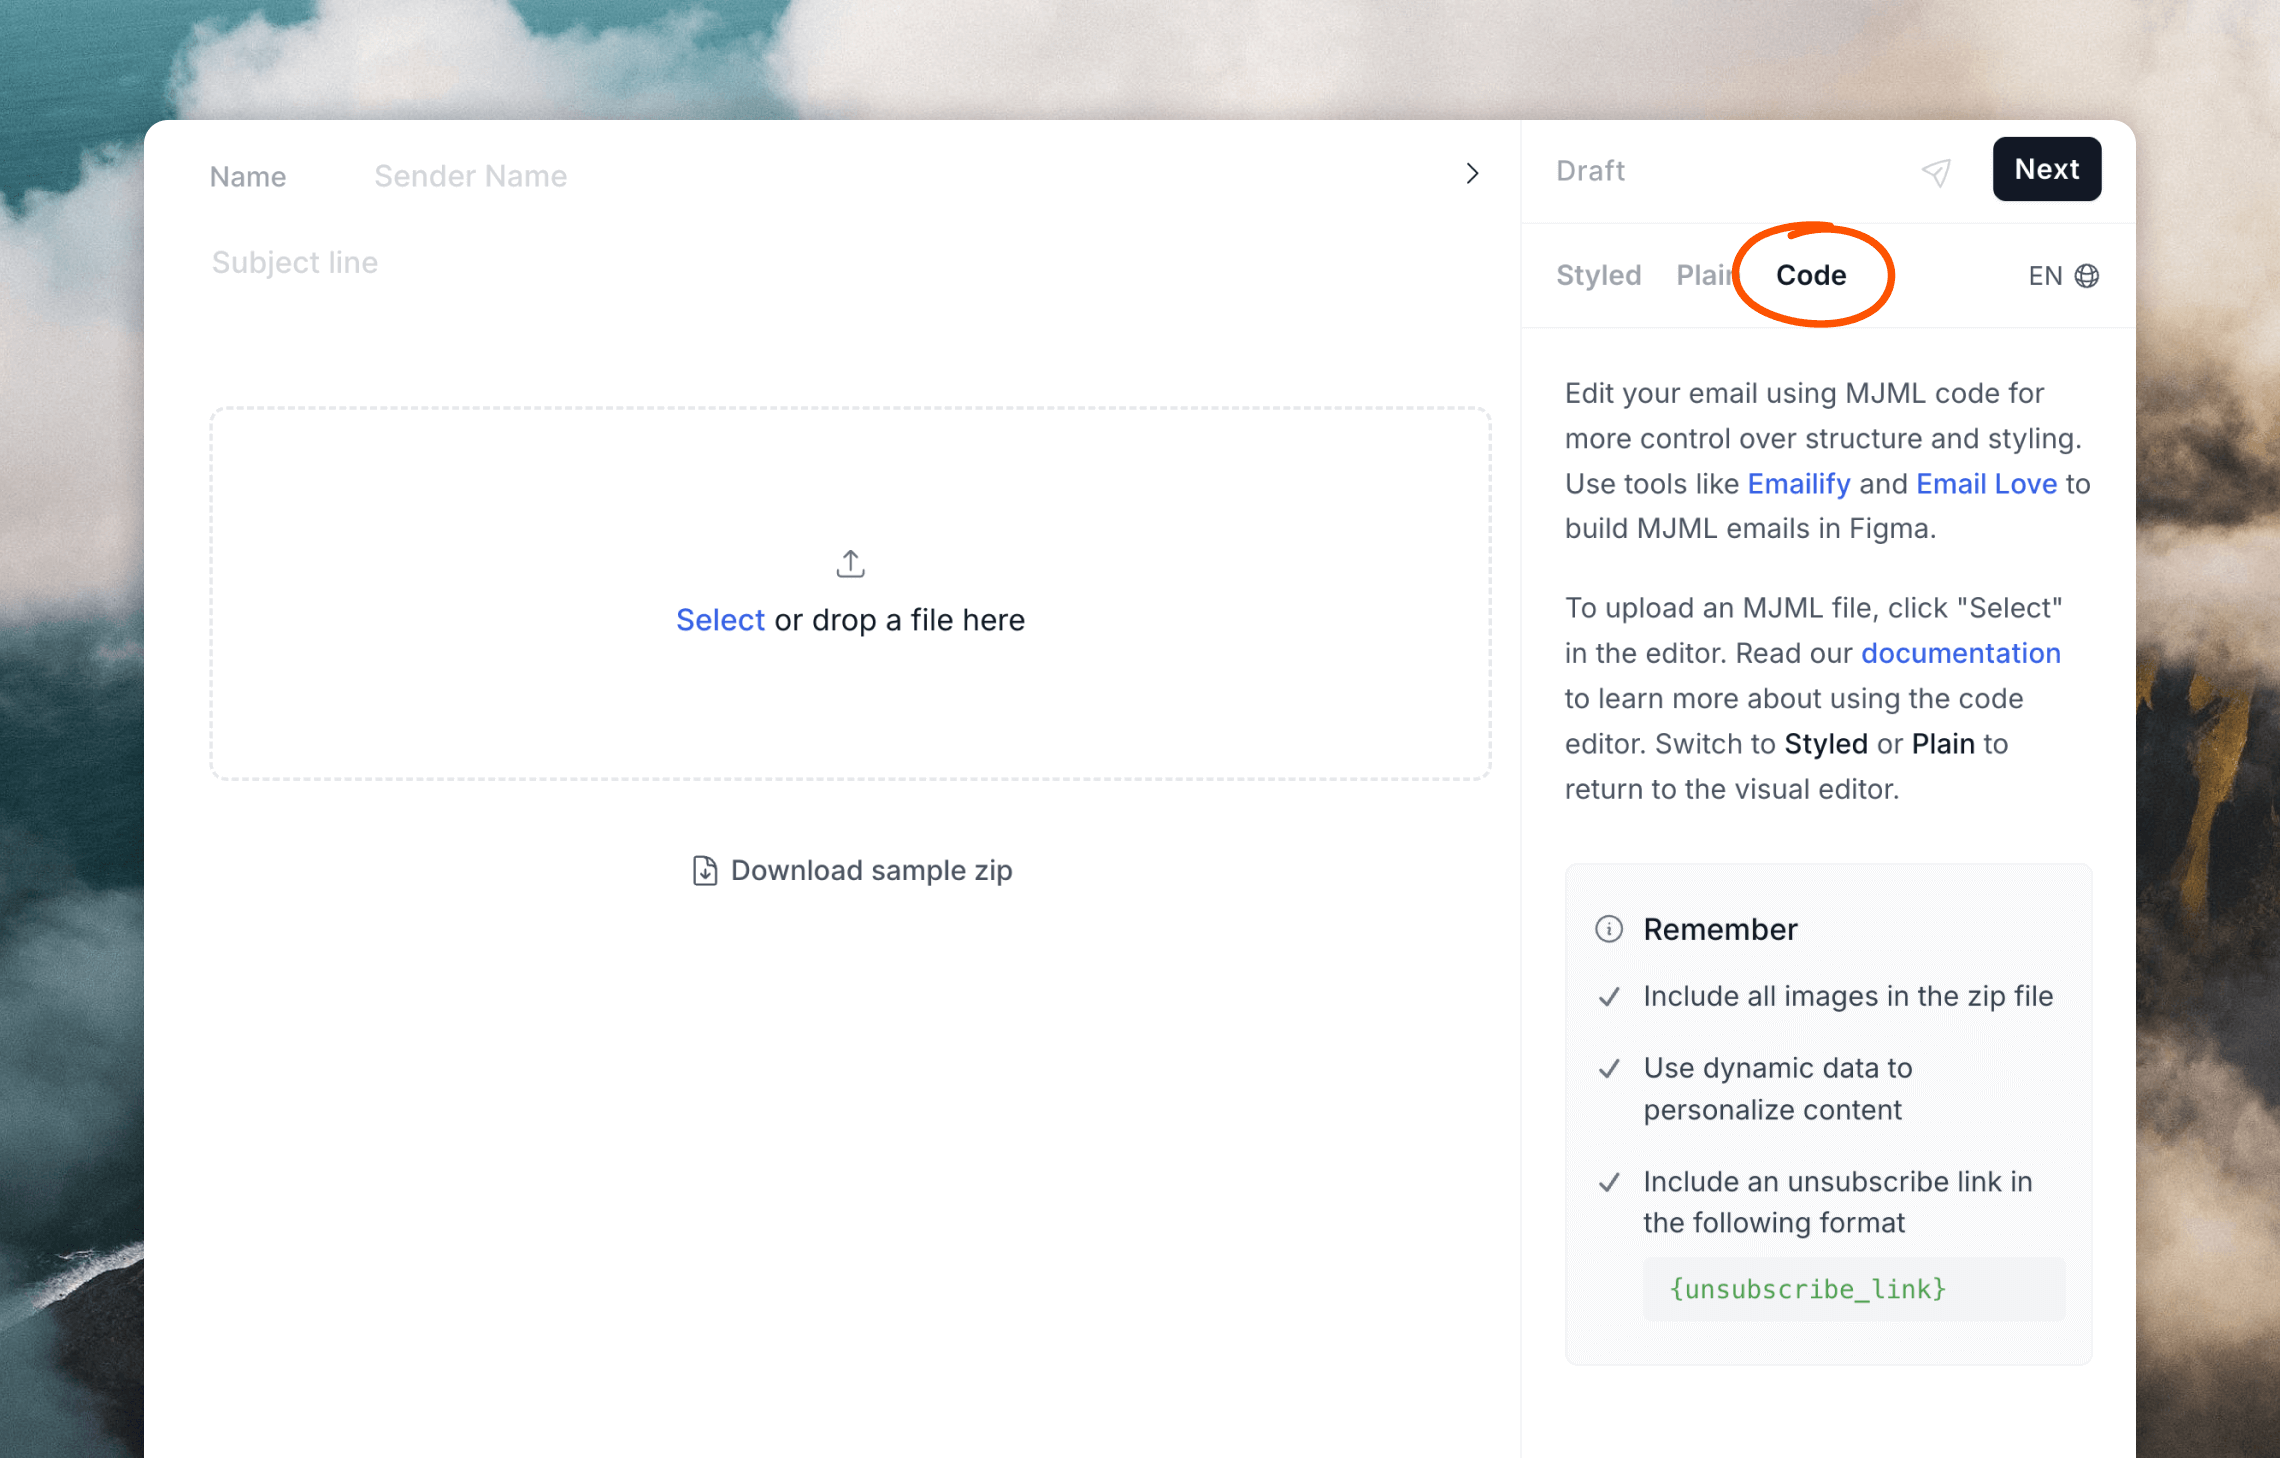
## Upload into Loops
Once you have MJML with an unsubscribe link included, you can upload it into Loops.
Click the **Code** styling option in the editor panel. This will reveal the file picker, where you can upload your ZIP file.
### Customize components
You can customize every component you add to your design. Each component features layers and frames that replicate the structure of MJML. For example, selecting **mj-section** in a header component enables you to update the background color and selecting **mj-image** in the header enables you to update the logo.
Go through each component and update the text, images, and styles as you wish.
### Add an unsubscribe link
For campaign and workflow emails you need to include an unsubscribe link in your email.
If you add a **Footer** component Email Love will automatically add a Loops unsubscribe link at the time of export.
Alternatively you can code an unsubscribe link manually by adding a link element with the URL `{unsubscribe_link}`.
```HTML theme={"dark"}
Unsubscribe
```
### Add dynamic content
You may want to add dynamic content (for example, a contact property) into your email. You can do this using dynamic content tags.
For example, adding a first name value can be added like this:
```
Hello {firstName},
```
In workflows you can also add event properties with an `EVENT_PROPERTY:` prefix:
```
Hello {EVENT_PROPERTY:firstName},
```
In transactional emails you can add data variables with a `DATA_VARIABLES:` prefix:
```
Hello {DATA_VARIABLE:firstName},
```
[Read more about dynamic content tags](/creating-emails/personalizing-emails#dynamic-tag-syntax)
### Export for Loops
When your email is finished, click on the frame you want to export. Click **Export** and select "Loops" from the **Export** dropdown. Then click **Export to Loops** to generate a ZIP containing MJML and any included images, which you can then upload into Loops.
## Upload into Loops
Once you have MJML with an unsubscribe link included, you can upload it into Loops.
Click the **Code** styling option in the editor panel. This will reveal the file picker, where you can upload your ZIP file.
 If you exported from Emailify, open the ZIP you downloaded. Drag and drop the `.zip` file found inside the **\_zips (For upload to Loops.so)** folder. Then click **Upload**.
If you exported from Email Love, upload the generated `.zip` file then click **Upload**.
Your email is now uploaded into Loops and can be sent out!
If you exported from Emailify, open the ZIP you downloaded. Drag and drop the `.zip` file found inside the **\_zips (For upload to Loops.so)** folder. Then click **Upload**.
If you exported from Email Love, upload the generated `.zip` file then click **Upload**.
Your email is now uploaded into Loops and can be sent out!