> ## Documentation Index
> Fetch the complete documentation index at: https://loops.so/docs/llms.txt
> Use this file to discover all available pages before exploring further.
# List management
> Organize contacts and offer a subscriber preference center with mailing lists.
Mailing lists are useful when you want to organize contacts in more public groups and when you want contacts to be able to opt in and out of specific lists.
Using Lists will automatically generate a branded Preference Center for contacts in your audience, allowing them to easily manage their subscription preferences.
Lists can be public or private and contacts can belong to many, one, or no lists.
For organizing contacts for your own use, we suggest using [filters and segments](/contacts/filters-segments) instead.
Lists are an optional feature. You can use Loops without lists but if you'd
like finer-grained control over your contacts and the types of communication
they receive, lists are available on any plan tier.
## List types
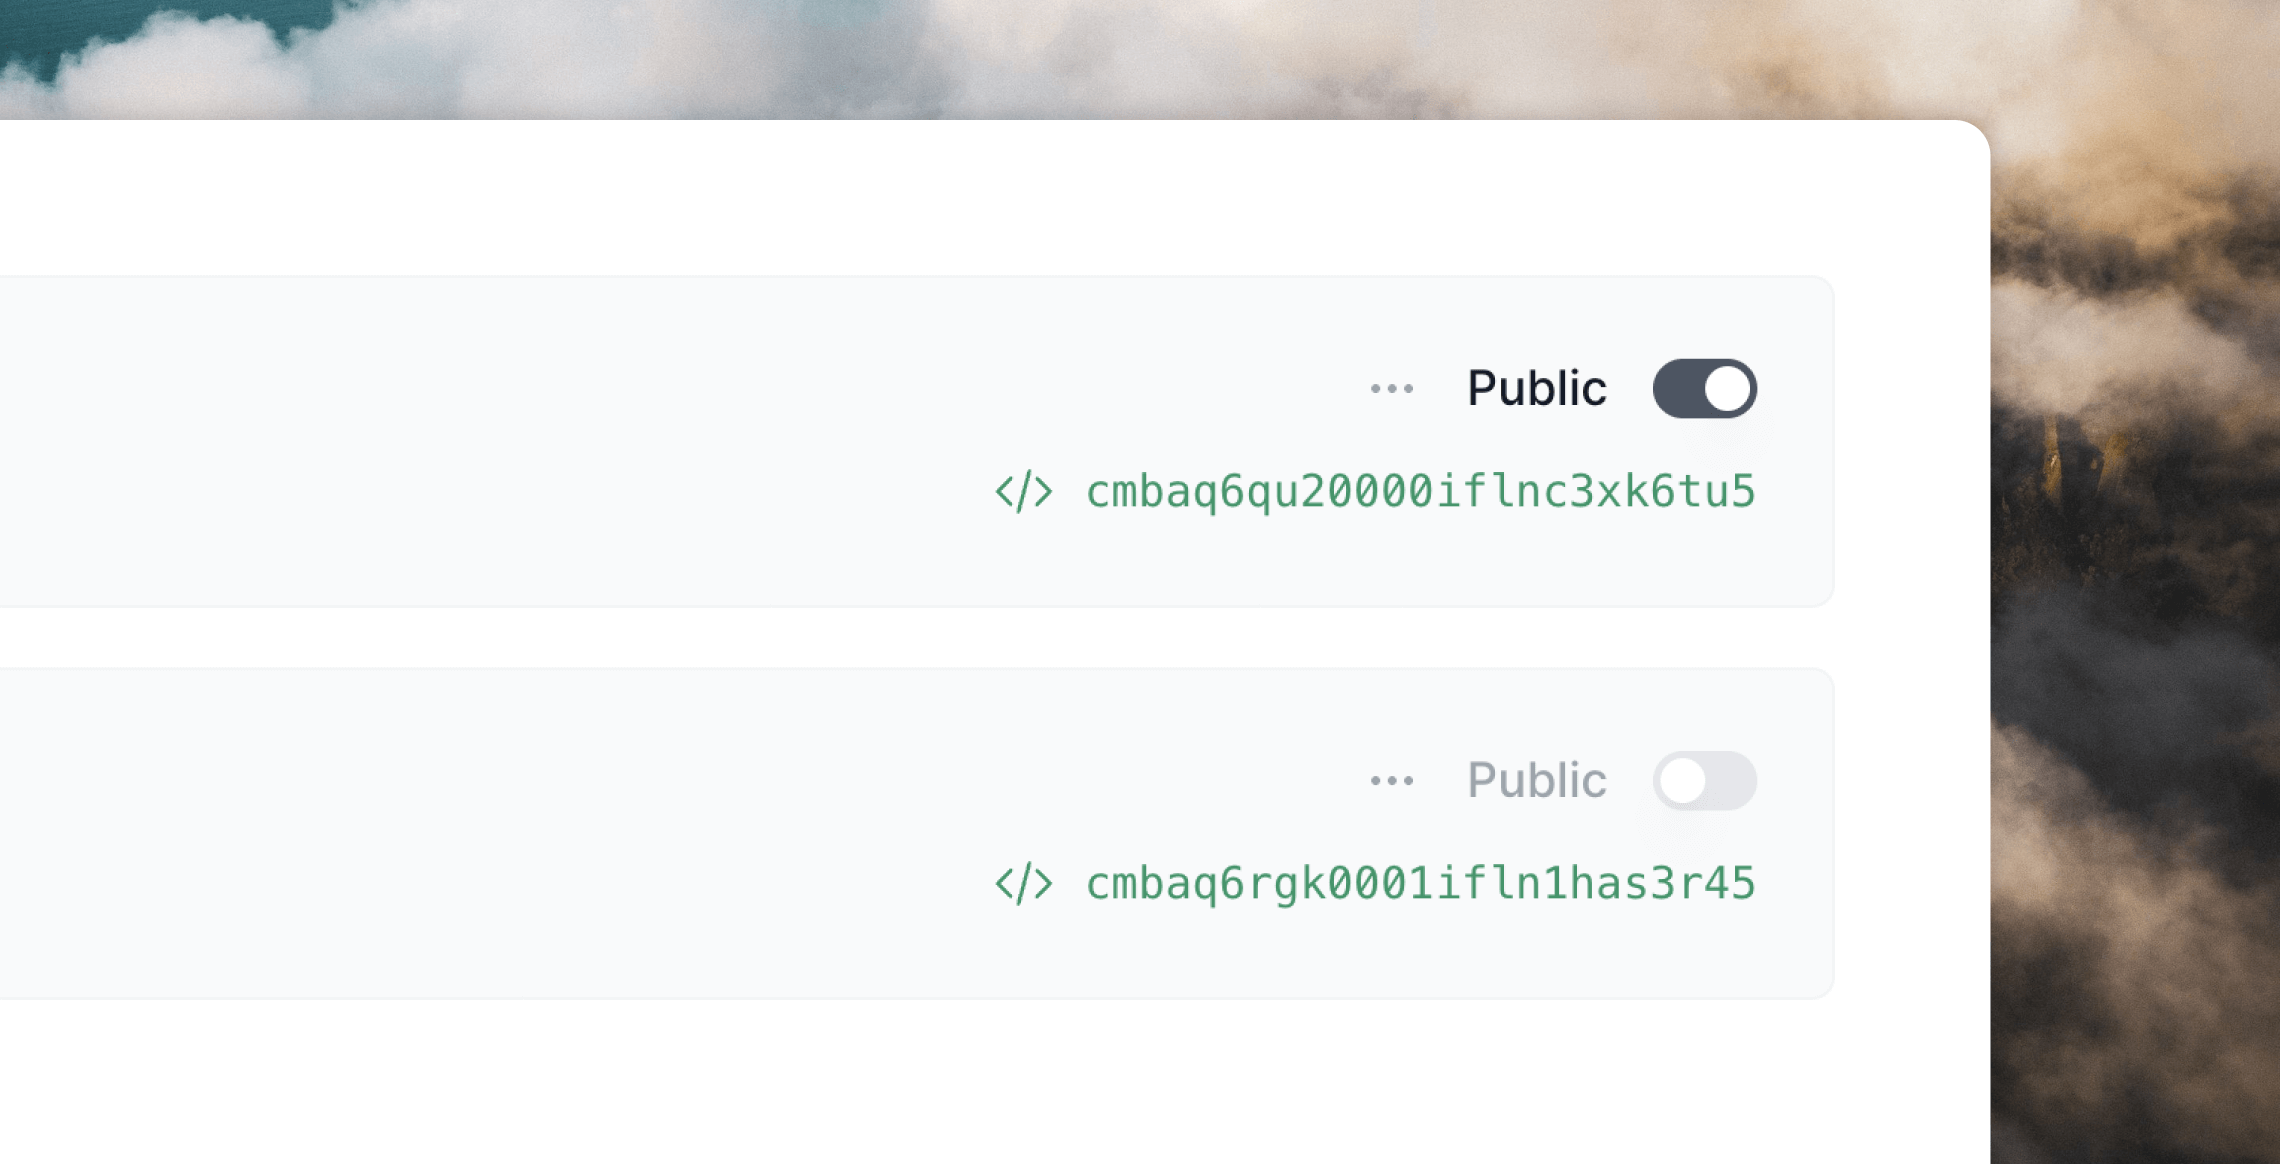
Each list you create can be **Public** or **Private**.
By default lists are private, meaning they are only shown to their subscribed contacts (non-subscribers won't be able to see or subscribe to private lists in the Preference Center).
If you want to allow general opt-in to a list, you can set the list visibility to `Public`. Public lists will be shown to all contacts in the Preference Center.
You can also sign up new subscribers to public lists with [Forms](/forms/simple-form).
Both private and public lists are visible within your Loops admin and can be
used for filtering contacts when sending campaigns and workflows.
## Preference Center
The Preference Center allows your contacts to manage their own subscription preferences.
 A link to the contact-specific Preference Center is automatically added to each marketing email sent from Loops. You can link to the Preference Center in MJML emails by using the `{unsubscribe_link}` [dynamic tag](/creating-emails/personalizing-emails#dynamic-tag-syntax).
You can upload a company icon to brand your Preference Center. This option is shown just below your mailing lists in the [Lists settings page](https://app.loops.so/settings?page=lists).
You can brand your unsubscribe page with a company icon even if you do not use
the lists features.
Within the Preference Center, contacts will see:
* your company icon (if uploaded)
* the names and descriptions of all public lists
* the names and descriptions of all private lists they are subscribed to
* the option to unsubscribe from each list they are subscribed to
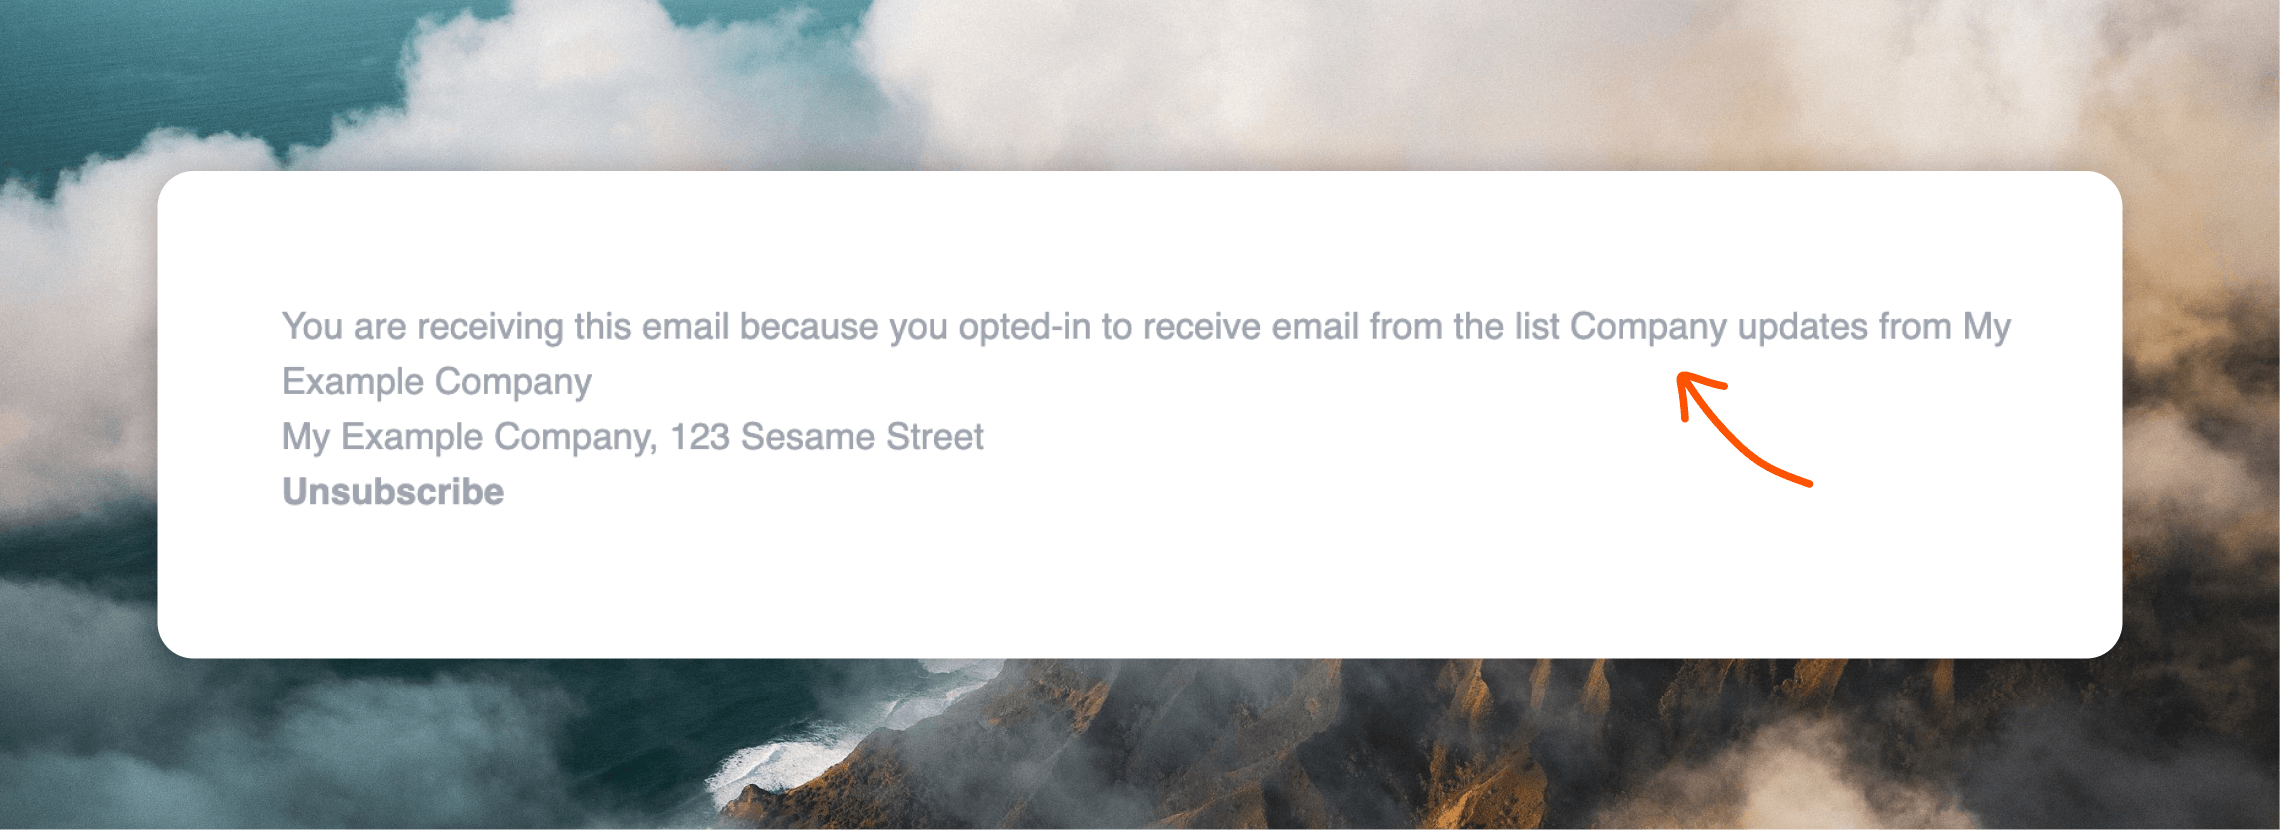
## Email footers
When sending campaigns and workflows to specific lists, the [email footer](/creating-emails/editor#footer-content) will include the name of the list the email was sent to. This is useful for contacts to see which list the email was sent to, as well as unsubscribe from a certain list.
A link to the contact-specific Preference Center is automatically added to each marketing email sent from Loops. You can link to the Preference Center in MJML emails by using the `{unsubscribe_link}` [dynamic tag](/creating-emails/personalizing-emails#dynamic-tag-syntax).
You can upload a company icon to brand your Preference Center. This option is shown just below your mailing lists in the [Lists settings page](https://app.loops.so/settings?page=lists).
You can brand your unsubscribe page with a company icon even if you do not use
the lists features.
Within the Preference Center, contacts will see:
* your company icon (if uploaded)
* the names and descriptions of all public lists
* the names and descriptions of all private lists they are subscribed to
* the option to unsubscribe from each list they are subscribed to
## Email footers
When sending campaigns and workflows to specific lists, the [email footer](/creating-emails/editor#footer-content) will include the name of the list the email was sent to. This is useful for contacts to see which list the email was sent to, as well as unsubscribe from a certain list.
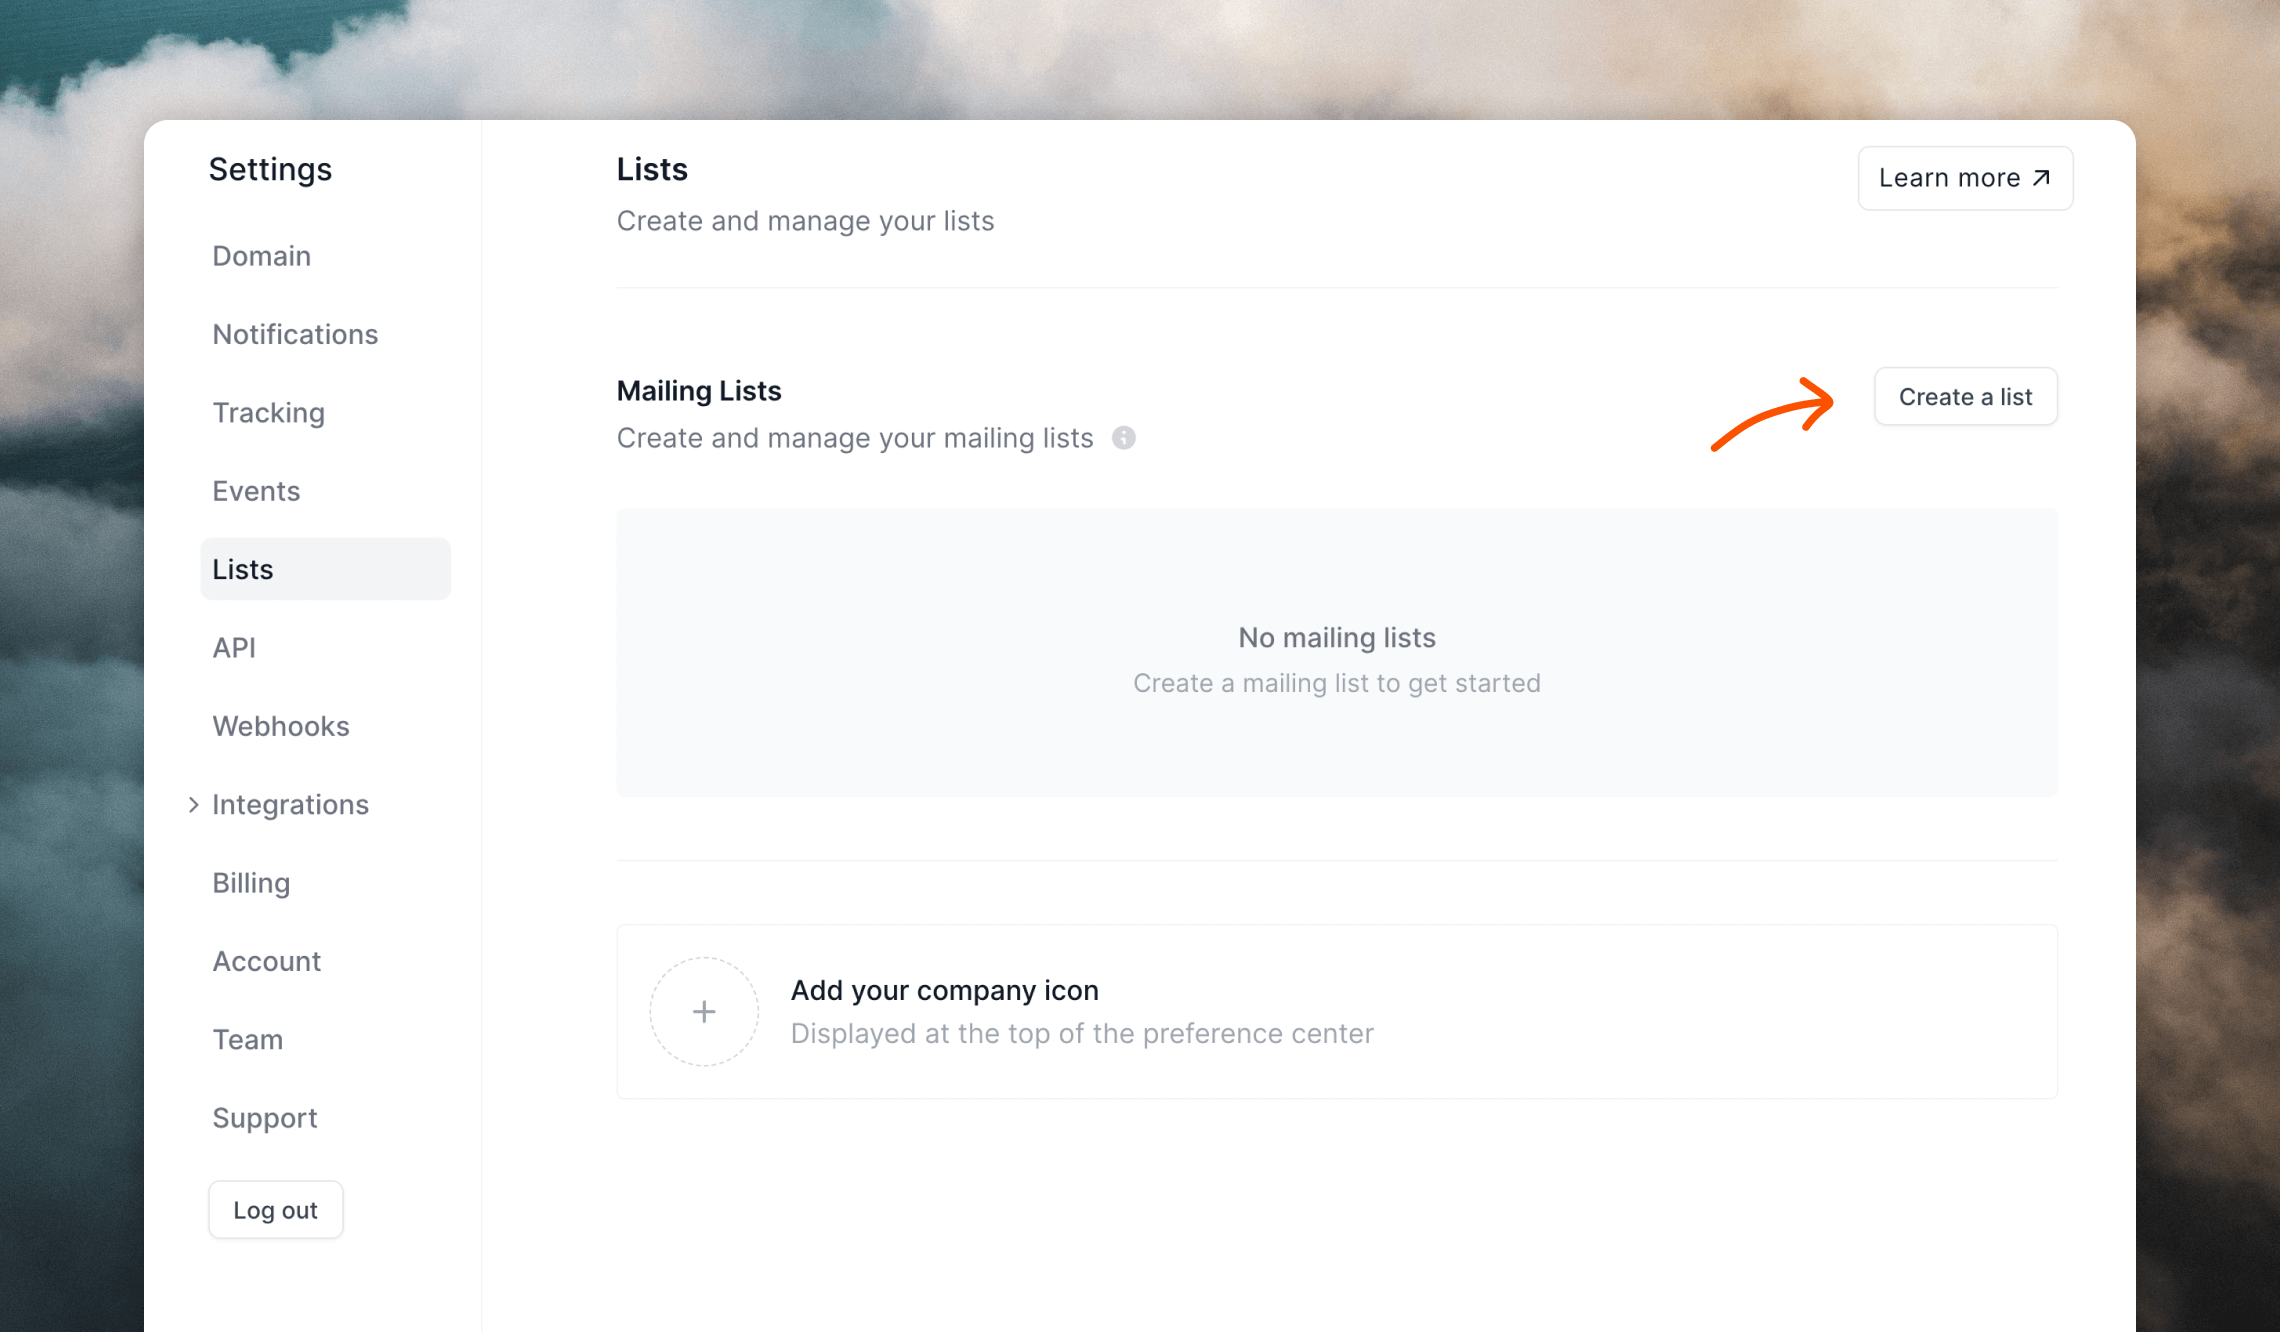
 ## Create a list
Go to [Settings -> Lists](https://app.loops.so/settings?page=lists).
Click on the **Create a list** button.
## Create a list
Go to [Settings -> Lists](https://app.loops.so/settings?page=lists).
Click on the **Create a list** button.
 A new mailing list will appear. Enter a name for your list and optionally, a description.
You can also choose a color to easily identify the list inside your Loops account.
A new mailing list will appear. Enter a name for your list and optionally, a description.
You can also choose a color to easily identify the list inside your Loops account.
 Choose between `Private` or `Public` ([see above](#list-types)).
Click **Save changes** to finalize the creation of the list.
## Edit a list
To edit an existing list, go to [Settings -> Lists](https://app.loops.so/settings?page=lists).
Edit the name, description, visibility and color.
Click **Save changes** to apply the changes.
After saving your changes, the updated list data will be instantly available
to your contacts in their Preference Centers.
## Delete a list
You can delete lists by clicking on a list's `•••` menu icon and selecting **Delete**.
Choose between `Private` or `Public` ([see above](#list-types)).
Click **Save changes** to finalize the creation of the list.
## Edit a list
To edit an existing list, go to [Settings -> Lists](https://app.loops.so/settings?page=lists).
Edit the name, description, visibility and color.
Click **Save changes** to apply the changes.
After saving your changes, the updated list data will be instantly available
to your contacts in their Preference Centers.
## Delete a list
You can delete lists by clicking on a list's `•••` menu icon and selecting **Delete**.
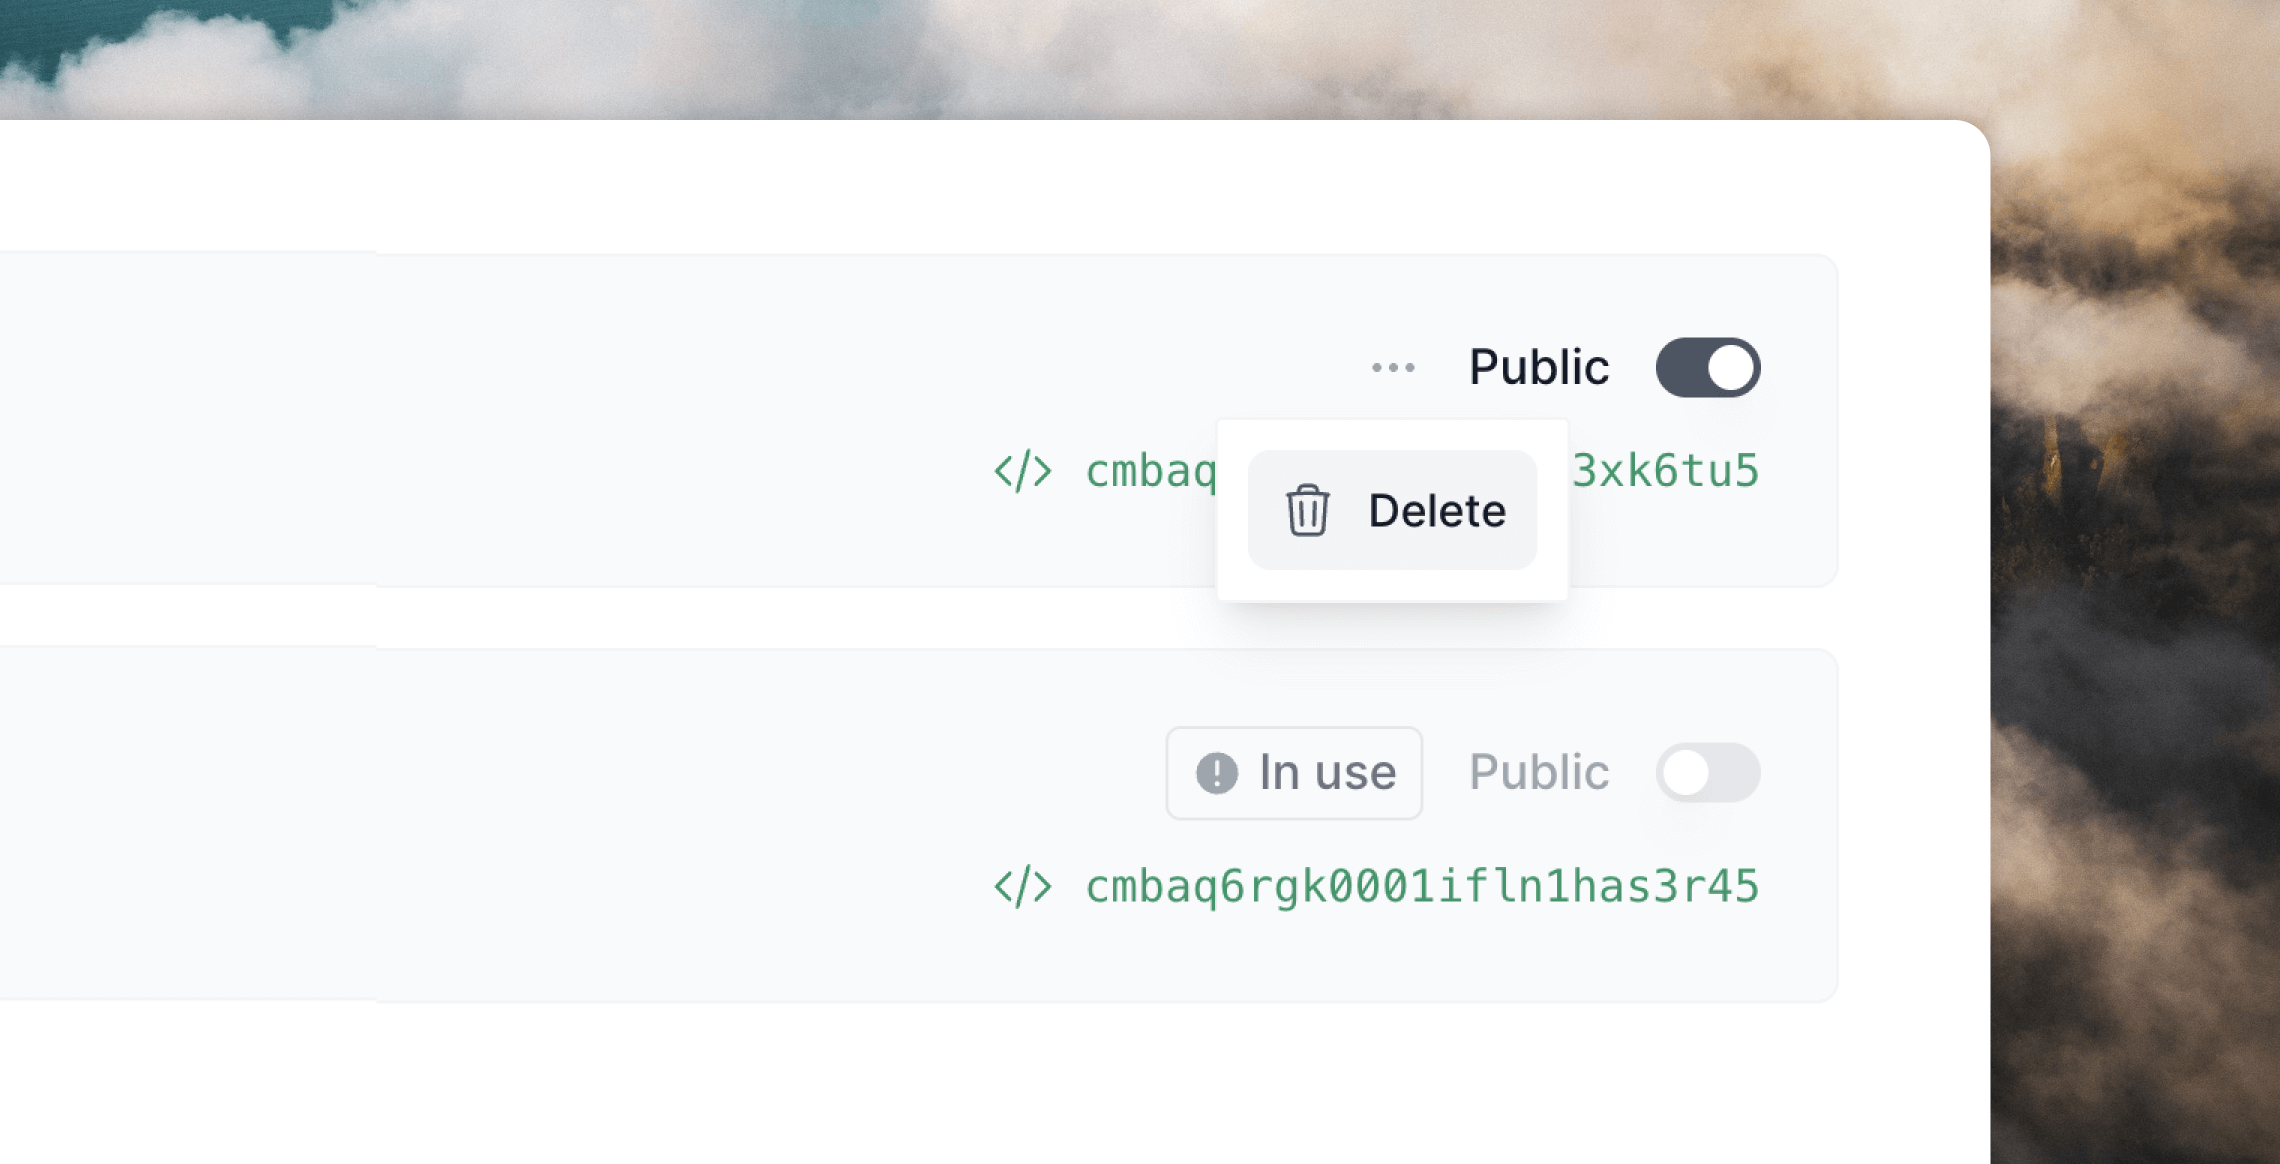 You cannot delete a list that:
* has been [sent a campaign](#send-campaigns-to-a-list), or has a sending or draft campaign
* is selected in the "Contact added to list" trigger [in a workflow](#trigger-a-workflow-when-a-contact-is-added-to-a-list)
* has been [applied to a workflow](#send-workflows-to-a-list)
* is being used in a [form](/forms)
Lists that cannot be deleted will show an "In use" badge. Hover over the badge to see a list of the campaigns, workflows and forms that are stopping the list from being deleted.
## Utilizing lists
Here are a few ways you can use lists to send emails and organize contacts.
### Send campaigns to a list
Instead of sending campaigns to your whole audience, you can send emails to a specific list.
[Create a campaign](https://app.loops.so/campaigns) or edit an existing one.
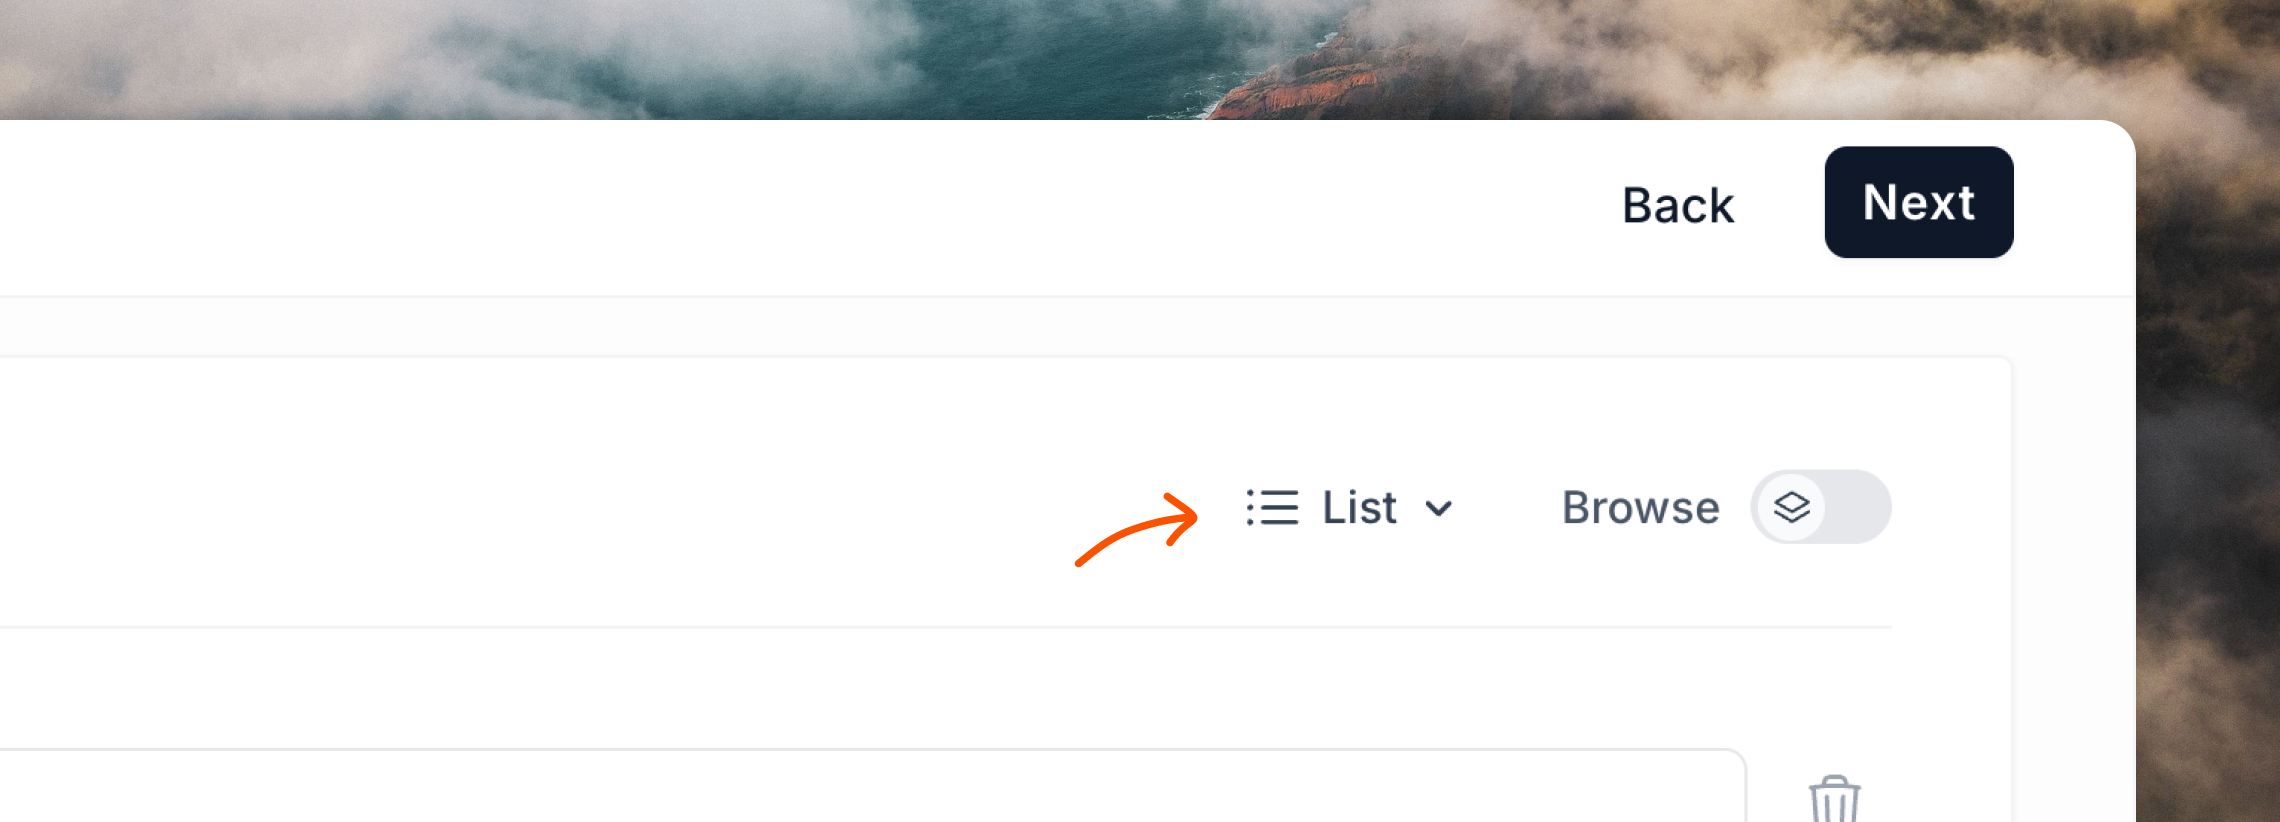
On the [Audience page](https://app.loops.so/audience), select the list you want to send to.
You cannot delete a list that:
* has been [sent a campaign](#send-campaigns-to-a-list), or has a sending or draft campaign
* is selected in the "Contact added to list" trigger [in a workflow](#trigger-a-workflow-when-a-contact-is-added-to-a-list)
* has been [applied to a workflow](#send-workflows-to-a-list)
* is being used in a [form](/forms)
Lists that cannot be deleted will show an "In use" badge. Hover over the badge to see a list of the campaigns, workflows and forms that are stopping the list from being deleted.
## Utilizing lists
Here are a few ways you can use lists to send emails and organize contacts.
### Send campaigns to a list
Instead of sending campaigns to your whole audience, you can send emails to a specific list.
[Create a campaign](https://app.loops.so/campaigns) or edit an existing one.
On the [Audience page](https://app.loops.so/audience), select the list you want to send to.
 Users not subscribed to the selected list will not receive the campaign.
Optionally, you can apply additional [filters or segments](/contacts/filters-segments) to further refine your audience.
### Send workflows to a list
You can configure workflows to only send to contacts in a specific list (this applies to all triggers).
[Create a workflow](/workflows) or edit an existing one.
Select the list you want to trigger the workflow.
Users not subscribed to the selected list will not receive the campaign.
Optionally, you can apply additional [filters or segments](/contacts/filters-segments) to further refine your audience.
### Send workflows to a list
You can configure workflows to only send to contacts in a specific list (this applies to all triggers).
[Create a workflow](/workflows) or edit an existing one.
Select the list you want to trigger the workflow. 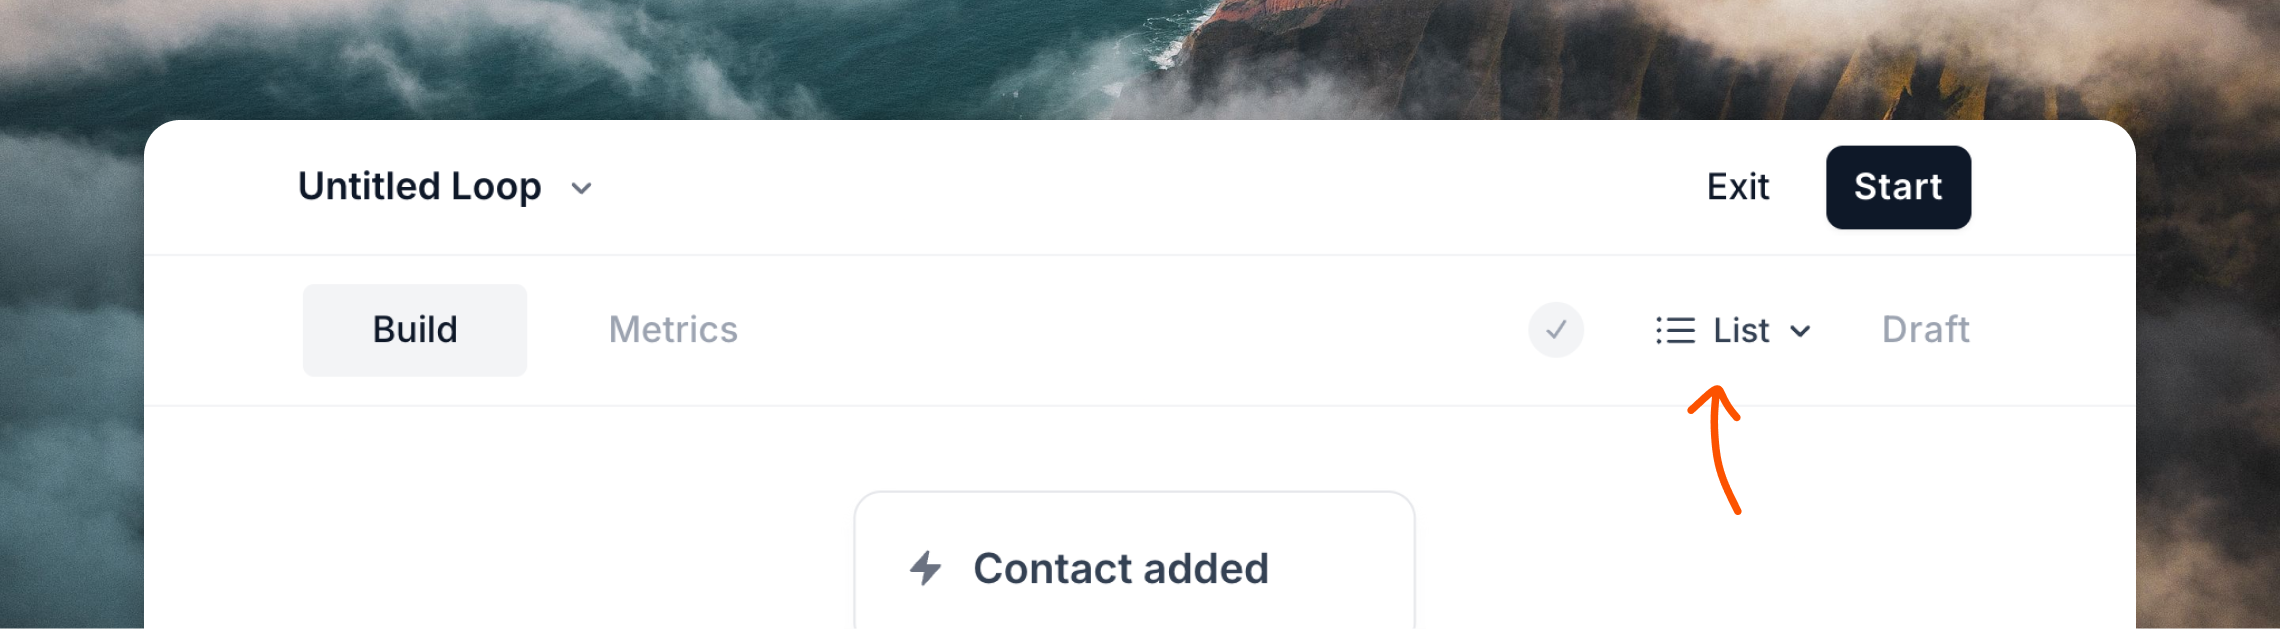 Start the workflow. Only contacts from the selected list will be entered into the workflow.
### Trigger a workflow when a contact is added to a list
This example is a typical use case of sending an email sequence to new contacts when they are added to a specific list.
[Create a workflow](/workflows) or edit an existing one.
Set the workflow trigger to "Contact added to list".
Select the list you want to trigger the workflow.
Start the workflow. Only contacts from the selected list will be entered into the workflow.
### Trigger a workflow when a contact is added to a list
This example is a typical use case of sending an email sequence to new contacts when they are added to a specific list.
[Create a workflow](/workflows) or edit an existing one.
Set the workflow trigger to "Contact added to list".
Select the list you want to trigger the workflow.  Start the workflow. When a contact is added to the selected list, the workflow will be triggered.
### Manually add contacts to lists
How to add existing contacts to your different mailing lists within Loops.
You cannot add contacts to mailing lists if they are unsubscribed from your audience.\
Likewise, if a contact unsubscribes from a list via the
Preference Center, they cannot be resubscribed by your team.
#### Individual contacts
Go to your [Audience page](https://app.loops.so/audience).
Click on the contact you want to manage.
In the contact details page, click on **Subscribed** to reveal the mailing
list dropdown.
Start the workflow. When a contact is added to the selected list, the workflow will be triggered.
### Manually add contacts to lists
How to add existing contacts to your different mailing lists within Loops.
You cannot add contacts to mailing lists if they are unsubscribed from your audience.\
Likewise, if a contact unsubscribes from a list via the
Preference Center, they cannot be resubscribed by your team.
#### Individual contacts
Go to your [Audience page](https://app.loops.so/audience).
Click on the contact you want to manage.
In the contact details page, click on **Subscribed** to reveal the mailing
list dropdown.  Toggle each list on or off as needed. Click **Save changes** in the top
right to apply the changes.
#### Bulk contacts
You can easily add any filtered group of contacts to a specific list on the Audience page.
Go to your [Audience page](https://app.loops.so/audience).
Add filters to segment your audience into the group of contacts you'd like
to add to a list.
Click the `•••` menu icon on the far right-hand side of the audience
filters, select **Add to mailing list** and then select the list(s) you want
to add the contacts to.
Toggle each list on or off as needed. Click **Save changes** in the top
right to apply the changes.
#### Bulk contacts
You can easily add any filtered group of contacts to a specific list on the Audience page.
Go to your [Audience page](https://app.loops.so/audience).
Add filters to segment your audience into the group of contacts you'd like
to add to a list.
Click the `•••` menu icon on the far right-hand side of the audience
filters, select **Add to mailing list** and then select the list(s) you want
to add the contacts to. 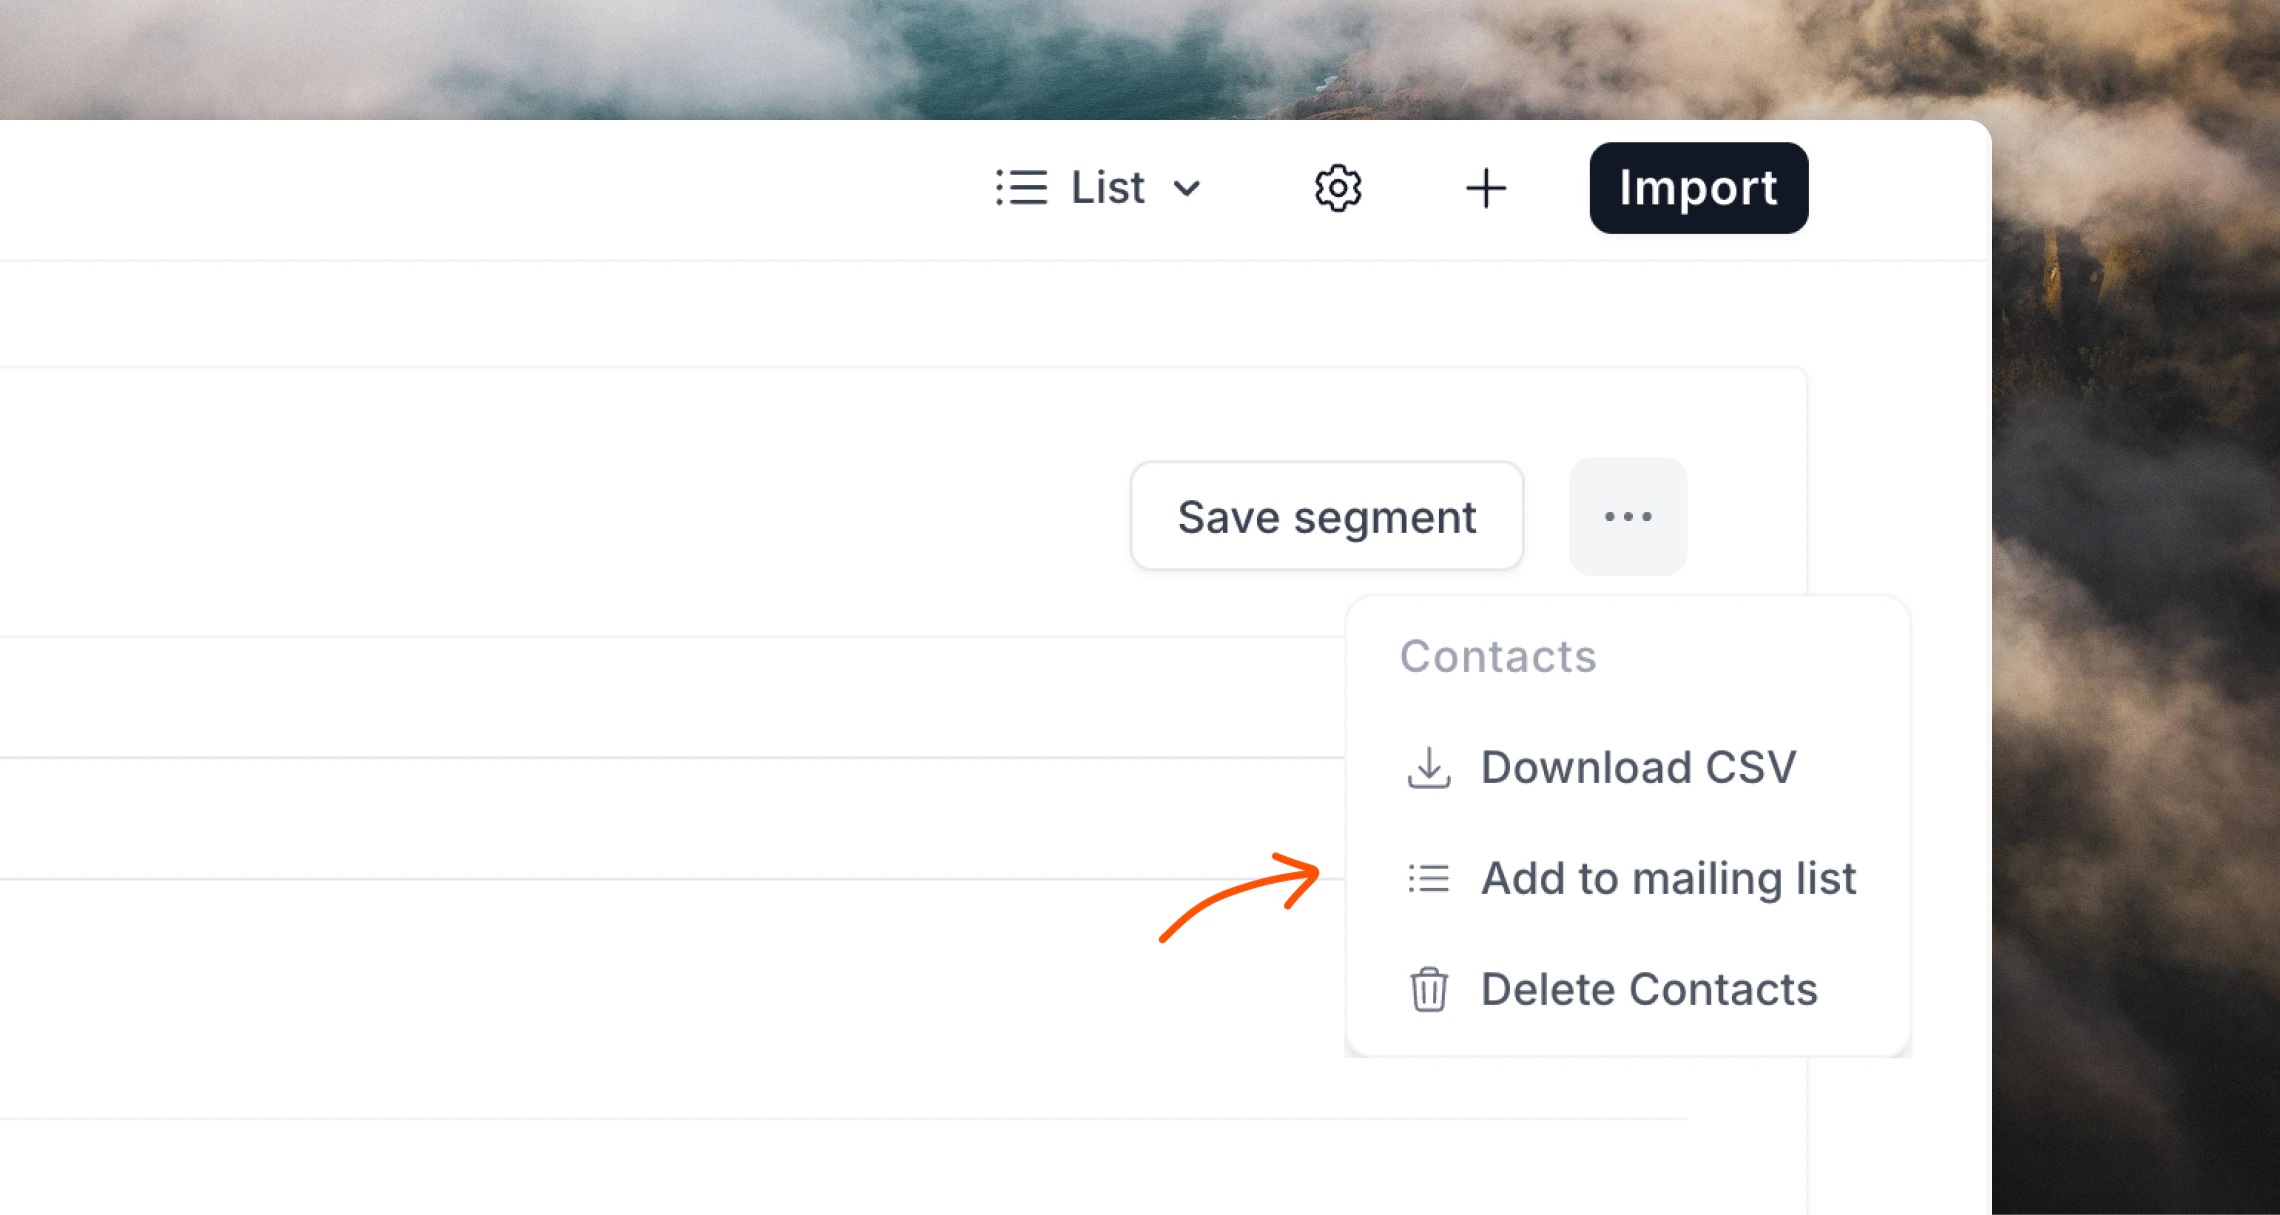 ### Upload a CSV to a list
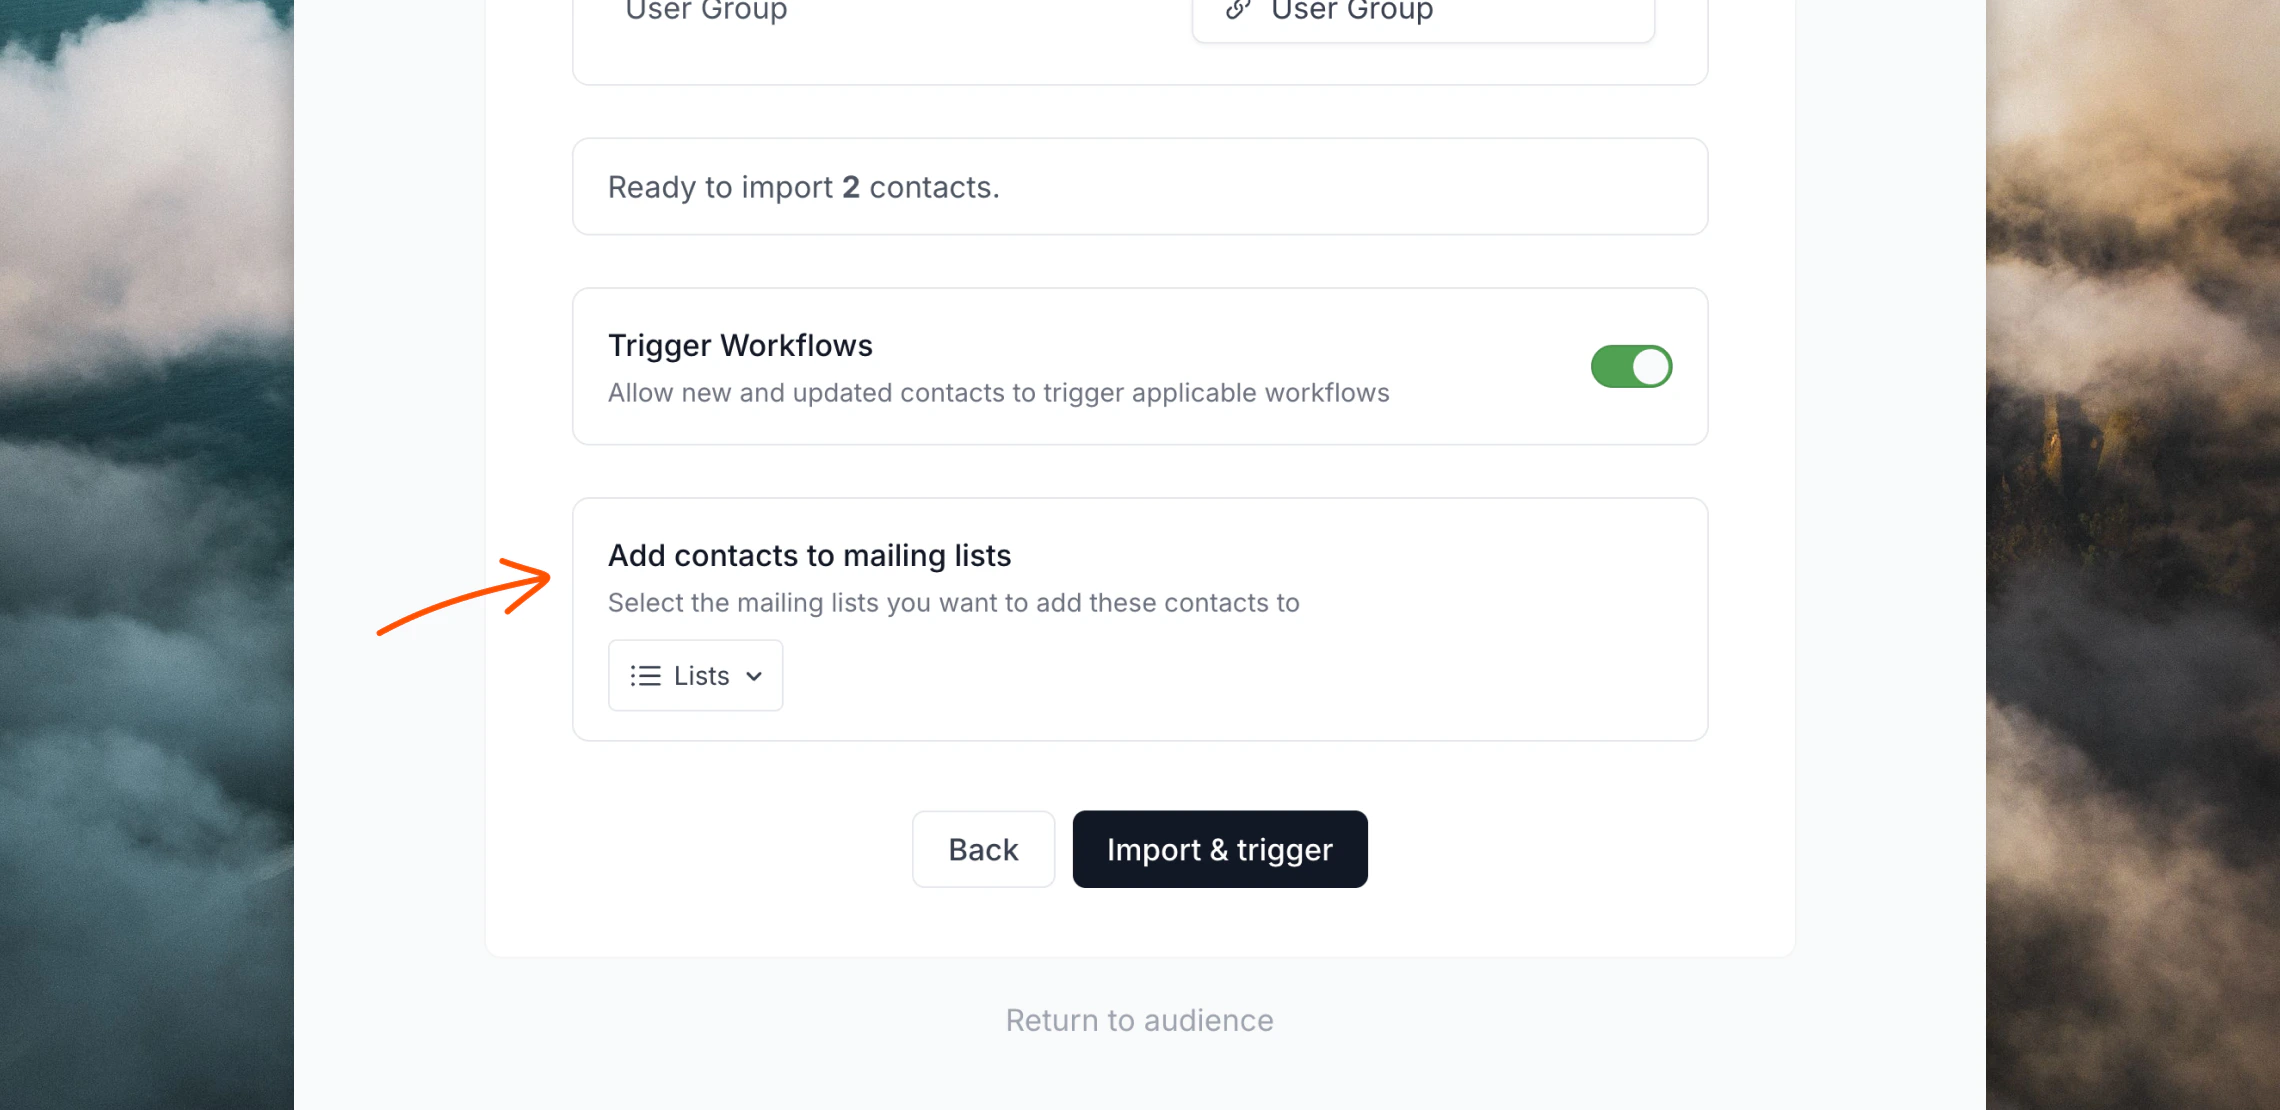
If you want to import contacts to a list in bulk you can use our [CSV importer](/add-users/csv-upload).
In the final stage of the form you can select a list, which will add all contacts (new or existing) in the CSV file to that list.
### Upload a CSV to a list
If you want to import contacts to a list in bulk you can use our [CSV importer](/add-users/csv-upload).
In the final stage of the form you can select a list, which will add all contacts (new or existing) in the CSV file to that list.
 ### Add contacts to lists with the API
Utilizing the [Loops API](/api-reference/intro) you can programmatically add and remove contacts to and from Lists.
You cannot add contacts to mailing lists if they are unsubscribed from your audience.\
Likewise, if a contact unsubscribes from a list via the
Preference Center, they cannot be resubscribed by your team.
When [creating a contact](/api-reference/create-contact), [updating a contact](/api-reference/update-contact), or [sending an event](/api-reference/send-event) with the API, you can include a `mailingLists` object in the payload.
This `mailingLists` object is a key-value pair of list IDs and a subscription status. The subscription status can be `true` or `false`.
```json theme={"dark"}
{
"email": "test@example.com",
"mailingLists": {
"cm06f5v0e45nf0ml5754o9cix": true,
"cm16k73gq014h0mmj5b6jdi9r": false
}
}
```
In this example, the contact would be subscribed to `cm06f5v0e45nf0ml5754o9cix` and unsubscribed from `cm16k73gq014h0mmj5b6jdi9r`.
Mailing list IDs can be found [in the app](https://app.loops.so/settings?page=lists) (click the ID to add it to your clipboard) or by using the [API](/api-reference/list-mailing-lists).
### Add contacts to lists with forms
If you use a [form](/forms/simple-form) on your website you can subscribe contacts to specific lists.
When exporting HTML from the [Forms page](https://app.loops.so/forms) in Loops, choose a list from the **Settings** tab.
### Add contacts to lists with the API
Utilizing the [Loops API](/api-reference/intro) you can programmatically add and remove contacts to and from Lists.
You cannot add contacts to mailing lists if they are unsubscribed from your audience.\
Likewise, if a contact unsubscribes from a list via the
Preference Center, they cannot be resubscribed by your team.
When [creating a contact](/api-reference/create-contact), [updating a contact](/api-reference/update-contact), or [sending an event](/api-reference/send-event) with the API, you can include a `mailingLists` object in the payload.
This `mailingLists` object is a key-value pair of list IDs and a subscription status. The subscription status can be `true` or `false`.
```json theme={"dark"}
{
"email": "test@example.com",
"mailingLists": {
"cm06f5v0e45nf0ml5754o9cix": true,
"cm16k73gq014h0mmj5b6jdi9r": false
}
}
```
In this example, the contact would be subscribed to `cm06f5v0e45nf0ml5754o9cix` and unsubscribed from `cm16k73gq014h0mmj5b6jdi9r`.
Mailing list IDs can be found [in the app](https://app.loops.so/settings?page=lists) (click the ID to add it to your clipboard) or by using the [API](/api-reference/list-mailing-lists).
### Add contacts to lists with forms
If you use a [form](/forms/simple-form) on your website you can subscribe contacts to specific lists.
When exporting HTML from the [Forms page](https://app.loops.so/forms) in Loops, choose a list from the **Settings** tab.
 Adding contacts to a list via a form only works with public lists. The option
to select a list will only appear in the form settings if you have at least
one public list.
If you already have a form in place or are using a [custom form](/forms/custom-form) you can add a `mailingLists` parameter to the form body with the value a comma-separated list of mailing list IDs.
```html HTML example {3} theme={"dark"}
```
```javascript JavaScript example {4} theme={"dark"}
fetch(formEndpointUrl, {
method: "POST",
body:
"mailingLists=cm06f5v0e45nf0ml5754o9cix,cm16k73gq014h0mmj5b6jdi9r" +
"&email=" +
encodeURIComponent(emailInput.value),
headers: {
"Content-Type": "application/x-www-form-urlencoded",
},
});
```
Adding contacts to a list via a form only works with public lists. The option
to select a list will only appear in the form settings if you have at least
one public list.
If you already have a form in place or are using a [custom form](/forms/custom-form) you can add a `mailingLists` parameter to the form body with the value a comma-separated list of mailing list IDs.
```html HTML example {3} theme={"dark"}
```
```javascript JavaScript example {4} theme={"dark"}
fetch(formEndpointUrl, {
method: "POST",
body:
"mailingLists=cm06f5v0e45nf0ml5754o9cix,cm16k73gq014h0mmj5b6jdi9r" +
"&email=" +
encodeURIComponent(emailInput.value),
headers: {
"Content-Type": "application/x-www-form-urlencoded",
},
});
```