> ## Documentation Index
> Fetch the complete documentation index at: https://loops.so/docs/llms.txt
> Use this file to discover all available pages before exploring further.
# Double opt-in
> Require and manage subscription confirmations for new contacts.
Double opt-in requires new contacts to confirm their subscription before you can send them marketing emails. This improves list quality and deliverability.
## Good to know
This feature only applies to [marketing sends](/types-of-emails) (campaigns and workflows). Transactional emails are never restricted by double opt-in.
Double opt-in is currently only enabled on [Form endpoints](/forms/simple-form). API endpoints like [Create contact](/api-reference/create-contact) and [Update contact](/api-reference/update-contact) are not yet gated. Coverage will expand to these endpoints soon.
## The double opt-in flow
When double opt-in is enabled:
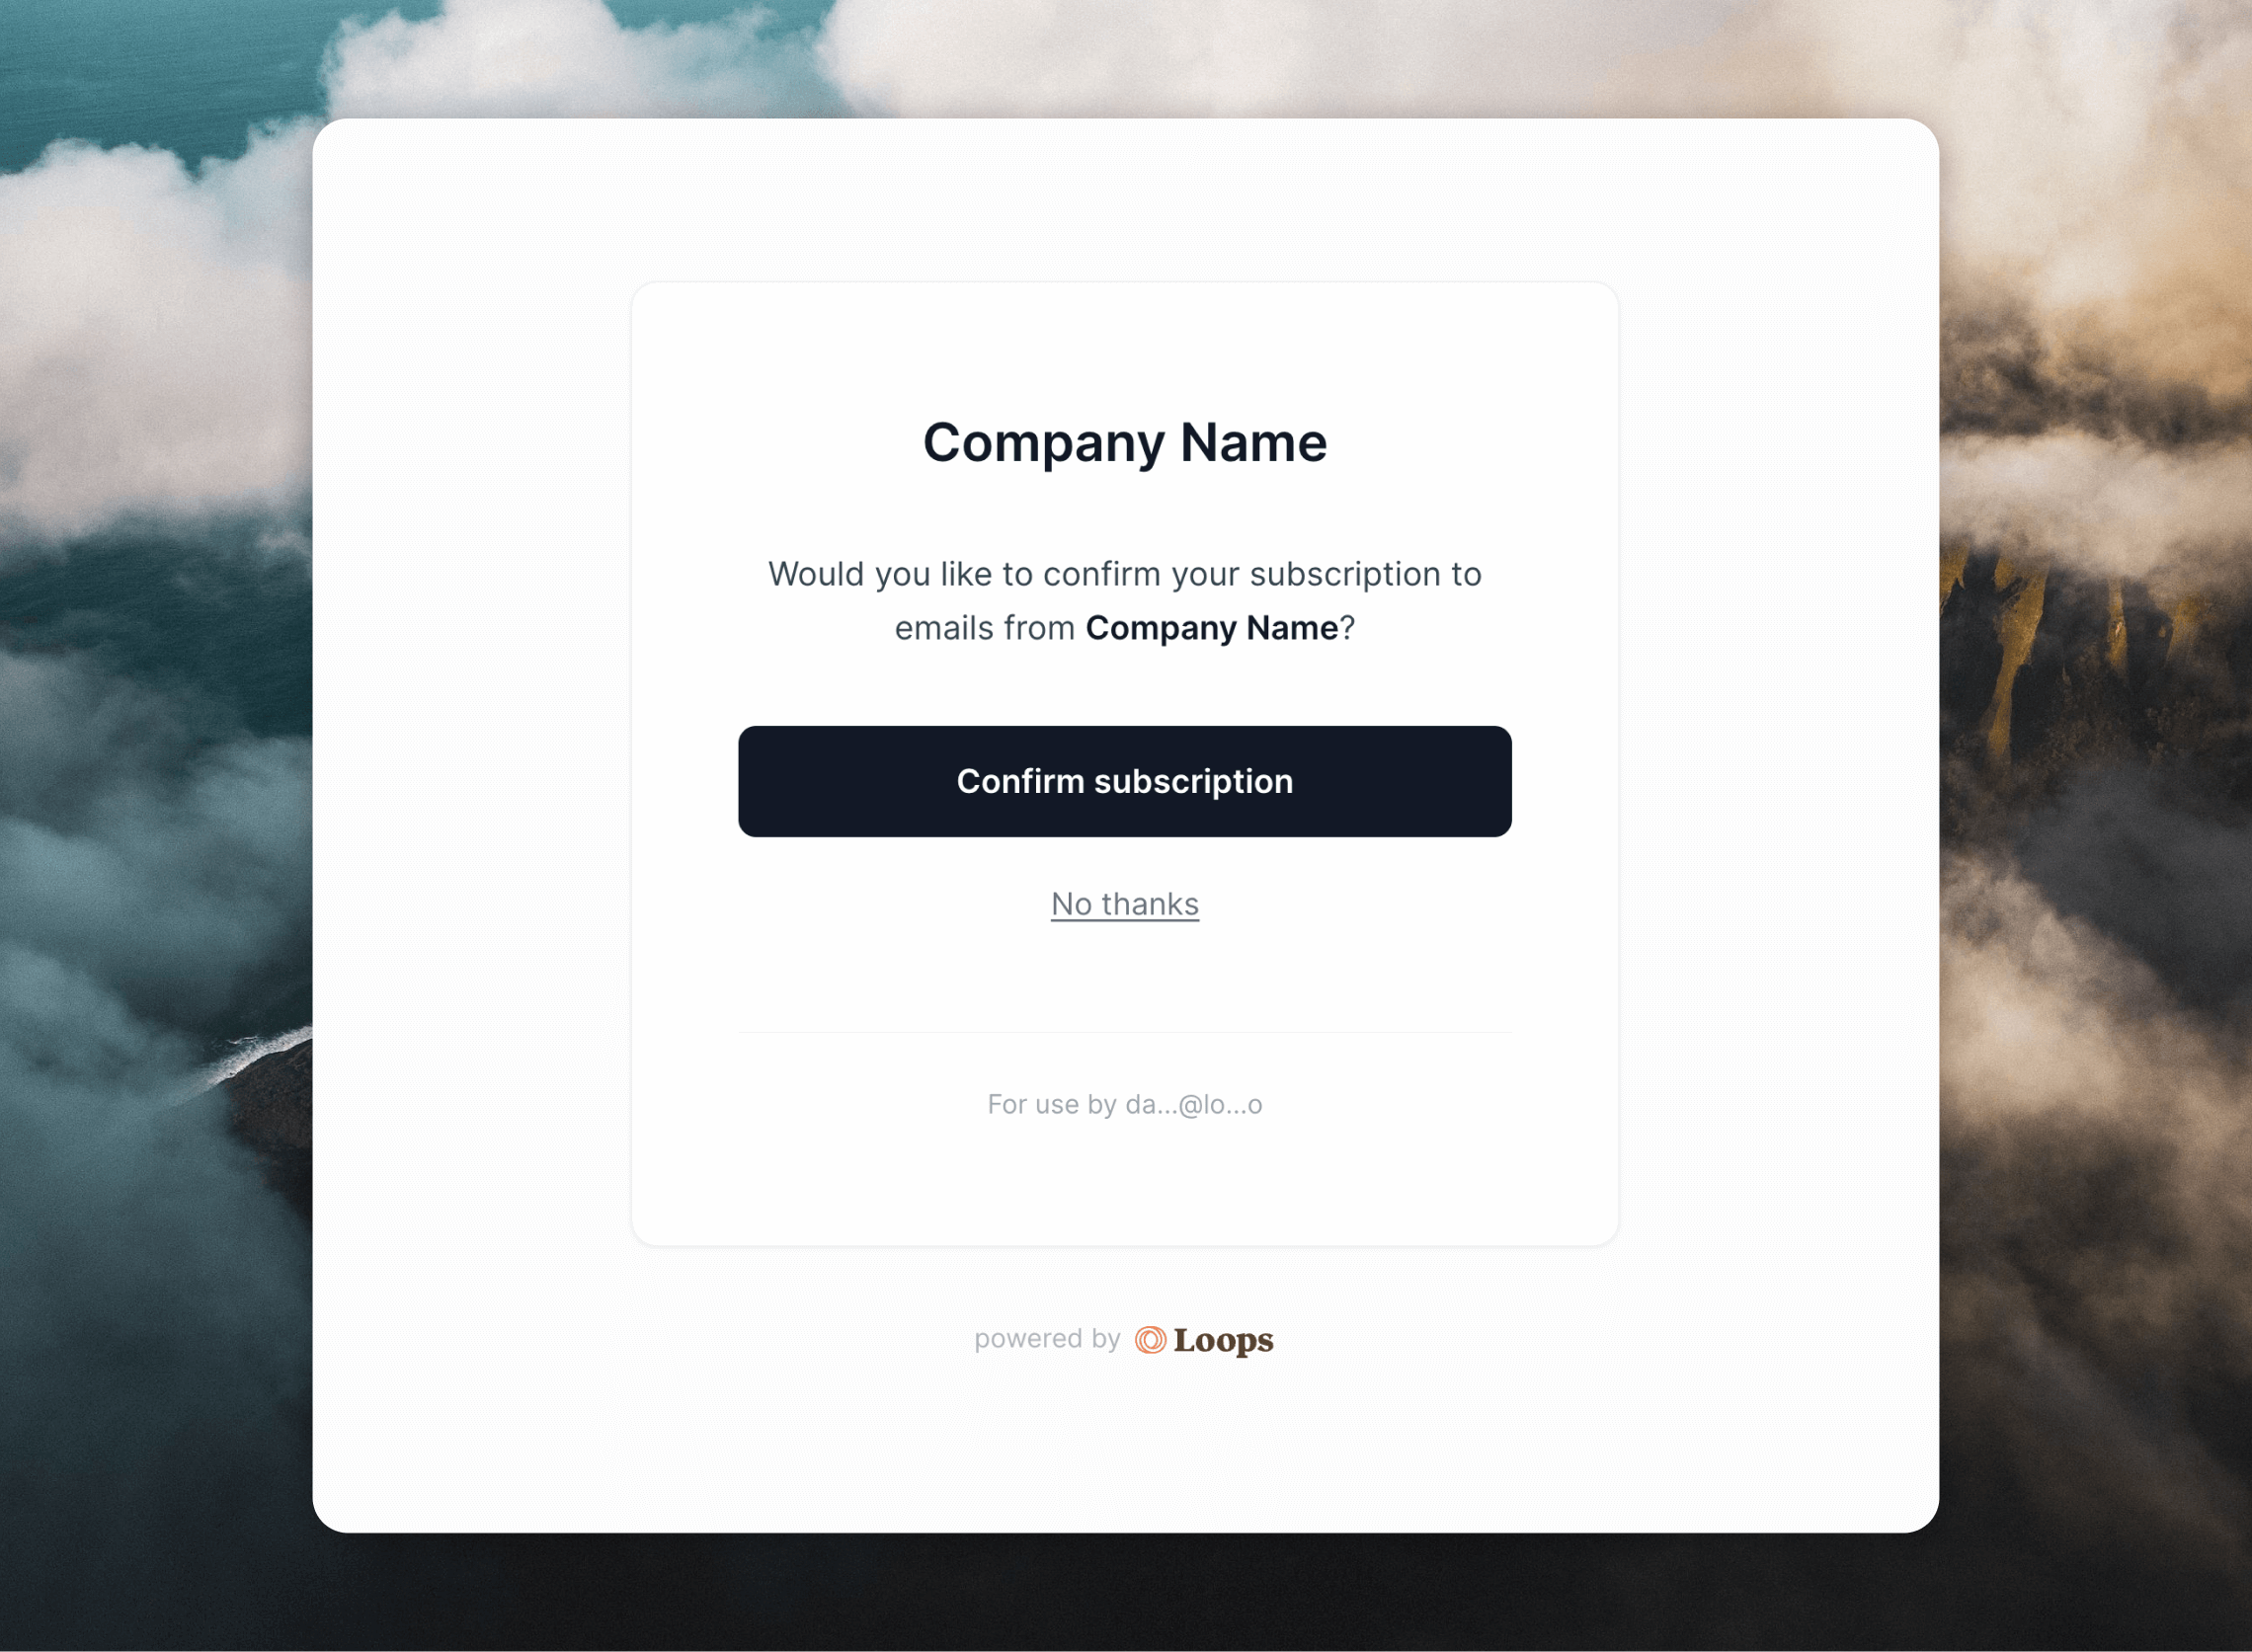
1. Contact submits a form and receives a confirmation email with a link to a branded confirmation page.
2. The confirmation page displays **Confirm subscription** and **No thanks** buttons.
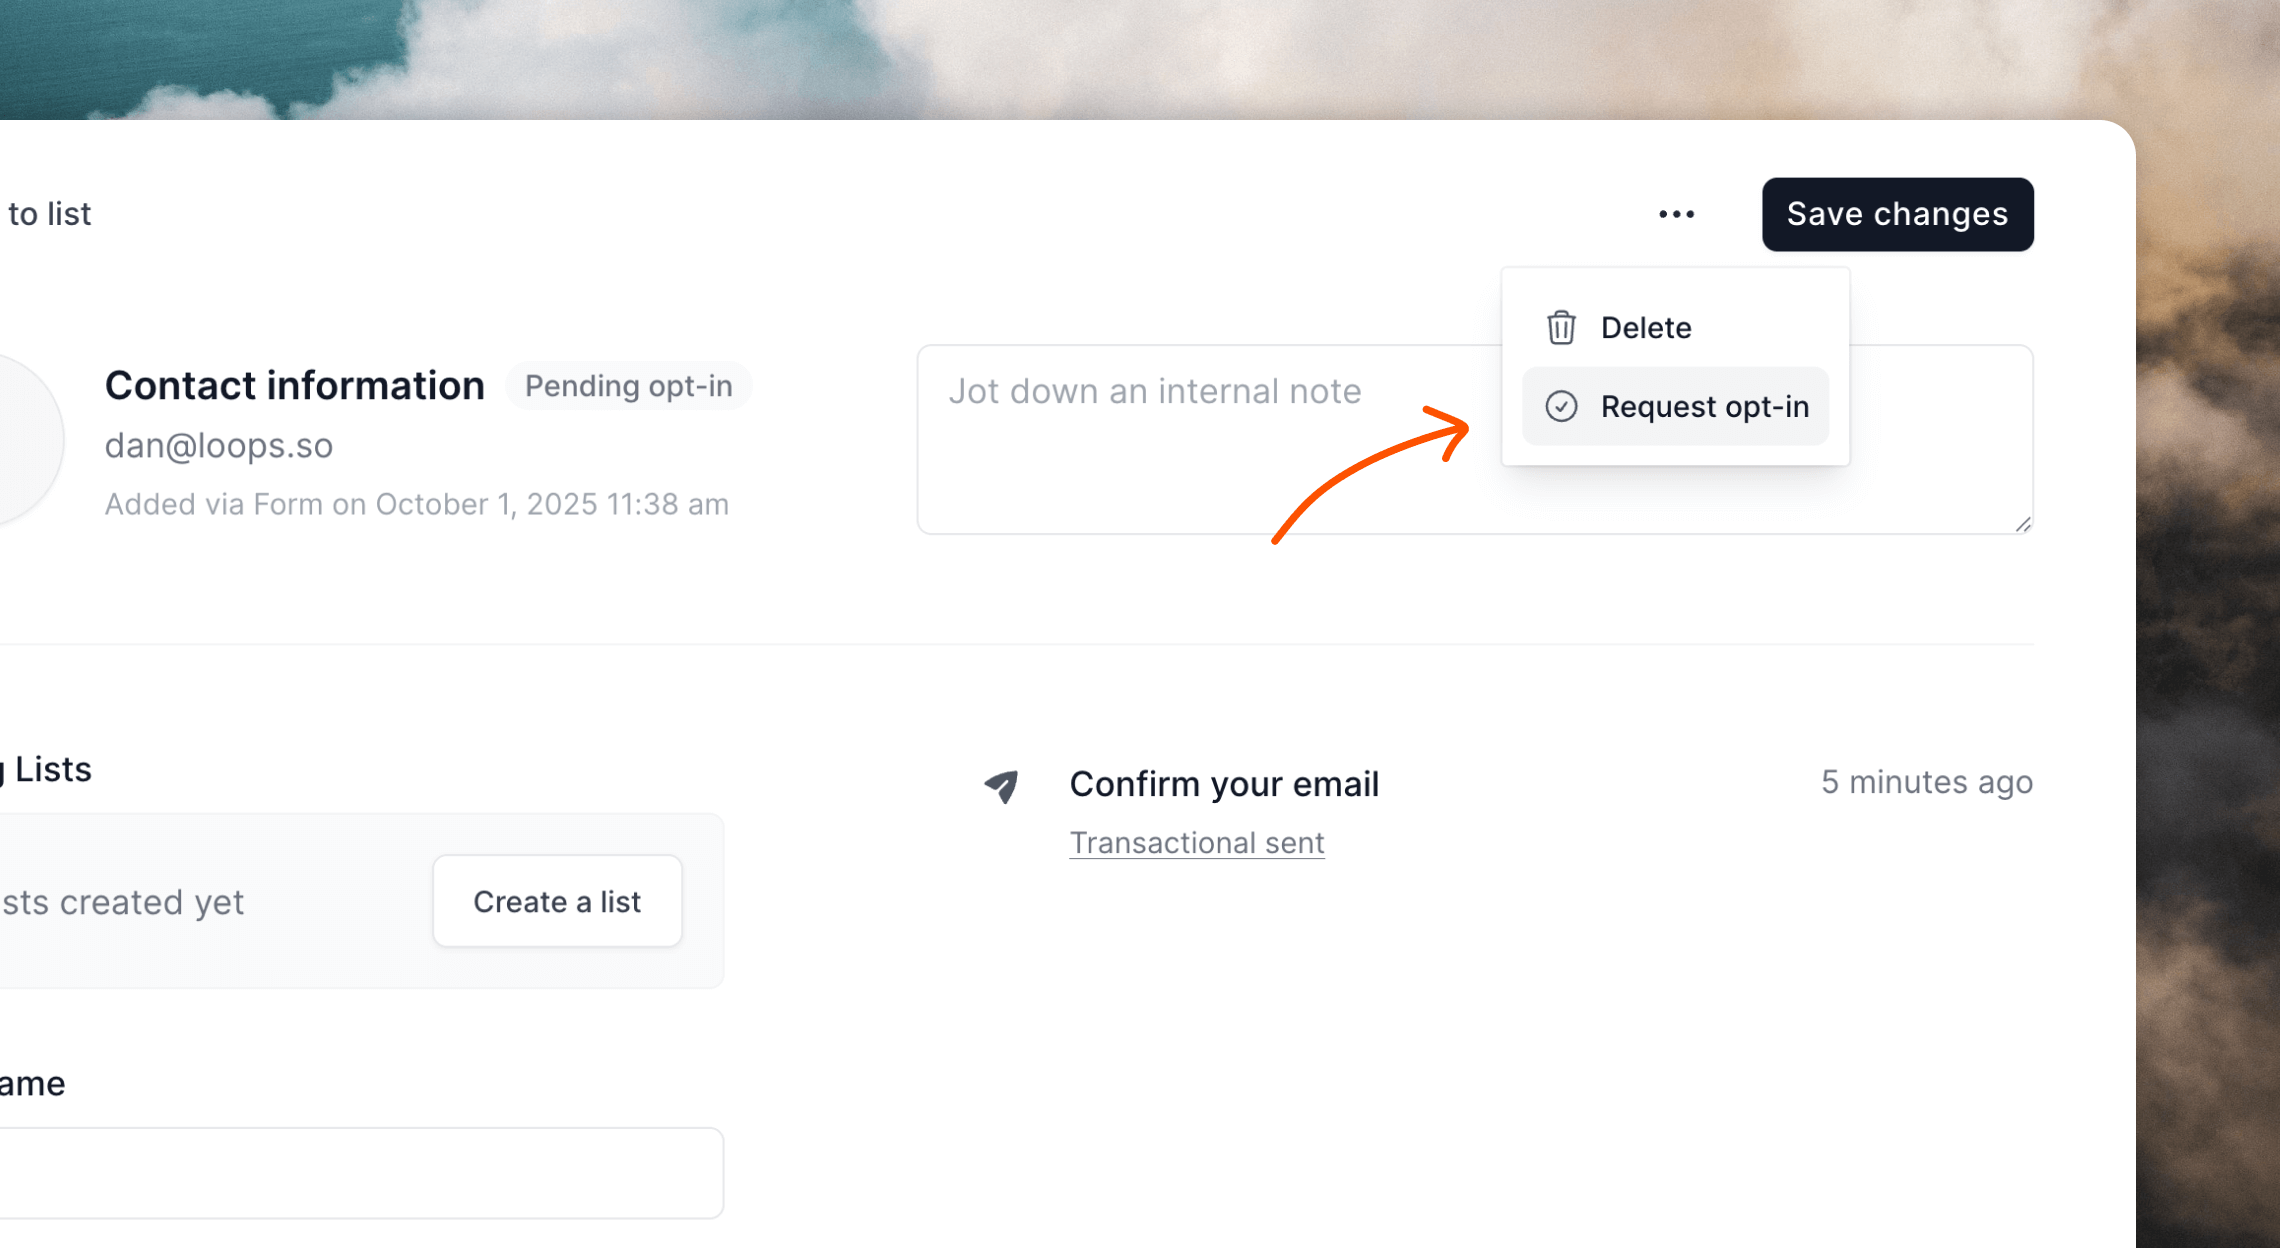
3. Contacts appear in your audience as "Pending" in the **Double opt-in** column.
4. Contact confirms or rejects the subscription:
1. If they click **Confirm subscription**, they're subscribed to your audience and any selected mailing lists. This also triggers any applicable workflows.
2. If they click **No thanks**, they remain in your audience but are marked as [unsubscribed](/contacts/properties#subscribed).\
They can request a new confirmation email from the same page if they clicked **No thanks** by accident.
Unsubscribed contacts do not count toward [your plan's
limits](https://loops.so/pricing).
3. If they don't respond, the contact continues to appear as "Pending". Pending contacts are not automatically removed. You can manually delete them if needed.
 ## Enable double opt-in
To enable double opt-in, go to [Settings -> Sending](https://app.loops.so/settings?page=sending) and scroll to the **Double opt-in** section. Turn the **Double opt-in** setting on.
This creates a special transactional email that is used to confirm the subscription, which you can customize in the [Transactional](https://app.loops.so/transactional) page in the Loops dashboard.
To disable double opt-in, turn the **Double opt-in** setting off.
## Enable double opt-in
To enable double opt-in, go to [Settings -> Sending](https://app.loops.so/settings?page=sending) and scroll to the **Double opt-in** section. Turn the **Double opt-in** setting on.
This creates a special transactional email that is used to confirm the subscription, which you can customize in the [Transactional](https://app.loops.so/transactional) page in the Loops dashboard.
To disable double opt-in, turn the **Double opt-in** setting off.
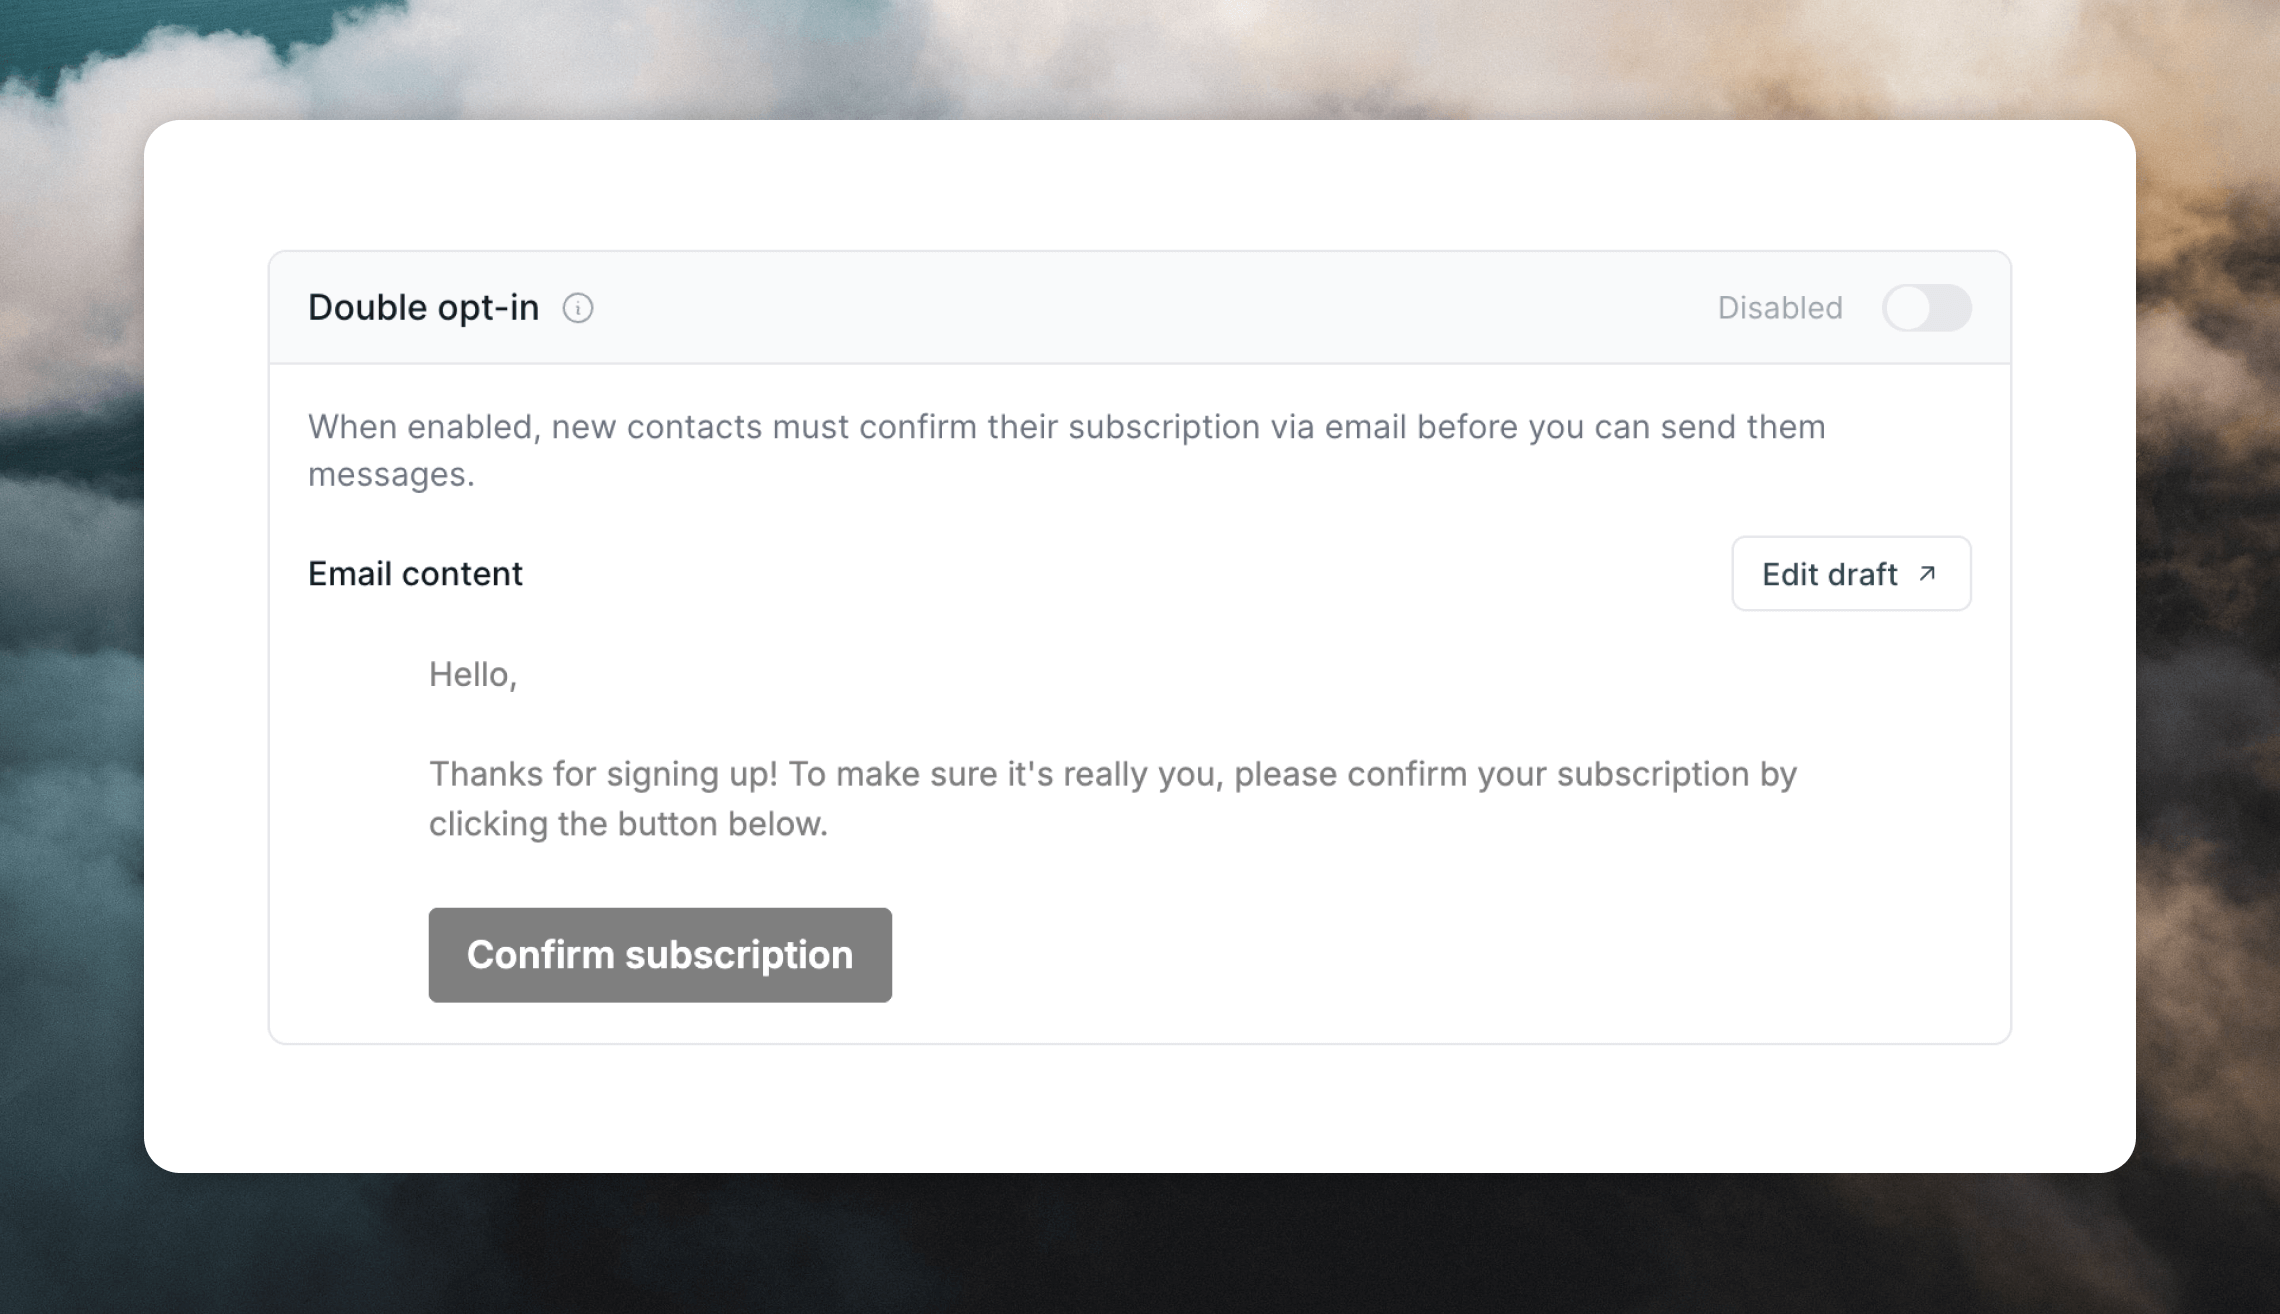 ## Customize the confirmation email
The opt-in email is a special [transactional email](/transactional) that is created automatically when you first turn on double opt-in in your account.
You are free to customize the email as you like but it has specific requirements:
* Keep the email short, clearly branded, and focused on the confirmation action.
* Include the required data variable `optInUrl` (added automatically when the email is created).
* Other data variables are not allowed.
Click **Edit Draft** to [edit the email](/transactional#editing-the-email). Make sure to click **Publish** after editing to make your changes live.
Learn how to create and send transactional email with Loops.
## Manually re-send a confirmation email
You can re-send a confirmation email to a contact from their profile page. This is only available for contacts who are currently "Pending".
On a contact's profile page, click the `•••` menu icon and choose **Request opt-in**.
## Customize the confirmation email
The opt-in email is a special [transactional email](/transactional) that is created automatically when you first turn on double opt-in in your account.
You are free to customize the email as you like but it has specific requirements:
* Keep the email short, clearly branded, and focused on the confirmation action.
* Include the required data variable `optInUrl` (added automatically when the email is created).
* Other data variables are not allowed.
Click **Edit Draft** to [edit the email](/transactional#editing-the-email). Make sure to click **Publish** after editing to make your changes live.
Learn how to create and send transactional email with Loops.
## Manually re-send a confirmation email
You can re-send a confirmation email to a contact from their profile page. This is only available for contacts who are currently "Pending".
On a contact's profile page, click the `•••` menu icon and choose **Request opt-in**.
 ## Webhooks and the API
When double opt-in is enabled, contact webhooks don't fire until the contact is confirmed. Specifically:
* The [`contact.created` event](/webhooks#event-types) will only be sent for contacts created via forms once the contact has confirmed their subscription.
* Other contact-related webhooks (such as `contact.mailingList.subscribed`) will also only fire after confirmation.
* Contacts remain in a "Pending" state in your audience until they confirm, and no webhook events are triggered during this pending state.
You can read a contact's opt-in status from the API by looking at the `optInStatus` field in the [Find contact](/api-reference/find-contact) endpoint.
## Webhooks and the API
When double opt-in is enabled, contact webhooks don't fire until the contact is confirmed. Specifically:
* The [`contact.created` event](/webhooks#event-types) will only be sent for contacts created via forms once the contact has confirmed their subscription.
* Other contact-related webhooks (such as `contact.mailingList.subscribed`) will also only fire after confirmation.
* Contacts remain in a "Pending" state in your audience until they confirm, and no webhook events are triggered during this pending state.
You can read a contact's opt-in status from the API by looking at the `optInStatus` field in the [Find contact](/api-reference/find-contact) endpoint.